
Welcome to the North Coast Creations February Release! We have some really wonderful images for you this month! Sssssshhhh… don’t tell…we are also giving you a little sneak peek at a couple of fabulous new dies from Our Daily Bread designs (the Eggs & Grass Border dies). They will be available with the March 1st ODBD release!
Prize Information:
Just for commenting on the Design Team Blog Posts, you have a chance to win a $10 NCC Gift Certificate, good towards the purchase of NCC Stamps. You have until February 17, 2015 at 10:00 PM EST to leave a comments on the participating designers blogs for a chance to win! Two random winners will be selected from the comments left on the designers blogs, the winners will be announced on the NCC Blog on February 18, 2015, be sure to check back there to see if you have won!
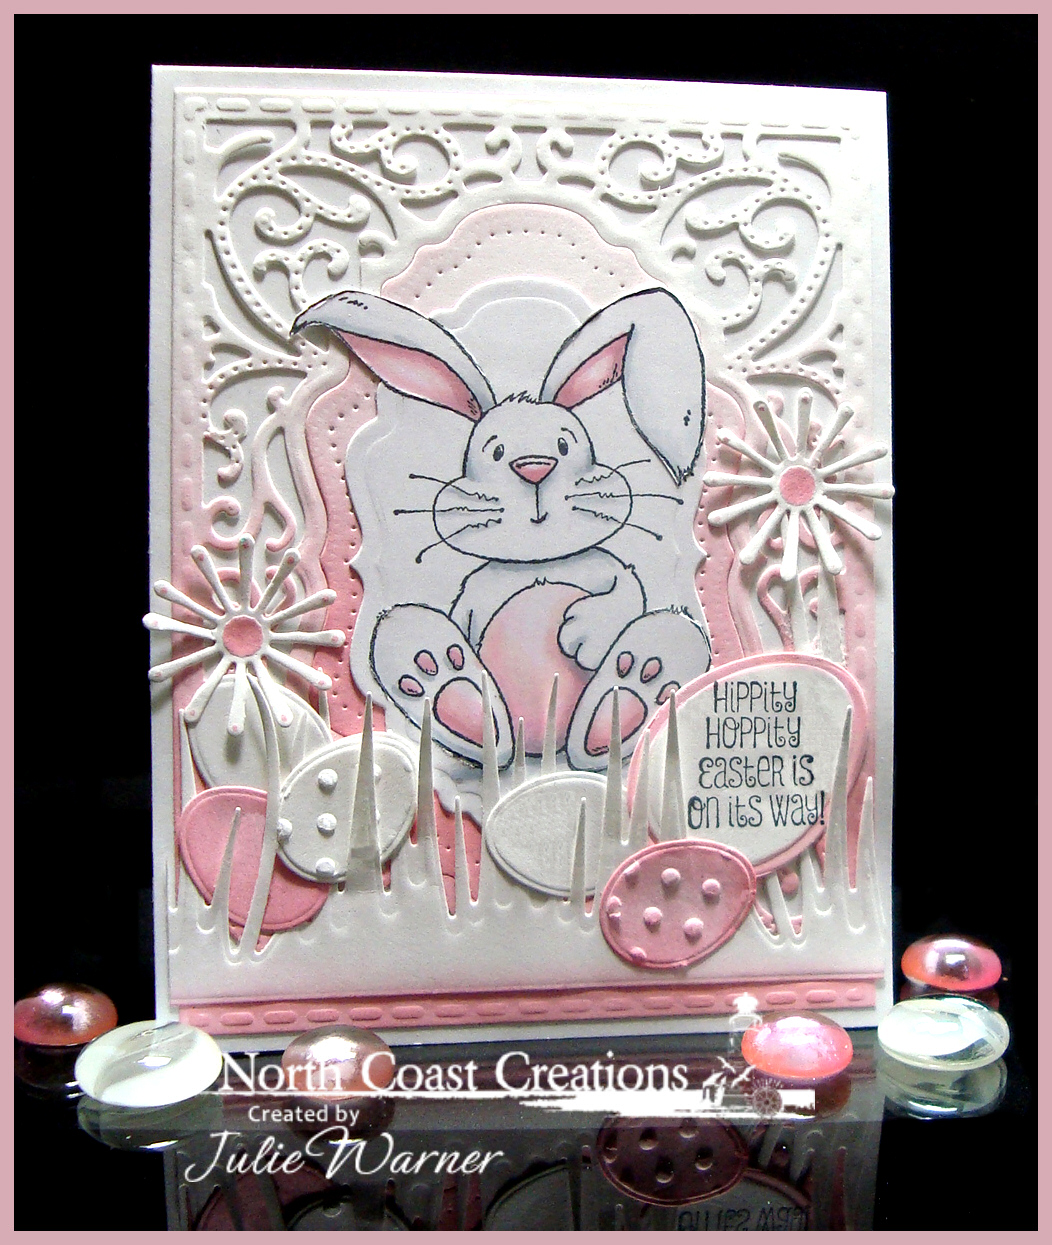
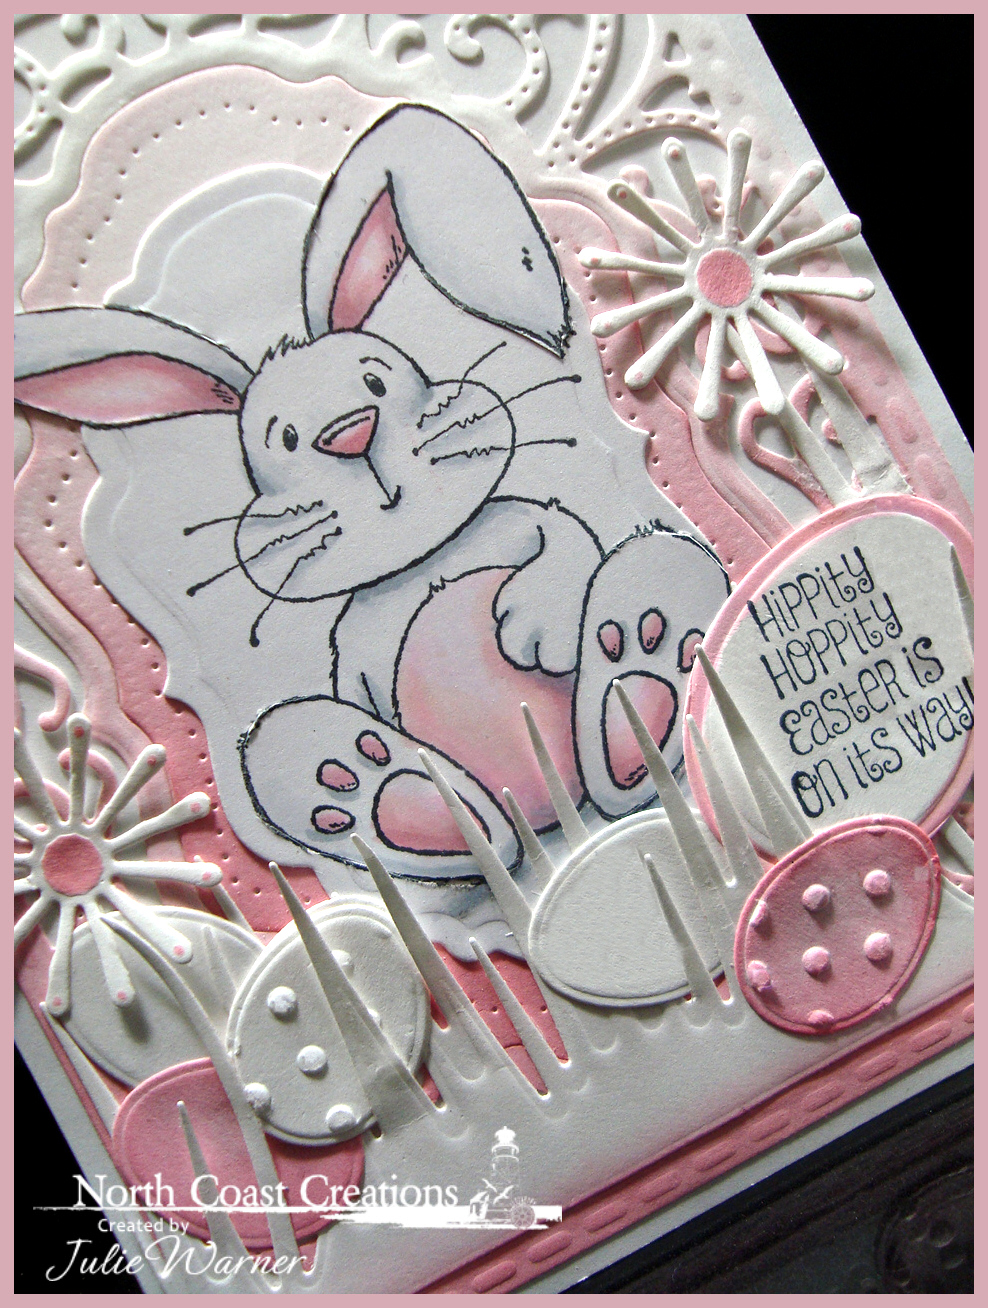
For my first card, I used the super cute Hippity Hoppity set. Don’t you just love the expression on the bunny’s face? When I think of Easter bunnies, I immediately think of pink & white. Nothing like a little fluffy white bunny with pink ears, feet & belly! I know white can be a hard color to try & shade, but if you use just a little light cool gray, it will make a huge difference. Use cool grays because on white, warm or neutrals will tend to look a little dirty. So after coloring my bunny, I used a little out of the box (click for tutorial) treatment so his ears wouldn’t be chopped off, lol. For the background I die cut an ODBD Vintage Flourish Pattern background & also the layer behind the bunny out of white. I used the pink ink to sponge from the bottom up on both so they would be darker pink at the bottom & fade to white at the top. I also sponged pink on some of the die cut small eggs. I combined two of the set greetings on the large egg & added the die cut grass. Two of the smallest Aster die cuts were sponged in the center & added on either side. These are the Copics I used.

| Stamps: North Coast Creations – Hippity Hoppity |
| Paper: Neenah white, X-Press It white |
| Ink: Memento tuxedo black, Distress ink angel pink |
| Accessories: ODBD Vintage Flourish Pattern, Vintage Label, Asters dies, Eggs & Grass Border dies, Copic markers, Cuttlebug Swiss dots embossing folder |
My second card uses the beautiful Pansies set.
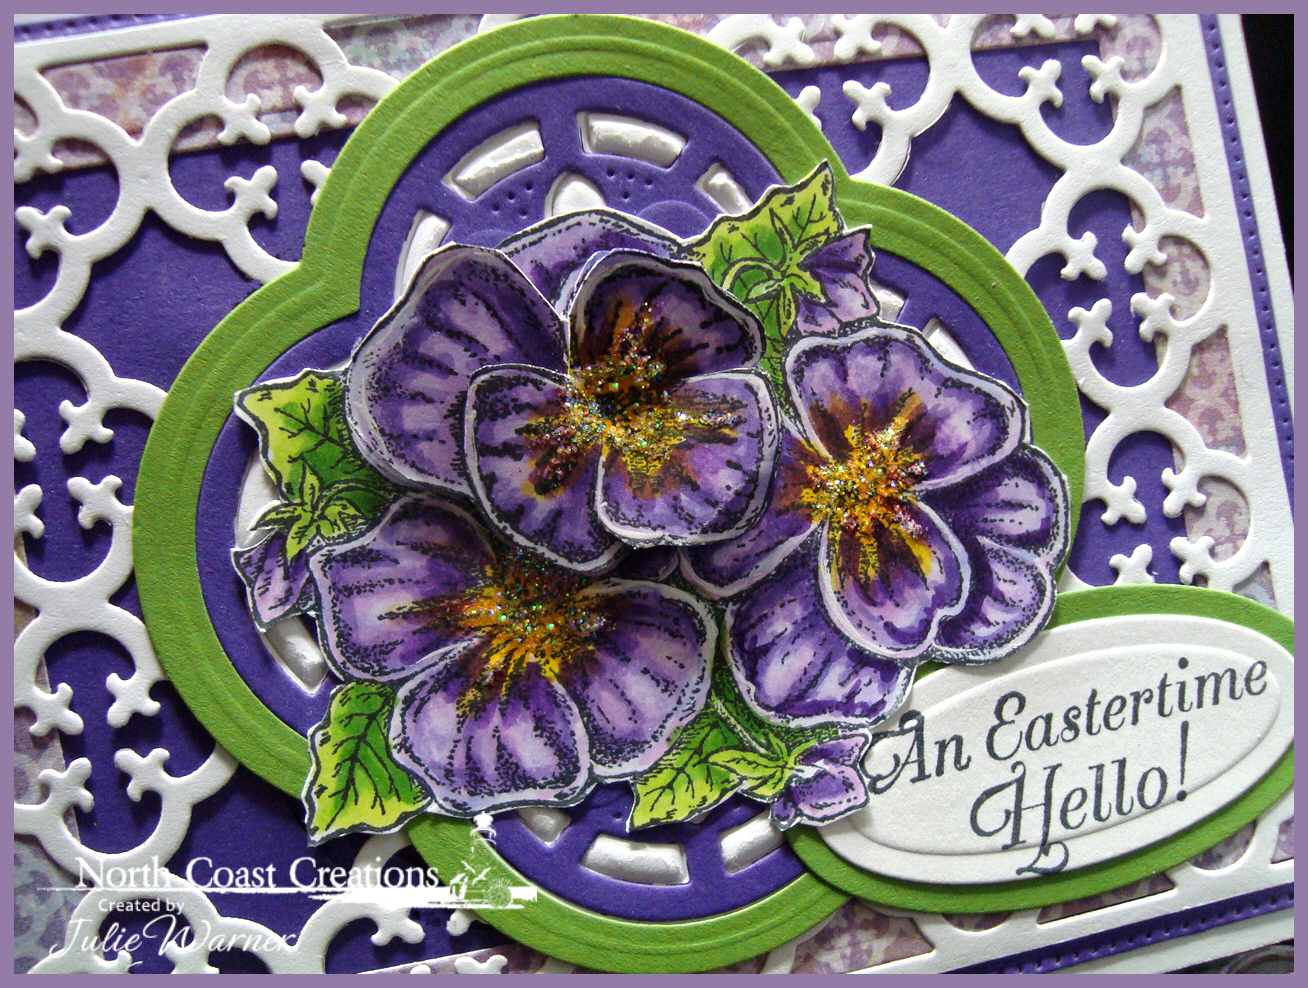
I went with purple pansies since that color is most prevalent in my area. They are so dramatic & velvety! I stamped the pansies twice, colored them then fussy cut them and some of the petals on the top pansy to pop up on top.
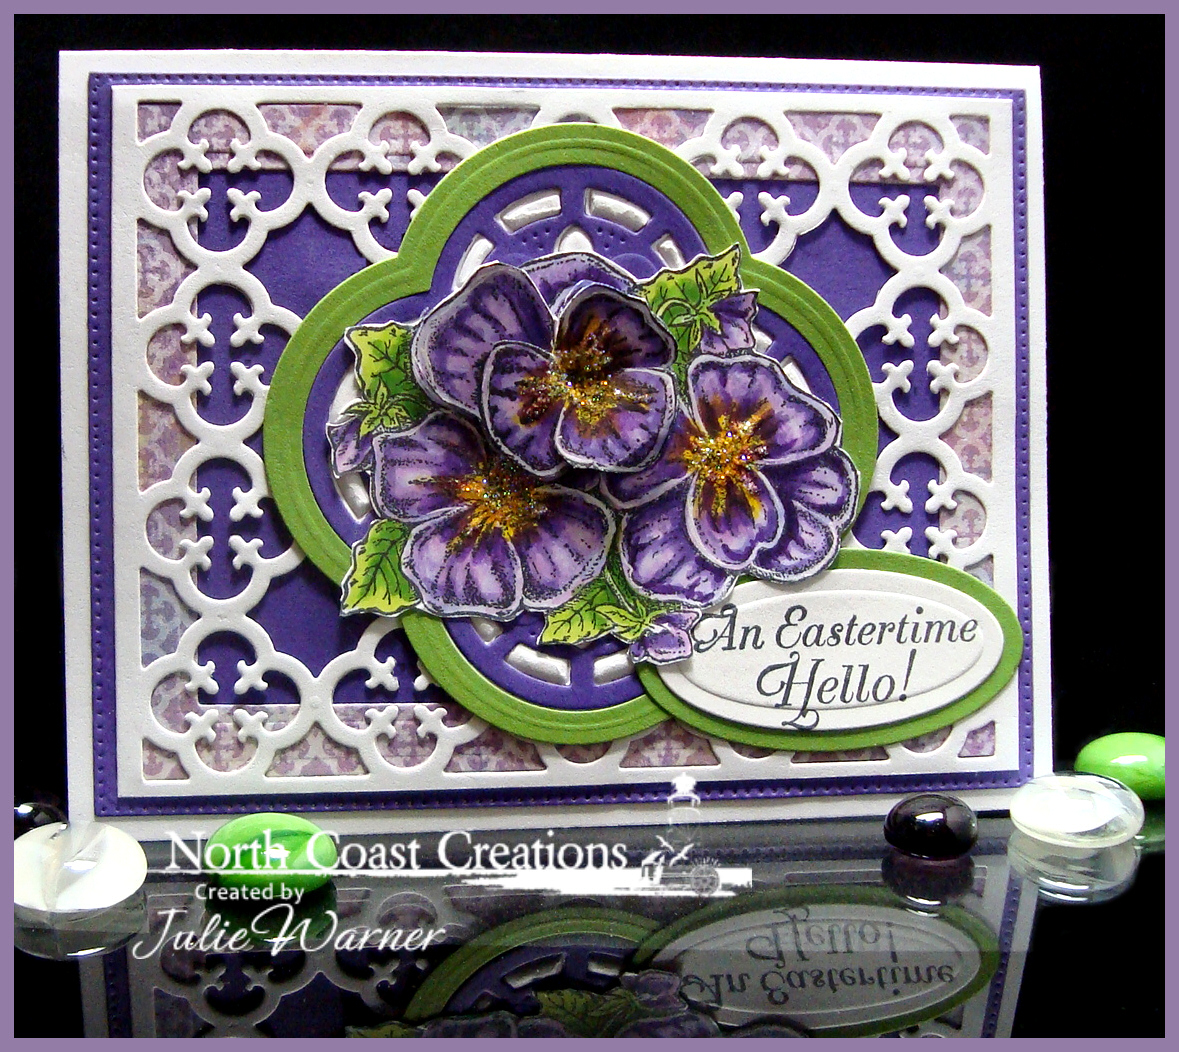
The pansies are attached to a purple die cut Quatrefoil Design . I die cut the green layer w/ the solid outline, then cut another Quatrefoil pattern out of it to get the frame. Both are attached to a white layer I cut w/ the solid die then embossed w/ the pattern die. The large white background was die cut using the Quatrefoil Pattern die. I used the largest of the Flourished Star Pattern die to cut the large purple mat then added a frame I die cut out a piece of designer paper from the Christian Faith paper collection.
| Stamps: North Coast Creations – Pansies |
| Paper: Neenah white, X-Press It white, purple, moss green, dp (ODBD Christian Faith collection) |
| Ink: Memento tuxedo black |
| Accessories: ODBD Flourished Star Pattern, Quatrefoil Pattern, Quatrefoil Design dies, Copic markers, Spellbinders A2 matting basics A & B, petite oval dies, stickles |
Please be sure to stop by and comment on all of the DT blogs to increase your chances to win!
Julie * Lisa * Dawn * Sandee * Patricia *
Lori * Angie * NCC Blog
Thanks so much for stopping by!