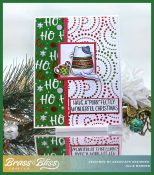
Follow Me On Pinterest justwritedesign - Julie
Subscribe by Email
Loading
Archives
Categories

Archive for the ‘Christmas/Holiday/Winter’ Category


Congrats to Kathy, the newest Featured Stamper! She has a lovely gallery & I chose THIS card to case. I kept the shaker & cute animals but used different stamps, dies, colors & made mine a winter card instead of a birthday card.

For my shaker card, I die cut the cute little critters & winter paper along w/ a scallop frame to go around the opening. I used a cellophane pkg, put large glitter inside then sealed the end & attached it behind the critters in the window. I added a fun foam frame behind to give it some lift for the shaker element. The greeting was actually stamped on the lt blue/grey panel behind the opening, but the glitter covered it too much so I stamped the greeting again & cut it to add on top of the shaker. I used a Sakura clear stardust glitter pen on the scarves of all the animals to add a little extra sparkle


Here are the Copics I used for everything except the fox:

The fox was colored earlier & here are the Copics for him:

Thanks so much for stopping by!


Supplies:

Stamps: Rubbernecker Stamps: Christmas Inchies , Winter Friends
Paper:  Staples 110# white, Rubbernecker Stamps: Wintery Woodlands paper pad
Ink: Memento tuxedo black
Accessories:  Rubbernecker Stamps:  Christmas Inchies,Winter Friends, Inside Scallop Frame dies, Crossover II, Copic Sketch Markers, MISTI, large glitter, plastic envelope


A big congrats to Amy, the newest Featured Stamper on Splitcoast! She has a big, beautiful gallery and I chose THIS card to case. I kept the layout and winter theme, but used different images, dies and colors.

For my card, I colored, die cut & popped up the snowman before adding him to a stitched oval. The greeting was silver embossed on a purple rectangle & all the little snowflakes were also die cut. Stickles was added to his hat & the center of the snowflakes.

The paper is from a wonderful Rubbernecker paper pad called Wintery Woodlands. I didn’t have a narrow blue ribbon to put on top of the silver edged ribbon, so I used a Copic to color the white ribbon a smoky blue.

Here are the Copics I used:

Thanks so much for stopping by!


Supplies:

Stamps: Rubbernecker Stamps: In Case You Get Cold
 Paper: Staples 110# white, smoky blue, lt purple, dp (Rubbernecker Stamps: Wintery Woodlands paper pad)
Ink: Memento tuxedo black
Accessories:  Rubbernecker Stamps: In Case You Get Cold, Rectangle Stitch, Outside Stitch Frame, Oval Stitch dies, MISTI, Stickles, Crossover II, Silver Dollar embossing powder


You might also like:


For the Splitcoast Inspiration Challenge (IC890), we’re visiting the Puzzle Shop & their Pinterest Board. I chose THIS puzzle for my inspiration.

On my poinsettia card, I used a big, build a poinsettia set & stamped, colored & die cut 2 of them. One of them I cut apart, & the other full poinsettia, I used a craft knife to cut around a few petals, lift them up & insert the cut apart leaves underneath. A few were tucked under the big poinsettia. It’s attached to a white layer where I stamped the greeting, then added a green scallop edge frame on top before adding the poinsettia.

The designer paper is a beautiful holly print in a new Rubbernecker paper pad.

These are the Copics I used: (note: on the full set, there are holly leaves which is where I used the greens. I didn’t add them to the card so only the reds were used.)

Thanks 
so much for stopping by! 


Supplies:

Stamps: Rubbernecker Stamps: Buildable Poinsettia, Girl in Window, 
Paper:  Staples 110# white, pine green, dp (Rubbernecker Stamps: country Christmas paper pad)
Ink:  Memento tuxedo black
Accessories:  Rubbernecker Stamps:  Stitched Rectangles, Buildable Poinsettia, Girl in Window, Outside Scallop Frame dies,  Crossover II, Misti, White Pearl Liquid Pearls