Today, I have a very bright floral card. These pinks and purples are really eye catching! The two part images make it easy to color without actually coloring. The matching dies make it a ci…
- Category Archives Glitter
-
-
 Dandelions
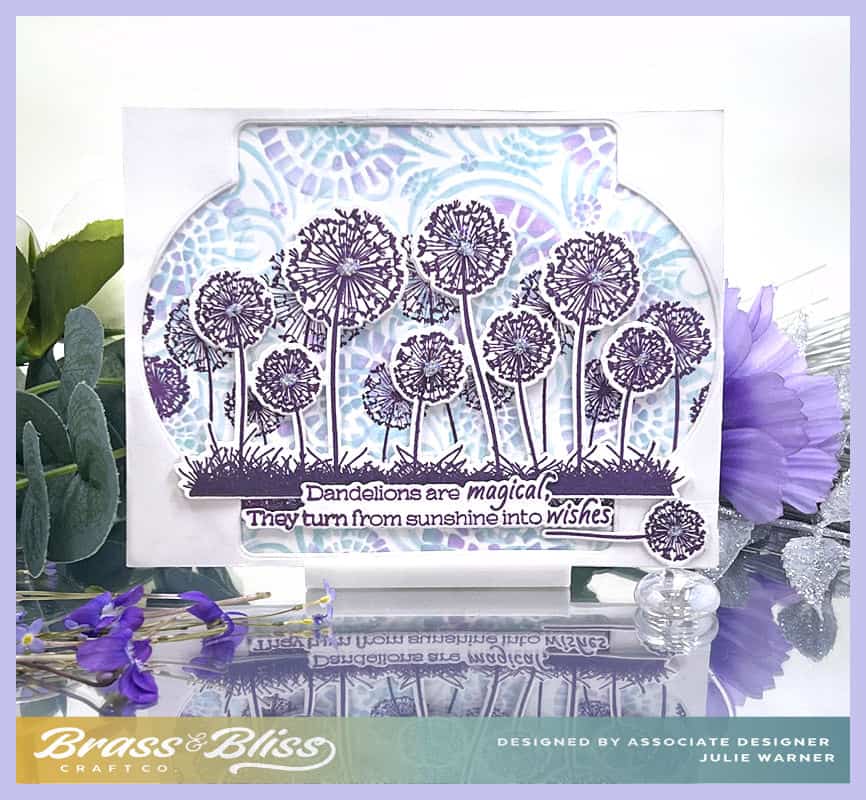
My card today is a dual row of dandelions. The front yard has dandelions a plenty right now but instead of white, I made mine purple with glittery centers. These dandelions are so fun and y…