Today I have a masculine sporty card perfect for a guy who loves golf. For birthdays or Father’s Day this surely will fit the bill. The new golf silhouettes also come with lady golfer…
- Category Archives Masking-Reverse Masking
-
-
 Flowers in Wreath
Today, I have an easy card using only a few dies, a stencil and a floral image. The flowers are a two part image..the outline and the solid images to ink that fill in the color for you. A l…
-
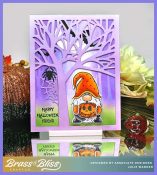 Halloween Gnome
Today, I have a cute little gnome all dressed up for Halloween. He has an adorable little Jack O’Lantern & he’s standing under a lavender tree wite a misty purple forest beh…