I have a special post over on the ODBD Blog today with a mini tutorial on how to create these cute little pumpkins. And here it is on my blog.
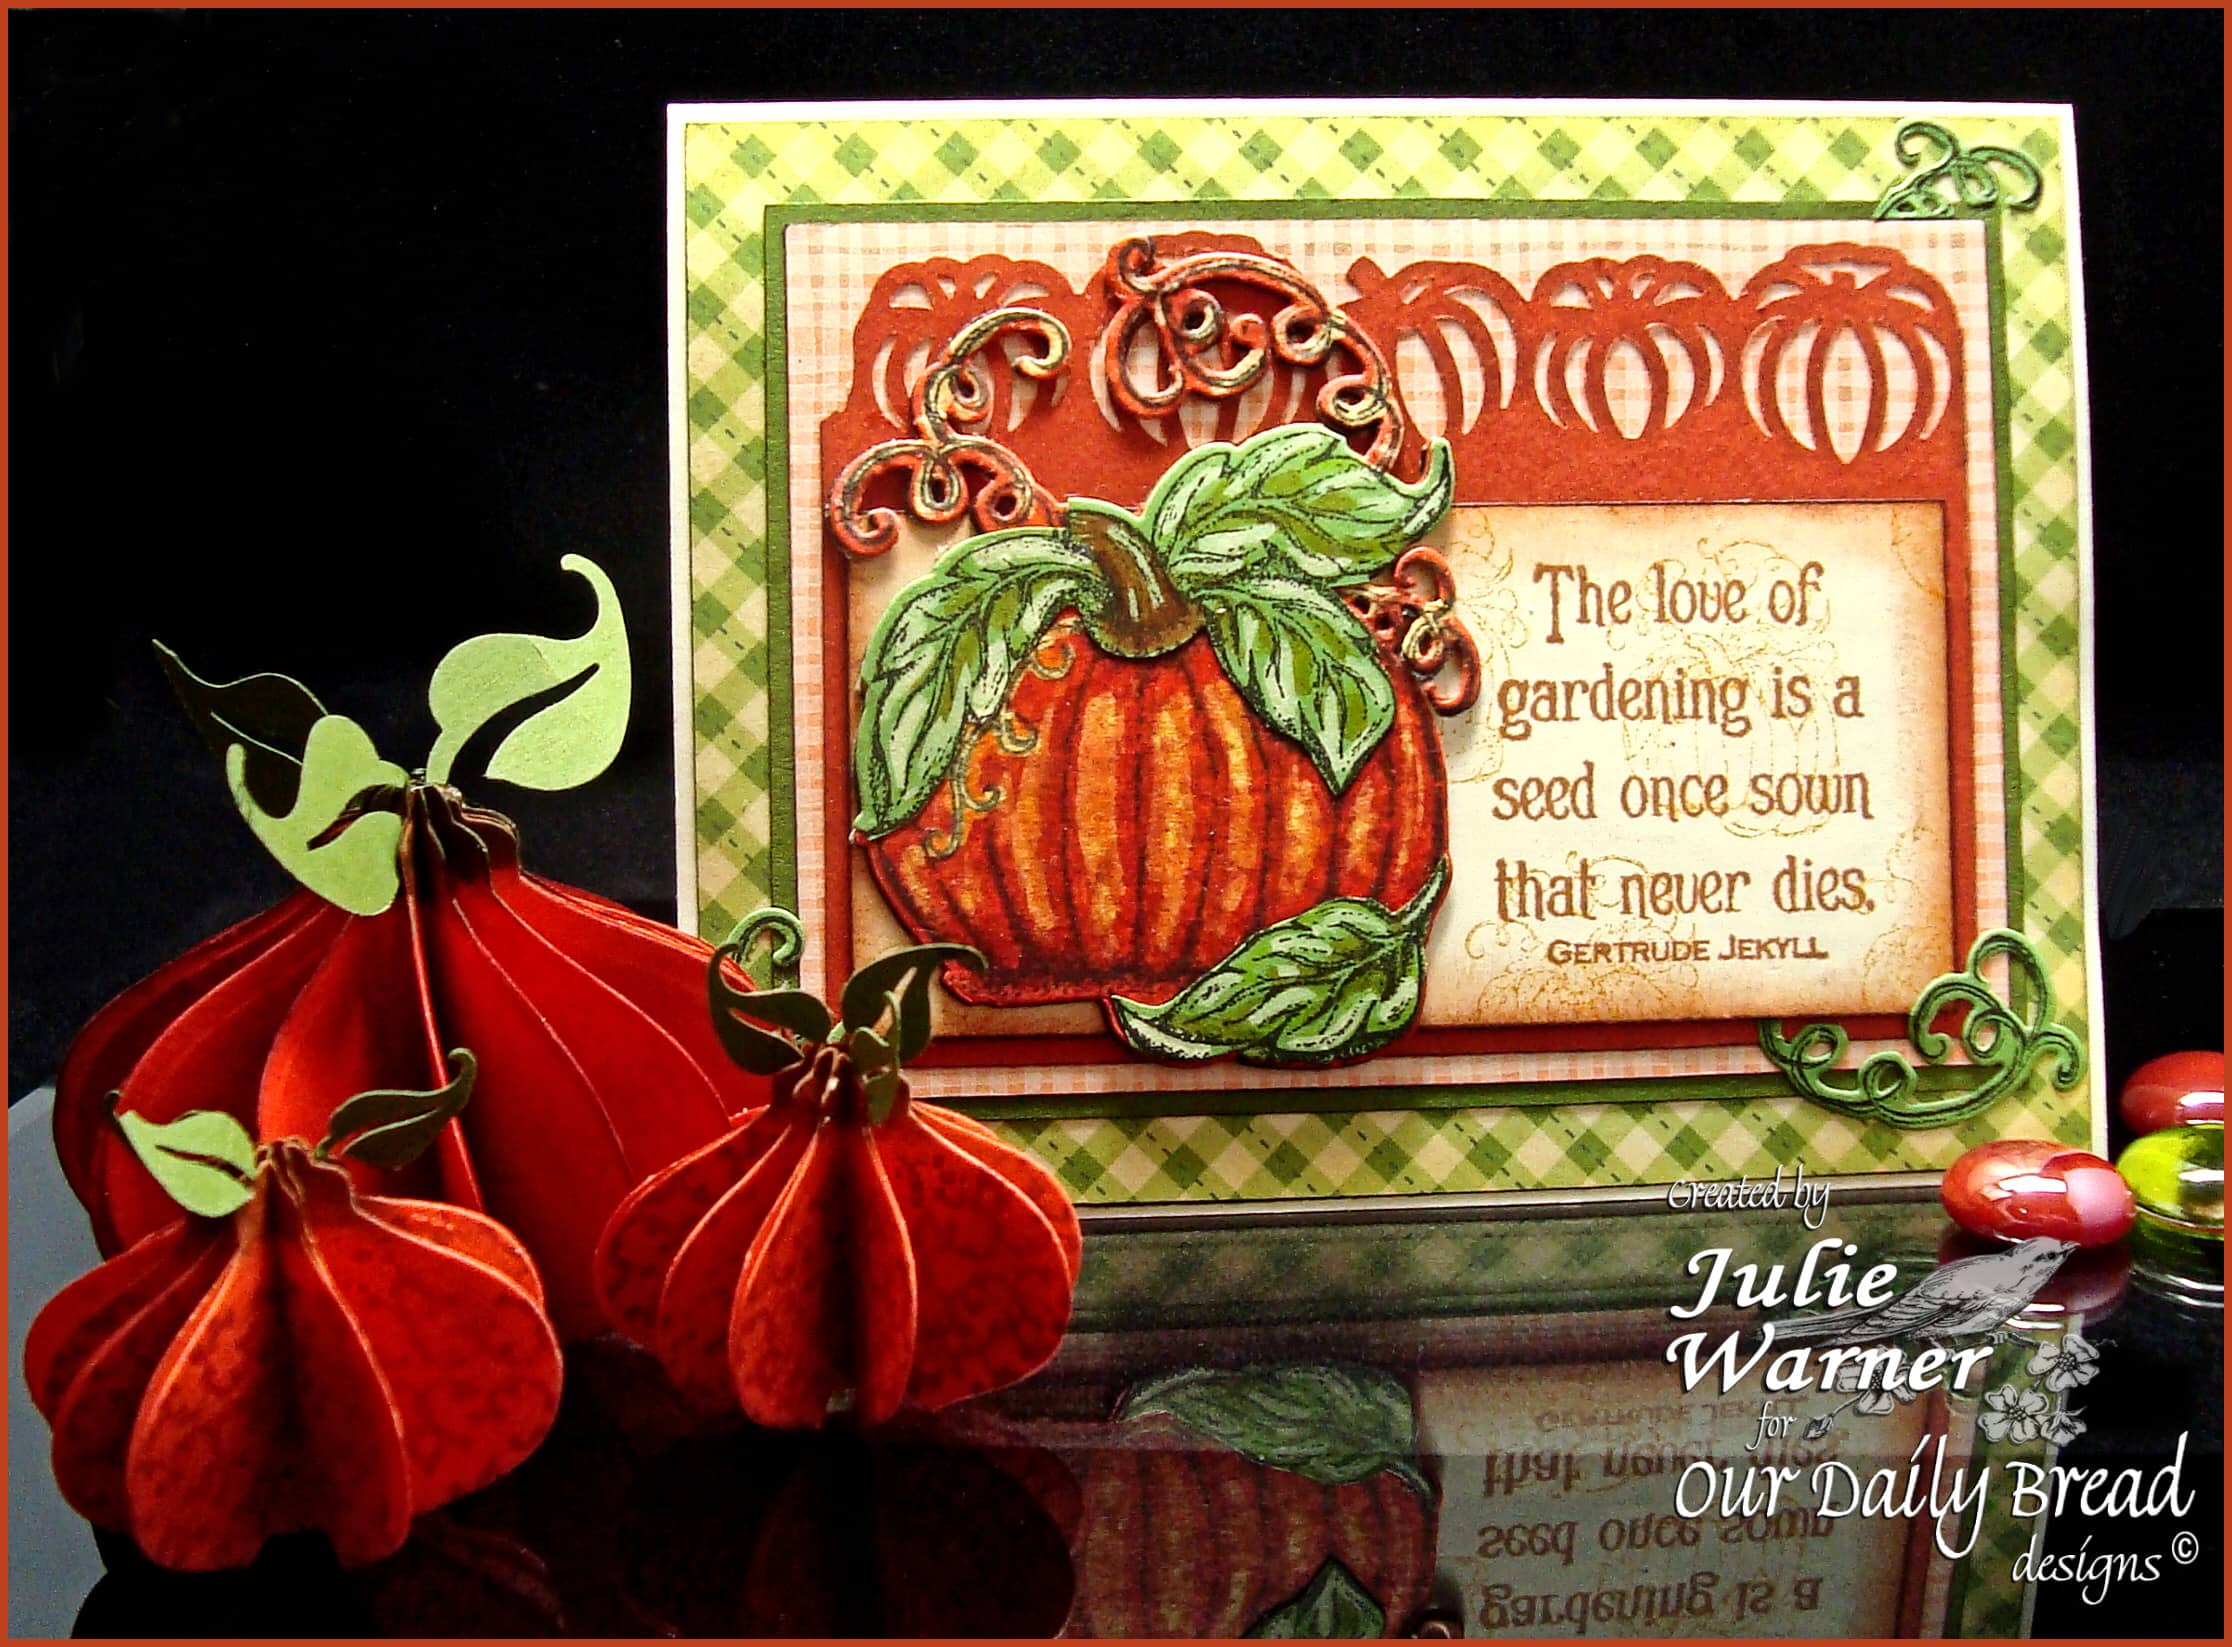
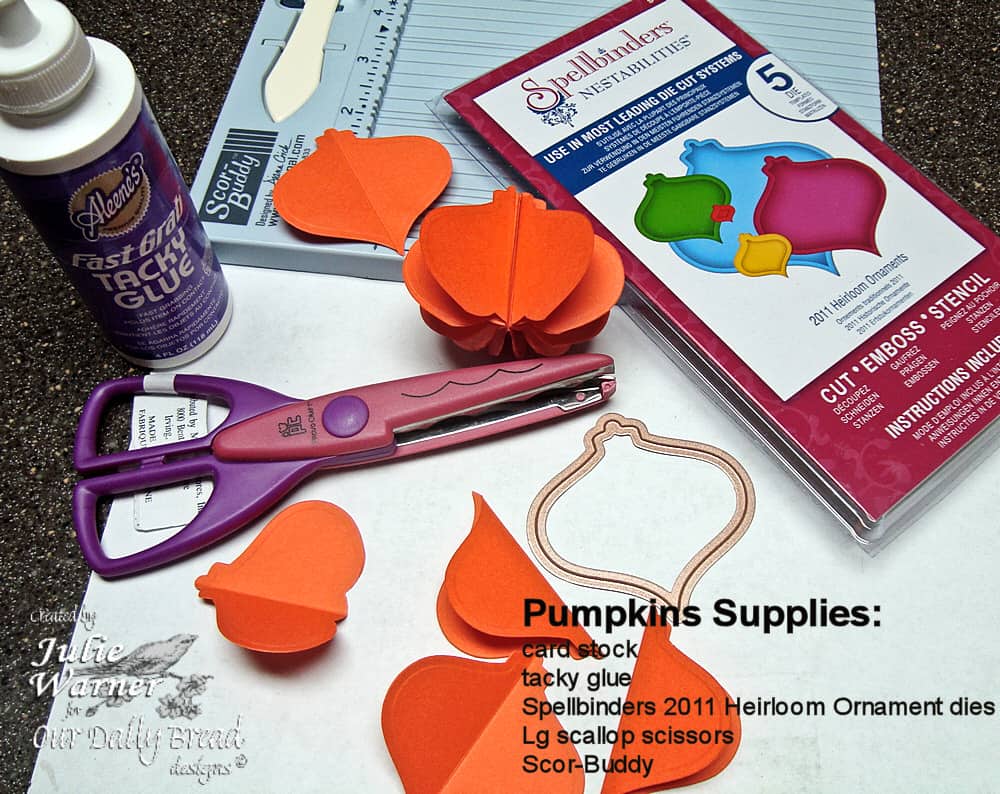
Fall is almost here! I have a little project for you today involving pumpkins. You know it’s fall when you see pumpkins on display! I also have pumpkin card to show you, made with the fabulous new ODBD pumpkin image and matching custom die. I had the idea of making the little accordion pumpkins but I started to use a circle or scallop circle die. Luckily, I had just received the brand new Spellbinders 2011 Heirloom Ornament dies and I thought if I trimmed the pointy bottom, the shape really looked like a pumpkin.
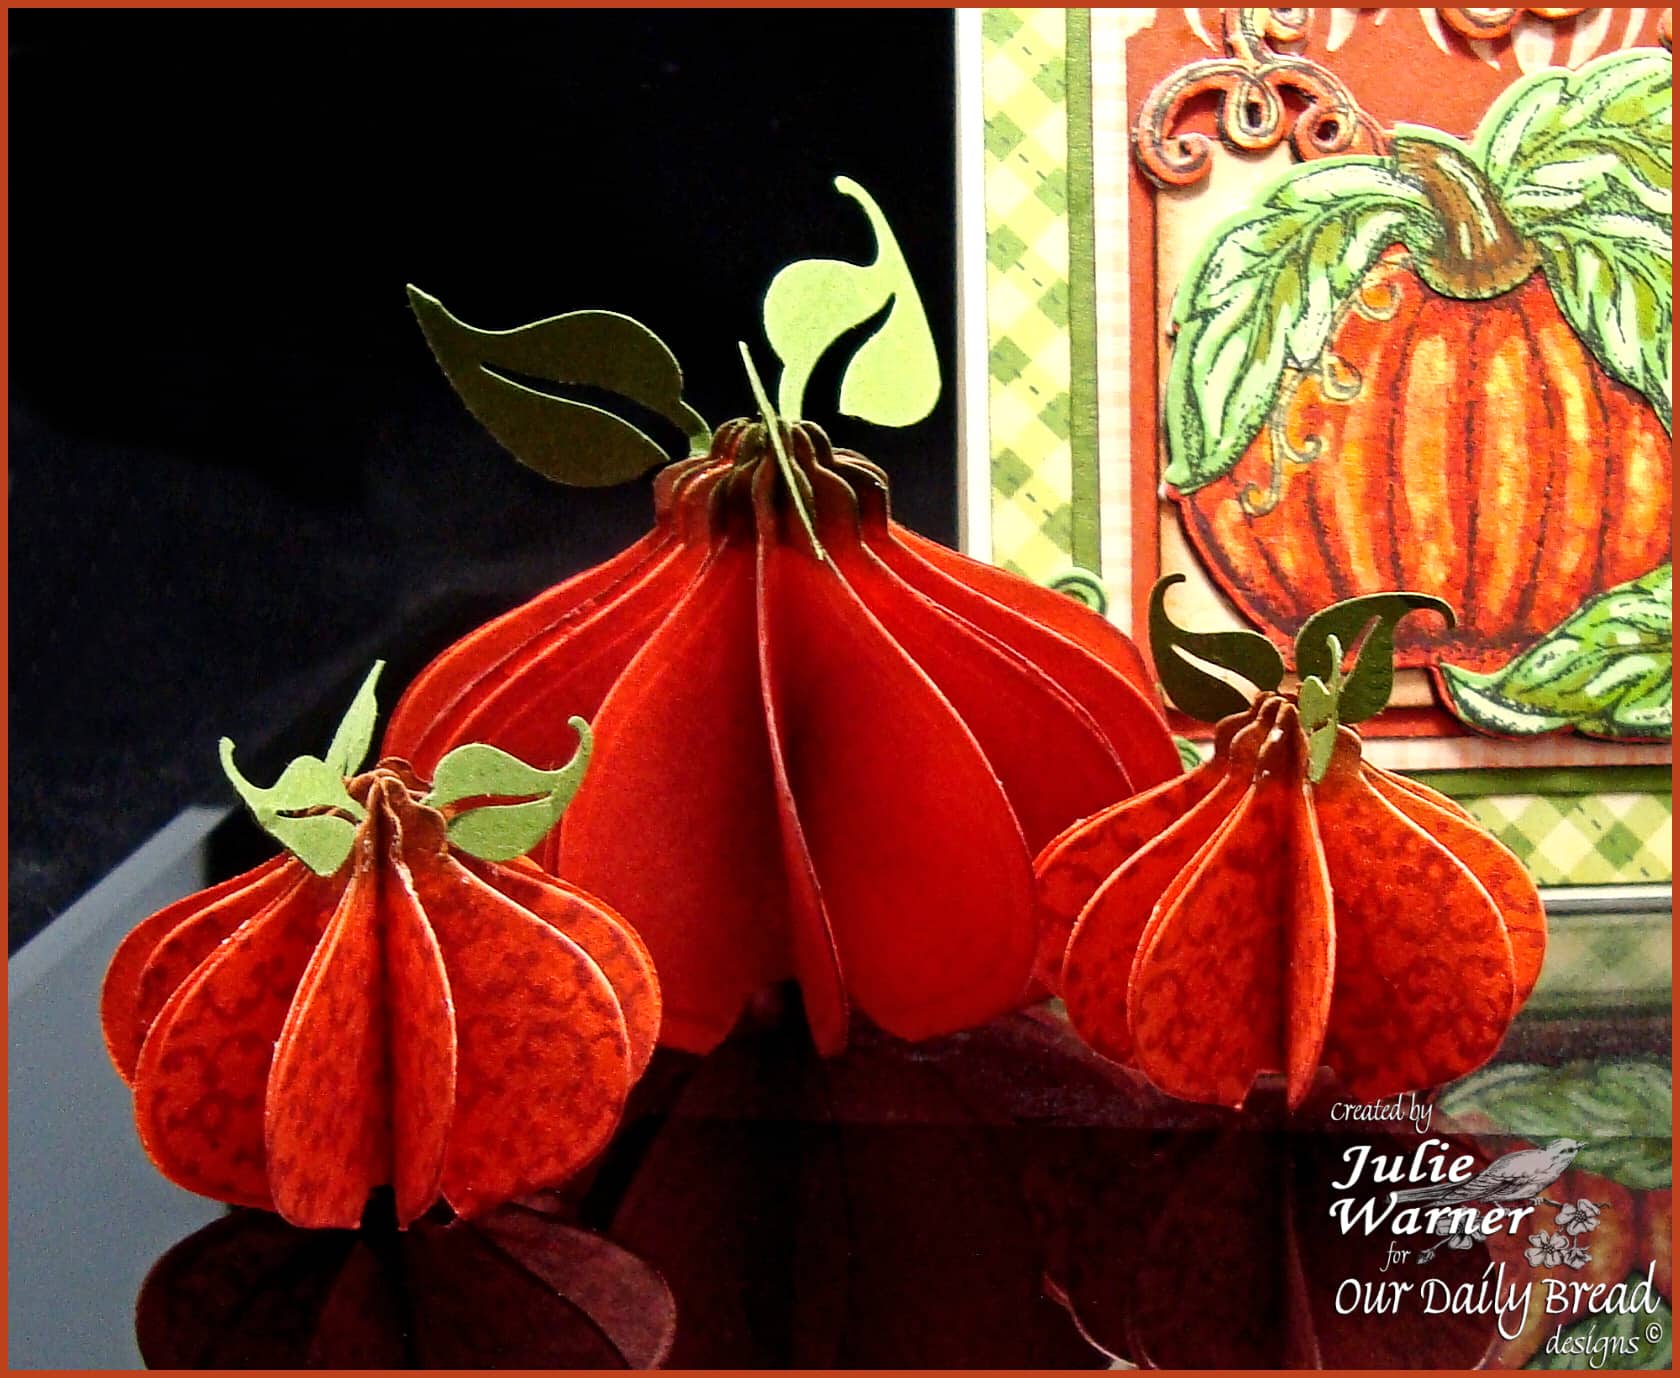
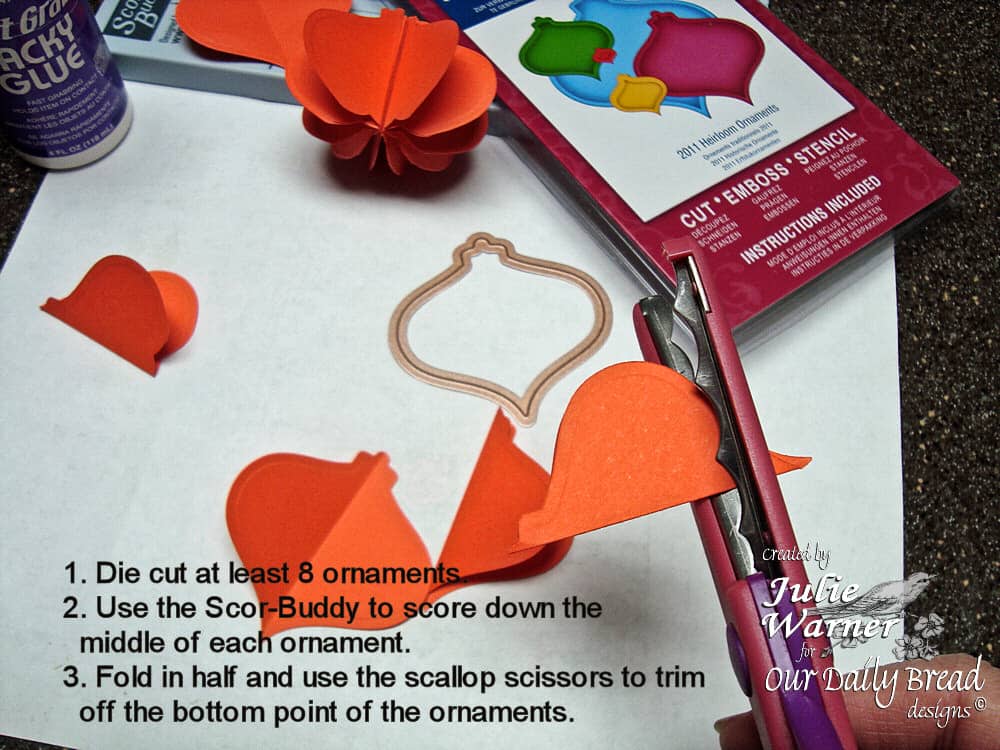
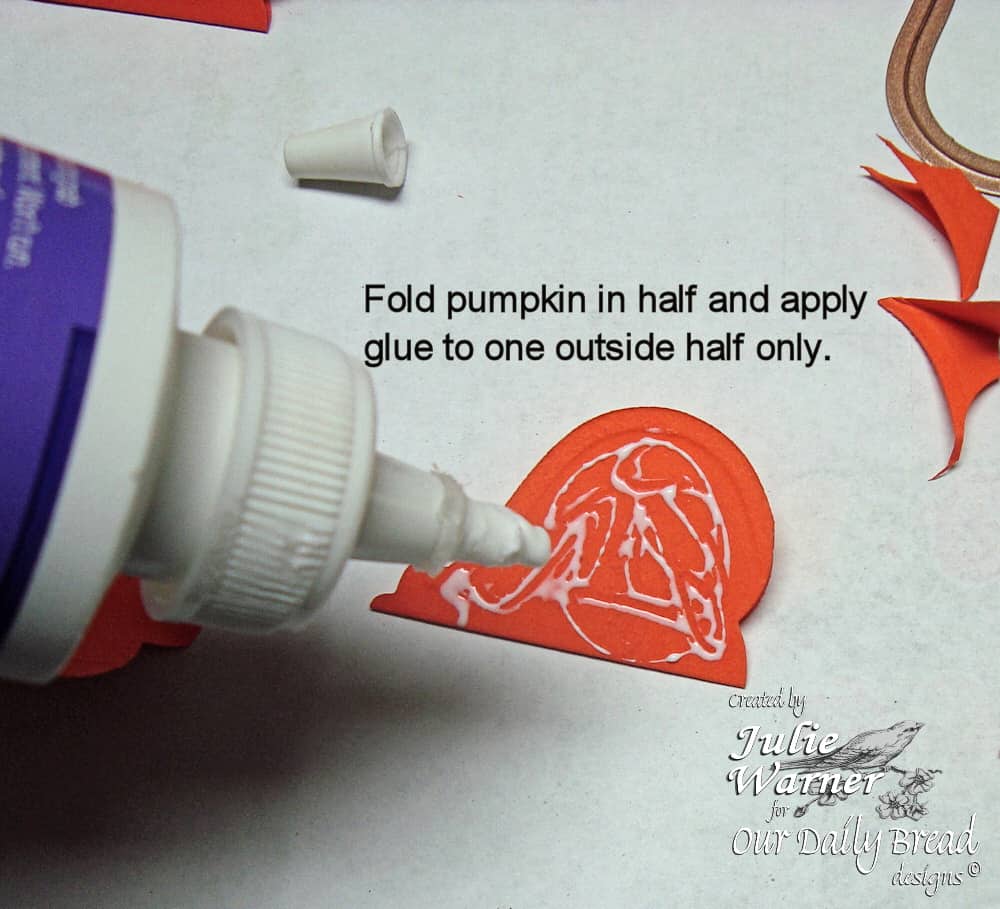
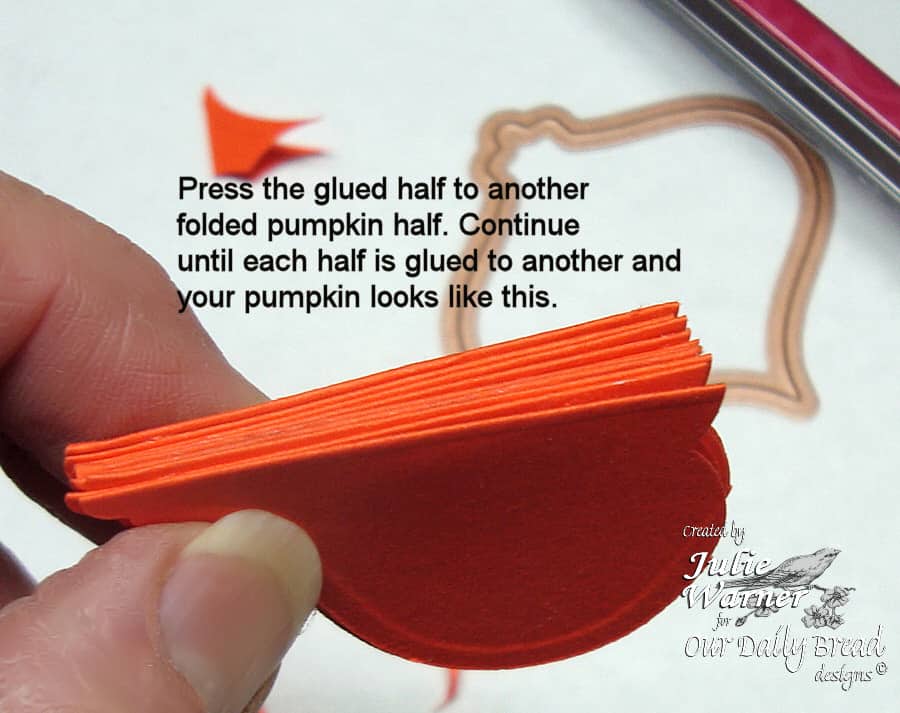
Here’s a little closer view of the pumpkins. I used the two middle size dies for these pumpkins. These are pretty easy; just follow the instructions on the pics. Remember, just click on each pic to enlarge. On the two little ones, I stamped the Vintage Border Background with Memento Rhubarb Stalk before I glued the sections together. The leaves were punched and I put a little glue on the stem and stuck them between the sections before I glued them together.
I sponged on a little dk green ink on the tops of the pumpkins in order to more resemble a stem. You could glue together the final 2 sections if you want them to remain permanently open, but it’s not necessary. And if you want to mail them, just fold them closed and put a little paper clip on them.

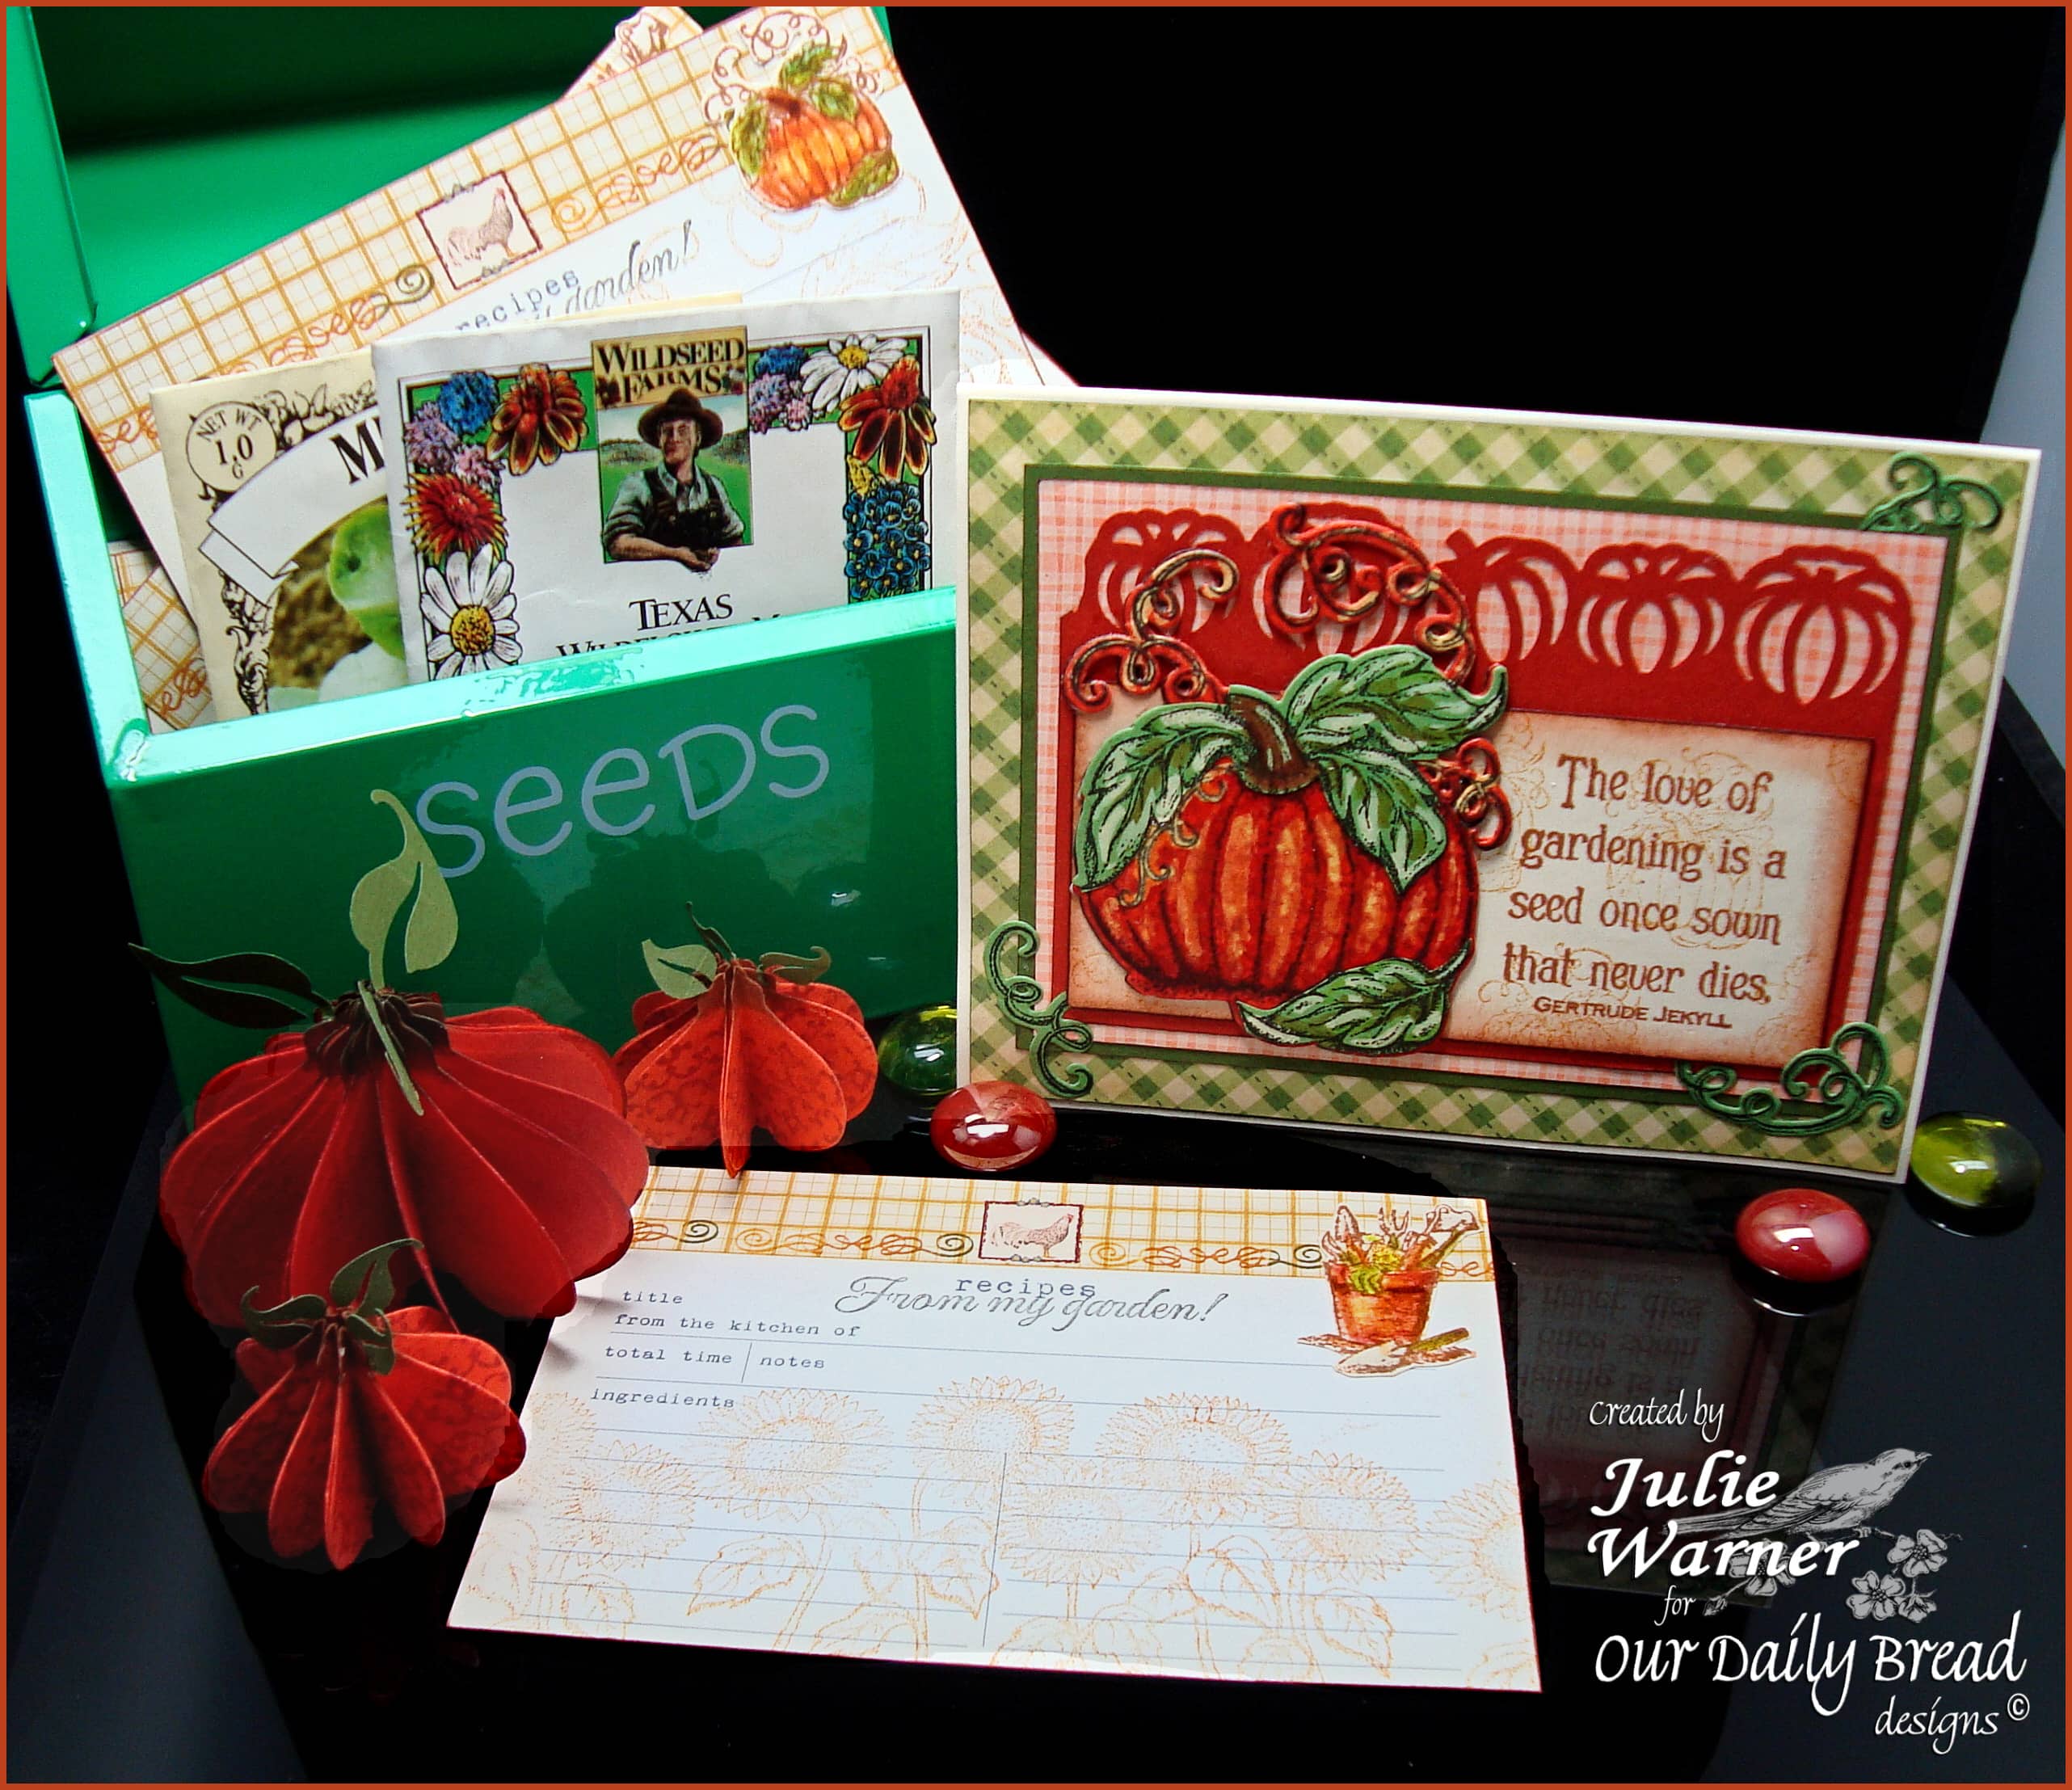 These recipe cards were in the dollar bin at my local craft store along with the Seeds tin. I added some stamping on the recipe cards and cut out the pot w/ tools and the little pumpkins from the Garden Tag Set, and attached them on the upper right corners. The recipe cards just fit inside the tin. Add a few packets of seeds, and you have a nice little fall gift set for someone special!
Thanks so much for stopping by! 


