Click any picture to enlarge.
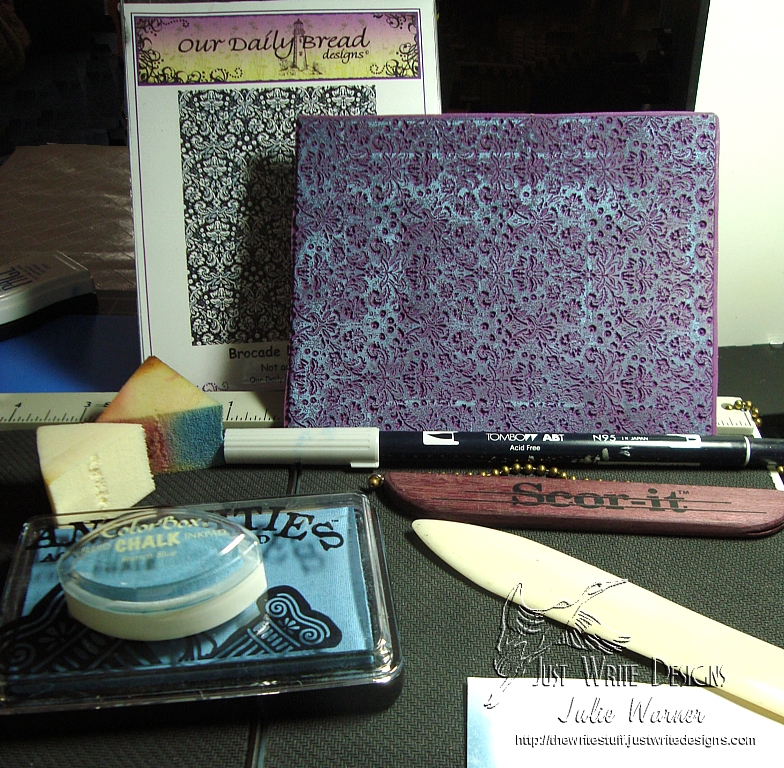
Supplies Needed:
- card stock (Neenah white used here)
- ink (Ranger chalk ink in cobalt used here -very similar to Fluid Chalk French Blue)
- Scor-It, Score Pal or bone folder and ruler
- cosmetic or similar sponge
- lt gray marker (Tombow used here)
- stamp (ODBD Brocade Background used here)
- scrap copy paper for a mask
Step 1:
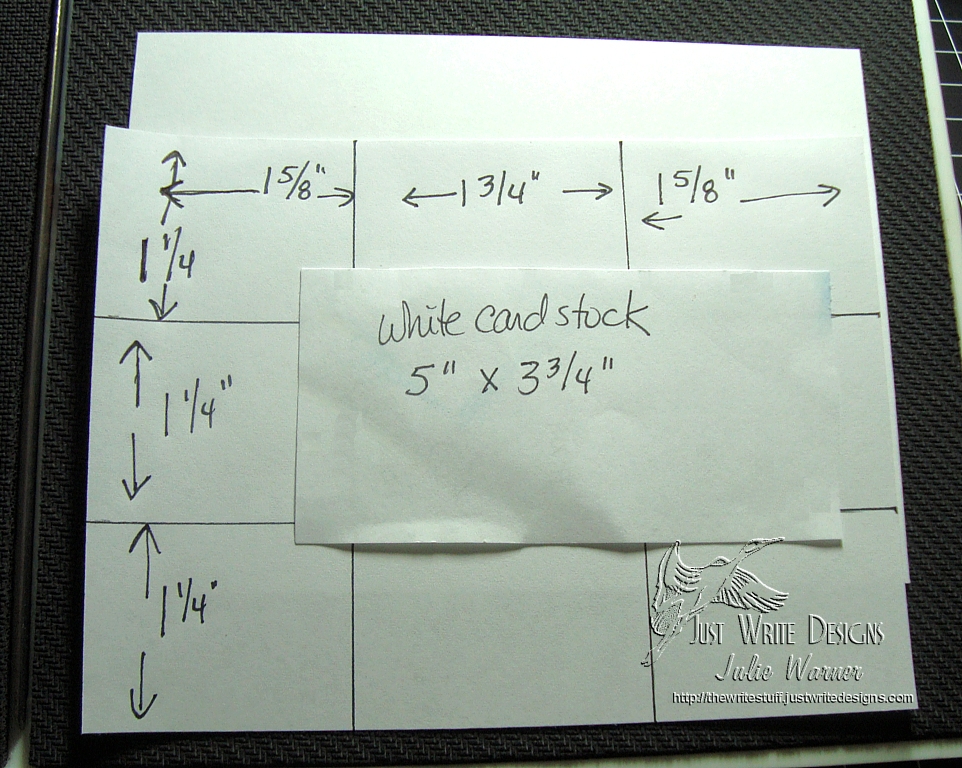
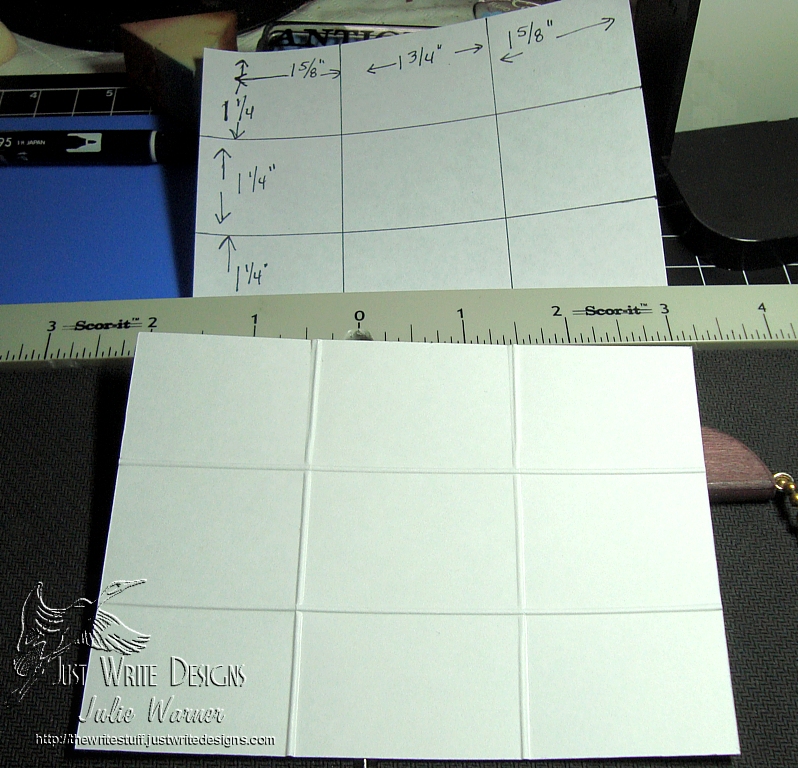
You may make your tile background any size by adjusting the dimensions of the score lines. For mine, I used a 5 x 3.75 inch piece and scored all the horizontal lines at 1.25 inch intervals. The vertical scores are 1 5/8, 1 3/4 and 1 5/8 as shown above. Score all lines all the way across and down so your card stock should look like the picture below.
Step 2:
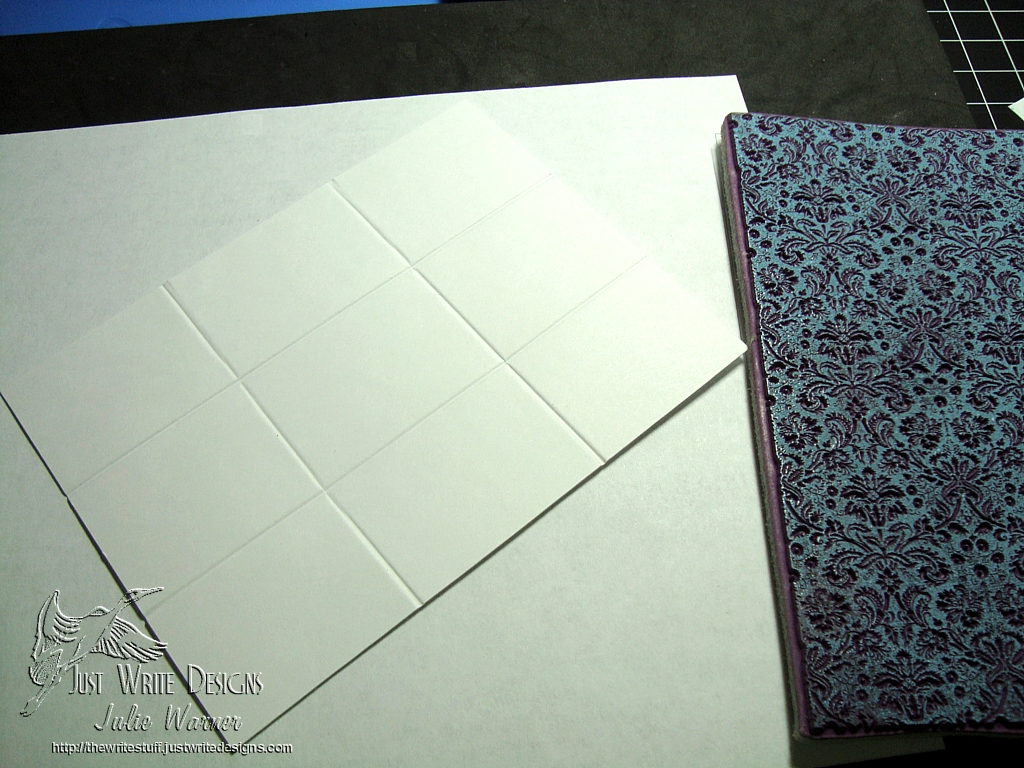
Turn your scored card stock over so that all scored lines are now indented. Ink your image and stamp onto the card stock.
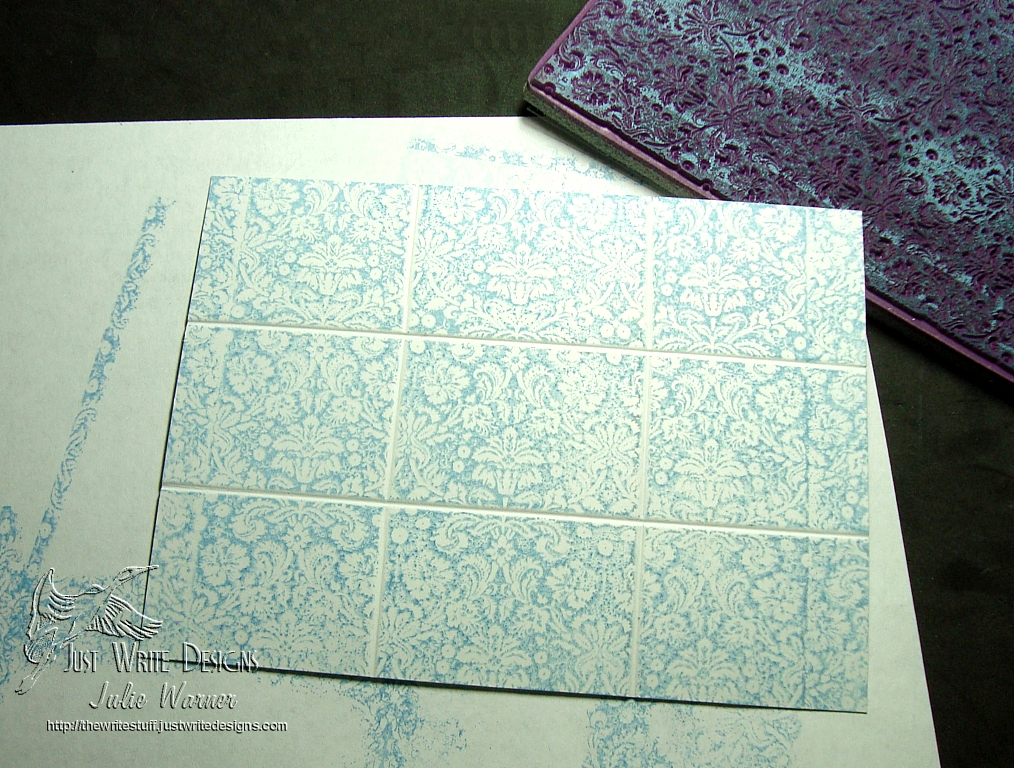
Your stamped card stock should be well on its way to looking like tile. Note the indented score lines mimic grout lines by preventing the image from stamping into them.
Step 3:
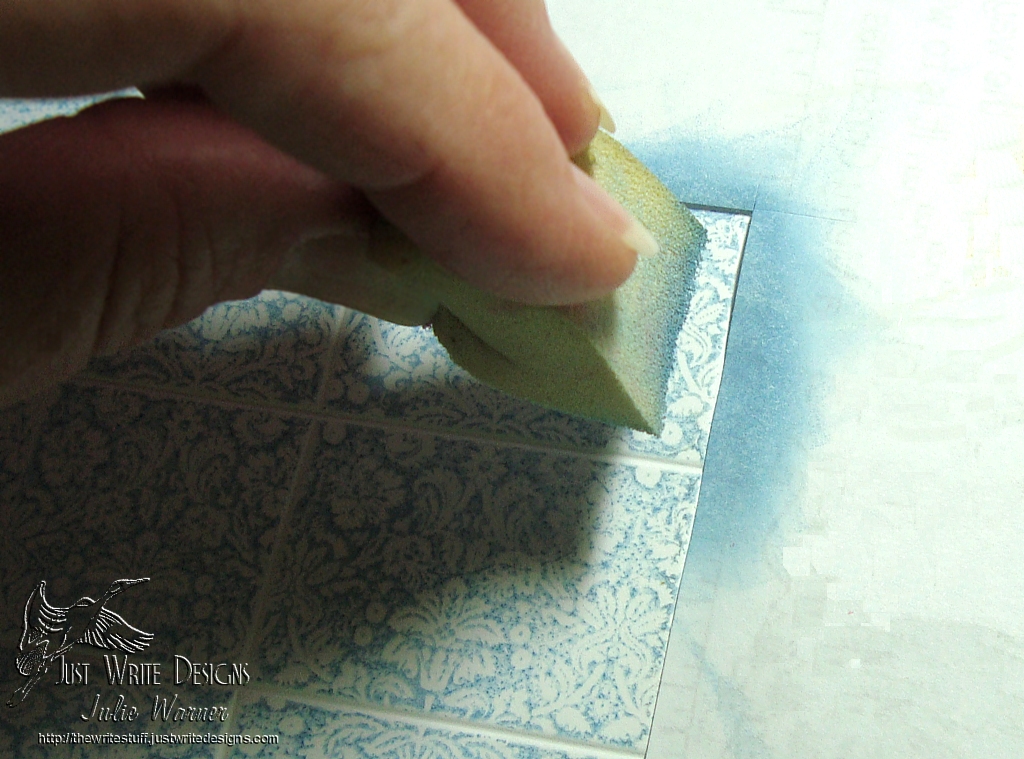
Cut a square inside corner in a piece of copy paper to use as a mask. Place the mask as shown and ink your cosmetic sponge with the same ink you used to stamp the image.
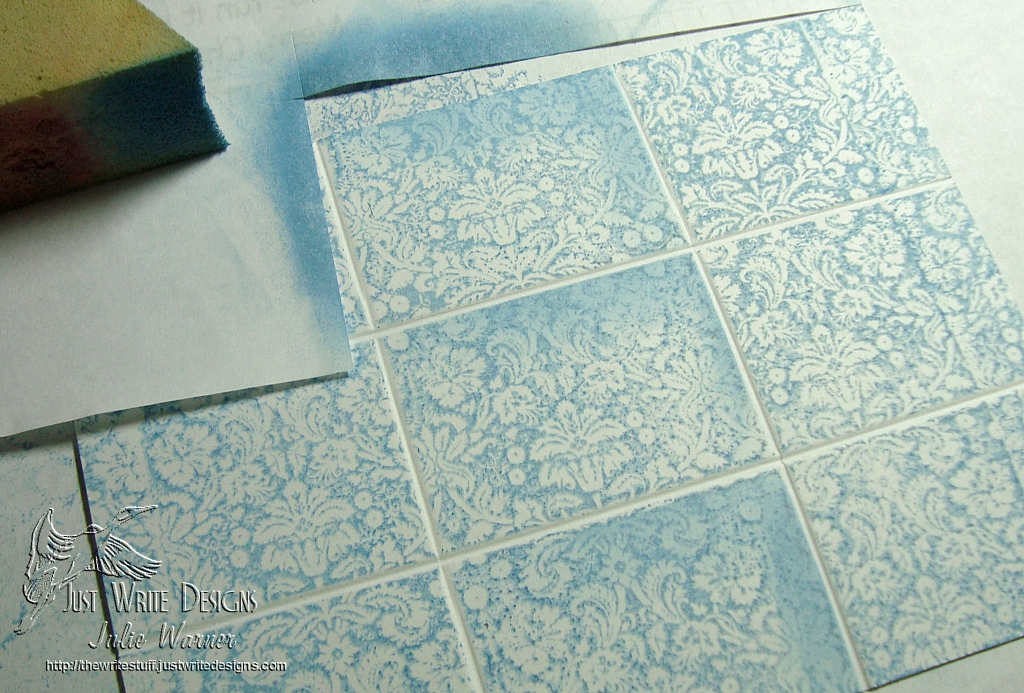
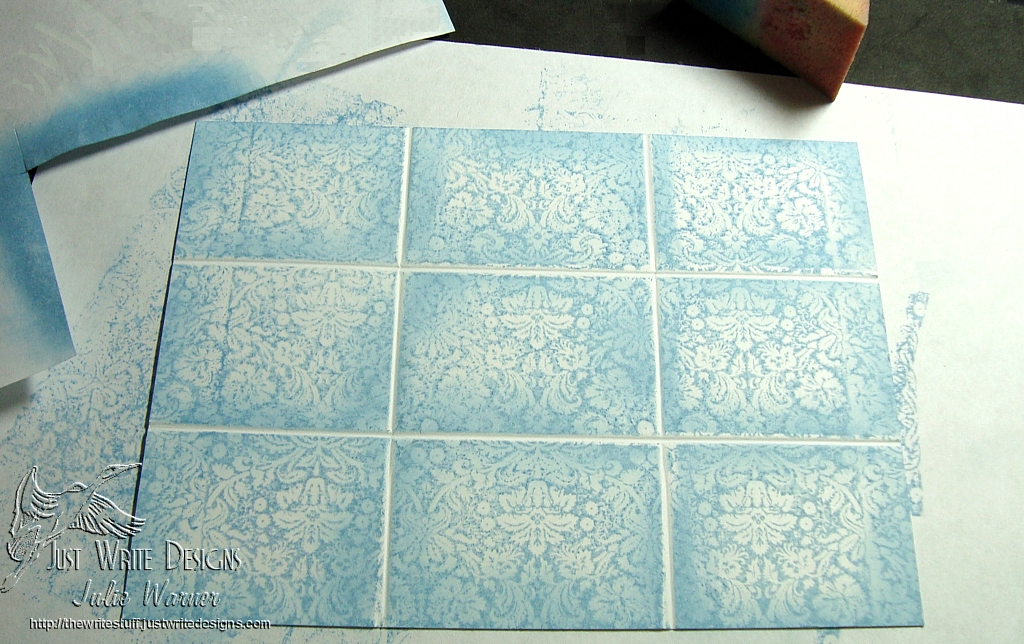
Move the mask around the corners as you go until all “tile” edges are lightly sponged.
Step 4:
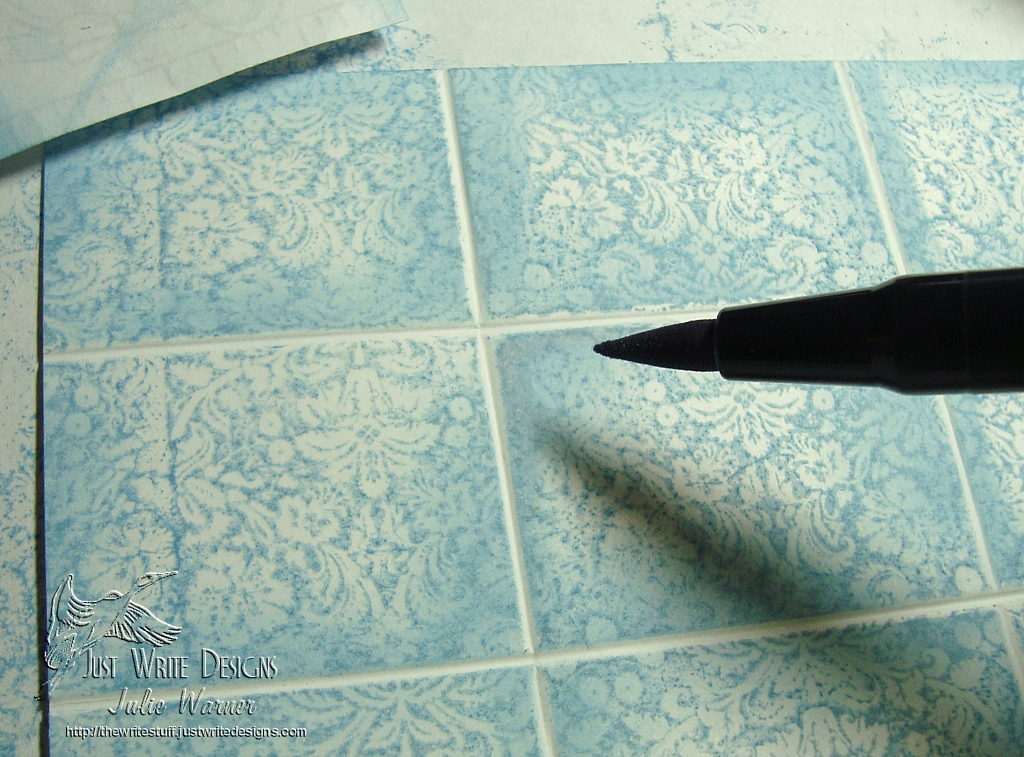
Use the light gray marker just at the very edges of each tile corner. This completes the “tile” appearance and adds depth to your tiles.
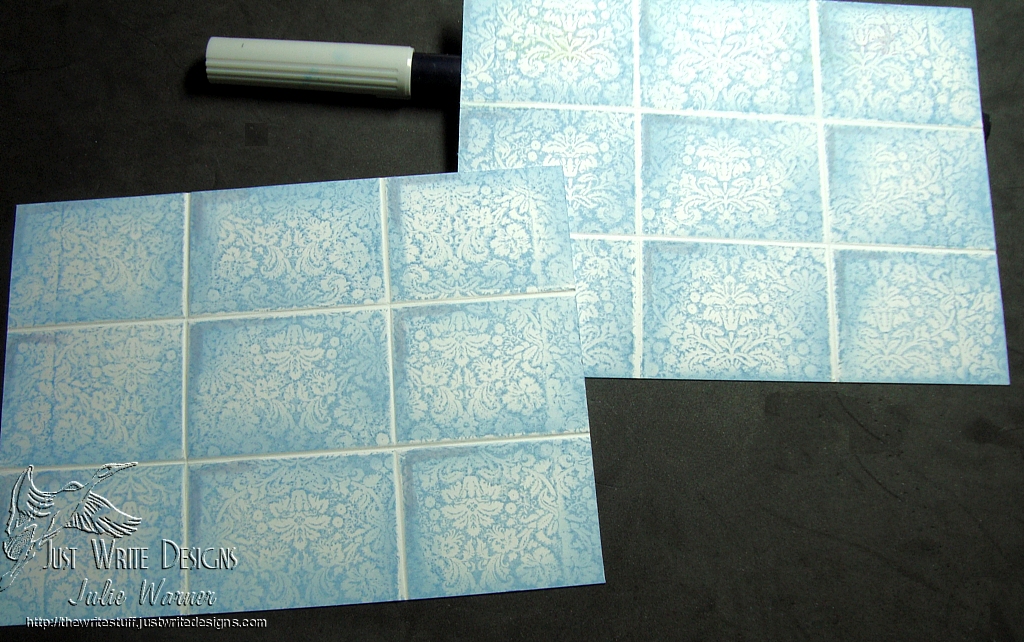
You can stop now or continue to add shading all the way around your “tiles”. The one sided shading is more of a light direction appearance while shading all around would be more of a head on light source.

Ohhh beautiful Julie! Love this card. Thanks for the tutorial too! Can’t wait to play!
Beautiful, Julie. Fabulous tech. Thanks for sharing!
Pingback:The Write Stuff » Blog Archive » Poinsettia Tile & Ornaments TLC301
Pingback:TLC301 Faux Tile Background (11/29/10): Card Techniques & Samples - Splitcoaststampers
This is such a great technique, Julie, and thanks for your wonderful tutorial!!! Your card is gorgeous and I can’t wait to try this tomorrow!!!!
Julie, what a great tutorial and stunning technique. I have some new bg stamps and am going to select one now!
Thank you so very much!!!
Love this tutorial, Julie! Especially the great idea of easy masking on the edges for depth sponging! You clever lady!
Hope you had a wonderful Thanksgiving!
~Bev
wow! this is great,
Thanks!
Sandra
Beautiful, can’t wait to try this great technique!
Annette
Awesome technique and wonderful instructions. Thanks!
This is a great technique. I’m so excited to try it.
Wowza, this is so awesome! An easy-to-follow tutorial and a simply stunning card!
thank you for the tutorial. You make it look so easy and so pretty. Thanks!
You are the BOMB!!! Very cool!
Great tutorial Julie, I’m definitely going to be trying this in the near future. Thanks.
Fantastic tutorial, Julie! Love this technique – I’ll have to give it a try! looking forward to seeing you today!!
Thank you for this great tutorial. I really like this one too. Always looking for something I have not tried before.
Thanks for sharing.
Loved the technique Love my scorepal and learning new ideas for cards
what a beautiful faux tile card-thanks for sharing!
great technigue
can’t wait ti try it
just found your blog thru SCS
thanks
This is amazing! Cased it for one of my parties….
Thanks for the idea!
Beautiful card- I love this look and how you can shade just one side- did not think of that….!
Great and very clear tutorial, and the results are beautiful! I really want to try this technique, hope i can do it justice. Thanks for sharing. CoB