Follow Me On Pinterest justwritedesign - Julie
Subscribe by Email
Loading
Archives
Categories

Posts Tagged ‘frame’


Birthday Paints cu 08013
Weekly-Favorite
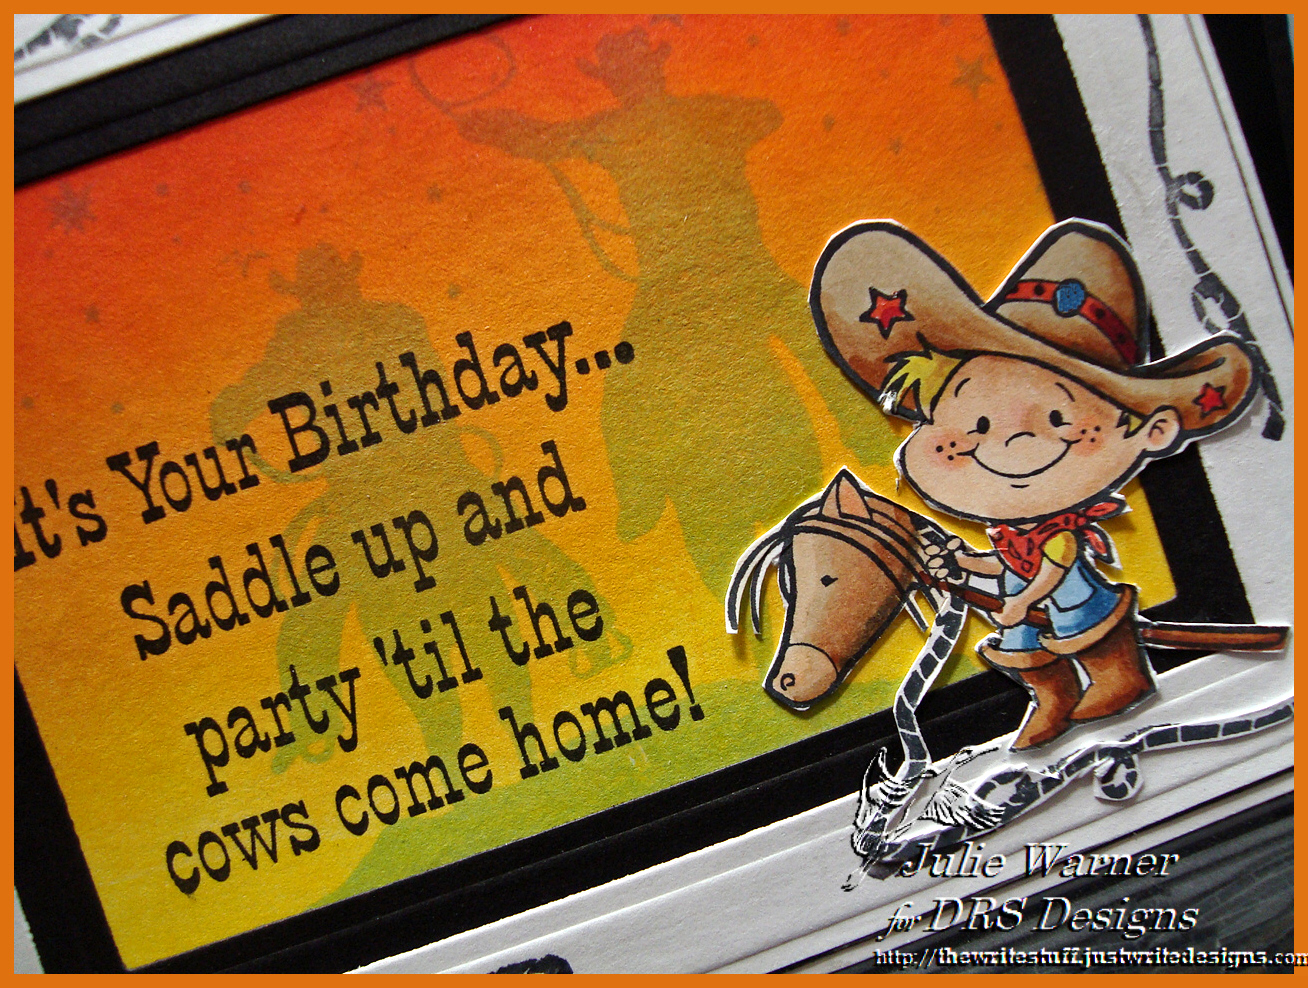
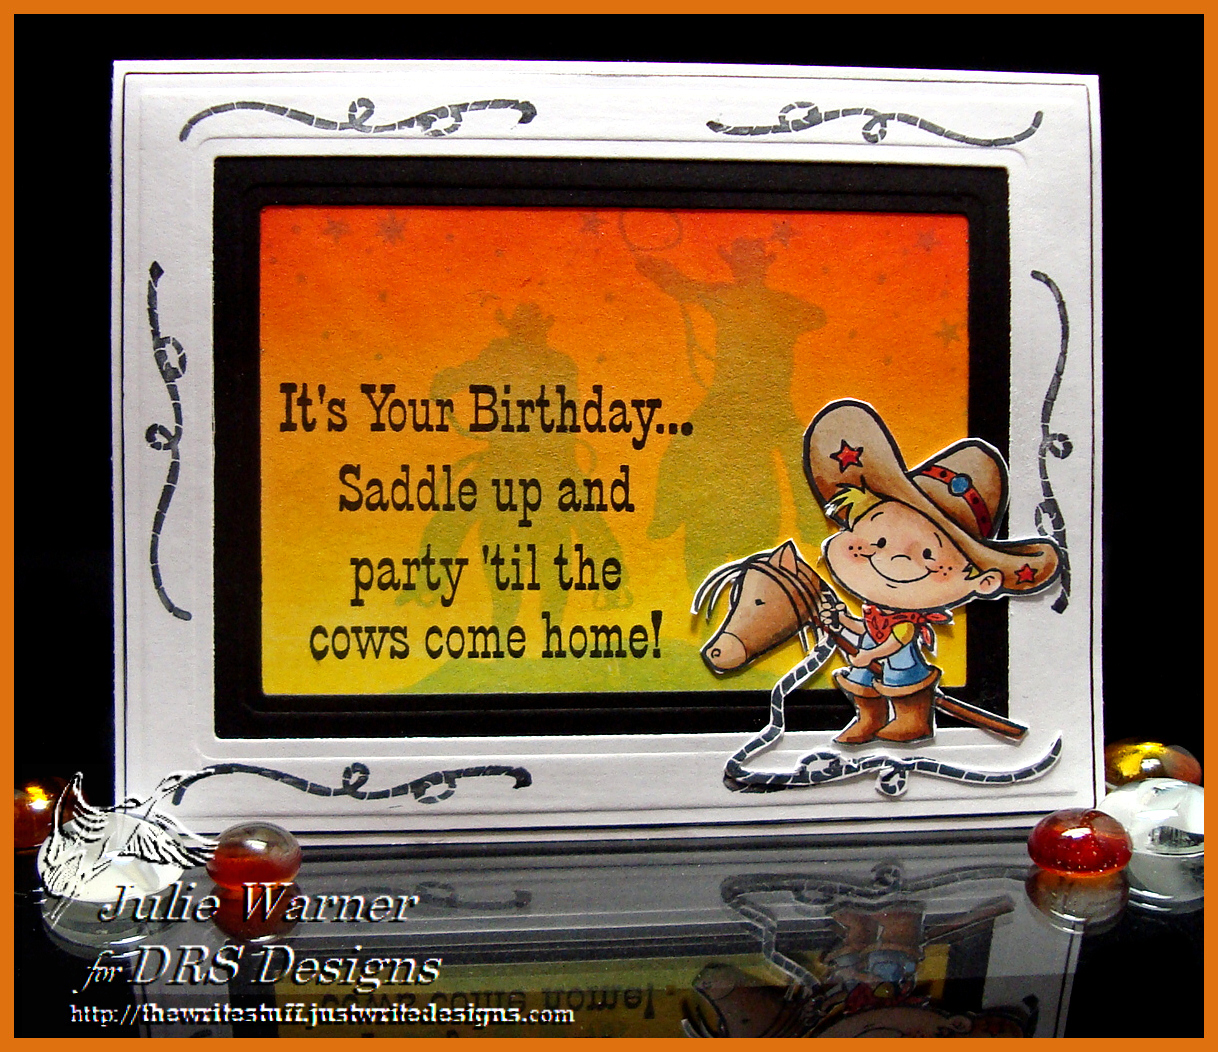
Today we are taking another look at the Our Daily Bread designs December release! Aren’t you over the moon with these beautiful images & fabulous dies? As a special treat, I’m including a little tutorial on how I did the double die cutting. The stitched circle around the horses is part of the white stitched frame. Tricky, huh? It’s actually a combination of out of the box & into the window. I will mention, I do both of these techniques on a regular basis so I don’t have a problem coloring my image first. If you’re trying this for the first time, you may want to color afterwards. That way if you have to try again, you won’t be out a lot of time & effort coloring it.
This is also for IC524 Inspiration Challenge & THIS was the button I was inspired by.

Birthday Paints 08015 
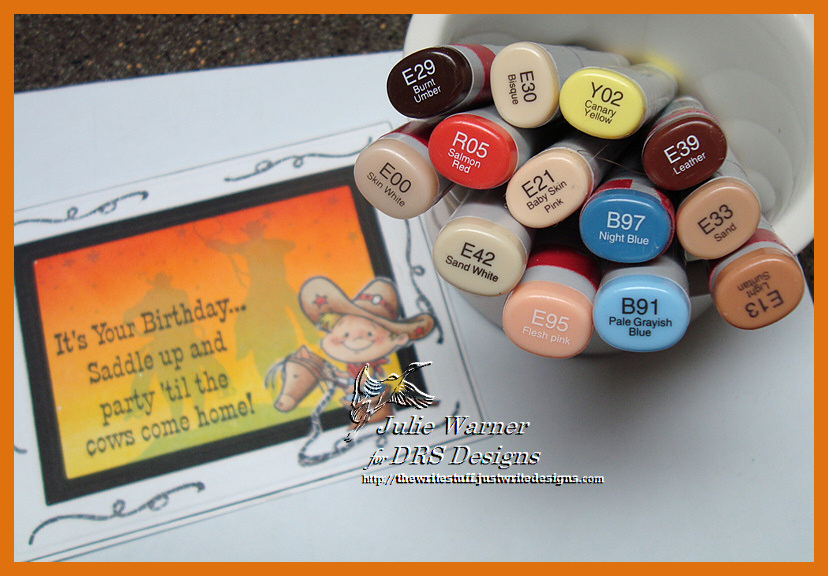
After I stamped my image w/ Memento onto a 4.25 x 5.50 piece of X-Press It, I colored it w/ Copics. The horses were colored to resemble Indian Paints. I still had the image in my Misti, so I over stamped it w/ Versafine to really sharpen the details.  Now comes the Double Die Cutting how to…(click any picture to make it bigger.) 

Bday Paints tut1 08003
Bday Paints tut2 08004
Bday Paints tut3 08005
Bday Painte tut4 08006 Bday Paints tut5 08007

Bday Paints tut6 08008
Bday Paints tut7 08009
Bday Paints tut8 08010
Birthday Paints cu 08013 To finish, I stamped the mill scene onto textured chocolate using the sepia ink twice then added the highlights w/ a white Prismacolor pencil. The leftover outer stitched circle frame was colored w/ a Copic & put back around the image. A punched fence was attached behind the image & the oval stitched greeting added on top. 

Here’s a look at the inside & below it are the Copics I used. 
Birthday Paints inside 08019
Birthday Paint copics 08011

Supplies:

Stamps: Our Daily Bread designs–Saddle Up (retired, replaced w/ Horses), Living Water
Paper: X-Press It white, textured chocolate
Ink:  Memento tuxedo black, Versafine onyx (to over stamp after coloring), Versafine sepia (greeting & background)
Accessories: ODBD Double Stitched Rectangles, Rectangles, Pierced Ovals,Double Stitched Circles, Flourished Star Pattern dies, Copic markers, Spellbinders A2 matting basics A dies,  Misti, Martha Stewart fence punch, white prismacolor pencil

Thanks so much for stopping by!
Julie2 sig

Please be sure to stop & visit all of the DT Blogs. You’ll find so much inspiration on ways to use this fabulous release!
Julie * Amy * Cathy * Robin * Sandee *

 Dawn * Lori * America

Saddle Up cu 04374
Weekly-Favorite
ETA: Just found out this card was Published in Just Cards, Summer 2015, Vol 38!
The Ways to Use It Challenge (WT535), has us heading west & using a cowboy theme in honor of John Wayne. I have this cute little cowpoke & silhouette riders so this is my western theme card.
Saddle Up 04372
After stamping, coloring and fussy cutting the little cowboy, I added him to a white frame I stamped w/ just the rope portion of the image. For the inside area, I sponged on yellows, oranges & a bit of red at the top, then stamped the silhouette cowboys & the stars in a combination of sky blue and soft pool because I wanted them visible, but not so dark that the greeting wouldn’t show up well when I stamped it on top.

The finished card is 5.50 x 4.25 and these are the Copics I used to color the cute little cowboy.
Saddle Up copics 04367
Thanks so much for stopping by! If you haven’t, please mosey on over and check out the DRS Thursday Challenge...Just Beachy! Use a beach, water or sea theme & DRS images are not required!
Julie2 sig

Supplies:

Stamps: DRS Designs – Saddle Up Greeting, Saddle Up CowboyCowboy SilhouetteStarry Background
Paper: Neenah white, black
Ink: Memento tuxedo black, Kaleidacolor melon melody & desert heat, Memories sky blue, HA soft pool
Accessories:  Copic markers, Spellbinders A2 matting basics A & B dies

Shamrock Lattice cu 05606
Weekly-Favorite
Today’s Free for All Challenge (F4A261)on Splitcoast has 2 requirements..St. Patrick’s Day theme & use one of the tutorials in the SCS Resources section. I went with THIS tutorial on creating a frame using Spellbinders nestabilities. 
Shamrock Lattice 05605
After using two sizes of Labels 22 to make my frame, I also die cut a fancy lattice, used part of it behind the frame and the rest for the lower part of my card front. The Infinity Shamrock was stamped w/ green ink, then I added a light green shading to it before stamping the greeting on top with black. I attached it on top of the lattice and a green panel behind the lattice before attaching to my card. The shamrock swag was colored & fussy cut. 

Thanks so much for stopping by! If you haven’t yet, please be sure to check out the DRS Thursday Challenge! This week, it’s a color challenge using spring greens. DRS images are not required so head on over and link up!
Julie2 sig

Supplies:

Stamps: DRS Designs – Infinity Shamrock, Irish Inventory, Shamrock Swag 
Ink:  Memento tuxedo black, cottage ivy
Paper: Neenah white, green
Accessories: a few green Copic markers, Spellbinders Labels 22, rectangle & fancy lattice dies