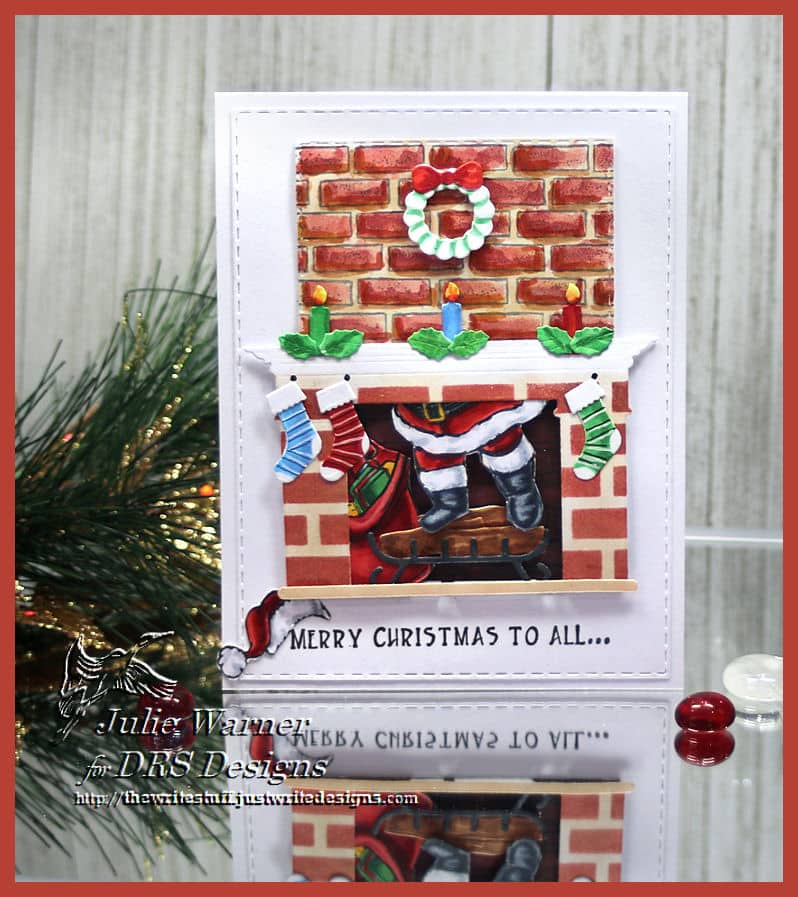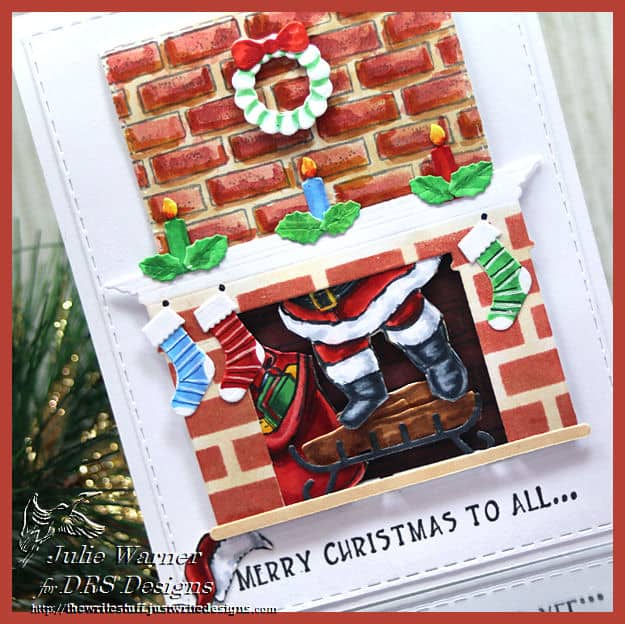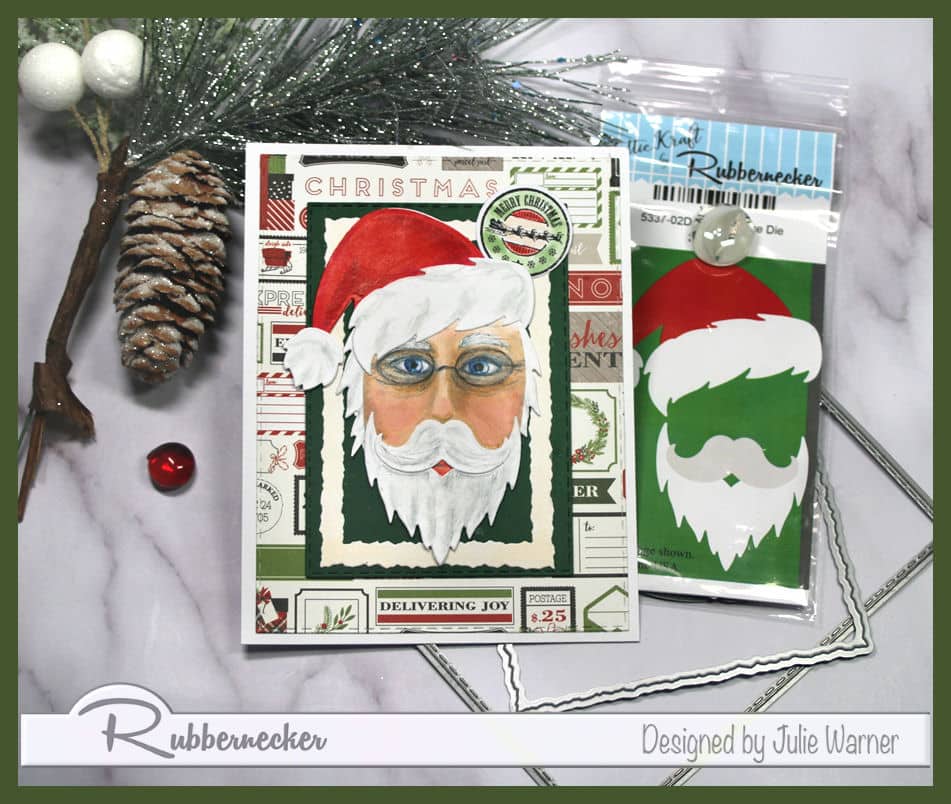
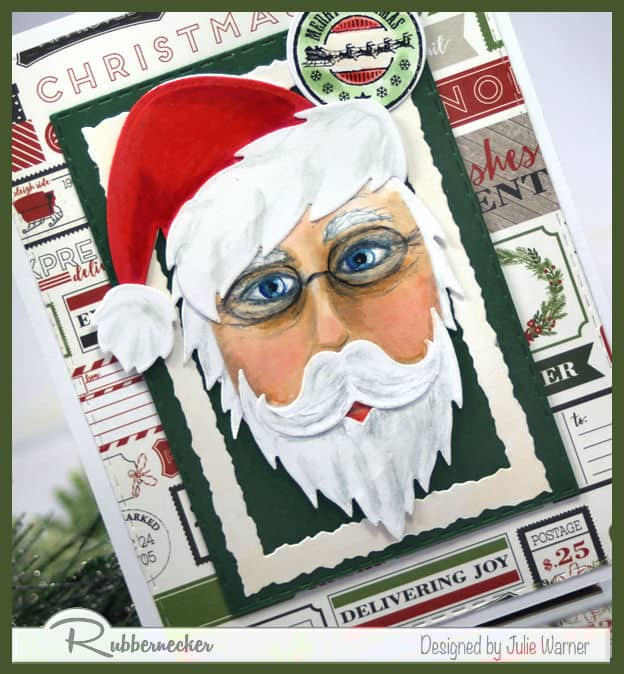
It’s my honor to host the Splitcoast Inspiration Challenge (IC783) & we’re headed to JRL Interiors (& their Pinterest Board) where I found THIS cute display. The Santa right in front reminded me of this new die set.
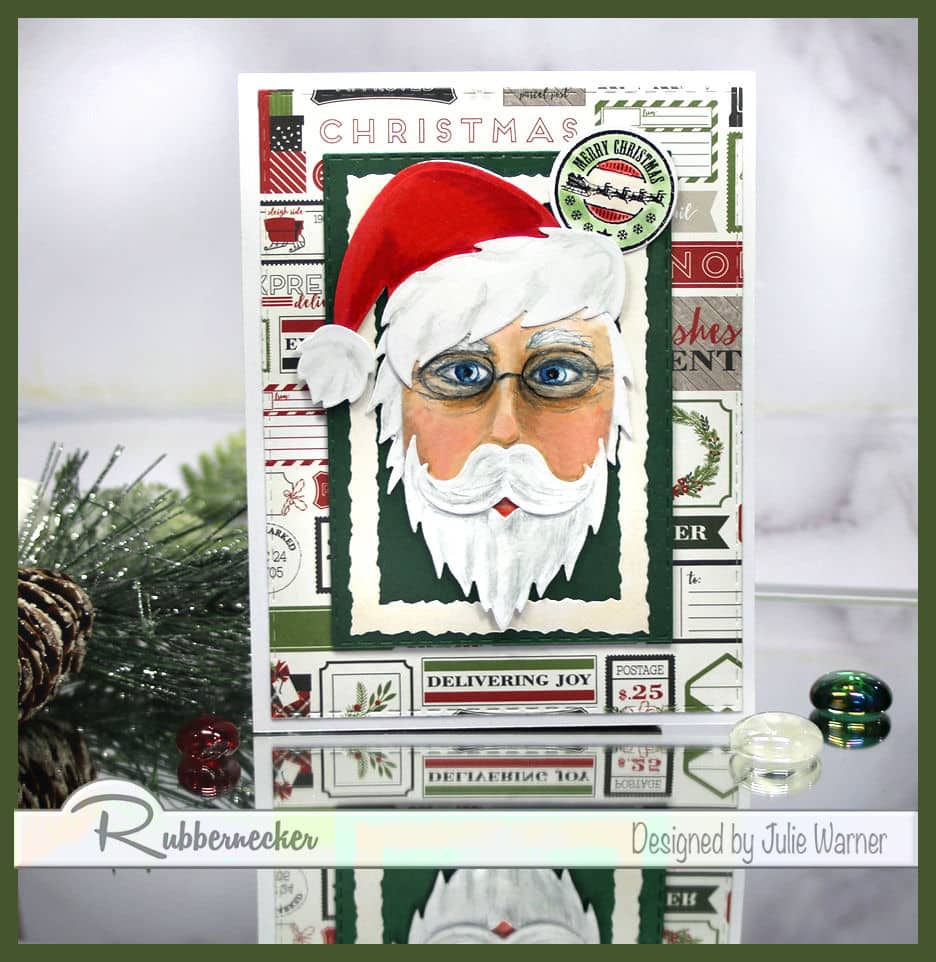
Now the dies don’t come w/ a face, but I kept picturing a face for Santa so I added one. I didn’t draw it so much as I just colored an oval die cut in & added the die cut Santa parts. For his face, I started w/ Copics & a lt gray permanent pen around the eyes. I finished shading his face & beard w/ some Prismas & die cut a second beard, cut it in half, & used it for his hair. He’s backed w/ a dk green layer & an off-white deckle frame, then a layer of designer paper. The little circle image was lightly colored in & die cut.
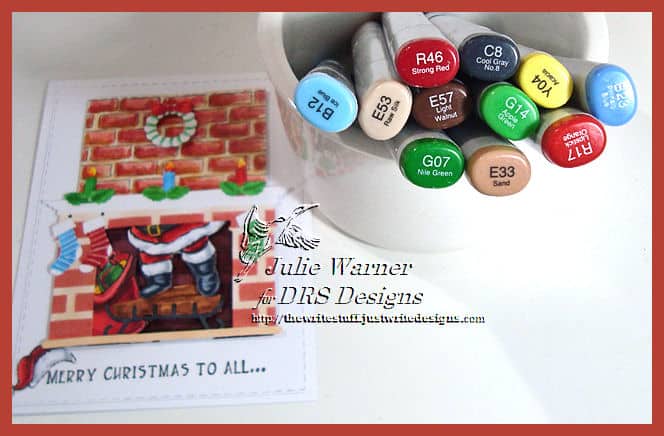
Here are the Copics I used for Santa:

Supplies for this card:
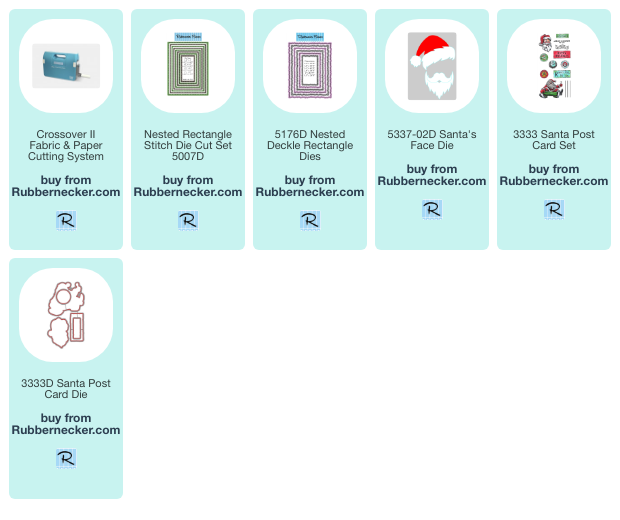
| Stamps: Rubbernecker Stamps: Santa Post Card (greeting circle) |
| Paper: Staples 110# white, dk green, dp (Carta Bella -Christmas Delivery) |
| Ink: Memento tuxedo black |
| Accessories: Rubbernecker: Stitched Rectangles, Deckle Rectangle , Santa Face , Santa Post Card set dies, Copic Sketch Markers, Prismacolor Pencils |
 AND..so sorry I forgot to write up a post for my next card for the Splitcoast Christmas Challenge.
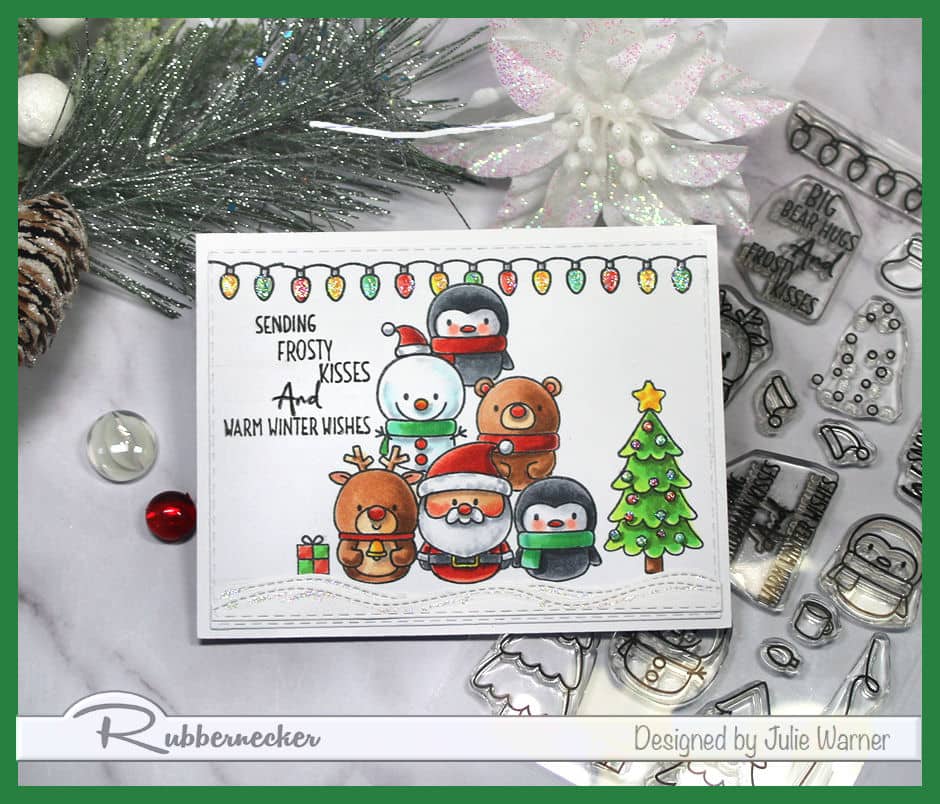
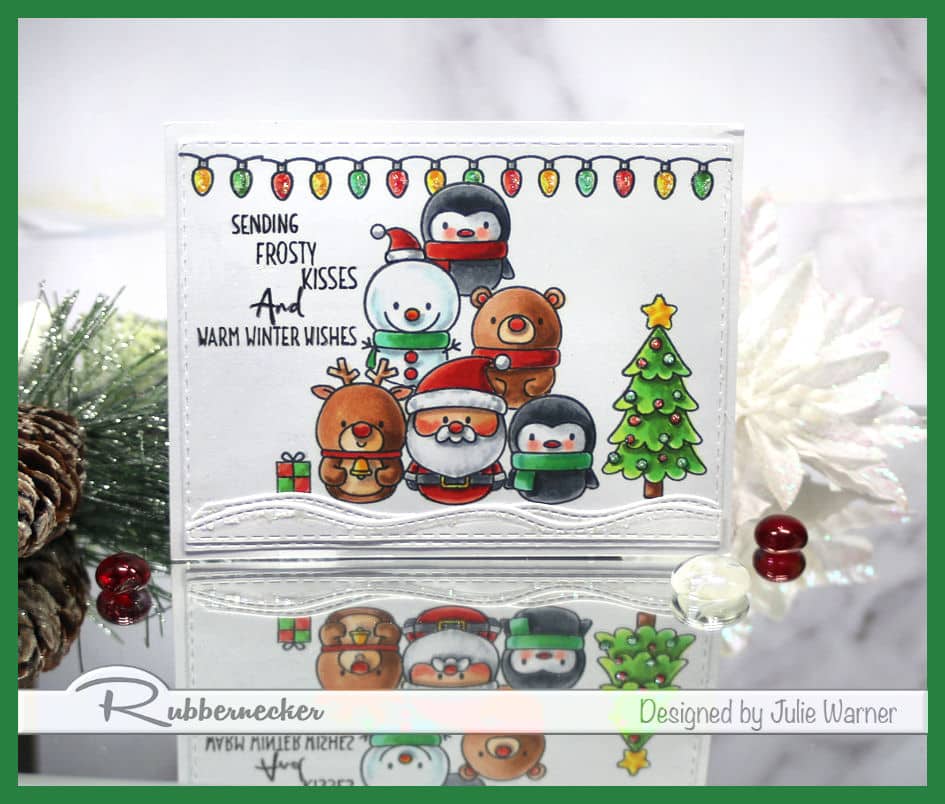
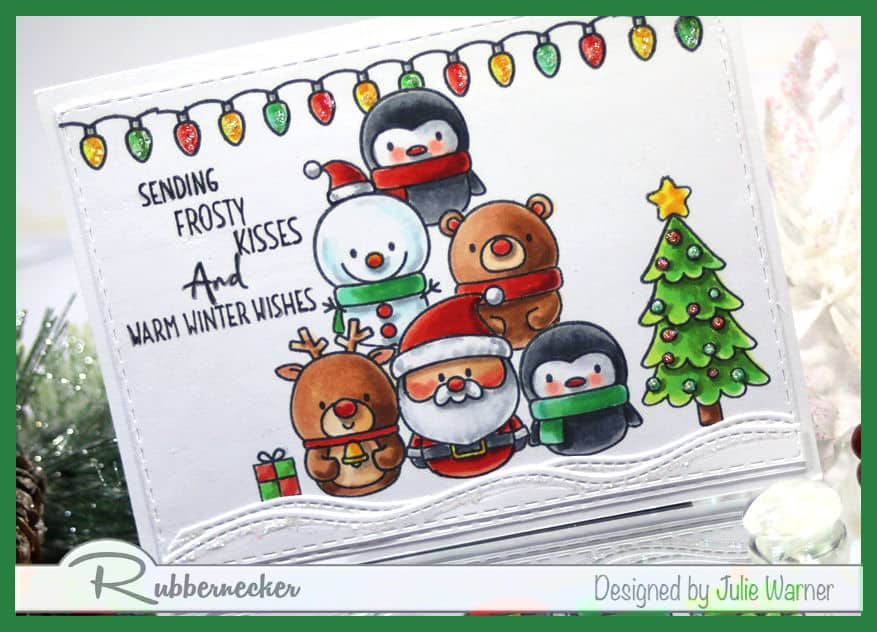
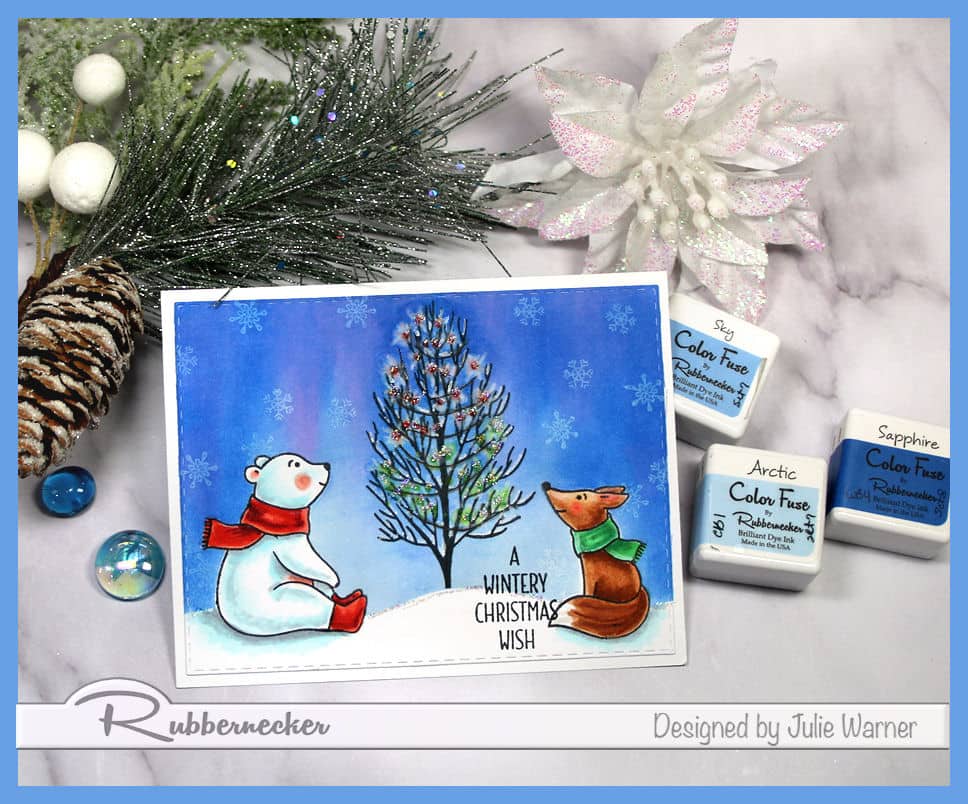
All the details for the Splitcoast December Fan Club Challenge can be found by clicking the blue link. On this card, I stamped the two winter friends, masked them & the snow they’re sitting on & sponged in the sky. The tree & lights were stamped & I used a water brush to lift some of the color around the lights to make them glow.
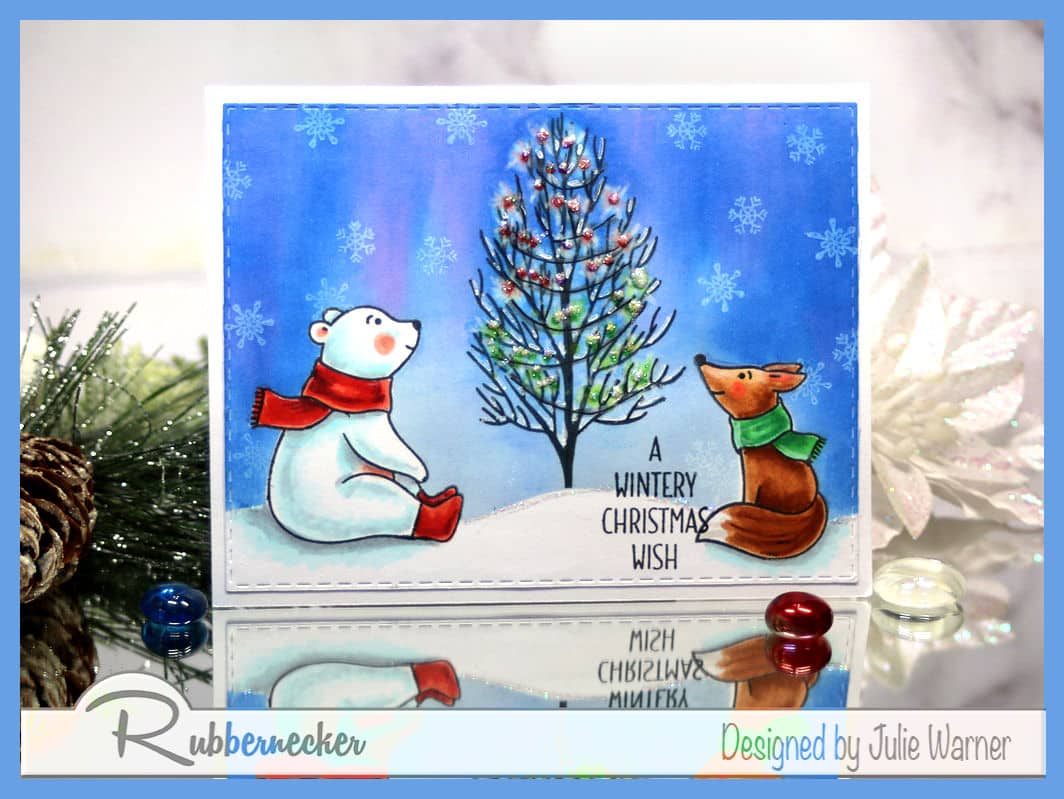
The snowflakes were stamped w/ the picket fence ink & I added stickles to the lights & snowbank.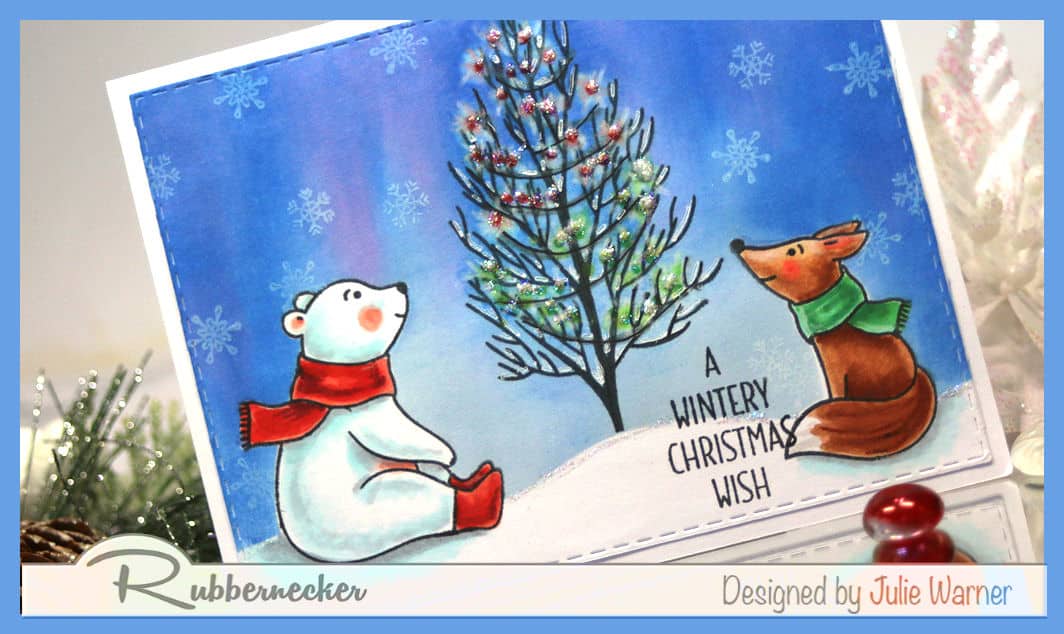
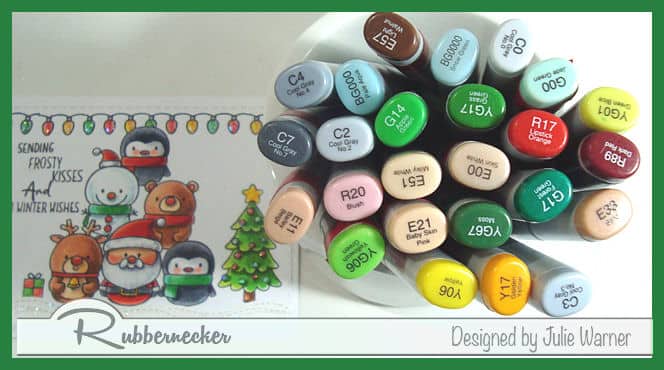
Here are the Copics I used:

Supplies for this card:

| Stamps: Rubbernecker Stamps: Wintery Friends , Snowmen w/ Presents (snowflakes) |
| Paper: Staples 110# white, dk green, dp (Carta Bella -Christmas Delivery) |
| Ink: Memento tuxedo black, Distress Inks picket fence, Rubbernecker Stamps Color Fuse inks set #6, set #7, set #8 |
| Accessories: Rubbernecker: Stitched Rectangles, Wintery Friends dies dies, Copic Sketch Markers, Stickles |
Thanks so much for stopping by!
![]()

|

|

|

|

|

|

|