• Category Archives Distressing
  • ISC August Release Day 4

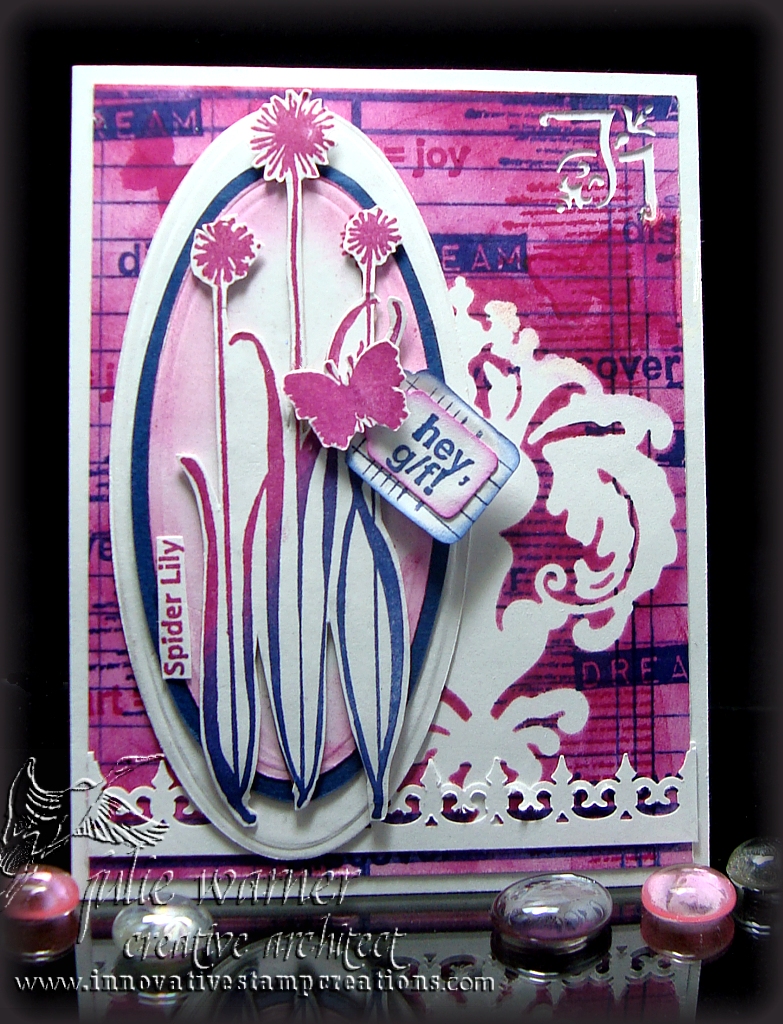
    Today, on our final day of August releases from Innovative Stamp Creations, I have two cards made with two of the sets released this week.  The first one is from  Nature Silhouettes  III.

    Julie Warner - justwritedesigns https://thewritestuff.justwritedesigns.com/

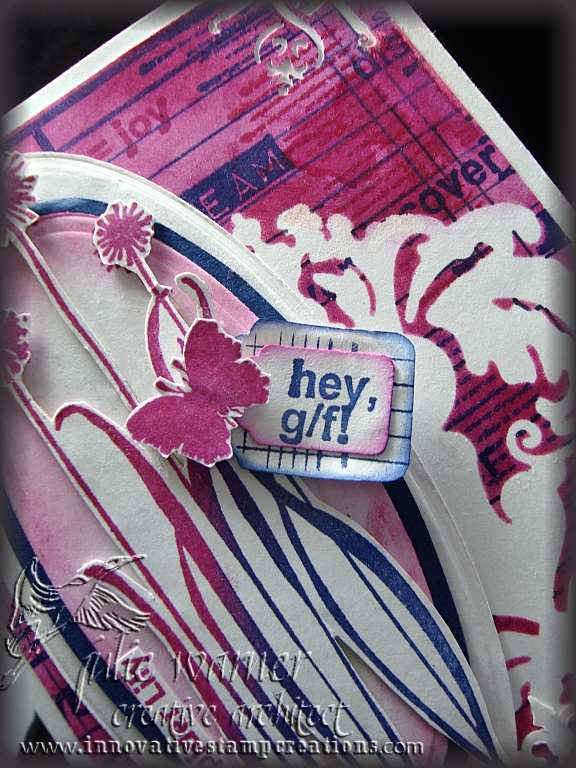
    For this card, I inked the spider lily with lapis and azalea inks, stamped it twice,  cut one out and die cut the other with a mega oval die.  After sponging a little ink around the edges, I attached the cut out lily on top of the base image. I traced this same die on navy paper and cut it out by hand in order to get the narrow mat. The white mat is the next largest oval die.

    For the background, I placed a large flourish mask on my white card stock, stamped the ledger and several word images, then sponged on azalea ink. I stamped a few of the small butterflies and used one as mask. I placed this one in a couple of areas on the background, then sponged more ink over it. I added a corner punch and a white punched fence. The sentiment was punched with a multi size tag punch. Card measures 4.25 x 5.5 (A2).

    Supplies:
    stamps: ISC – Nature Silhouettes III
    paper: Neenah white, navy
    ink: Ancient Page azalea, lapis
    accessories: corner punch (All Night Media), multi tag punch (McGill), flourish mask (Heidi Swapp), Spellbinders mega oval dies, Martha Stewart iron gate border punch

    Julie Warner - justwritedesigns https://thewritestuff.justwritedesigns.com/

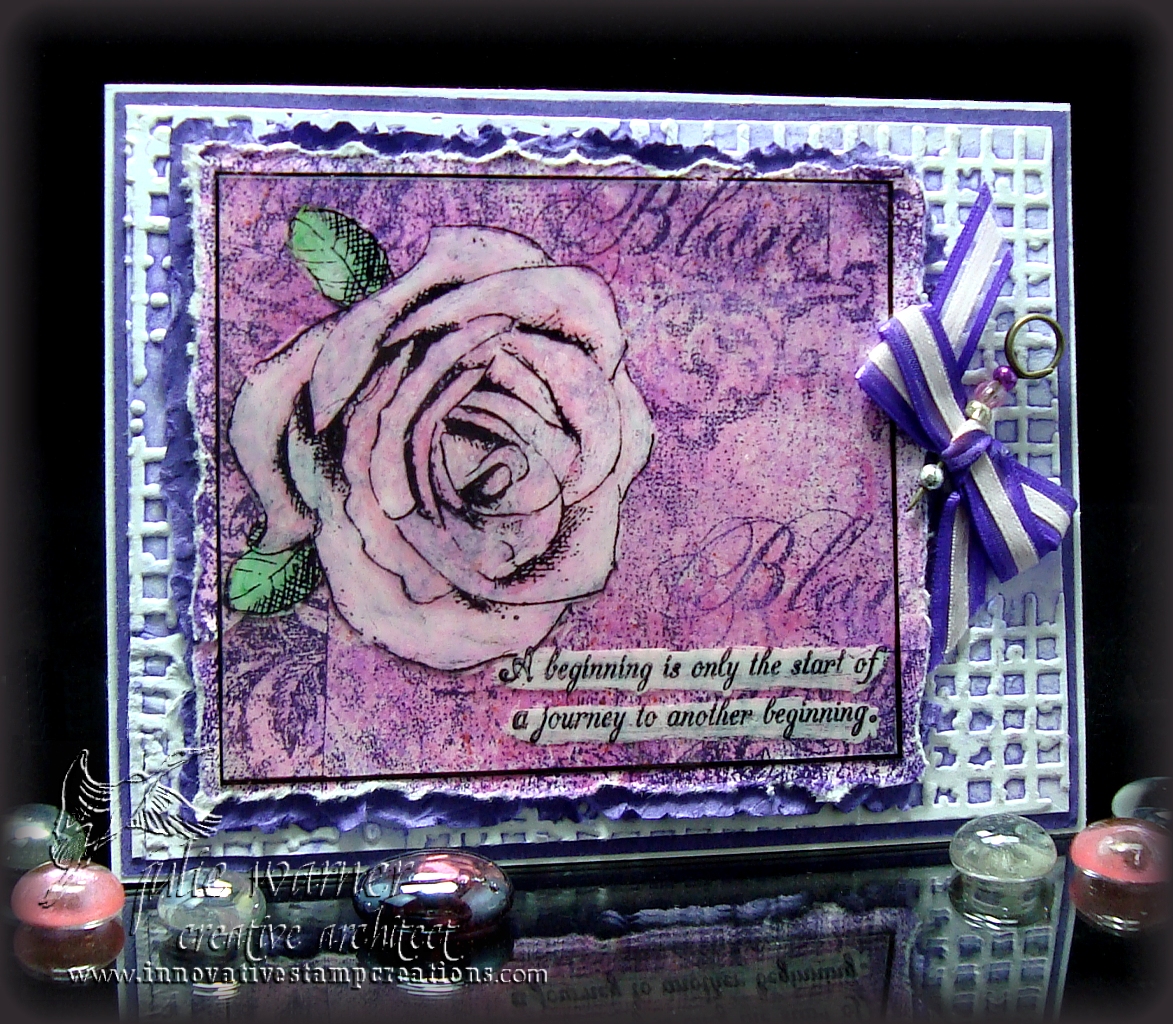
    And this final card uses images from Sketch of Roses II.

    Julie Warner - justwritedesigns https://thewritestuff.justwritedesigns.com/

    My final card I started by stamping the large background with a dk plum ink onto watercolor paper.  I used various pink dye inks direct to paper (DTP) then misted it with water and distressed the edges. The rose image and greeting were stamped with Stazon onto a piece of acetate. On the back side, I used a white China marker to make the images stand out. I added a hint of color to the rose and leaves with markers (on top of the white China marker). It’s attached to a heavily distressed piece of purple card stock. I created the embossed background by inking the the grid embossing folder, misting a piece of white card stock, then placing it in the folder and embossing.  A bow was added and I glued a few beads onto a stick pin and attached it to the bow.  Card measures 5.5 x 4.25 (A2).

    Supplies:
    stamps: ISC Sketch of Roses II
    paper: white, purple, water color, acetate
    ink: Printworks (various pinks & purples), Stazon black
    accessories: white China marker, green & pink Galaxy markers, beads, ribbon, stick pin, grid embossing folder (Sizzix/Tim Holtz)

    Thanks so much for stopping by and I hope you’ve enjoyed all the new ISC releases! Please be sure to stop by all of the Architect’s blogs for more inspiring art!

    1. Kathy Tucker
    2. Joanne Grzelak
    3. Julie Warner (you are here!)
    4. Karen Dunbrook
    5. Judi Rose
    6. ISC Blog
     

    SaveSave


  • ISC August Release Day 2

    Julie Warner - justwritedesigns https://thewritestuff.justwritedesigns.com/

    Background Series: Ledger/Nature Silhouette III

    Lately, have you noticed all the lovely Ledger design paper at your local stamp store? Well, now you can create a ton of lovely backgrounds on your cards and even in a mini book with this lovely Ledger image!

    The Creative Architects were challenged to incorporate some of the images from both of these lines on our card. Moreover, Nature Silhouette III bodes well with Nature Silhouette I/II.

    A little tip from Betsy: Use caution, but you can cut apart each of the images on the Hollyhock Shadow stamp and place them on your acrylic mount and arrange to your liking, then stamp away!

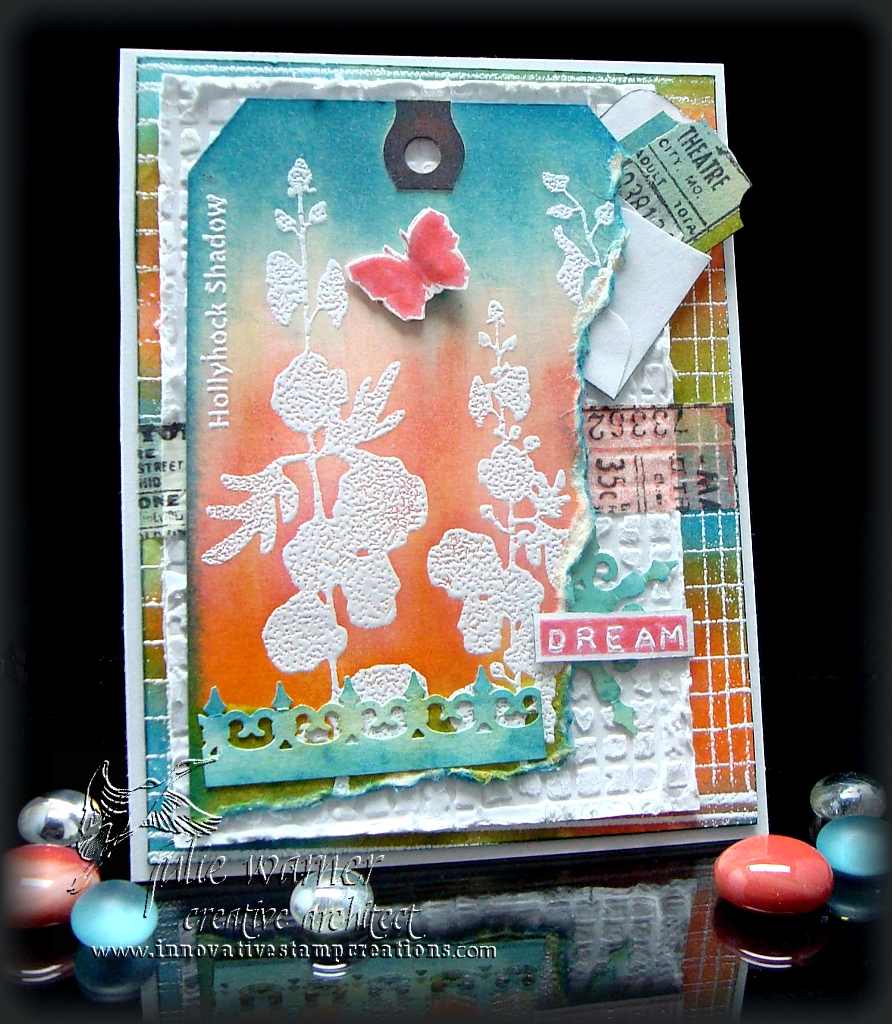
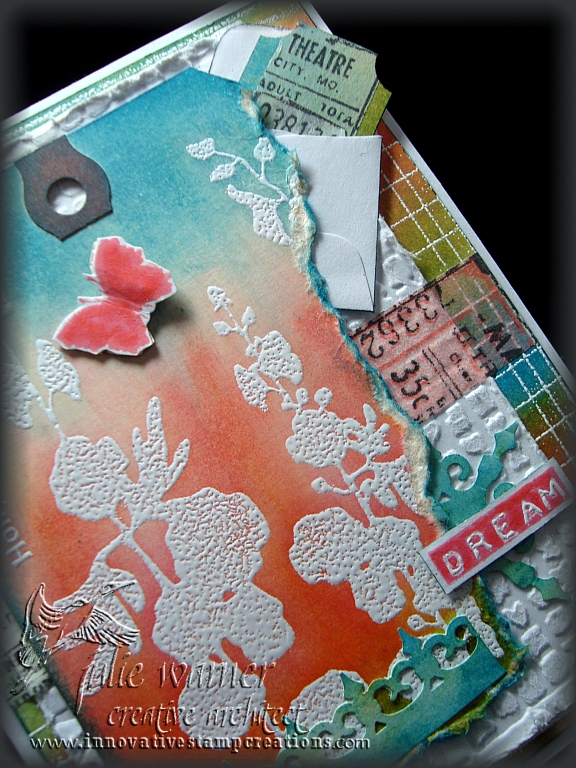
    For my card, I white embossed the Hollyhock Shadow onto a large shipping tag then sponged on three colors of distress inks.  I tore the side and bottom of the tag and used scissors and ink to further distress them. A portion of a punched fence was also sponged and added to the bottom. The white layer was embossed with a grid pattern embossing folder (Tim Holtz/Sizzix line). I distressed the edges all around.  I used a ticket corner punch and some sheer tissue ticket tape to create the small ticket in the upper right and tucked it into a tiny white envelope. You can see more of this tape across the center of the card.

    Julie Warner - justwritedesigns https://thewritestuff.justwritedesigns.com/

    For the background, I white embossed the ledger then sponged on the distress inks as before. The little sentiment was also white embossed onto inked c/s and cut out.  The little butterfly was cut out and popped up with a little foam tape. Finished card measures 4.25 x 5.50 (A2).

    Thanks so much for stopping by! Please be sure to visit the entire Architect team. I know they’ll have wonders to behold!

    1. Kathy Tucker
    2. Joanne Grzelak
    3. Julie Warner (you are here!)
    4. Karen Dunbrook
    5. Judi Rose

    6. ISC Blog
     

    Julie2 sig

    I’m also including this in Today’s Moxie Fab challenge.

    Supplies:
    stamps: ISC – Nature Silhouette III, Ledger
    paper: white, lg shipping tag
    ink: Distress Inks  in broken china, worn lipstick, spiced marmalade,  shabby shutters & peeled paint, white pigment ink
    accessories: white embossing powder, Martha Stewart iron fence punch,  tiny envelope, sheer tissue ticket tape, grid embossing folder (Sizzix/Tim Holtz)


  • Out of the Box Nestie Tutorial

    This tutorial came about after an ongoing discussion with Roxie at SCS about our methods of doing the Out of the Box Nestie Technique. We each were using this technique, we just went about it differently.  (6/23/10 Edited to add: Roxie now has a blog and here is her version of this technique.)  I promised I would take some pictures to show my method.

    (Click on any image to enlarge.)


    Julie Warner - justwritedesigns https://thewritestuff.justwritedesigns.com/
    Step 1


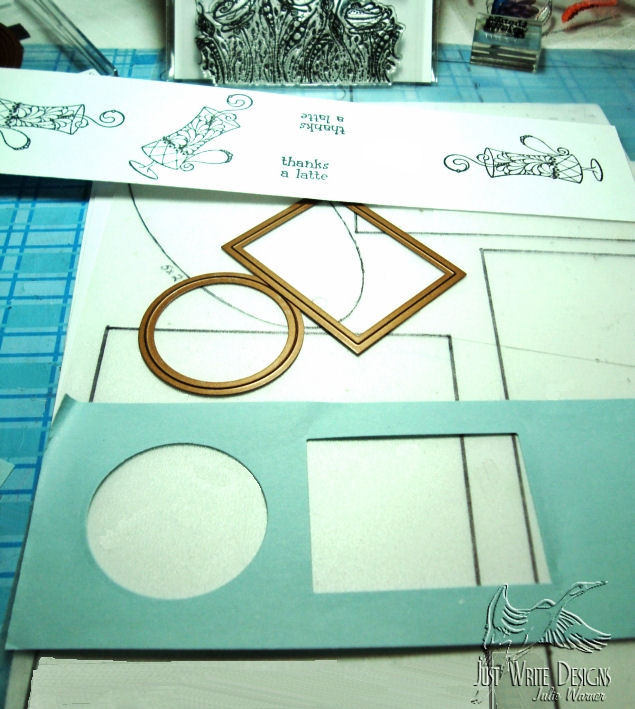
    For Step 1, I stamped my image(s) and selected the Nestie shapes I might want to use. I selected the sizes of the circle and rectangle that were slightly smaller than my image in order to get the Out of the Box look I want. Usually, I just cut this frame out of white copy paper, but I’m using a light blue in order to be more visible here. The only reason I use a cut template and not the actual die is because of the 1/8″ difference in size. The inside of the die will be 1/8″ further into your image than the template. Most of the time this won’t matter, but on some of the more intricate ones I’ve done, it did make a difference.

    Julie Warner - justwritedesigns https://thewritestuff.justwritedesigns.com/
    Step 2


    Julie Warner - justwritedesigns https://thewritestuff.justwritedesigns.com/
    Penciled Frame

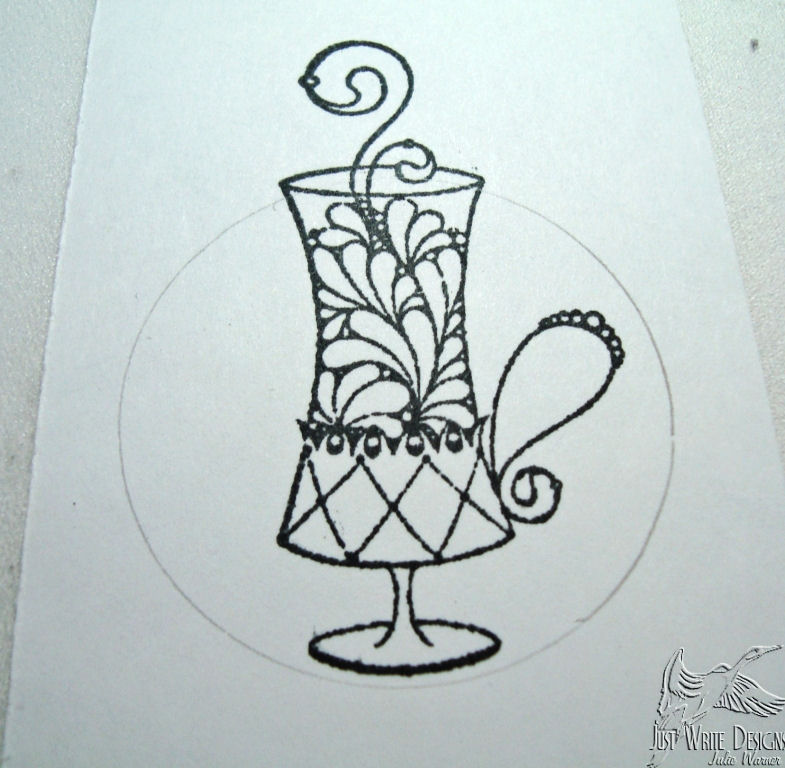
    For Step 2, place the frame around the image and lightly trace the frame with a pencil.

    Julie Warner - justwritedesigns https://thewritestuff.justwritedesigns.com/
    Step 3

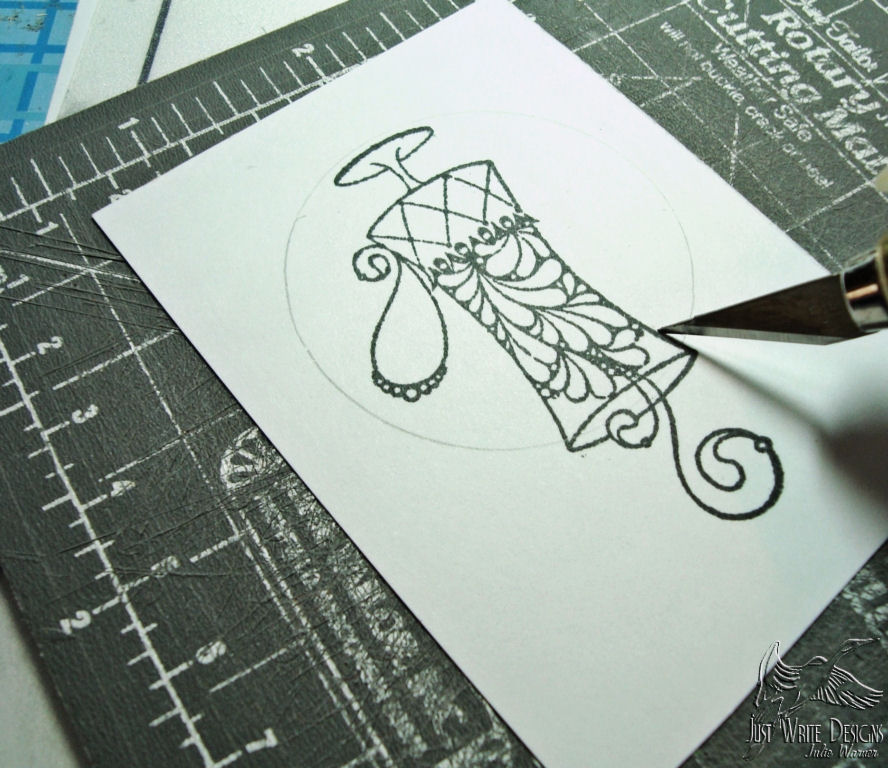
    In Step 3, I use a craft knife to cut the areas which will be Out of the Box. In order to insert the Nestie die under this area, I have to start the cut inside the circle. I cut very close to the image outline and continue around the image to other side.

    Julie Warner - justwritedesigns https://thewritestuff.justwritedesigns.com/
    Top Cut

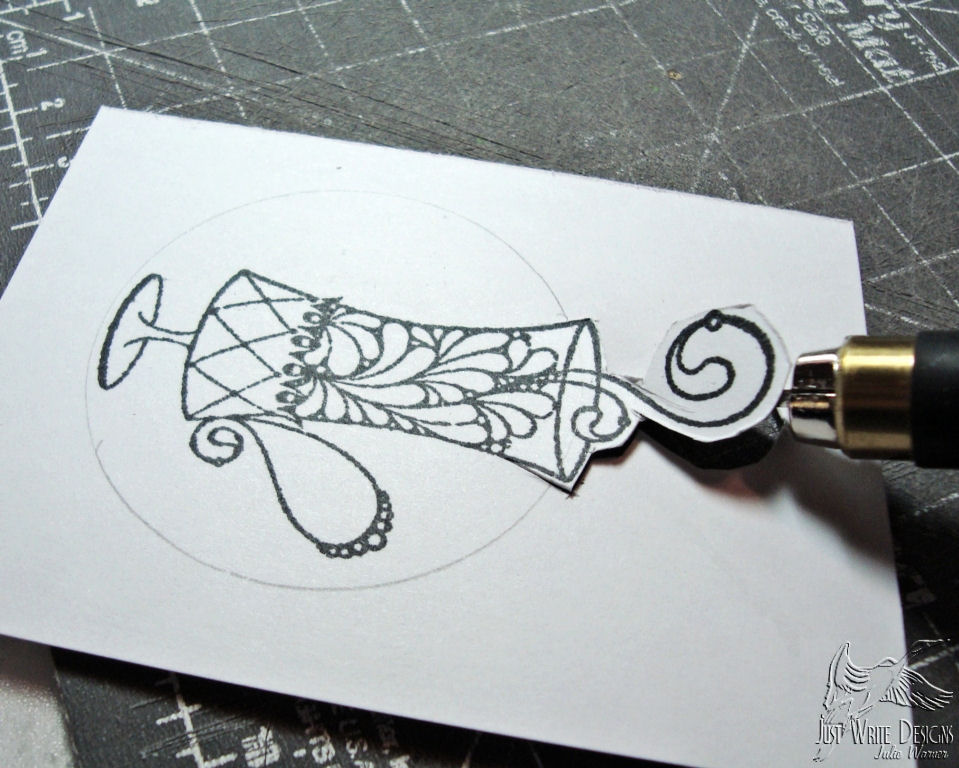
    The Out of the Box area is cut. Note that the very top is just a rough cut for now. I don’t want it to be too unstable when I insert the Nestie die. I will go back and finish trimming this area with detail scissors after I’ve cut and embossed the Nestie circle.

    Julie Warner - justwritedesigns https://thewritestuff.justwritedesigns.com/
    Step 4

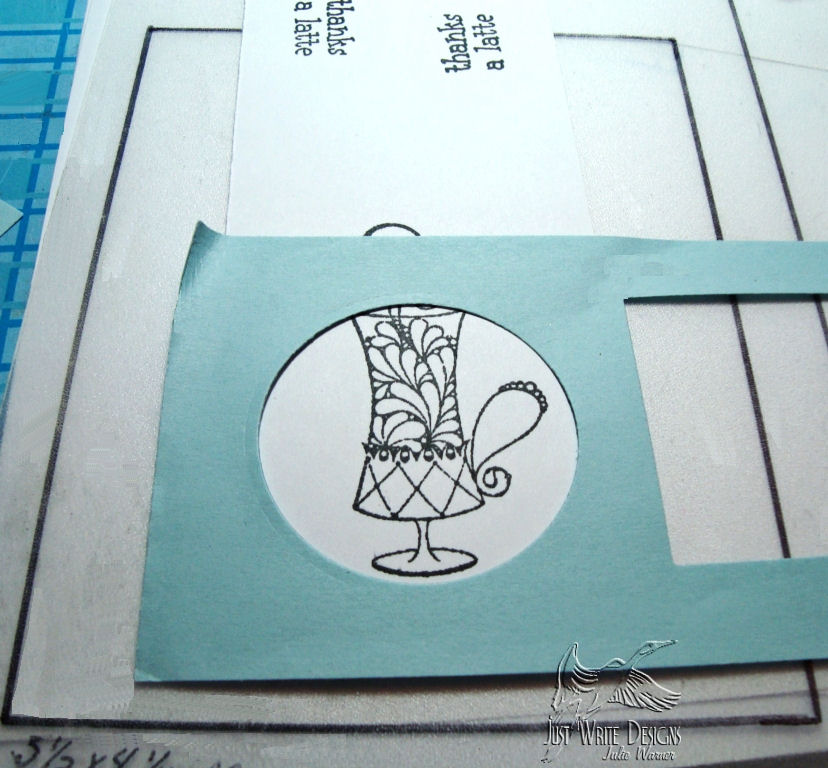
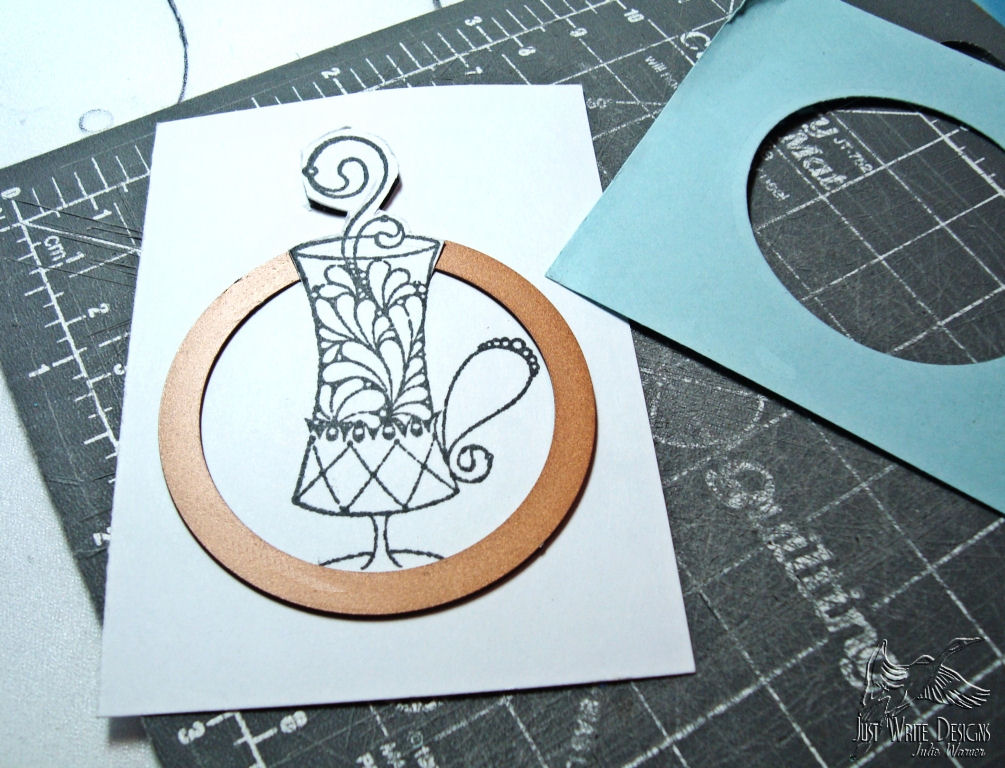
    In Step 4, I insert the die under the Out of the Box area I’ve cut out. With the die under this area, it will not be cut or embossed. Test fit your die before cutting to make sure you have cut your image deep enough to allow the die to be inserted on your pencil lines.

    Julie Warner - justwritedesigns https://thewritestuff.justwritedesigns.com/
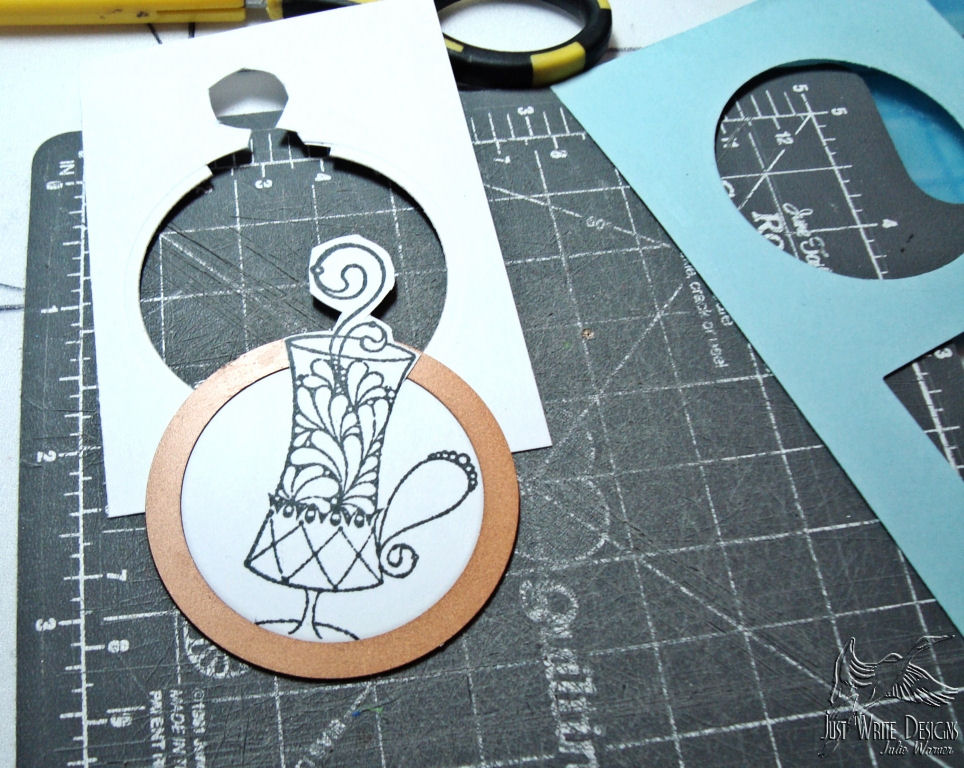
    After cutting & embossing

    Now I will remove the die and finishing trimming the top area.

    Julie Warner - justwritedesigns https://thewritestuff.justwritedesigns.com/
    After top is trimmed

    My Out of the Box is ready for coloring. It doesn’t really matter if you color your image before or after. I have done it both ways. With this method, it has worked the first time for me and I haven’t had to do it over. If my Out of the Box area has a lot of cutting inside the shape, I will usually add a little scotch tape to the back after it’s cut and embossed. This just stabilizes the area and really makes the cut disappear.

    Julie Warner - justwritedesigns https://thewritestuff.justwritedesigns.com/
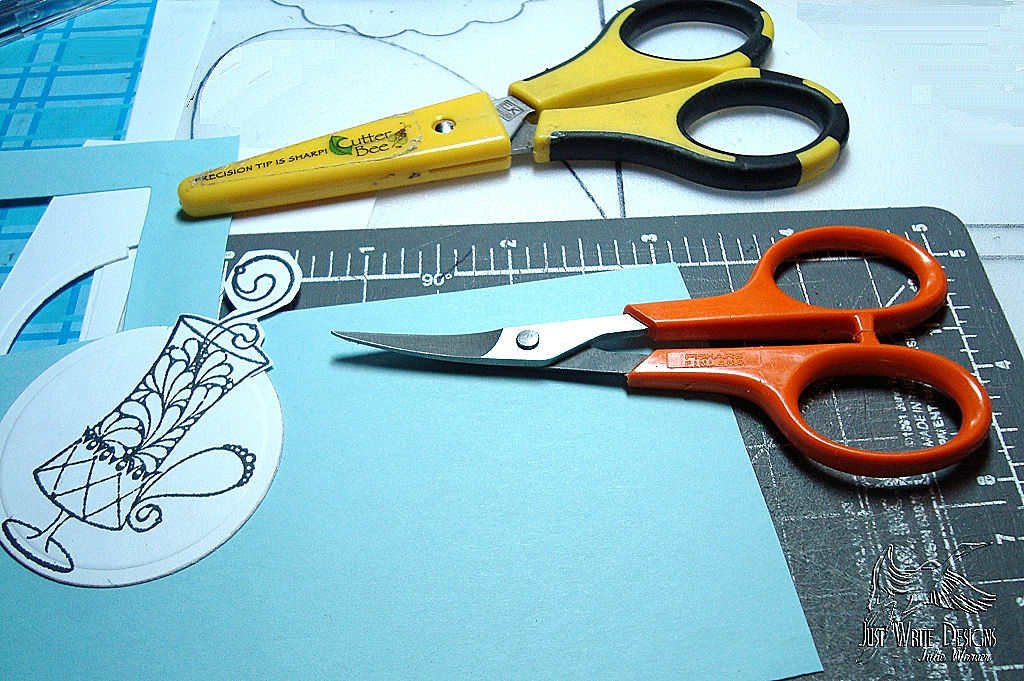
    Detail scissors

    I’m including this picture to show you my detail scissors. Quite a few people have commented on my detail cutting so I wanted to include this. The little orange pair of scissors have small, curved blades. You can see they are only about 4″ in length but the small curved tips make cutting a breeze. I’ve done a lot of decoupage and these scissors are invaluable. Fiskars made these, but cuticle scissors work, too. Another trick is to remember to turn the paper, not the scissors, when you are cutting.

    Julie Warner - justwritedesigns https://thewritestuff.justwritedesigns.com/

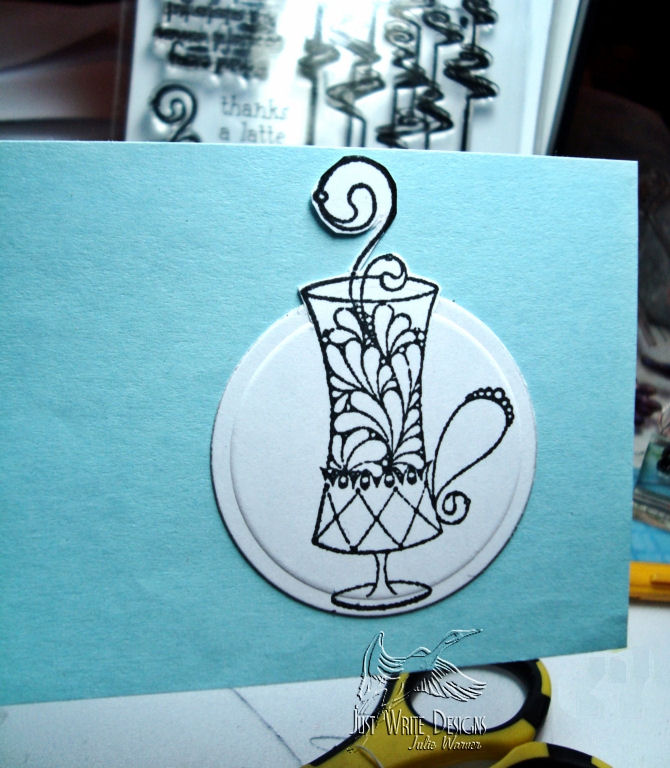
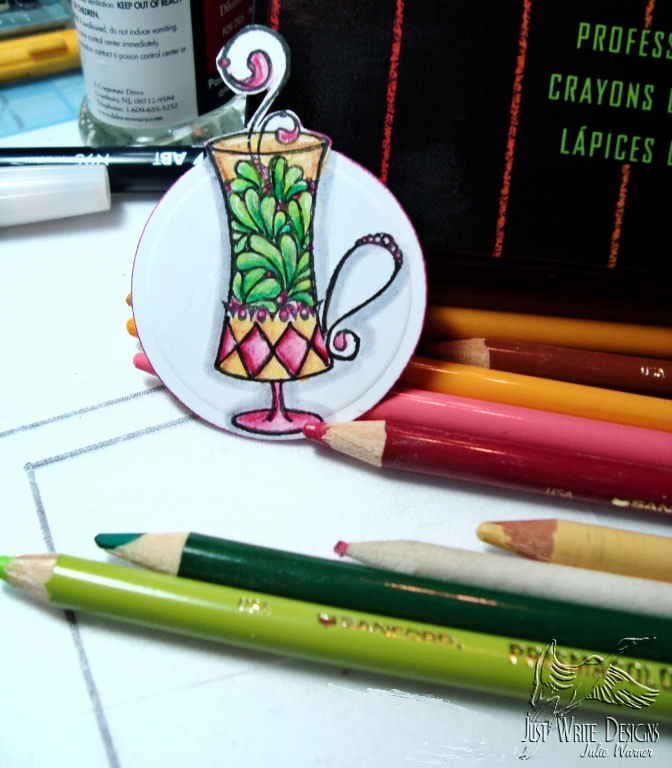
    All done! This was colored with Prismacolor Pencils and OMS (odorless mineral spirits, aka Gamsol).

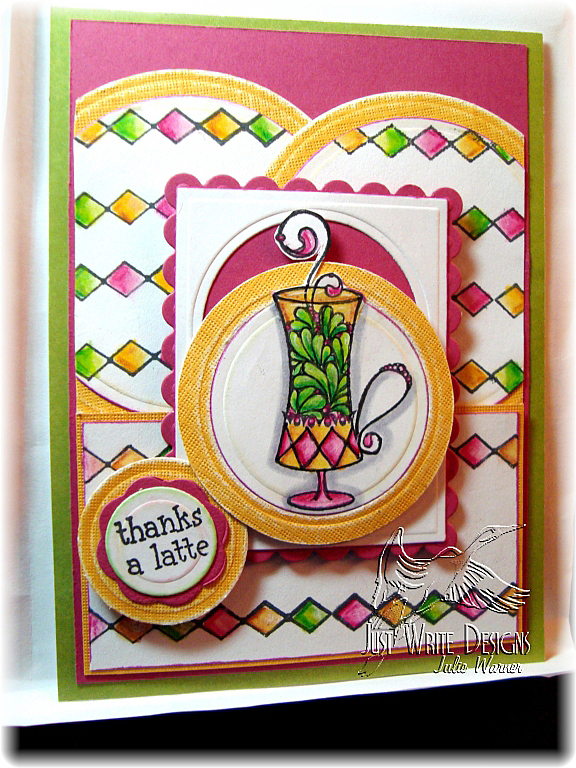
    Thanks for looking and I hope you try this fun technique. Here’s the finished card I made with this fun image.


    Julie Warner - justwritedesigns https://thewritestuff.justwritedesigns.com/

    Julie2 sig