• Tag Archives Divinity Designs/Our Daily Bread designs
  • ODBD Jan Release Blog Hop!

    Julie Warner - justwritedesigns https://thewritestuff.justwritedesigns.com/

    Happy New Year! Welcome to the January Our Daily Bread designs Release “Taking a Leap of Faith” Blog Hop!

    If you arrived here from the ODBD Blog then you are in the right place! If not you should go to the Our Daily Bread designs Blog to start from the beginning so you don’t miss anything! The Hop will run from 8am Eastern Jan. 1 to 8pm Jan 2. The winners will be announced on the ODBD Blog on Jan. 3. There will be 5 prizes. Kelley has very generously offered to give five prizes of YOUR CHOICE of one set!!! The prizes are hidden on various blogs along the hop, so it is important that you visit and comment on each one!

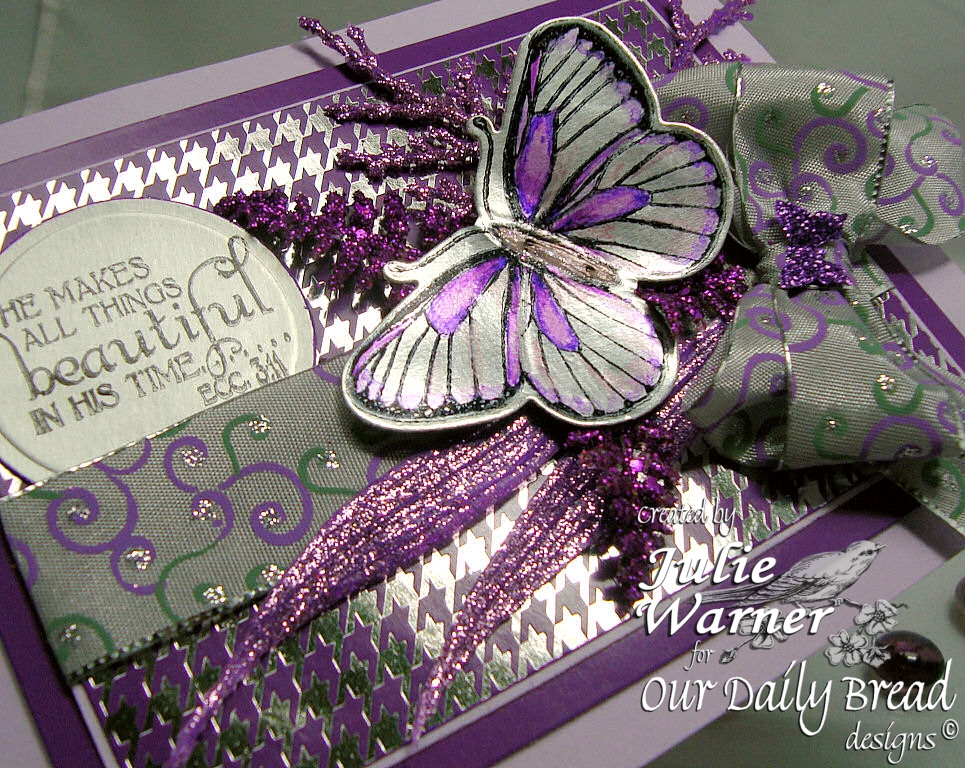
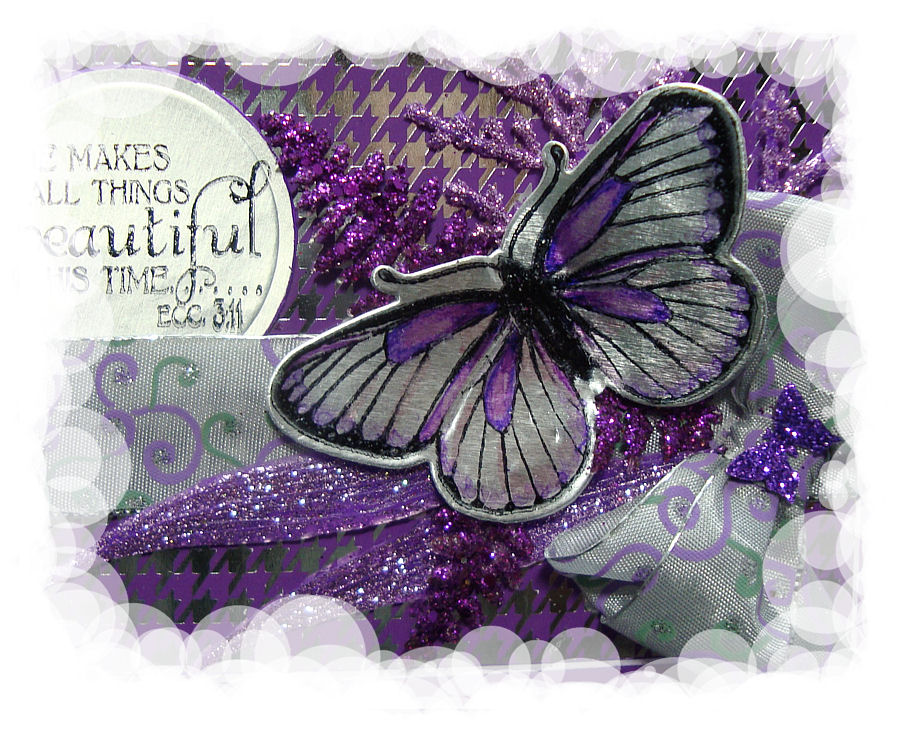
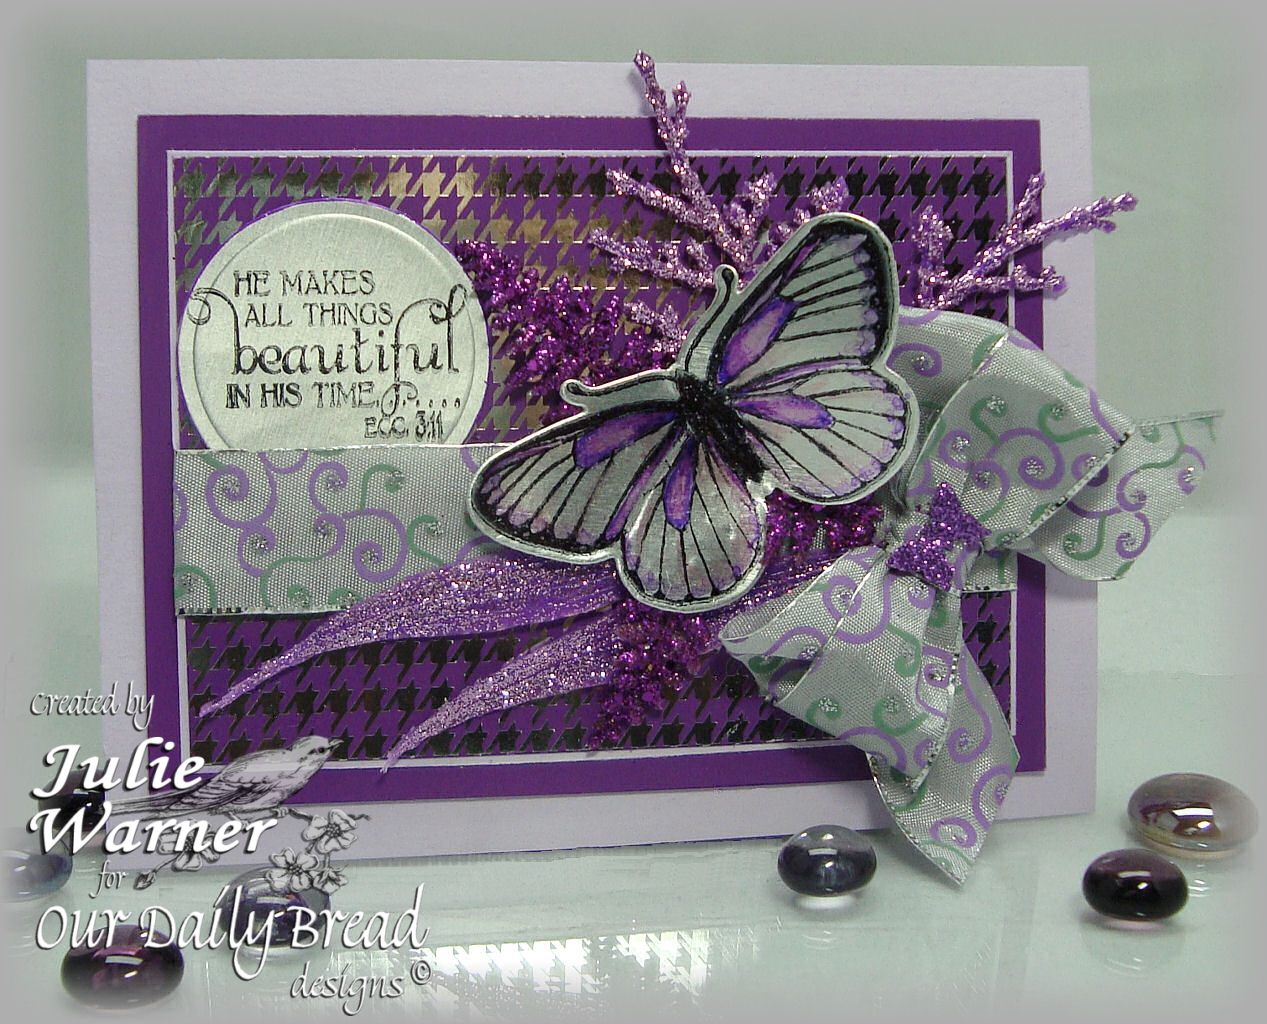
    The hardest part of my card was taking a picture of it, lol. With all the metallic/mirror finish card stock and glittery bling, my camera really wigged out on most of the pics.  I don’t usually do a lot of glittery metallics, but New Year’s is a perfect time to bring on the bling! And it was a lot fun, as well. All of the glittery fronds, the ribbon and even the houndstooth mirror card stock came from the Christmas clearance isles at Michael’s. The silver card stock for the butterfly and sentiment is a recycled/repurposed foil lid from a container. I stamped them with Stazon and on the butterfly, added a touch of color with some Sharpies. It was cut with the matching butterfly die available only at ODBD.

    Julie Warner - justwritedesigns https://thewritestuff.justwritedesigns.com/

    On the sentiment, I used a Spellbinders circle die and my brand new Grand Calibur. What a wonderful machine! I added the fronds and a bow then arranged the layers on a lavender 5.5 x 4.25 card.

    Julie Warner - justwritedesigns https://thewritestuff.justwritedesigns.com/

    From here, hop on over to Angie’s Blog. I know she’ll have something wonderful for you! Thanks for stopping by and have a Blessed and Prosperous New Year!


    Supplies:
    stamps: ODBD – Faith, Single Butterly
    paper: lavender, mirror finish houndstooth & purple (Michael’s $ bin)
    ink: Stazon black
    accessories: ODBD Butterfly die, Spellbinders circle die, Grand Calibur machine, ribbon & glitter fronds (also from Michael’s), small butterfly punch (All Night Media), Sharpies


  • ODBD Dec Release Blog Hop

    Julie Warner - justwritedesigns https://thewritestuff.justwritedesigns.com/Welcome to the December Our Daily Bread designs Release Blog Hop!

    If you came from Becca’s Blog, you are in the right place, but if you just happened on my blog you should go to the ODBD Blog and start from there, and if along the way any links are broken simply return to the ODBD blog where the entire list will be listed in order. Now on to my project!….. Click any picture to enlarge

    Julie Warner - justwritedesigns - https://thewritestuff.justwritedesigns.com

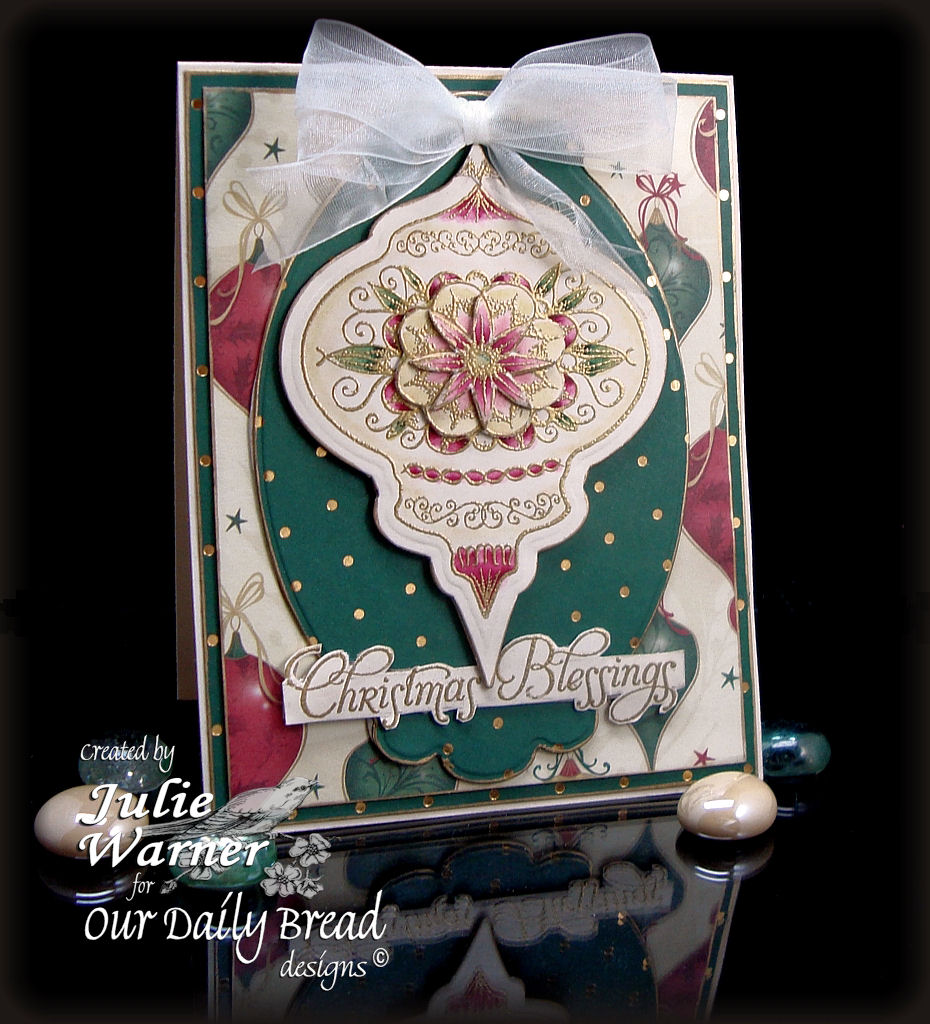
    I’m using the smaller of the two beautiful ornament images on the new Ornaments set. You’ll notice that these ornaments fit perfectly inside the Spellbinders Heirloom Ornament dies! That’s because Spellbinders chose ODBD as a Preferred Stamp Partner!  What does that mean? ODBD will be expanding their lines to include perfect match sentiments, Scriptures and images to Spellbinders dies. Pretty exciting!

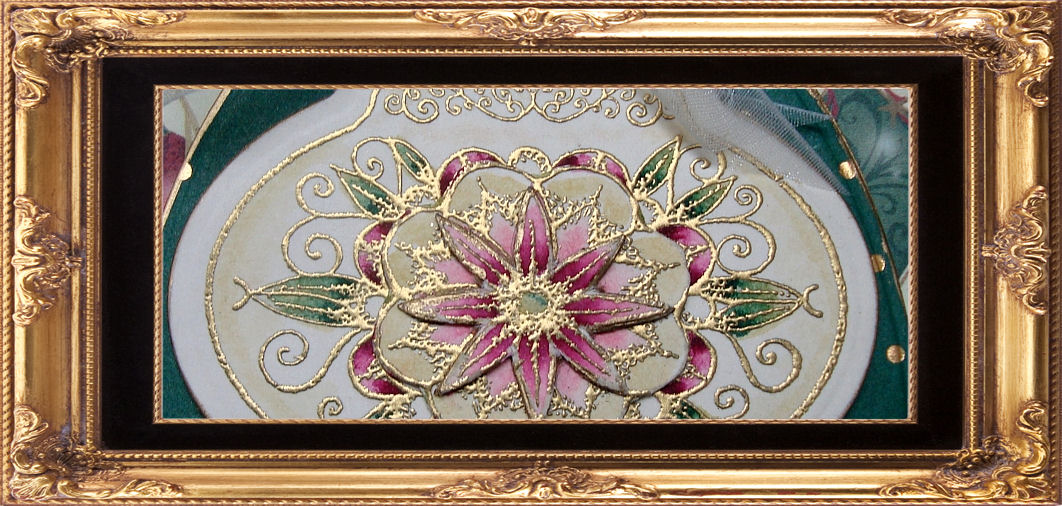
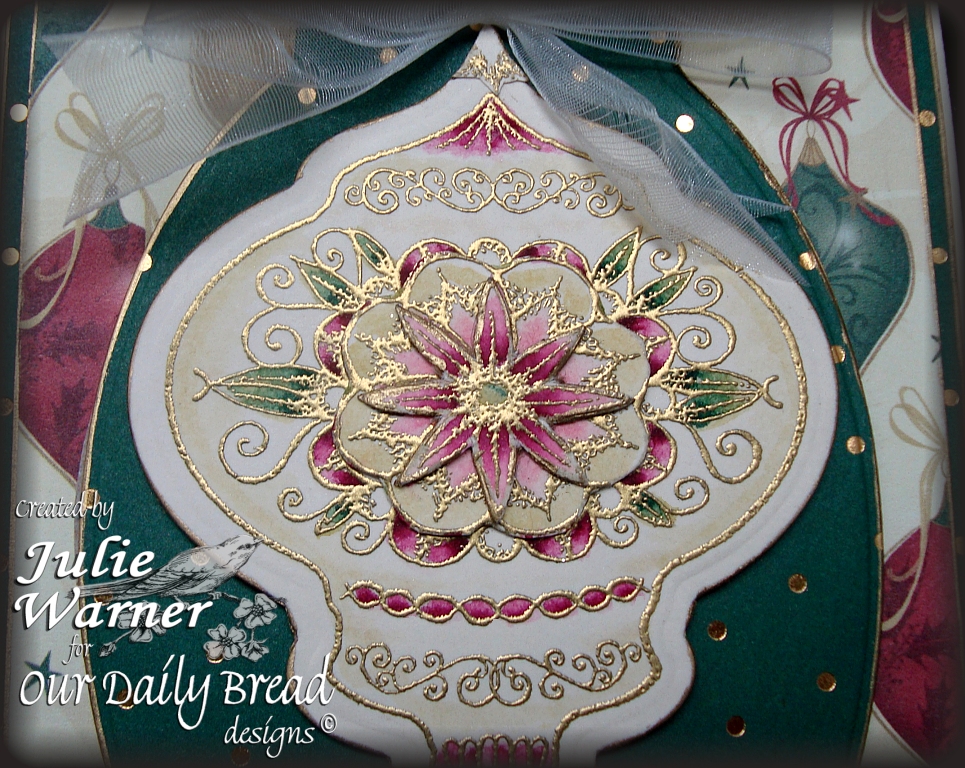
    My ornament was gold embossed three times on vanilla card stock in order to layer the center of the ornament.  It was colored with markers and a water brush, the base ornament was die cut with the Spellbinders die and the other two centers were layered on top. The dk green/gold dot dp was cut with a Labels 10 die and all layers were edged with a gold leafing pen. The sentiment was also gold embossed and hand cut. A sheer ivory bow was added on top of the ornament. The finished card measures 4.25 x 5.50.

    Julie Warner - justwritedesigns https://thewritestuff.justwritedesigns.com/
    

    I hope you enjoyed my project today! From here, hop on over to Kathy’s blog for some more inspiration!

    Thanks so much for stopping by!


    Supplies:
    stamps: ODBD – Ornaments
    paper: vanilla, dp (all from The Paper Studio)
    ink: Encore Ultimate Metallic Gold
    accessories: gold embossing powder, Krylon gold leafing pen, sheer ivory ribbon, Spellbinders Heirloom Ornament & Labels 10 dies


  • Faux Tile Background Tutorial

    Julie Warner - justwritedesigns https://thewritestuff.justwritedesigns.com/

    Click any picture to enlarge.

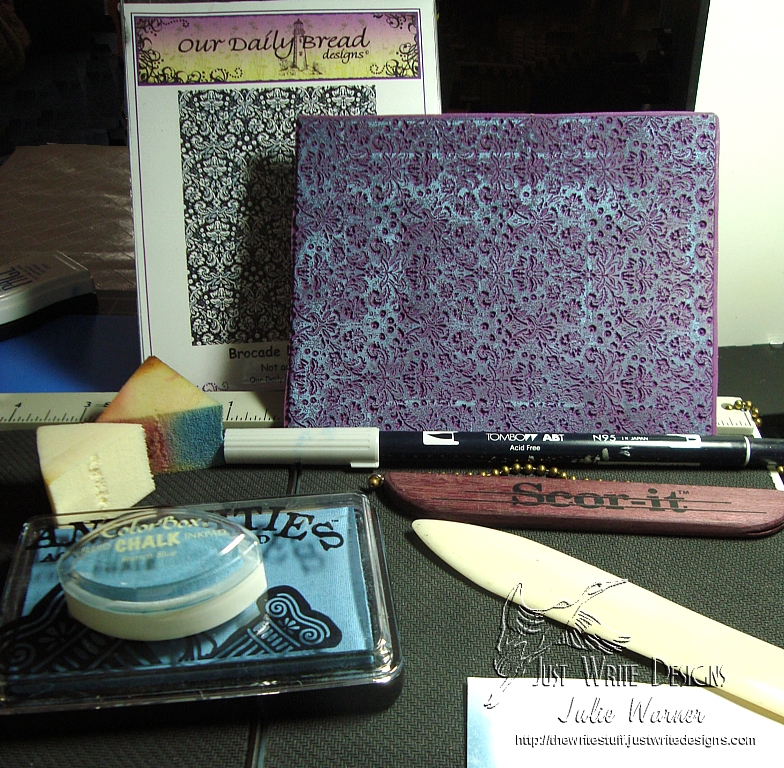
    Supplies Needed:

    • card stock (Neenah white used here)
    • ink (Ranger chalk ink in cobalt used here -very similar to Fluid Chalk French Blue)
    • Scor-It, Score Pal or bone folder and ruler
    • cosmetic or similar sponge
    • lt gray marker (Tombow used here)
    • stamp (ODBD Brocade Background used here)
    • scrap copy paper for a mask
    Julie Warner - justwritedesigns https://thewritestuff.justwritedesigns.com/
    Step 1

    Step 1:
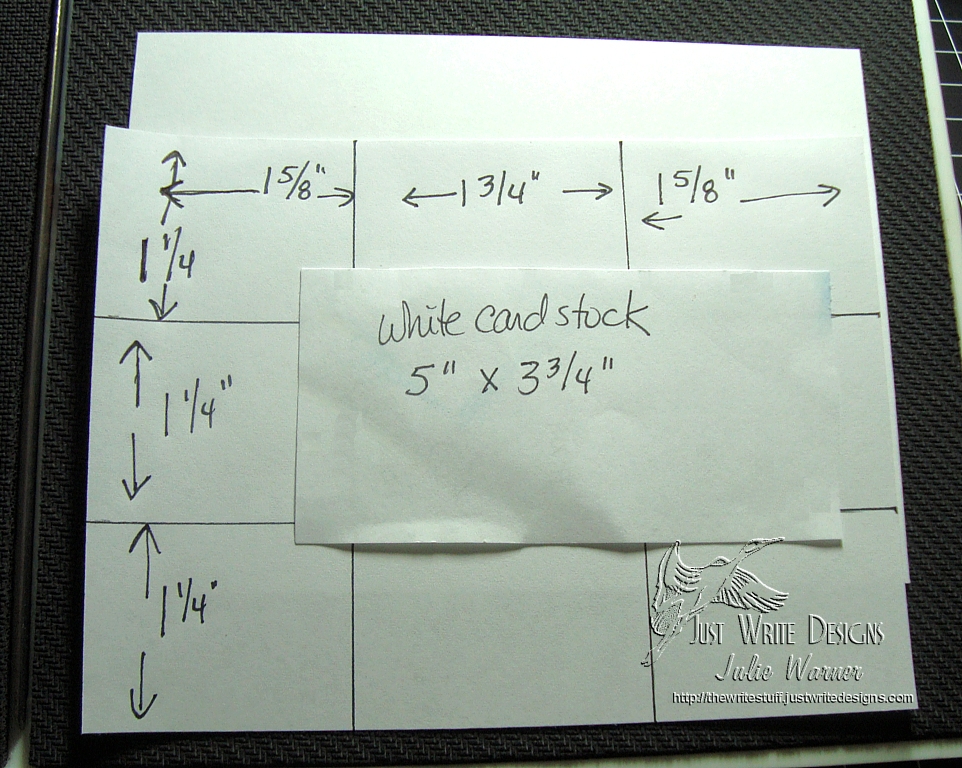
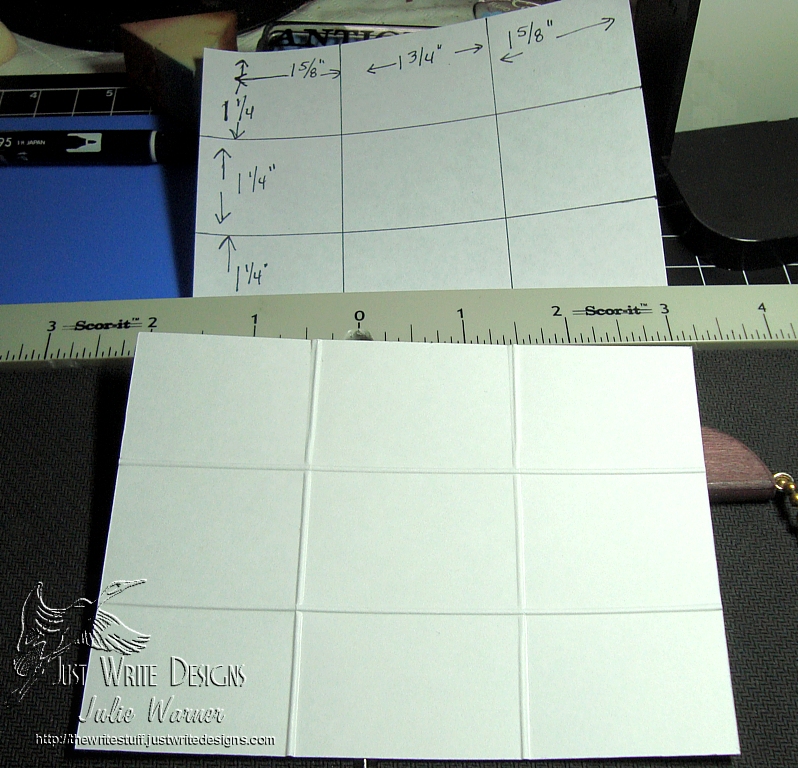
    You may make your tile background any size by adjusting the dimensions of the score lines. For mine, I used a 5 x 3.75 inch piece and scored all the horizontal lines at 1.25 inch intervals. The vertical scores are 1 5/8, 1 3/4 and 1 5/8 as shown above. Score all lines all the way across and down so your card stock should look like the picture below.

    Julie Warner - justwritedesigns https://thewritestuff.justwritedesigns.com/
    After all scoring is done
    Julie Warner - justwritedesigns https://thewritestuff.justwritedesigns.com/
    Step 2

    Step 2:
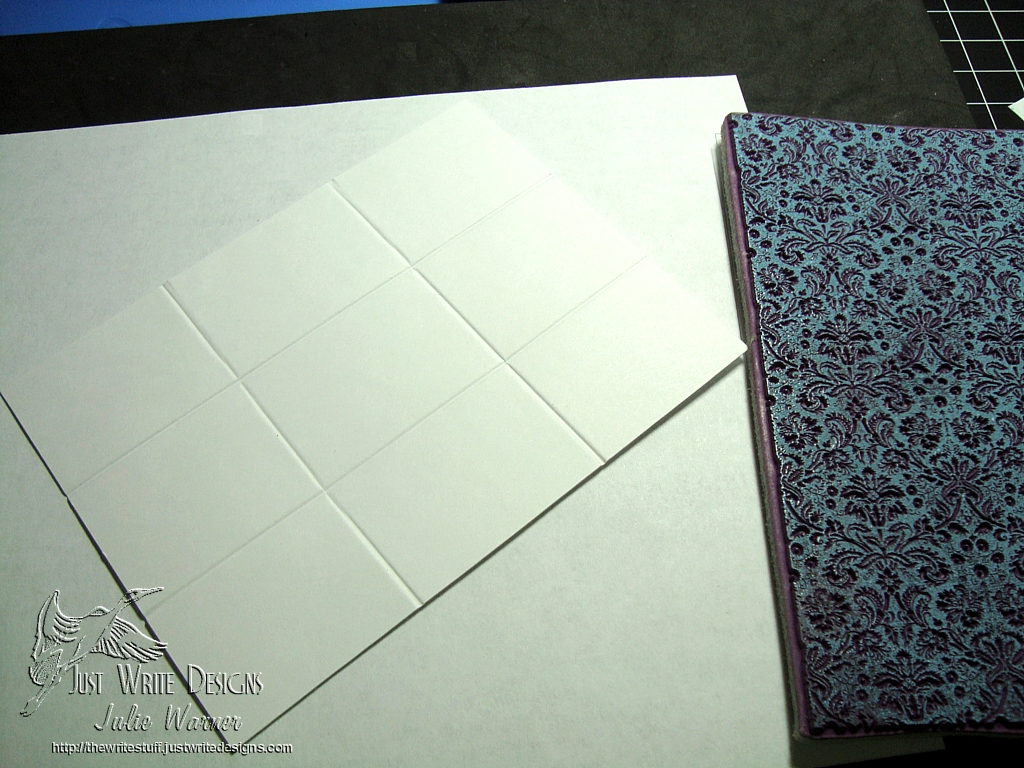
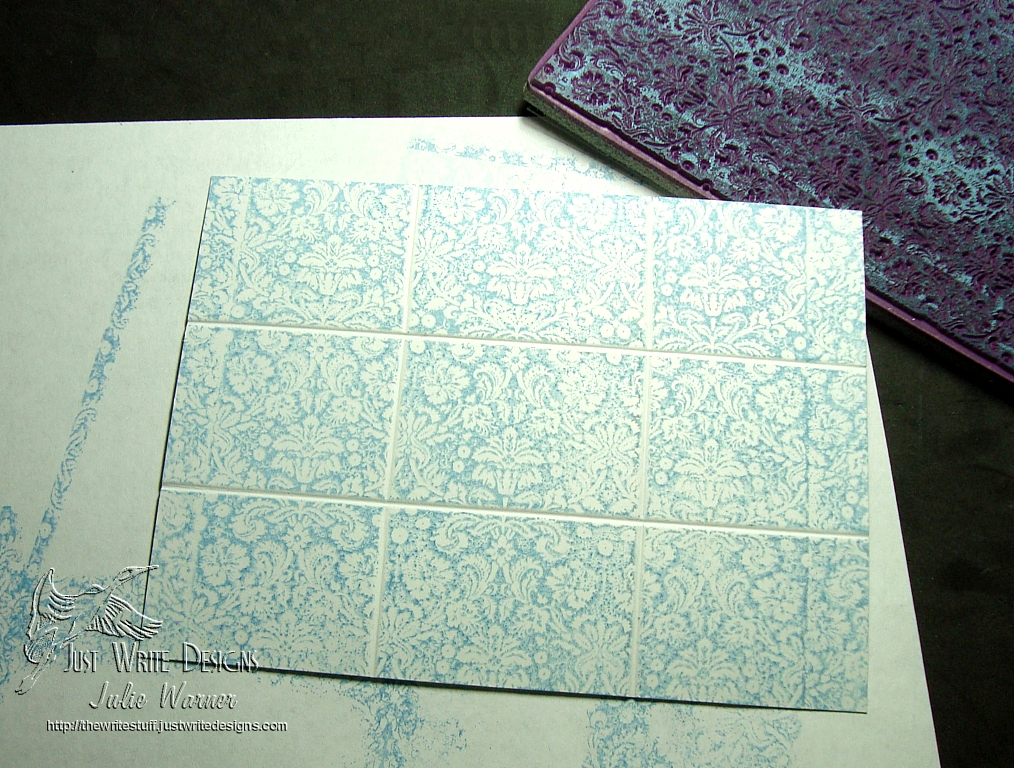
    Turn your scored card stock over so that all scored lines are now indented.  Ink your image and stamp onto the card stock.

    Julie Warner - justwritedesigns https://thewritestuff.justwritedesigns.com/
    After stamping

    Your stamped card stock should be well on its way to looking like tile. Note the indented score lines mimic grout lines by preventing the image from stamping into them.

    Julie Warner - justwritedesigns https://thewritestuff.justwritedesigns.com/
    Step 3

    Step 3:
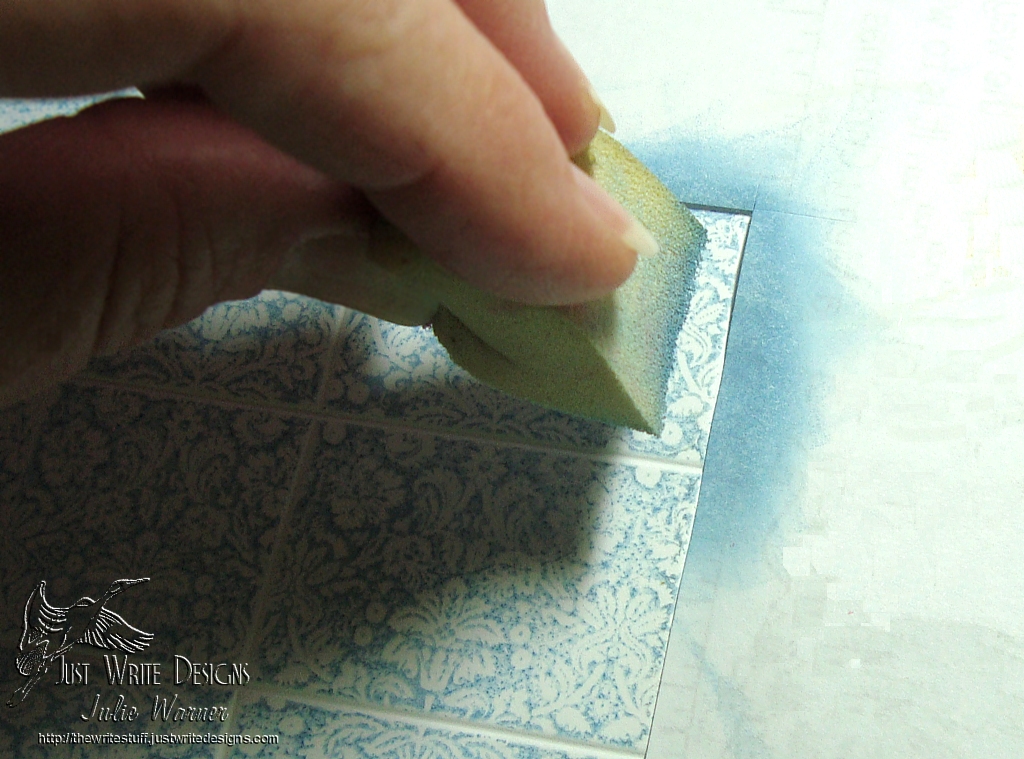
    Cut a square  inside corner in a piece of copy paper to use as a mask. Place the mask as shown and ink your cosmetic sponge with the same ink you used to stamp the image.

    Julie Warner - justwritedesigns https://thewritestuff.justwritedesigns.com/
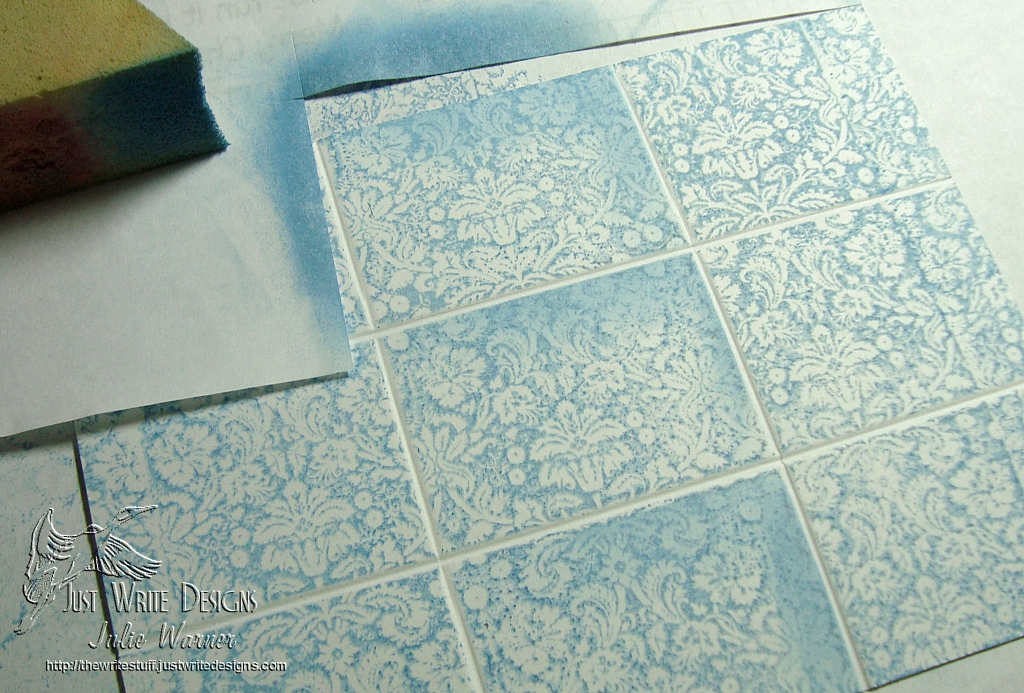
    After one row of corners are sponged

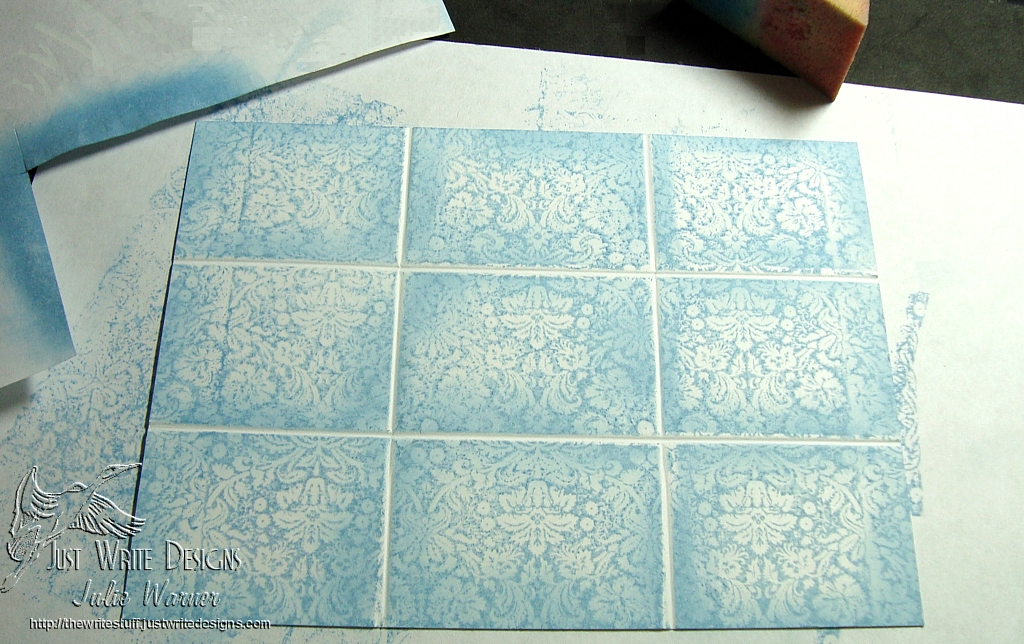
    Move the mask around the corners as you go until all “tile” edges are lightly sponged.

    Julie Warner - justwritedesigns https://thewritestuff.justwritedesigns.com/
    Sponging of tile corners completed.
    Julie Warner - justwritedesigns https://thewritestuff.justwritedesigns.com/
    Step 4

    Step 4:
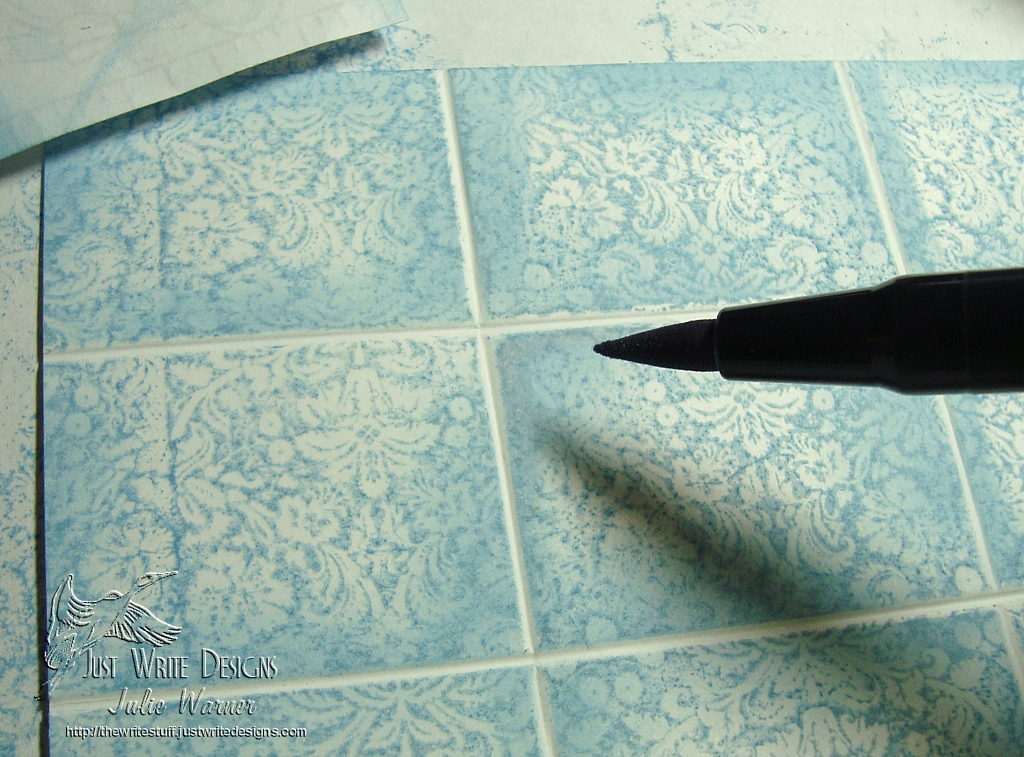
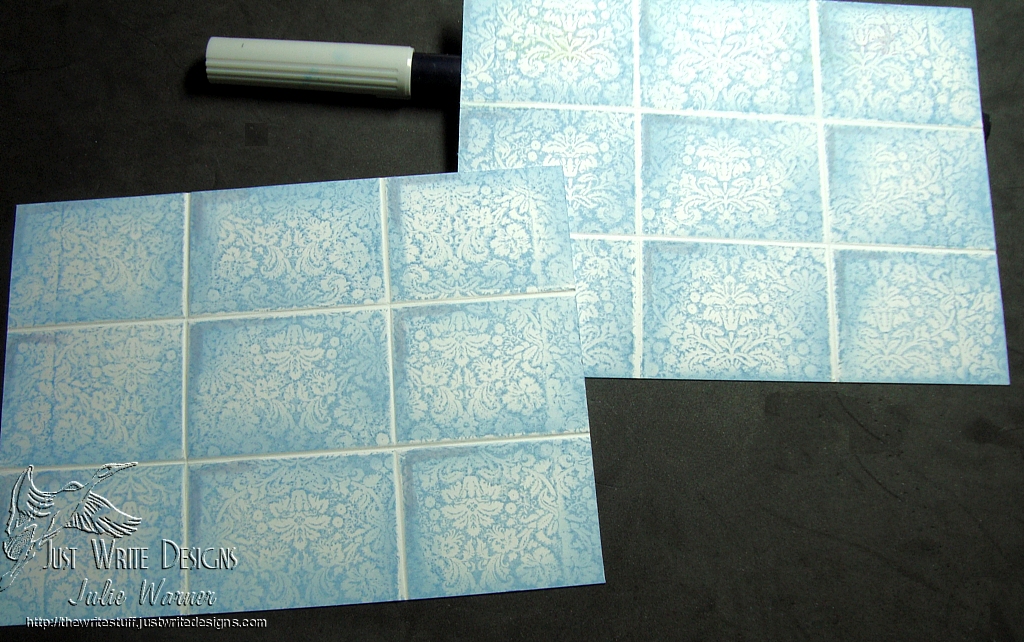
    Use the light gray marker just at the very edges of each tile corner. This completes the “tile” appearance and adds depth to your tiles.

    Julie Warner - justwritedesigns https://thewritestuff.justwritedesigns.com/
    After the marker was used on half of the corners

    You can stop now or continue to add shading all the way around your “tiles”. The one sided shading is more of a light direction appearance while shading all around would be more of a head on light source.

    Julie Warner - justwritedesigns - https://thewritestuff.justwritedesigns.com
    Finished Card