• Tag Archives Sweet Stamps
  • Vintage Lady

    Julie Warner – https://thewritestuff.justwritedesigns.com
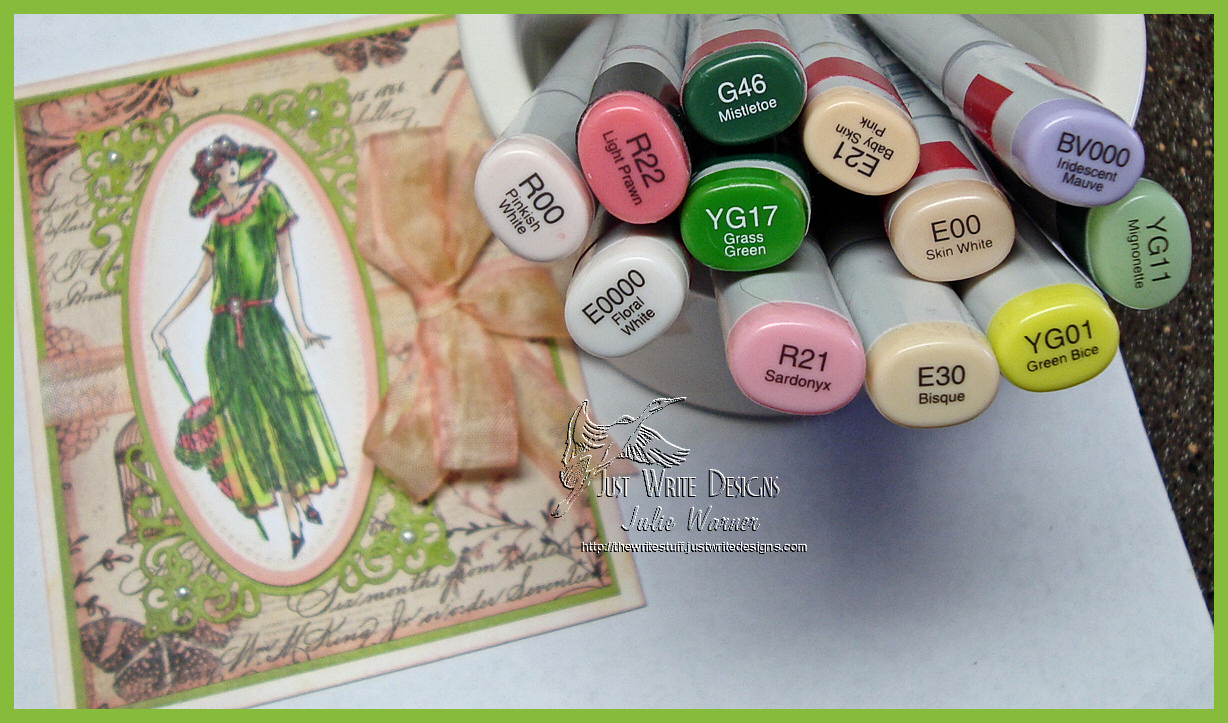
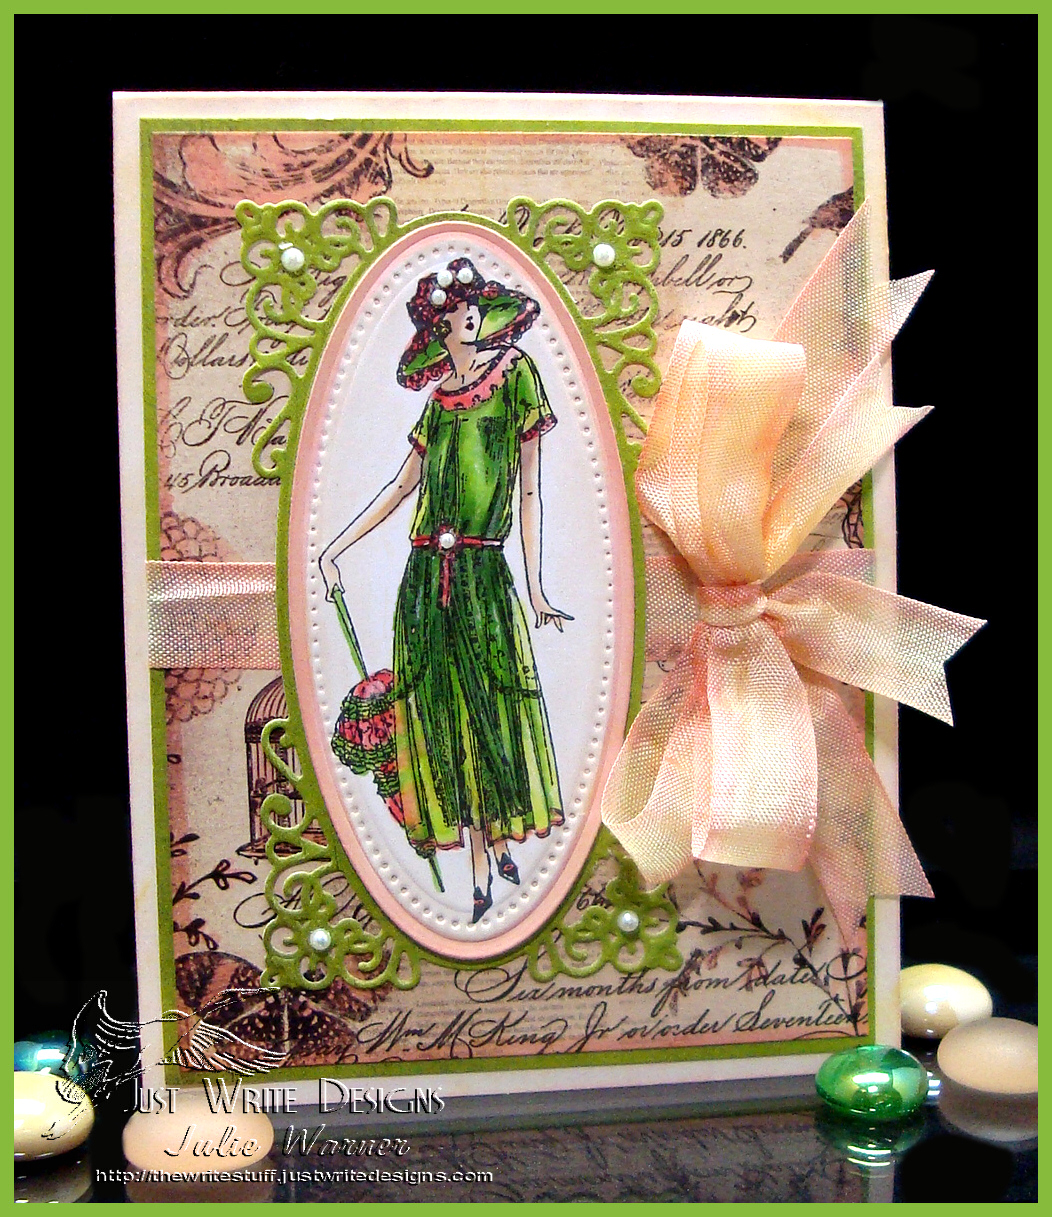
    Congrats to Jenn, the newest Featured Stamper (FS369) on Splitcoast! After much browsing, I chose THIS card of Jenn’s to case. I kept the layout and used a girl for the main image, but I used different image, different colors and turned my bow sideways. This is also for the Sweet Stamps Challenge…Favorite Color! My fave color is green and I love it paired w/ these peachy/pink colors.

    After coloring Margery with Copics, I die cut her with a mega oval then embossed her with the oval from the Radiant Rectangles set then added her to the green die cut from the same set. The designer paper is from Prima and I used it because the vintage style seemed to go with my vintage lady. But…the paper didn’t have quite enough of the peachy pink colors so I used a Copic to add more of these colors to the paper. I also used the bisque & sardonyx Copics to color the seam binding I used for the wrinkled bow. The finished card is 4.25 x 5.50 and these are the Copics I used. And in case you’re wondering, the blue violet was used for the shadows on Margery’s skin.

    Julie Warner – https://thewritestuff.justwritedesigns.com


    Congrats again, Jenn! Thanks so much for stopping by!
    Julie2 sig

    Stamps: Sweet Stamps Margery
    Paper: X-Press It, green dp (Basic Grey-Wander ), printed (Prima – Almanac)
    Ink: Memento tuxedo black
    Accessories:  Copic markers, pearls, Spellbinders mega oval & radiant rectangle dies, seam binding, mini bowdabra

  • Framed Flowers

    Julie Warner – https://thewritestuff.justwritedesigns.com
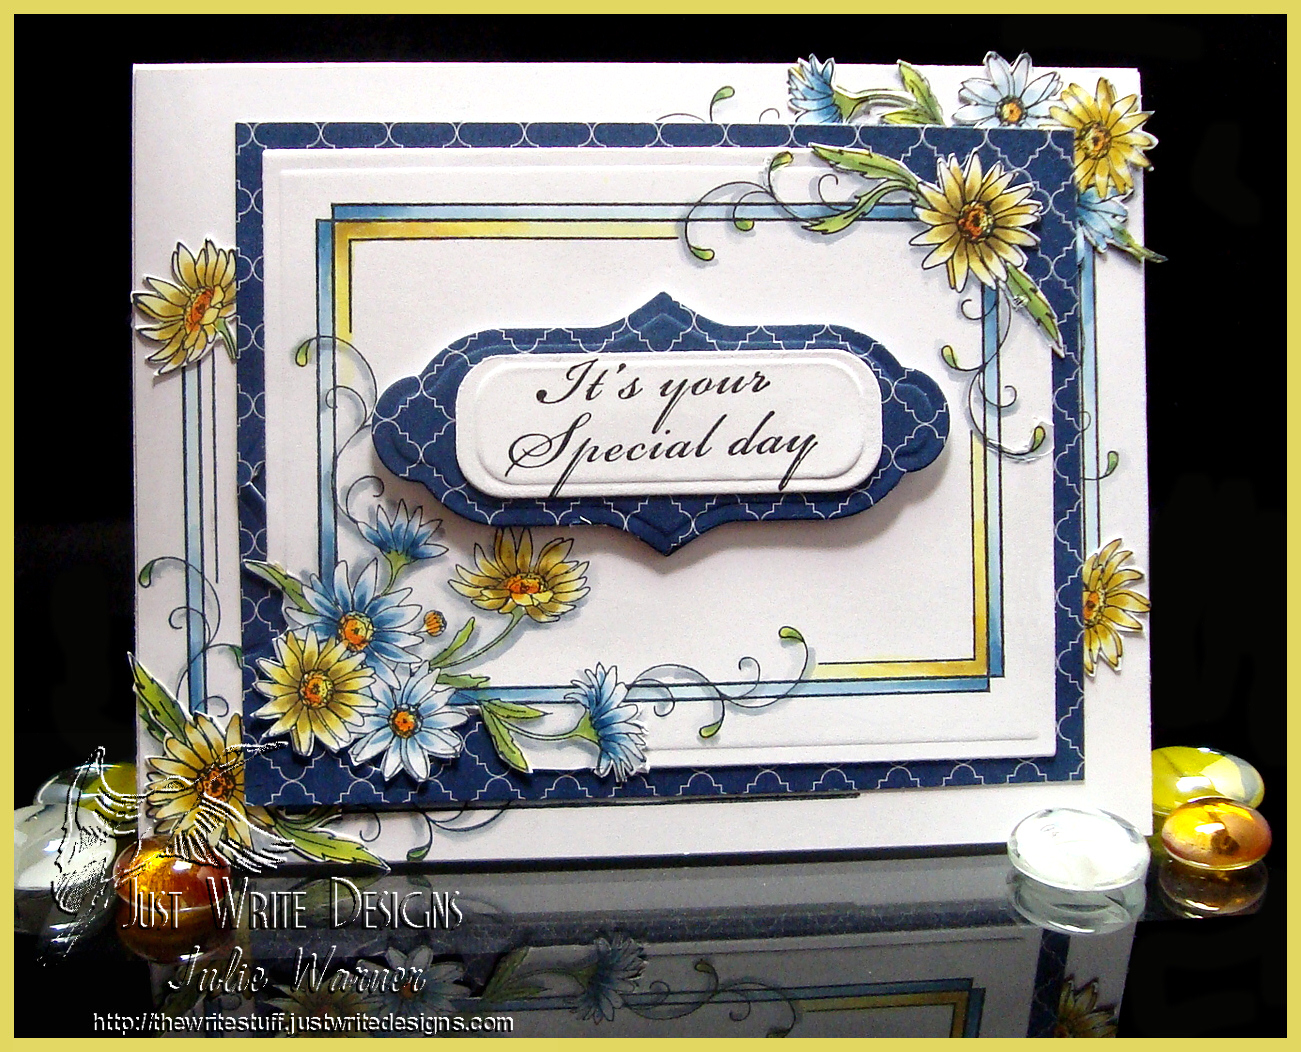
    Congrats again to Dawn, the newest Featured Stamper (FS368)! I actually started this one before my first one, but it took a bit longer to complete. While cruising Dawn’s beautiful, gallery, I noticed she uses THIS layout quite a bit…flowers framed and with a wide border around them. So I took that theme & layout but I loved the colors of THIS card so I combined them w/ the layout of the other.

    This is also for the Sweet Stamps #157 Anything Goes Challenge and the SCS LOVEFEST2014J. I think this is in the Classy & Elegant category for that challenge.

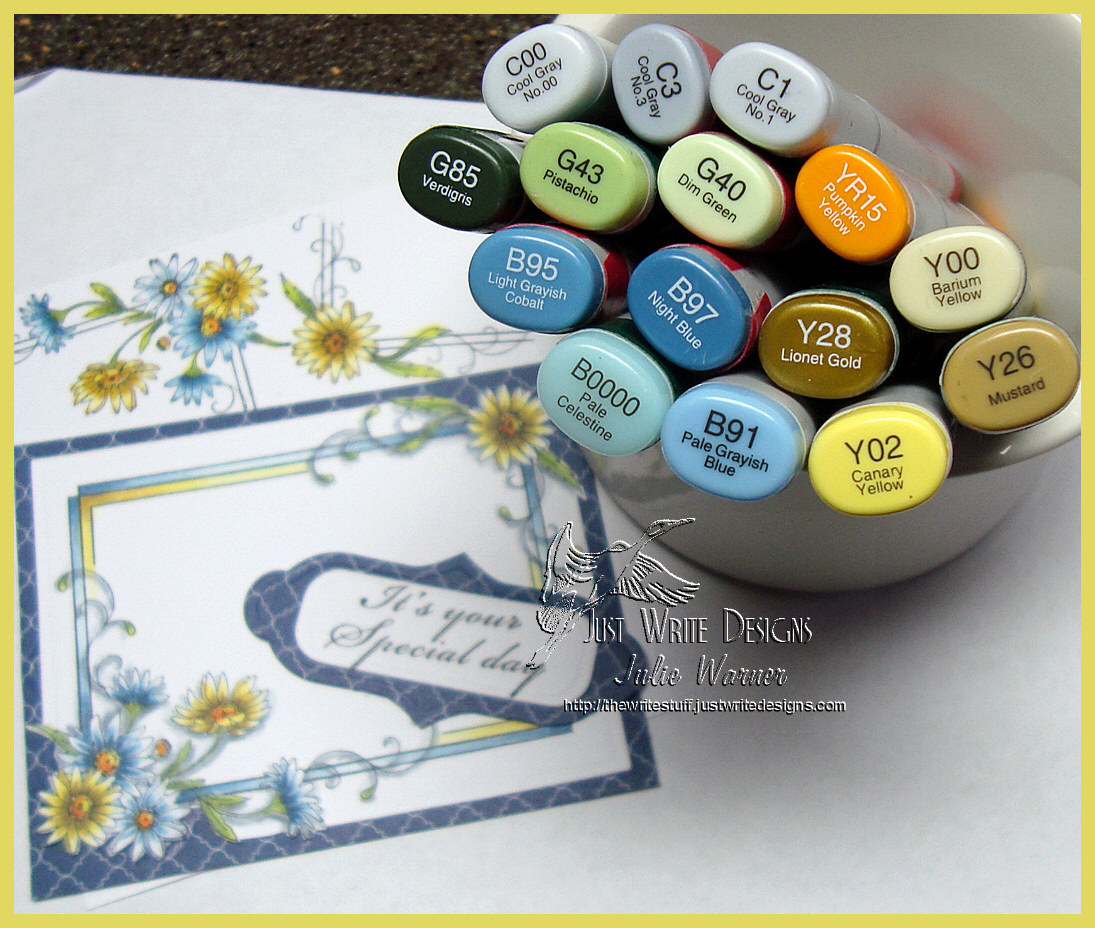
    This is one of those cards that the idea starts out simply enough, but as it develops, it gets more and more complicated. I’m sure that never happens to you! After stamping the image on a large white panel and coloring with Copics, I decided I really wanted to die cut it. First problem, none of my rectangle dies are big enough. Ok, so I used a larger square and resized it…not a problem, except I combined it with the out of the box techniquee, too. So it’s a little more complicated. But it worked and I liked the way the corner flowers pop against the navy blue paper. I used the same paper to back the greeting oval. I decided to repeat the daisy corners on the background and colored the lines and shaded the vines but the daisies themselves were fussy cut and added on top. Two extra daisies were added where the frames stopped on the sides, just to finish the line. The finished card is 5.50 x 4.25 and these are the Copics I used.

    Julie Warner – https://thewritestuff.justwritedesigns.com
    Thanks so much for stopping by!
    Julie2 sig
    Supplies:

    Stamps: Sweet Stamps  Framed Daisies 3019, Special Day 9114
    Paper: X-Press It, designer paper (Teresa Collins – Moments collection)
    Ink: Memento tuxedo black
    Accessories:  Copic markers, Spellbinders squares & ribbon tags & labels 33 dies

  • Poppy Love

    Julie Warner – https://thewritestuff.justwritedesigns.com
    Weekly-Favorite
    Best of 2014!
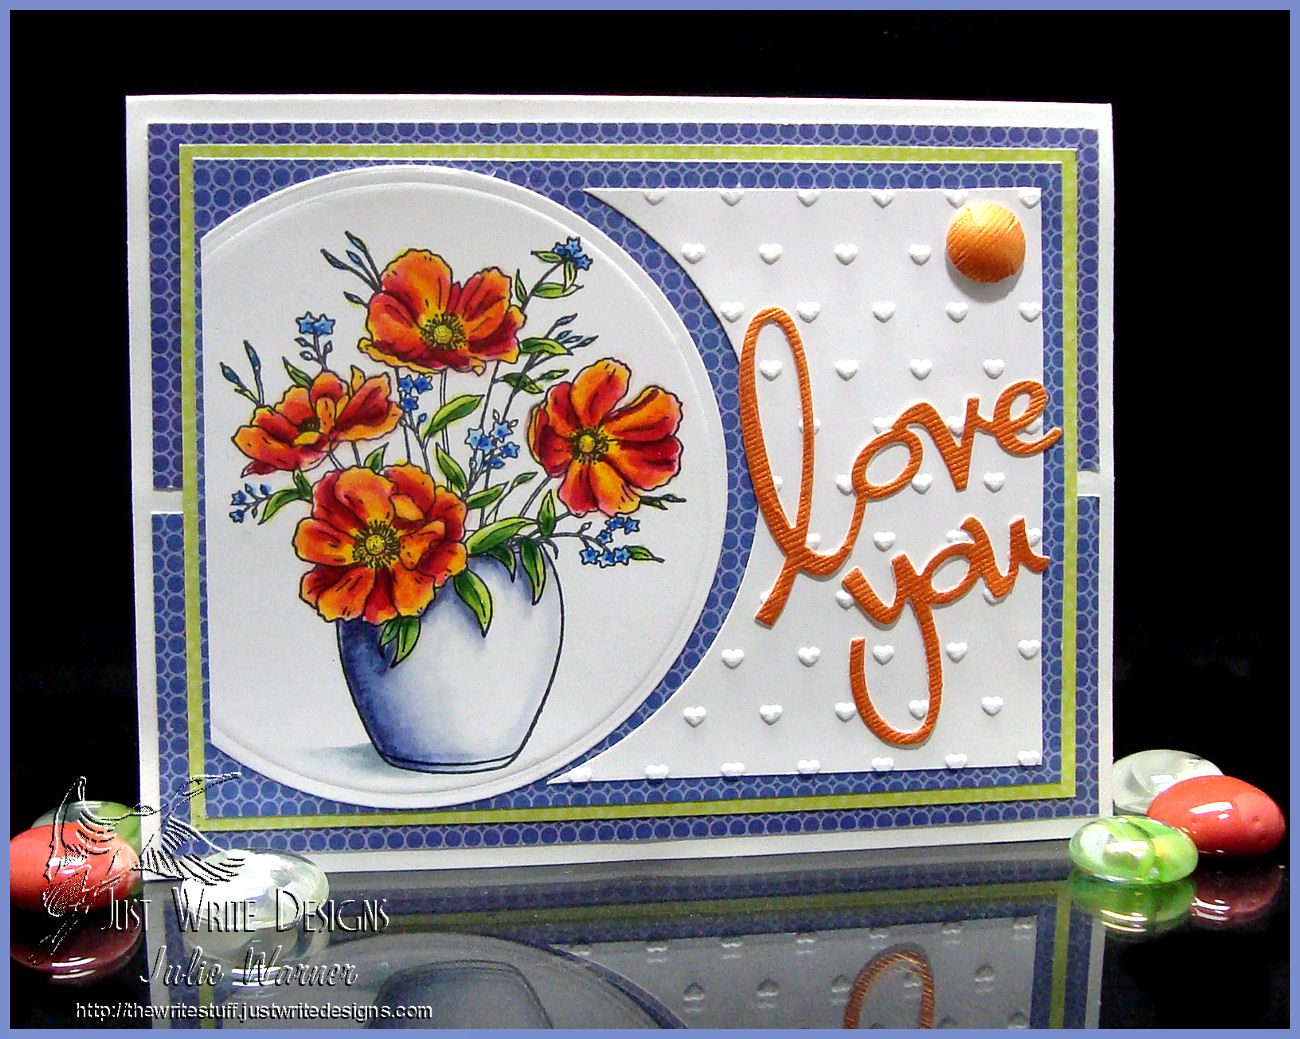
    My card today is for 3 Challenges: Sweet Stamps Love Challenge, Splitcoast Inspiration Challenge (IC428), & Splitcoast Lovefest Challenge (LOVEFEST2014B)! For the IC Challenge, I was inspired by THIS rug. I love the poppies and circular shape around them.

    It’s no secret that I love floral images..especially I love to color them. Don’t you just adore this Poppy Vase image? I couldn’t wait to color it. Instead of bright red poppies, I made mine more of a coral, orangey color, sort of a California poppy color.  I used Copics to color it then a circle die to cut it out. I decided I only wanted a partial circle, so I cut off the left side. The remaining piece of white card stock, was trimmed and embossed with a small heart pattern before I attached them both to a piece of violet blue designer paper. The “love you” phrase was die cut out of a textured metallic copper card stock and I made a matching 1/2 inch faux brad  ( I also did a similar tutorial for Splitcoast HERE) out the same card stock and attached it to help fill in a little of the blank space. The rest of the layout came about because of pieces I had left over and I decided I liked the way they fit.

    These are the Copics I used to color the image:
    Poppies, Flowers & Leaves- Y06, Y15,  R00, R02, R22, R27, R35, R46, R89, , B21, B24, B28,YG01, YG25,YG45, G28
    Vase: B60, B63, BV20, BV25, C00, C1, C3

    Thanks so much for stopping by!

    Julie2 sig


    Stamps: Sweet Stamps  Poppy Vase
    Paper: X-Press It white, designer paper (SEI – On the Coast collection), textured metallic copper
    Ink: Memento tuxedo black
    Accessories:  Cuttlebug embossing folder & love you die (Love Language combo), Spellbinders circle die, Copic markers