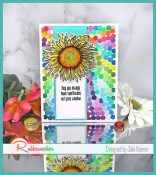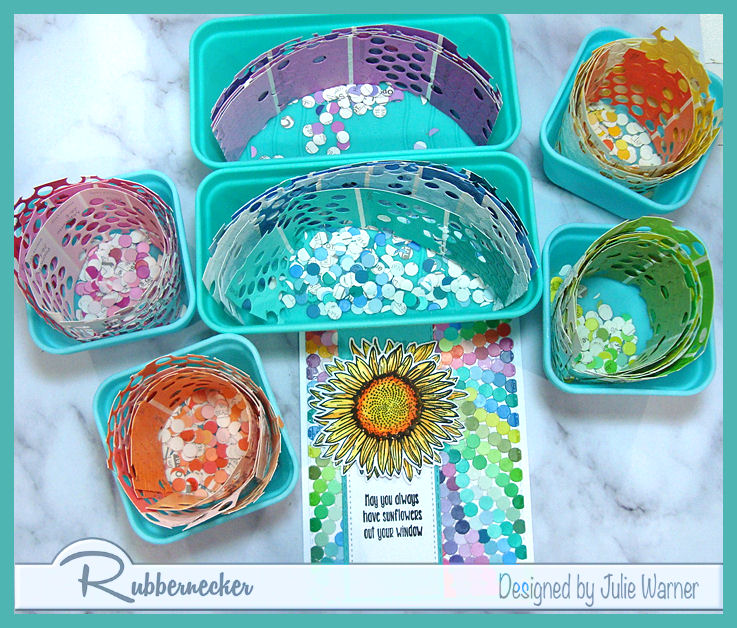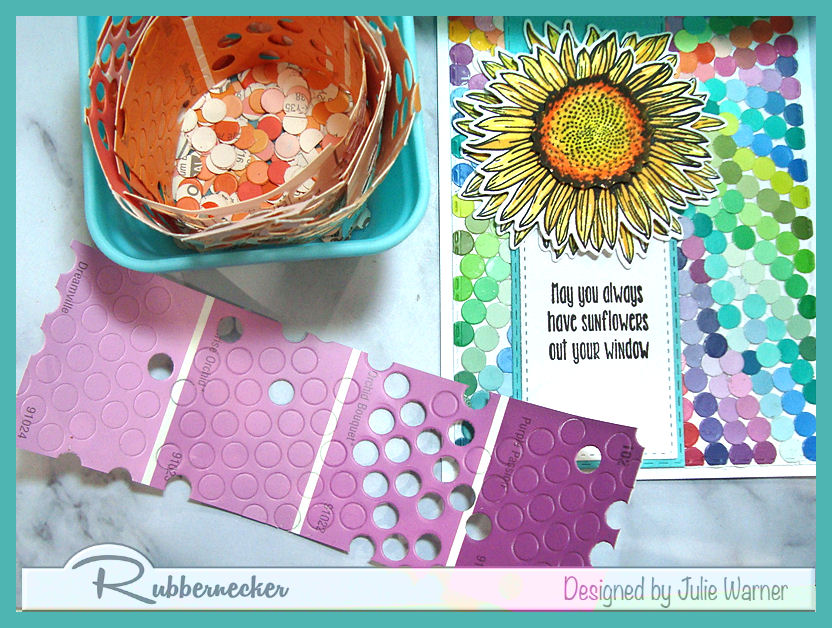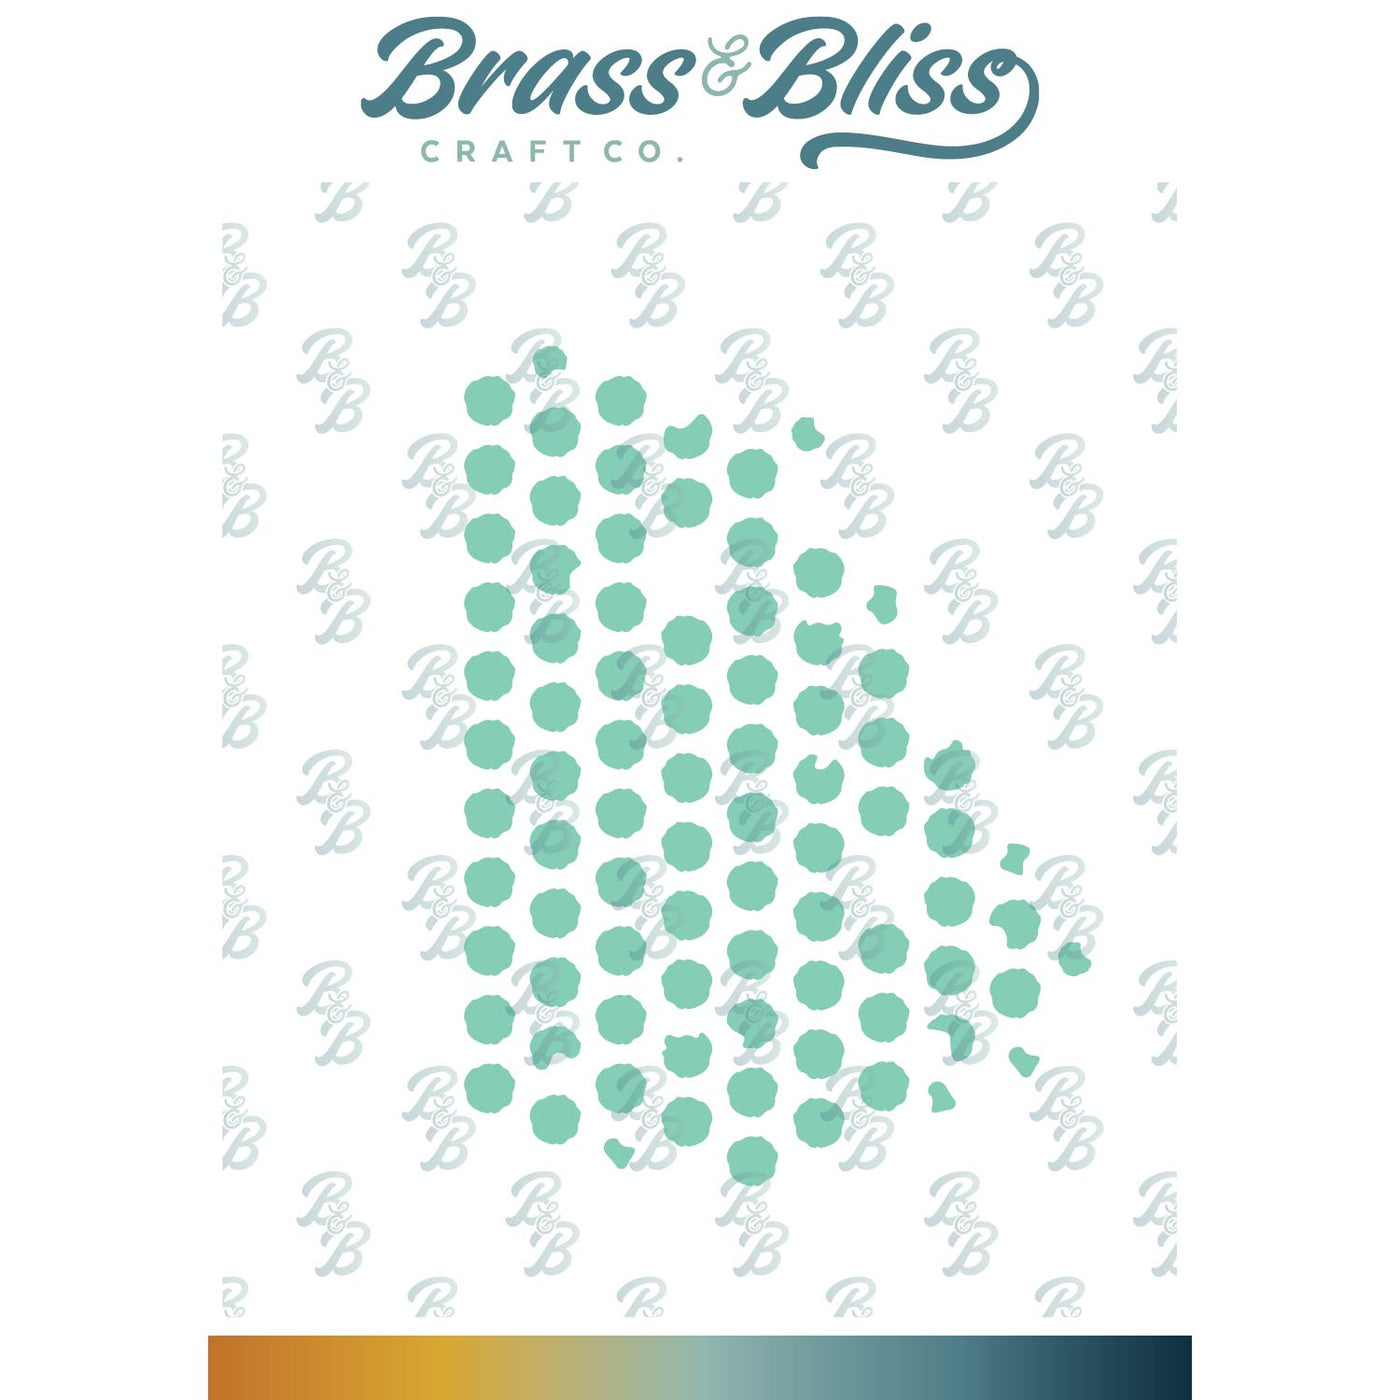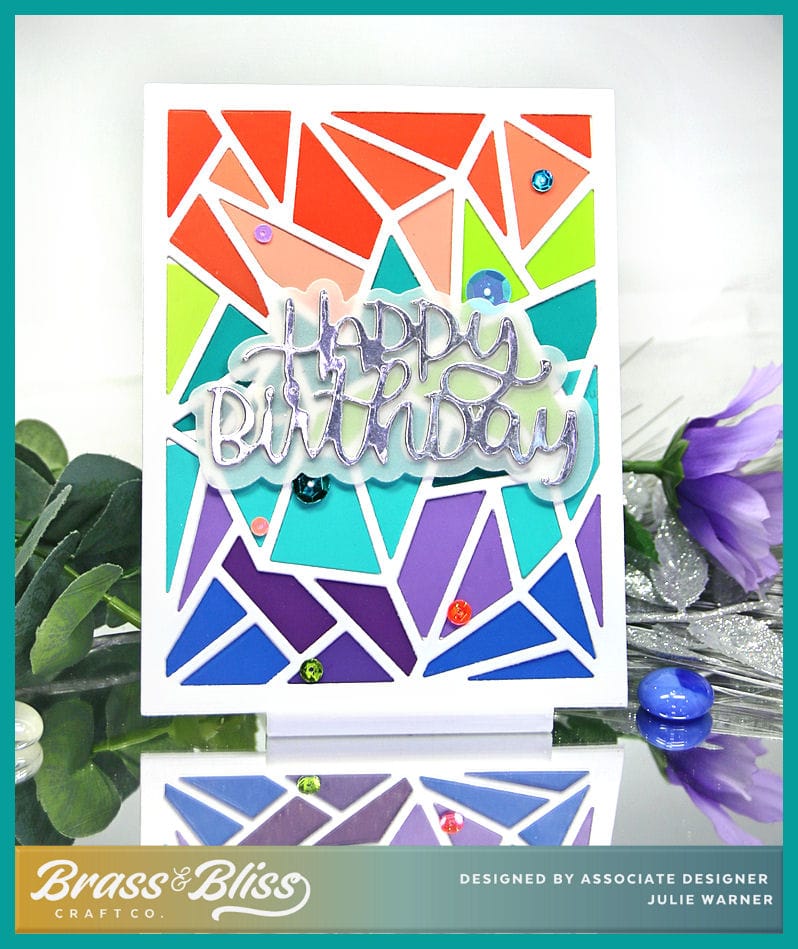

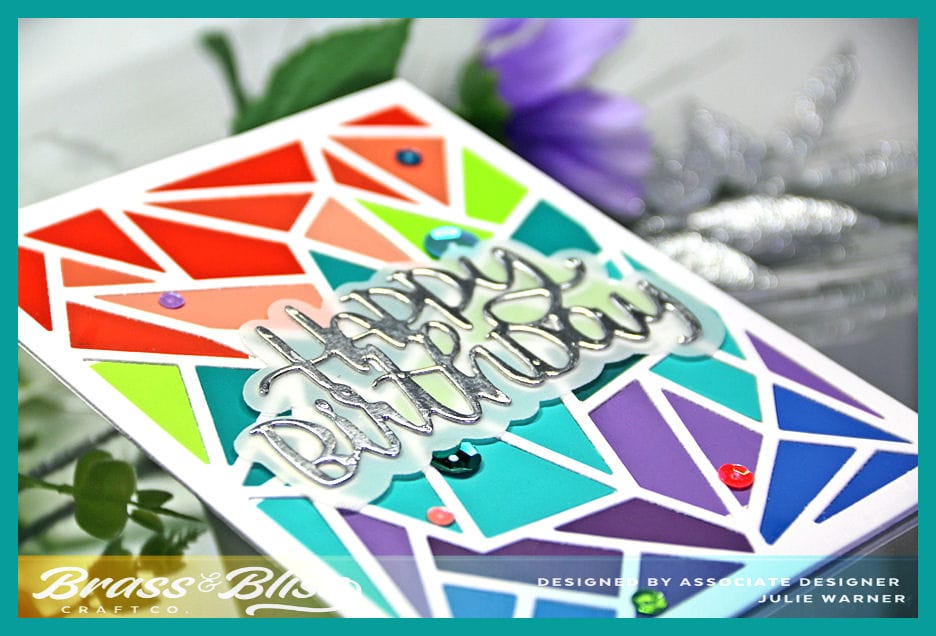
It’s a New Year and time for a very colorful birthday card! This was a lot of fun and only requires 2 dies. This mosaic cover is fantastic and there are so many different colors you can put behind it or die cut them, like I did, and piece them all into place. I used large paint chips for all the colors and aluminum foil for the greeting die. How fun is that?
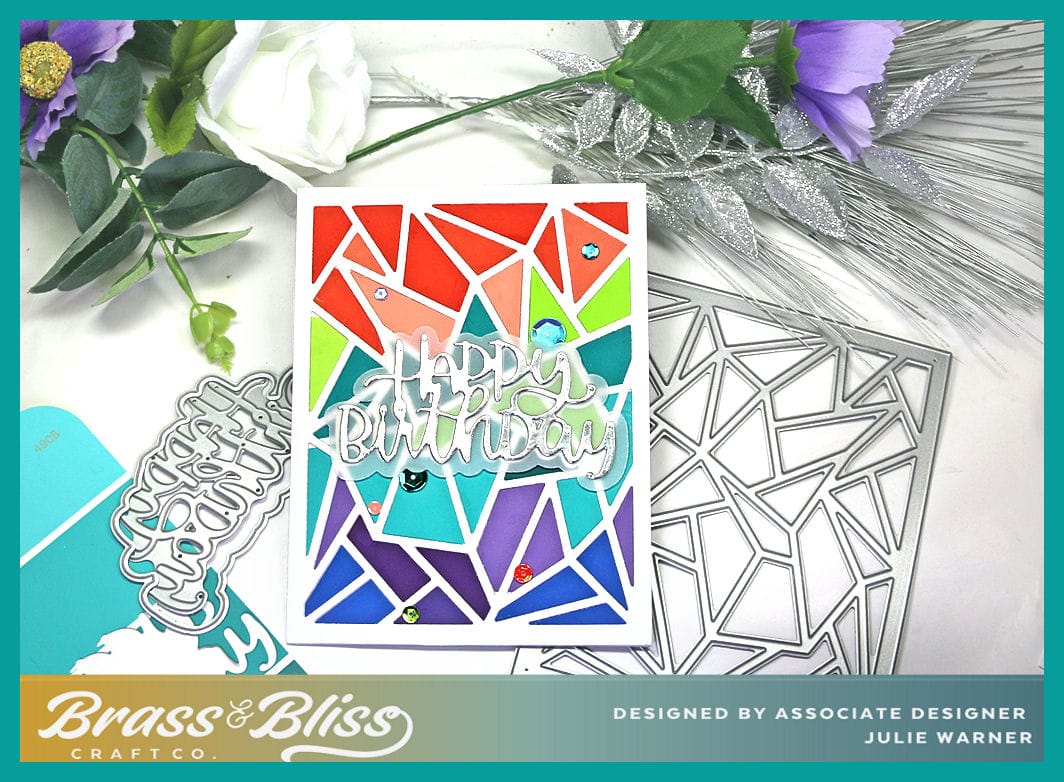
It’s my turn to host the Inspiration Challenge IC996, and we are visiting Lifestyle for Real Life & their Pinterest Board. I was inspired by THIS picture. I knew I had the perfect die & I also have a lot of paint chips.
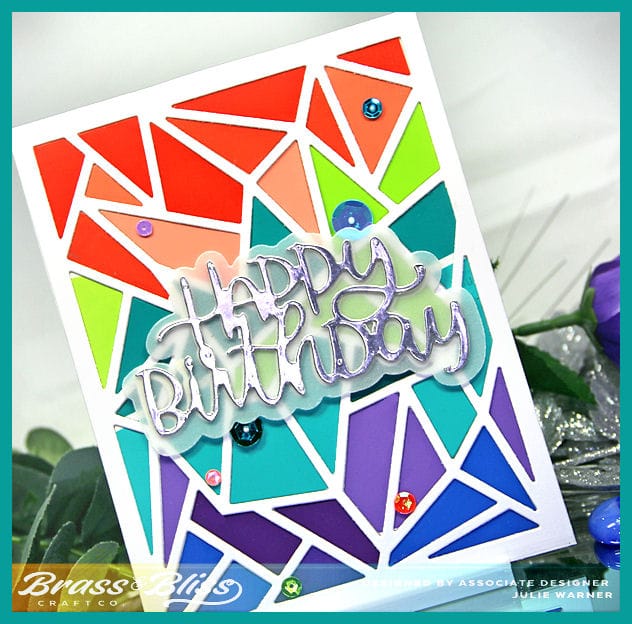
I die cut the mosaic twice..once out of plain white & again out of heavy white. I used a temporary adhesive tape all over a piece of white & attached it. Areas of the die were cut out of a bunch of paint chips then I played with them to get a color arrangement I liked. Since I had adhesive underneath, it made it easy to place them. I used a permanent glue under each one when I was finished then attached the heavy white outline on top. For the greeting, I glued a piece of heavy aluminum foil to a piece of card stock then die cut the wording. I also die cut 2 more out of heavy white. One to put under the words for lift & another to go under the vellum backing. I used a very heavy translucent vellum for the shadow. After piecing all of those colors, I didn’t want to cover them up. The extra die cut word has adhesive on top & bottom and was attached under the vellum with the foil word attached on top. With the word sandwich, it will attach to the front but the adhesive won’t show. Some sequins were added for a little sparkle.
Thanks so much for stopping by!

Supplies:
| Stamps: Brass & Bliss: none |
| Paper: Staples 110# white, Recollections heavy white, large paint chips, heavy vellum |
| Ink: none |
| Accessories: Brass & Bliss/Rubbernecker Stamps: Mosaic Cover, Happy Birthday dies, sequins |
|

|

|

|

|

|

|
You might also like: