

Welcome to the North Coast Creations November Release! And wow, do we have some fabulously cute images for your Christmas card making this year! You’re going to LOVE these!
How can you not love a Christmas Cactus all decked out w/ shiny lights? It just screams Southwest! As a native Texan, I adore SW themed images and this one is right up my alley.
 After I stamped, colored, over stamped & fussy cut the Cactus Lights image, I kept picturing a little window scene so that’s what I tried to recreate. ODBD has several window dies, but I just felt like it needed to be round on top & not too big. (Please note: the ODBD site is having technical difficulties so the pictures & links may not be working for a day or two). I used a resizing trick I came up with a long time ago, but instead of making it bigger, I made the window smaller by cutting just the top part down to the middle of the first set of square panes, turning the die around & moving the bottom up. Then I cut the bottom part only & there you go..a window that is shorter by one set of square panes. I added 4 die cut shutters (for blinds) from the Welcoming Window die & a piece of dp behind it that is Christmasy but still has a SW look to it. On the white layer, I stamped the greeting at the bottom & used a SW border folder to emboss just under the dp. I used the O from the Joy image as a wreath for the window.
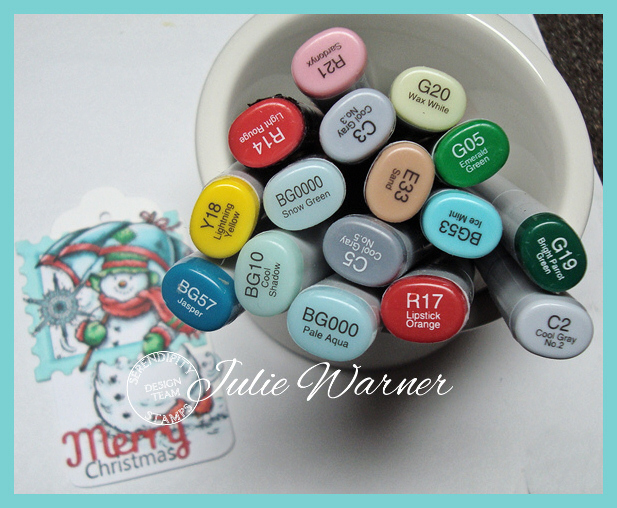
Here’s a look at the inside & below it are the Copics I used.


Supplies:
Stamps: North Coast Creations –Cactus Lights, Joy
|
| Paper: X-Press It white, Neenah white, kraft, dp (DCWV -The Christmas matstack) |
| Ink: Memento tuxedo black, Versafine onyx (to overstamp after coloring), (Distress ink twisted citron on inside) |
| Accessories: ODBD Flourished Star Pattern, Welcoming Window, Window dies, Copic markers, Misti, Spellbinders A2 Matting Basics A & B dies, Cuttlebug embossing folder (Southwest borders set) |
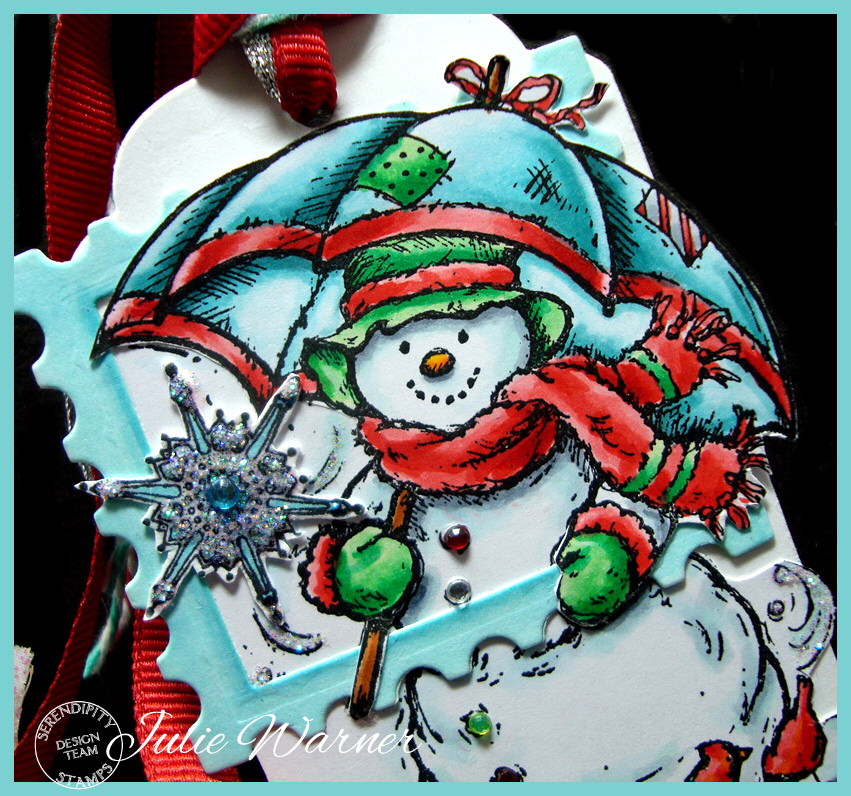
 On my second card, I used the super cute Santa Buford. After stamping w/ Memento, I colored him using a combination of Copics & Prismacolor pencils. His jacket & bag are mostly pencils & Buford is mostly Copics w/ a white pencil highlight. I just love the way Prismacolors look when used on this lt kraft c/s. And since he was still in my Misti, I stamped over him w/ Versafine after I was finished coloring. This really brings back the lines you tend to lose when using Prismacolor pencils. He was die cut w/ a Circle Ornament & I did my out of the box tech to keep from cutting off his tail.
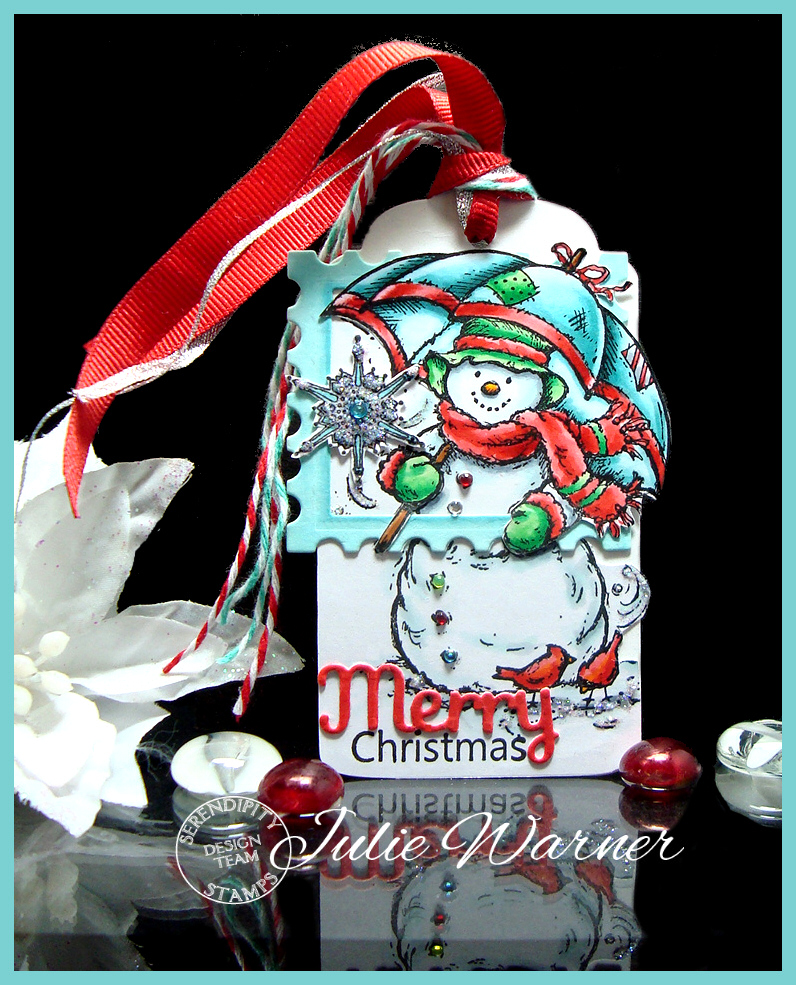
 I put together the 3 pieces of dp to get my background then added the die cut Merry w/ a few stockings fussy cut from the dp. The Medium Bow was die cut from red & I used a small letter J punch to make the candy canes on the bow. The cut glass button was clear & I used a red copic to color it.
Here’s a look at the inside & below it are the Copics I used.


Supplies:
Stamps: North Coast Creations –Santa Buford (Holly Jolly Christmas -inside greeting)
|
| Paper: lt kraft, red, white, dp (Pebbles – Welcome Christmas) |
| Ink: Memento tuxedo black, Versafine onyx (to overstamp after coloring) |
| Accessories: ODBD Flourished Star Pattern, Circle Ornaments, Matting Circles, Medium Bow, Merry Christmas dies, Copic markers, Misti, Prismacolor pencils, glass gem, small letter J punch (used for candy canes on bow) |
Thanks so much for stopping by!


