• Out of the Box Nestie Tutorial

    This tutorial came about after an ongoing discussion with Roxie at SCS about our methods of doing the Out of the Box Nestie Technique. We each were using this technique, we just went about it differently.  (6/23/10 Edited to add: Roxie now has a blog and here is her version of this technique.)  I promised I would take some pictures to show my method.

    (Click on any image to enlarge.)
     

    Julie Warner - justwritedesigns https://thewritestuff.justwritedesigns.com/
    Step 1


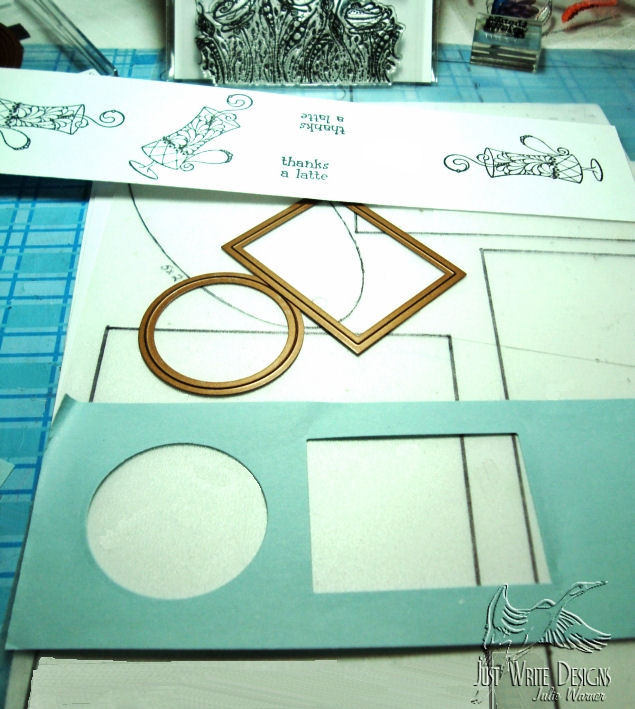
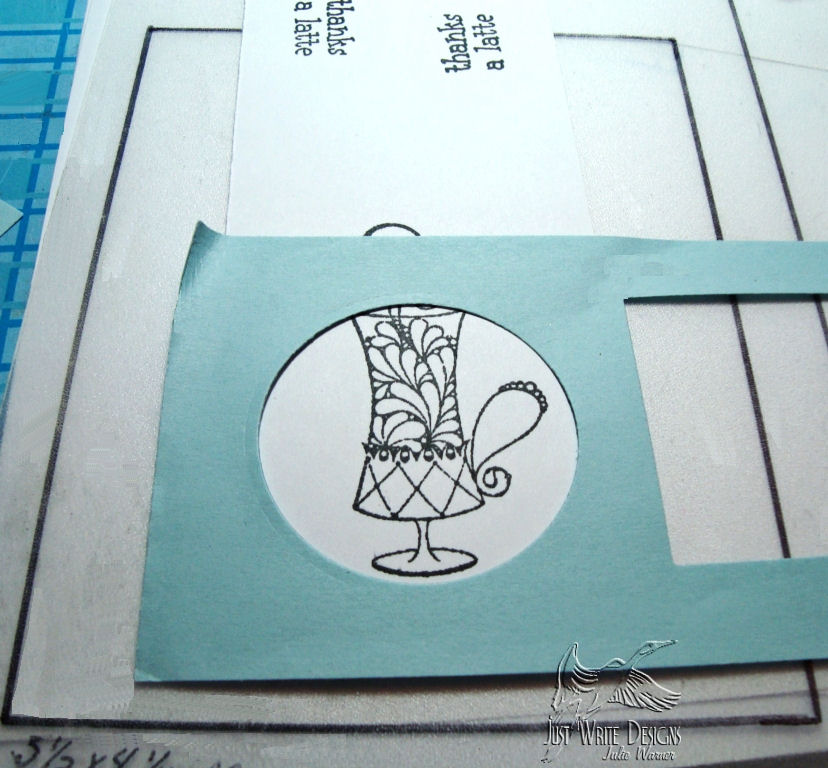
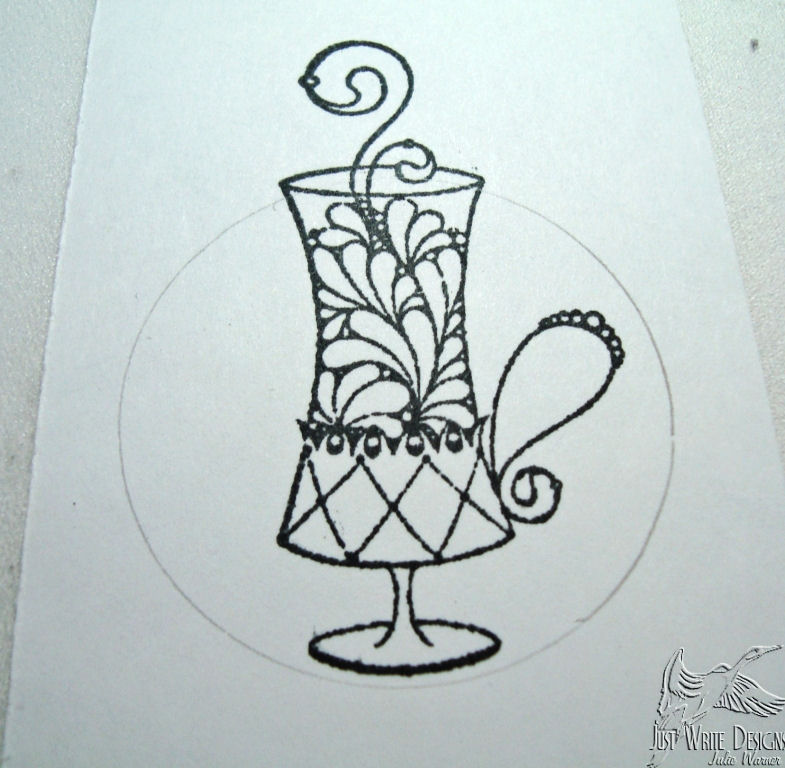
    For Step 1, I stamped my image(s) and selected the Nestie shapes I might want to use. I selected the sizes of the circle and rectangle that were slightly smaller than my image in order to get the Out of the Box look I want. Usually, I just cut this frame out of white copy paper, but I’m using a light blue in order to be more visible here. The only reason I use a cut template and not the actual die is because of the 1/8″ difference in size. The inside of the die will be 1/8″ further into your image than the template. Most of the time this won’t matter, but on some of the more intricate ones I’ve done, it did make a difference.
    Julie Warner - justwritedesigns https://thewritestuff.justwritedesigns.com/
    Step 2


    Julie Warner - justwritedesigns https://thewritestuff.justwritedesigns.com/
    Penciled Frame

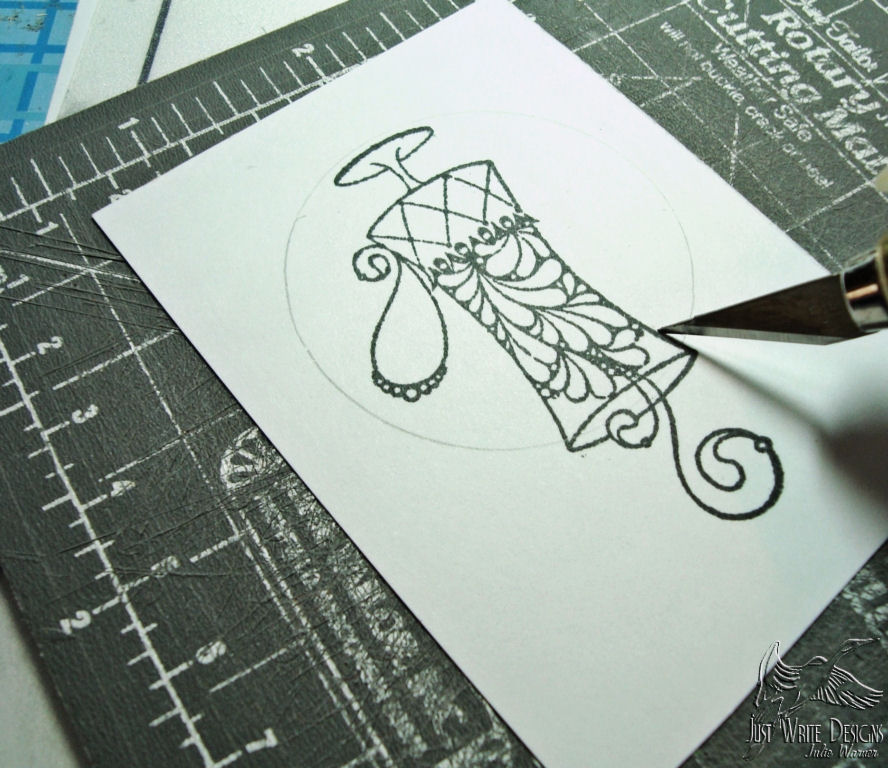
    For Step 2, place the frame around the image and lightly trace the frame with a pencil.
    Julie Warner - justwritedesigns https://thewritestuff.justwritedesigns.com/
    Step 3

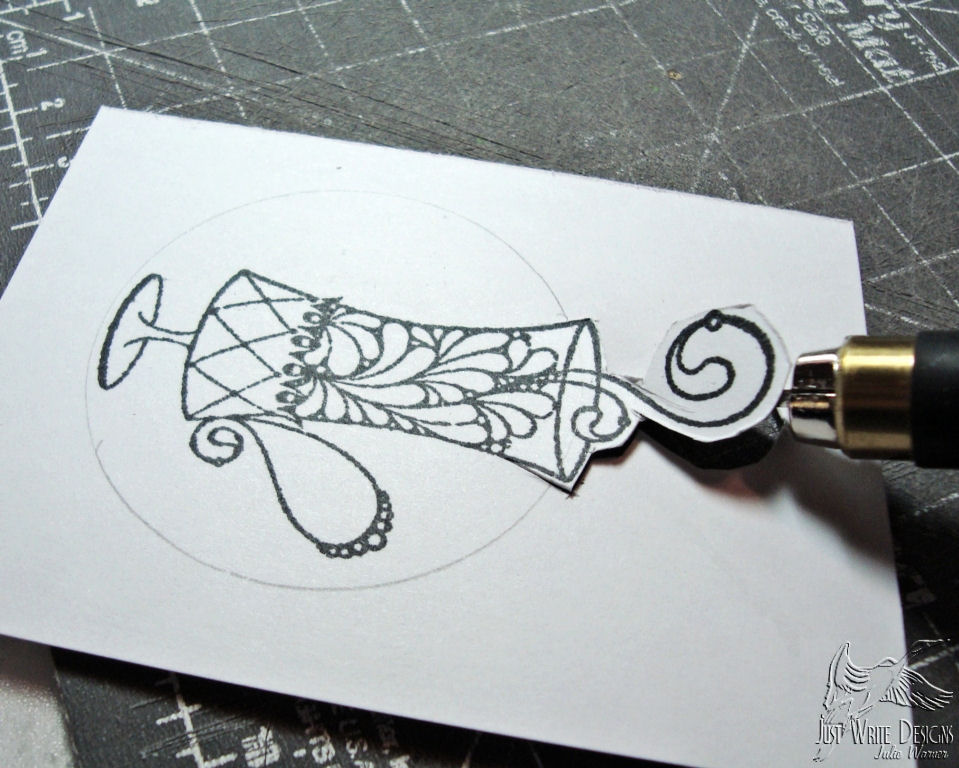
    In Step 3, I use a craft knife to cut the areas which will be Out of the Box. In order to insert the Nestie die under this area, I have to start the cut inside the circle. I cut very close to the image outline and continue around the image to other side.
    Julie Warner - justwritedesigns https://thewritestuff.justwritedesigns.com/
    Top Cut

    The Out of the Box area is cut. Note that the very top is just a rough cut for now. I don’t want it to be too unstable when I insert the Nestie die. I will go back and finish trimming this area with detail scissors after I’ve cut and embossed the Nestie circle.
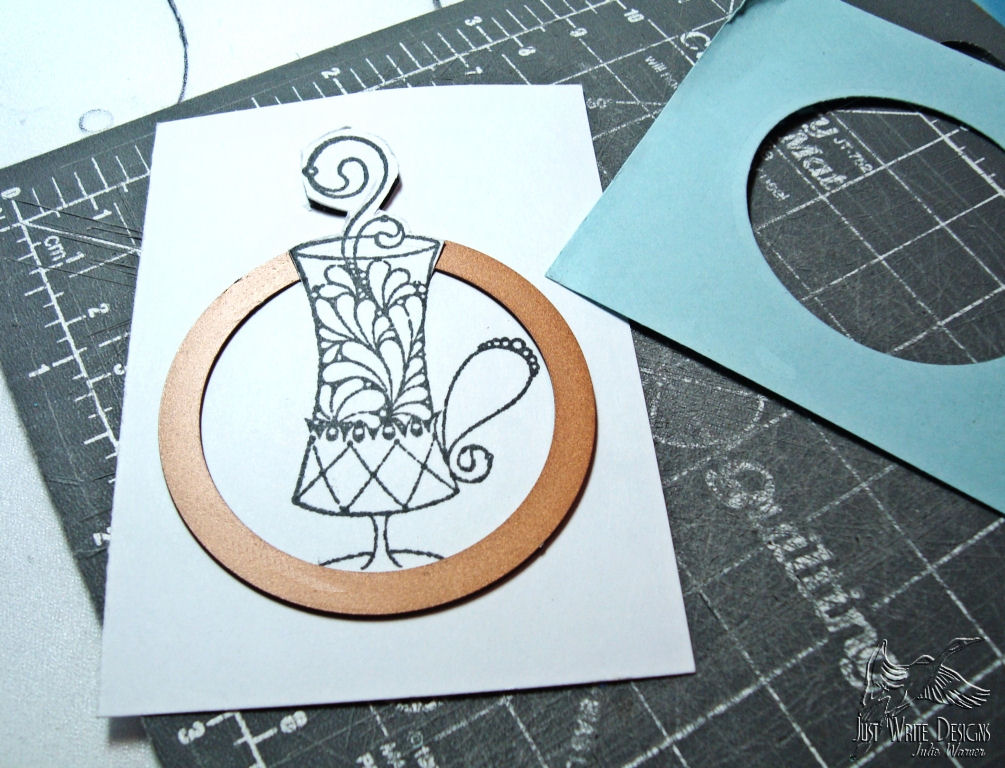
    Julie Warner - justwritedesigns https://thewritestuff.justwritedesigns.com/
    Step 4

    In Step 4, I insert the die under the Out of the Box area I’ve cut out. With the die under this area, it will not be cut or embossed. Test fit your die before cutting to make sure you have cut your image deep enough to allow the die to be inserted on your pencil lines.
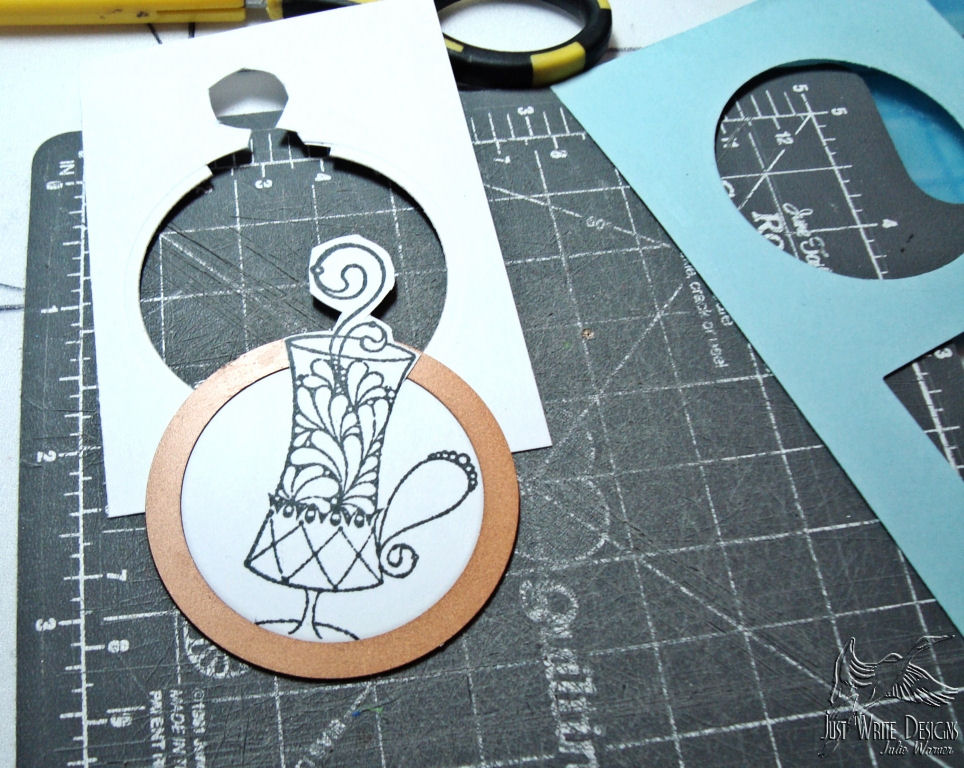
    Julie Warner - justwritedesigns https://thewritestuff.justwritedesigns.com/
    After cutting & embossing

    Now I will remove the die and finishing trimming the top area.
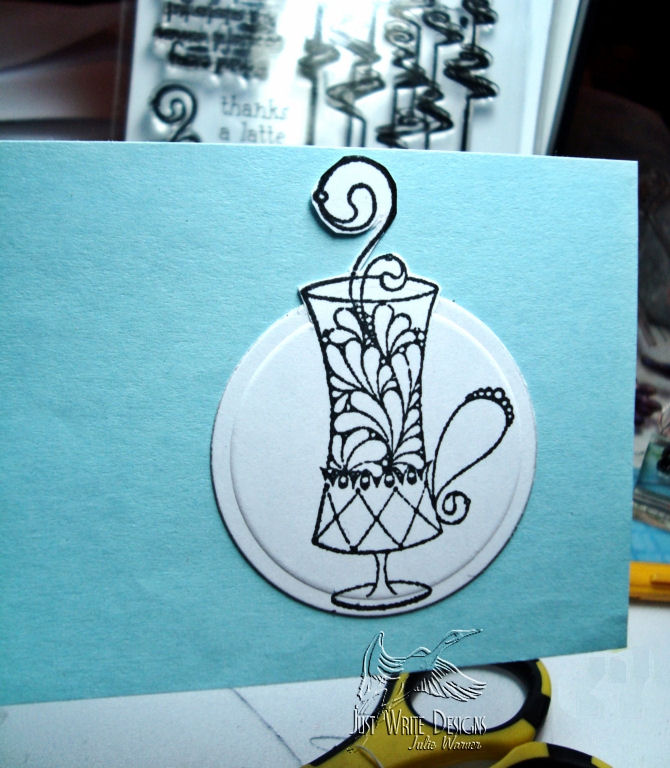
    Julie Warner - justwritedesigns https://thewritestuff.justwritedesigns.com/
    After top is trimmed

    My Out of the Box is ready for coloring. It doesn’t really matter if you color your image before or after. I have done it both ways. With this method, it has worked the first time for me and I haven’t had to do it over. If my Out of the Box area has a lot of cutting inside the shape, I will usually add a little scotch tape to the back after it’s cut and embossed. This just stabilizes the area and really makes the cut disappear.
    Julie Warner - justwritedesigns https://thewritestuff.justwritedesigns.com/
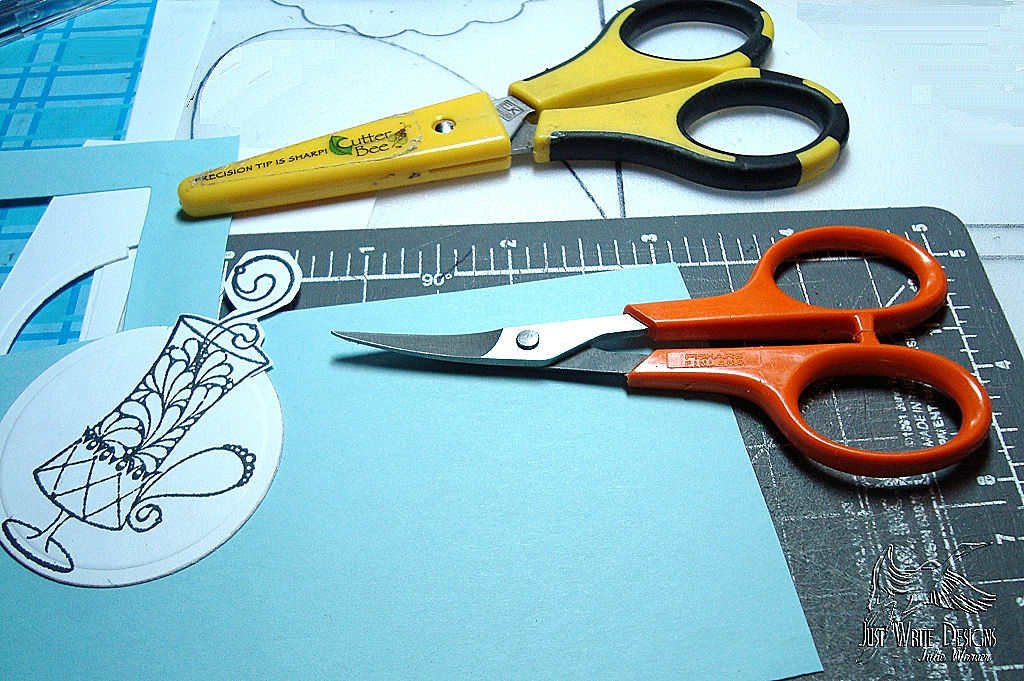
    Detail scissors

    I’m including this picture to show you my detail scissors. Quite a few people have commented on my detail cutting so I wanted to include this. The little orange pair of scissors have small, curved blades. You can see they are only about 4″ in length but the small curved tips make cutting a breeze. I’ve done a lot of decoupage and these scissors are invaluable. Fiskars made these, but cuticle scissors work, too. Another trick is to remember to turn the paper, not the scissors, when you are cutting.

    Julie Warner - justwritedesigns https://thewritestuff.justwritedesigns.com/

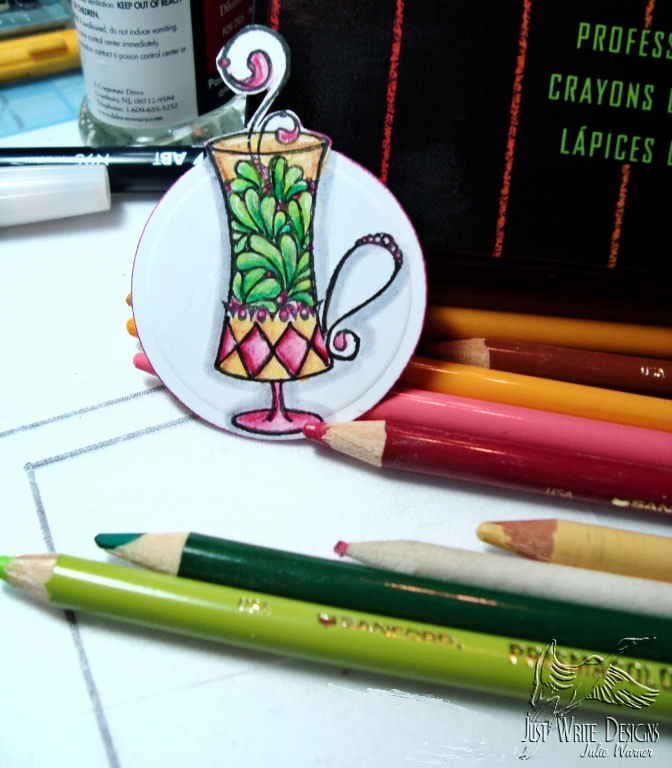
    All done! This was colored with Prismacolor Pencils and OMS (odorless mineral spirits, aka Gamsol).

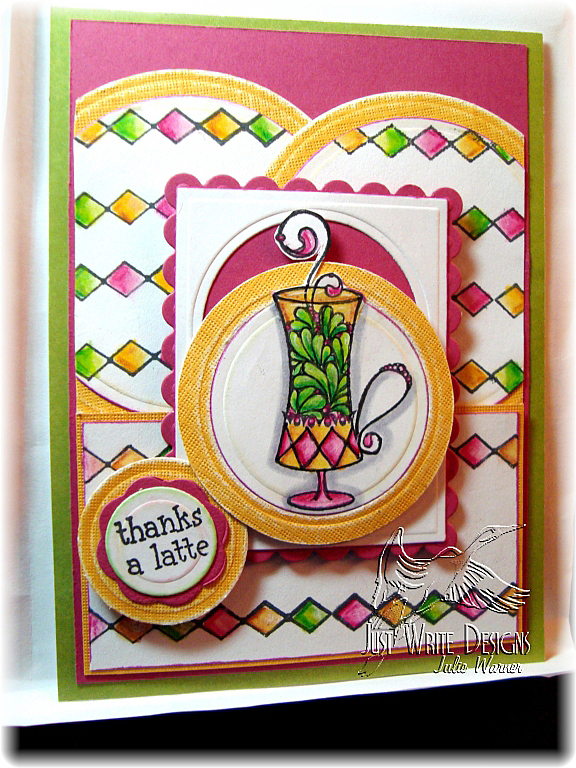
    Thanks for looking and I hope you try this fun technique. Here’s the finished card I made with this fun image.
     

    Julie Warner - justwritedesigns https://thewritestuff.justwritedesigns.com/

    Julie2 sig


  • Diamond Latte

    Julie Warner - justwritedesigns https://thewritestuff.justwritedesigns.com/

    Love the sketch, but the circles gave me a little trouble. I see now that maybe the circles weren’t supposed to overlap. Oh well.

    I stamped the latte cup (IO), made a template of the circle die and lightly penciled around the image. The top part of the image I cut around w/ a craft knife so I could slip the circle die underneath it so it wouldn’t get chopped off. Then I cut and embossed the nestie as usual. Roxie and I have had an ongoing discussion about our different methods of doing this nestie out of the box thing. I promised I would do a tutorial as a pic is worth a thousand words. So, I took pics as I did this one and hopefully, I’ll have tutorial to go w/ this tomorrow.

    Anyway, I stamped the rows of diamonds (SG) on the bottom band and more on the two pieces that became my overlapping circles. I colored everything w/ Prismacolor pencils and Gamsol (Odorless Mineral Spirits).

    On the m.mustard layers, I used an emery board to sand the edges. I placed one of these layers behind my latte cup then attached it, slightly lower, to the negative frame left when I cut it out (I placed a rect nestie around the circle when I cut it.)

    I used the scallop nesties to cut a red frame for my image and also the greeting.

    Supplies:
    Stamps: Impression Obsession, Studio G
    Paper: white, rose red, old olive, DCWV mat stack = to more mustard
    Ink: AP coal, primrose
    Accessories: gamsol, Prismacolor pencils, nestie circle, scallop rectangle and rectangle sets, foam tape


  • Mosaic Tutorial

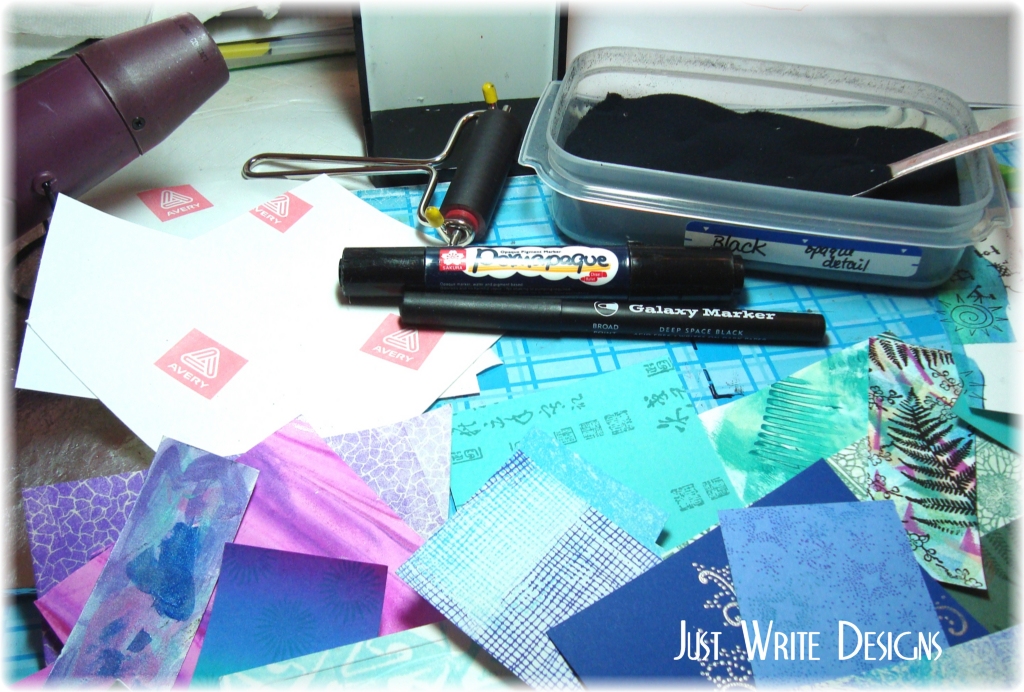
    Supplies Needed: (click on any image to enlarge)

    1. Sticker Paper
    2. Various Scraps
    3. Black Embossing Powder
    4. Brayer
    5. Heat Gun
    6. Black Marker (Galaxy Deep Space Black or Permopaque Black)
    Supplies Needed

    Step 1.
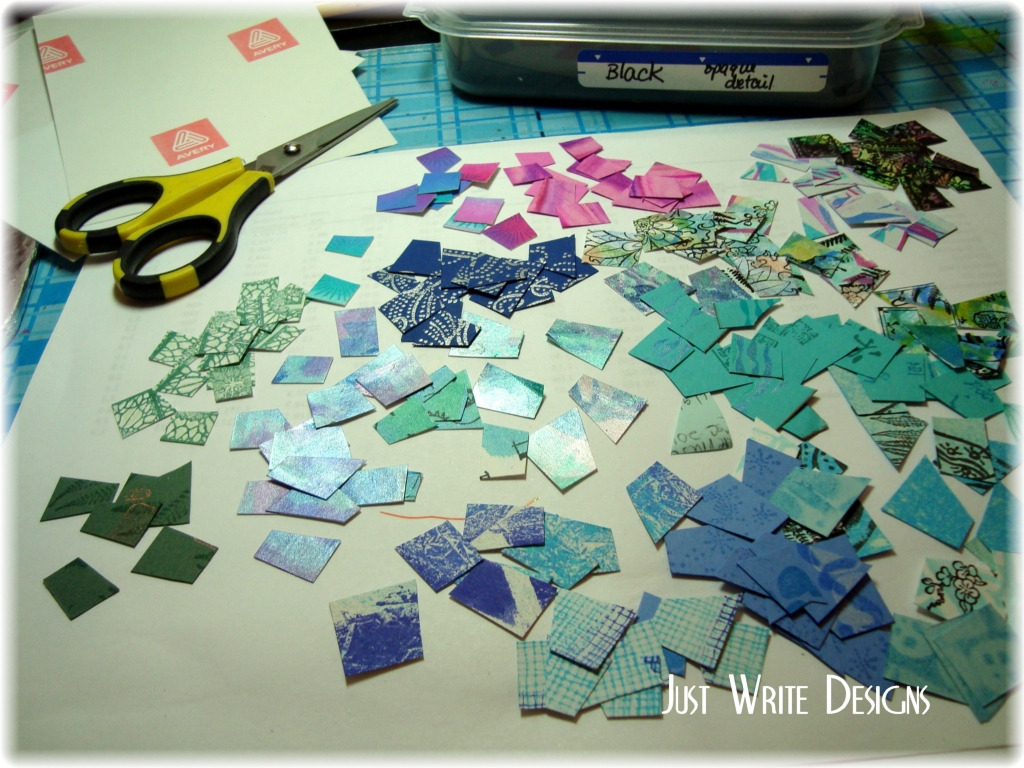
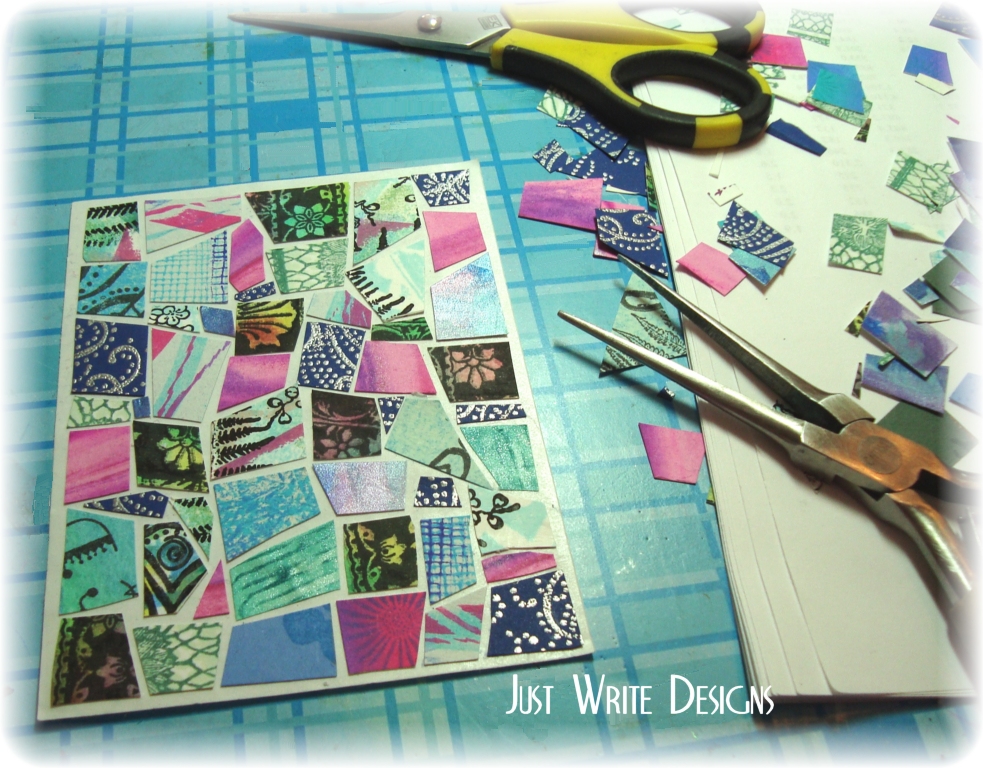
    Pick some scraps. I usually use 3 or 4 color groups. Here, I selected some blues, turquoise, and an orchid color for contrast. Scraps that are stamped and/or embossed will work well, too. With scissors, cut some of each color you plan to use. Vary the sizes and angles slightly. I try to leave 2 sides fairly square so they fit around the edges.

    Step 1.
    Step 1.

    Step 2:
    Cut your sticker paper to the size you want. For my example, my sticker sheet measures 3.25″ x 4.25″. I precut to this size because I want to leave a border around the edge of my sticker paper.
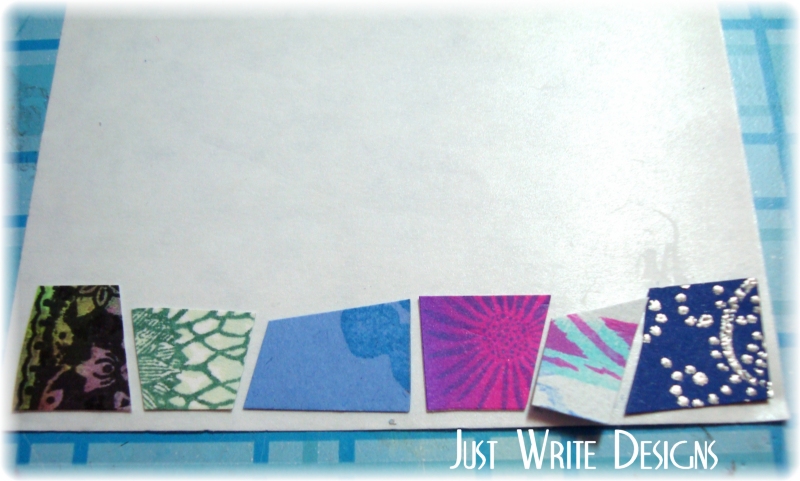
    I put a little removable adhesive on the back side of my sticker paper to hold it still while I am working with it. Peel the release sheet off the sticky side of your sticker paper. Start placing your cut mosaic pieces. I start in one corner and work across. Vary the pieces and colors.

    Step 2.

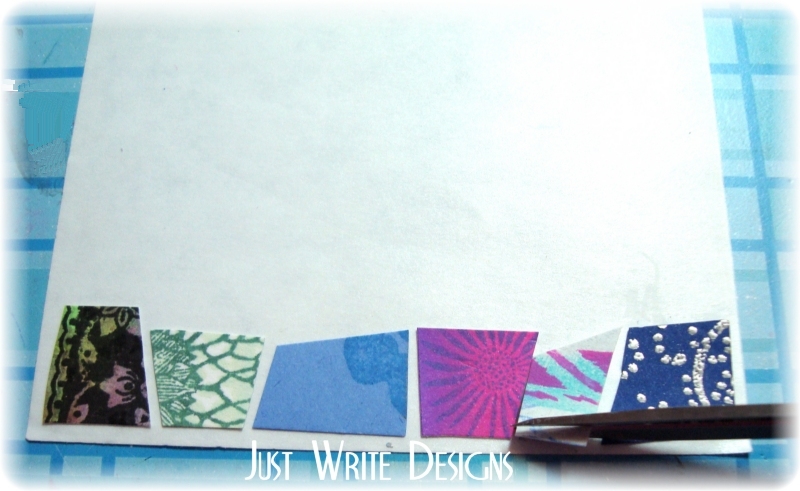
    Note that one piece is hanging over the border. When a piece does not fit correctly, use your scissors to trim it before pressing it down. (Step 2a)

    Step 2a
    Step 2a

    Step 3:
    Finish arranging your pieces. I find it easier to place my pieces on the sticker paper if I use a pair of needle nose pliers. Note the border around my pieces. You do not have to have this border.

    Step 4:
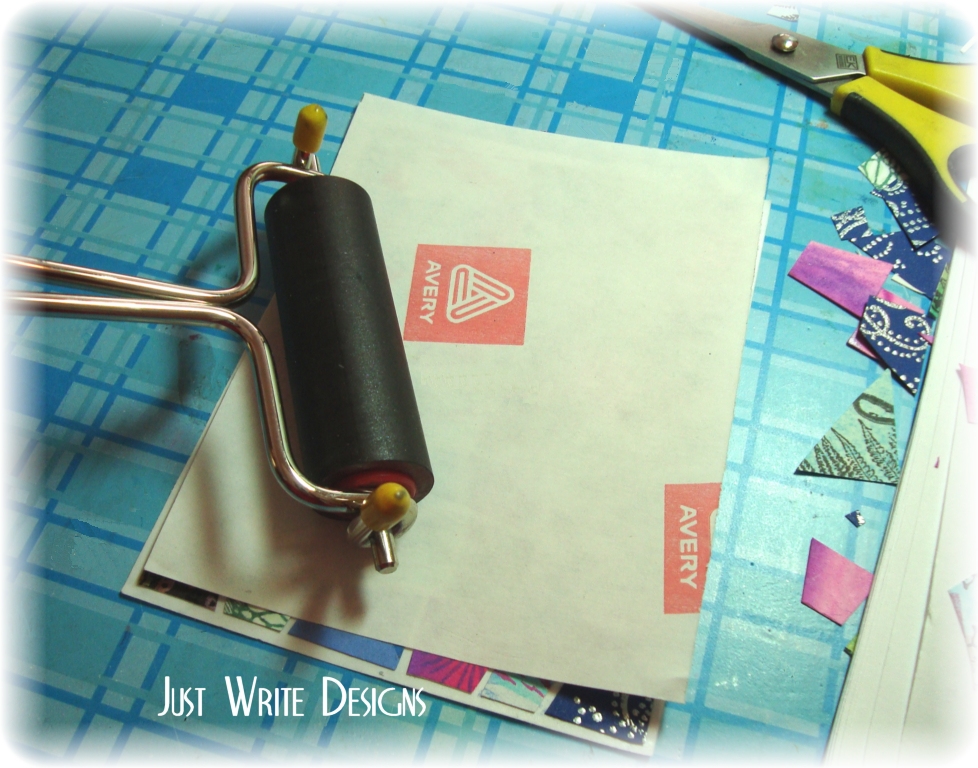
    Place the release paper over your mosaic. Using the brayer, roll over the release paper covered mosaic. This will help to secure the pieces to your sticker paper.

    Step 4
    Step 4

    Step 5:
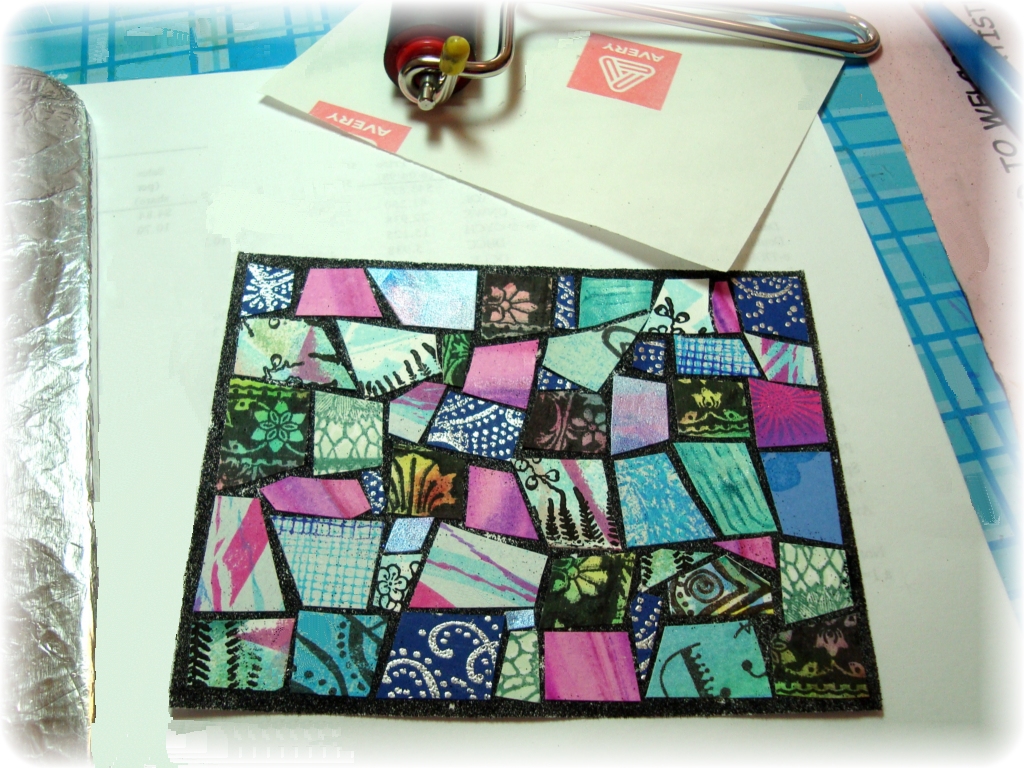
    Coat your piece with the embossing powder. For my example, I am using detail black powder. Gently tap off excess. Place the release paper over the piece again and repeat the pressing with your brayer. This will help the embossing powder to cover the exposed areas of the sticker paper (“grout lines”).

    Step 5
    Step 5


    Step 6:

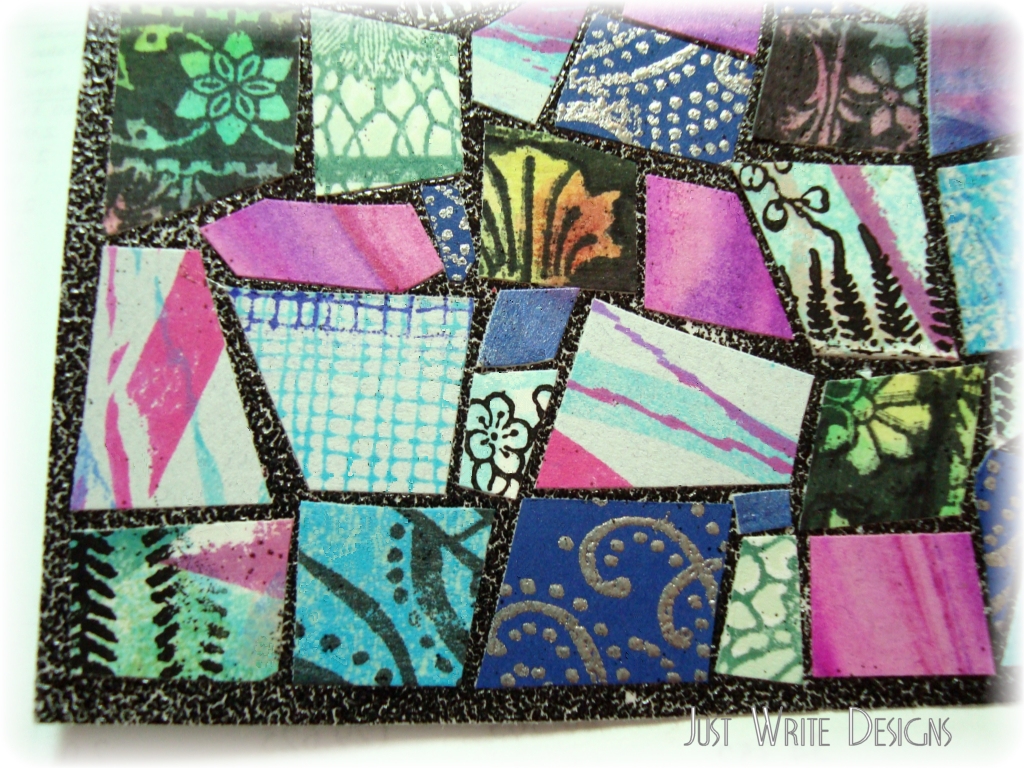
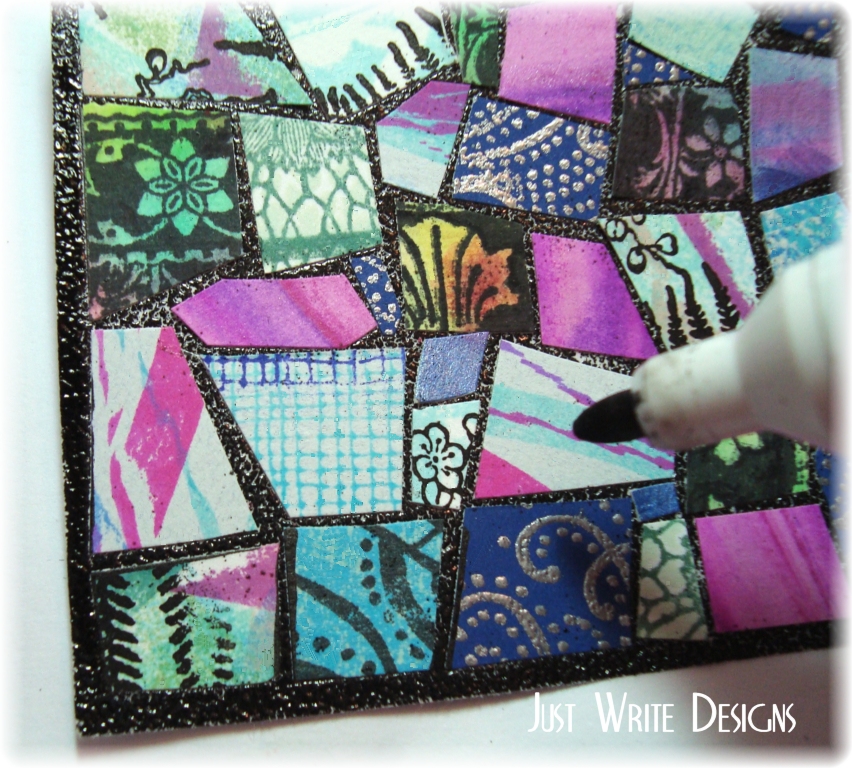
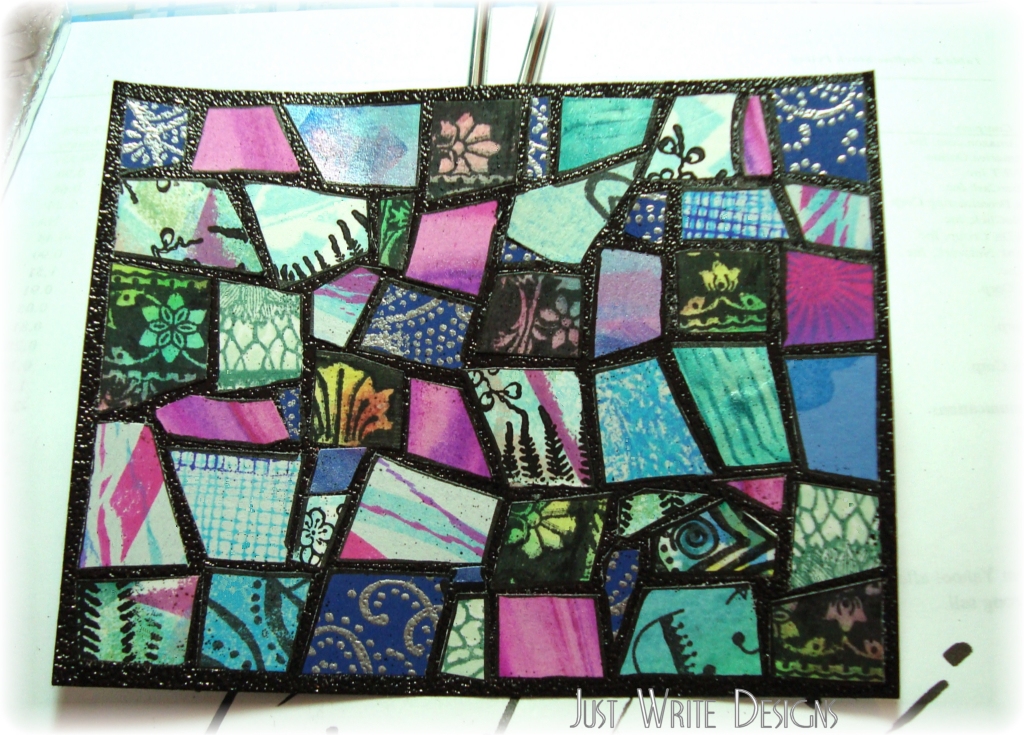
    Melt the embossing powder with your heat gun. Note that when using black embossing powder, tiny areas of the white may show through. This is not noticeable with other colors of embossing powder. If you look closely, you can see this, especially around the outer border.

    Step 6
    Step 6

    Step 7:
    Since I am using the black powder, I go over the “grout lines” with a permanent black marker. After testing a number of these, I found that the Galaxy or the Permopaque work the best and do not dull the shine of the embossing powder.

    Step 7
    Step 7
    Finished Mosaic Sheet
    Finished Mosaic Sheet
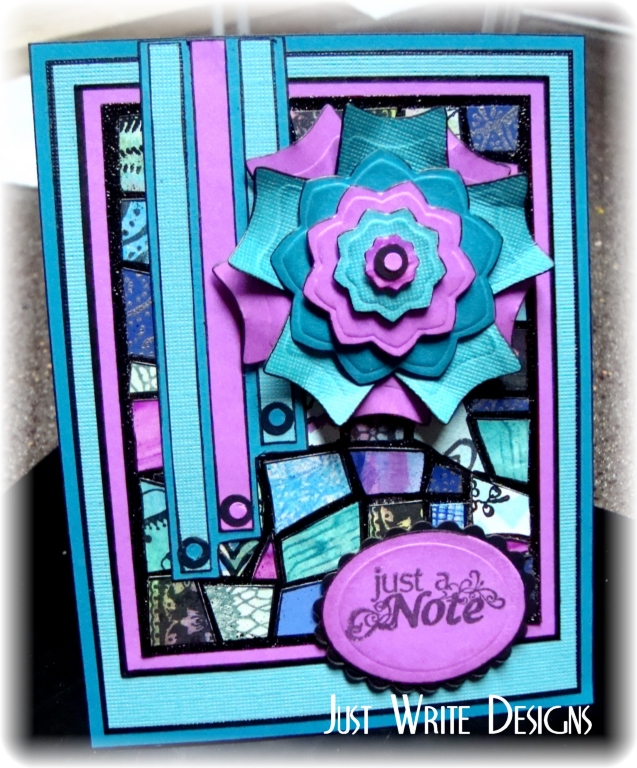
    Finished card using the mosaic example.
    Finished card using the mosaic example.

    Other Supplies used for this card:
    Spellbinders Nestabilities: Flower set, oval and scalloped oval sets
    Hole punches in 2 sizes
    Sentiment image: Studio G

    Julie2 sig