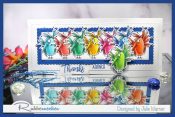
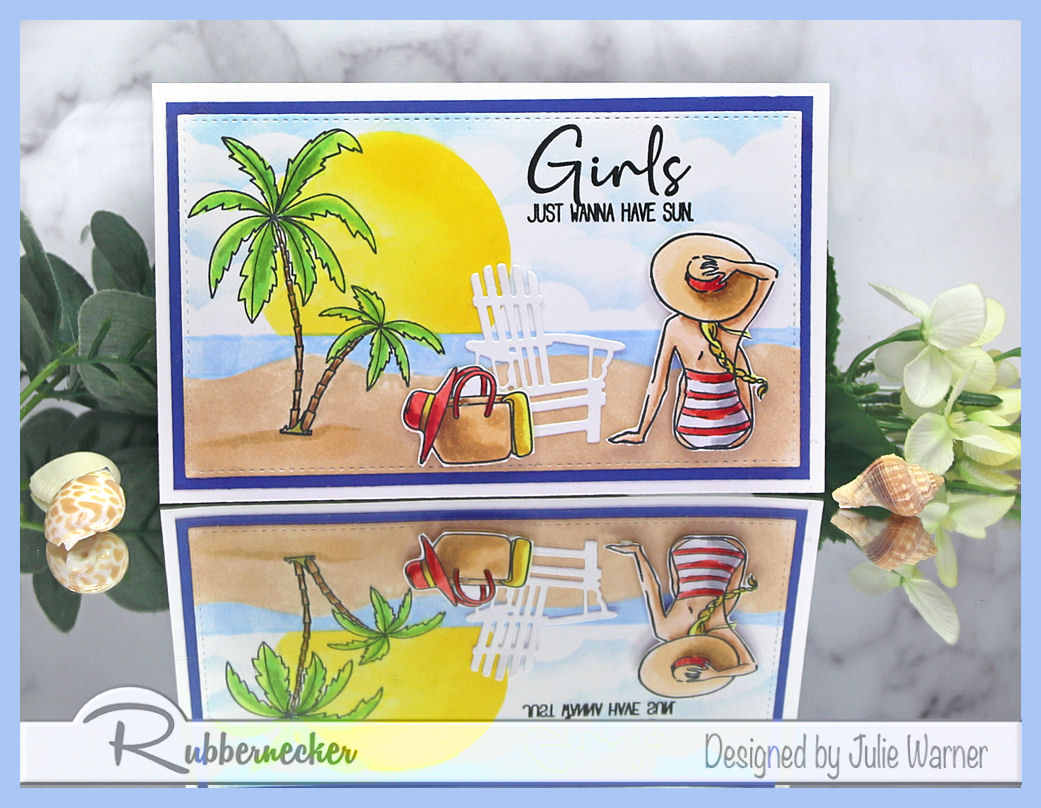
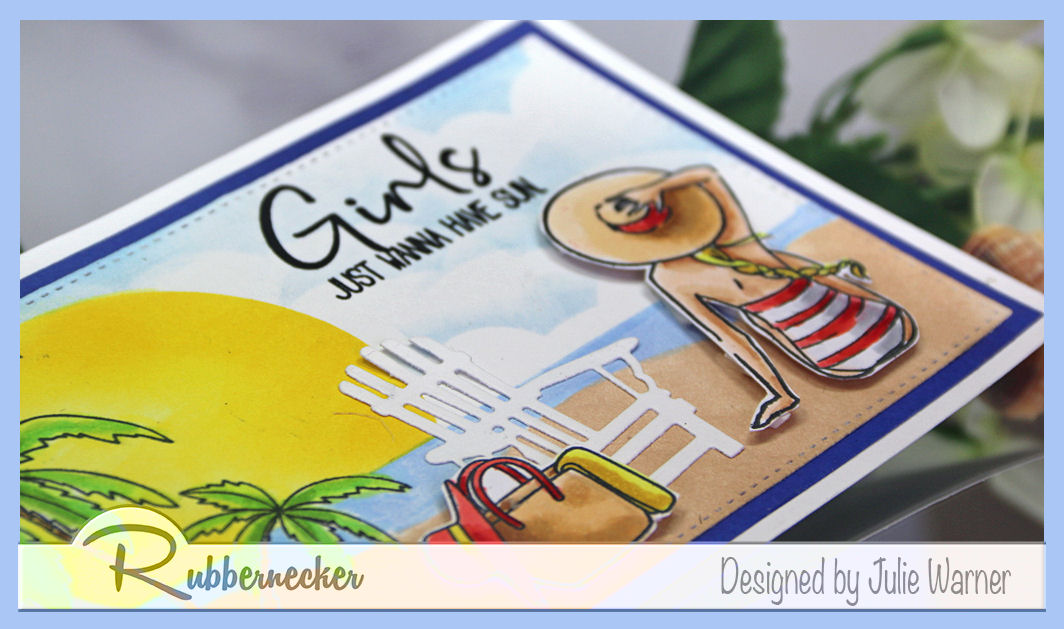
a fun in the sun beach girl mini slimline card. easy to make w/ stencils & dies for this new Beach Girl set & dies.
For the Inspiration Challenge (IC911), we’re visiting Lumas & their Pinterest Board where I found THIS picture for my inspiration.
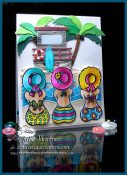
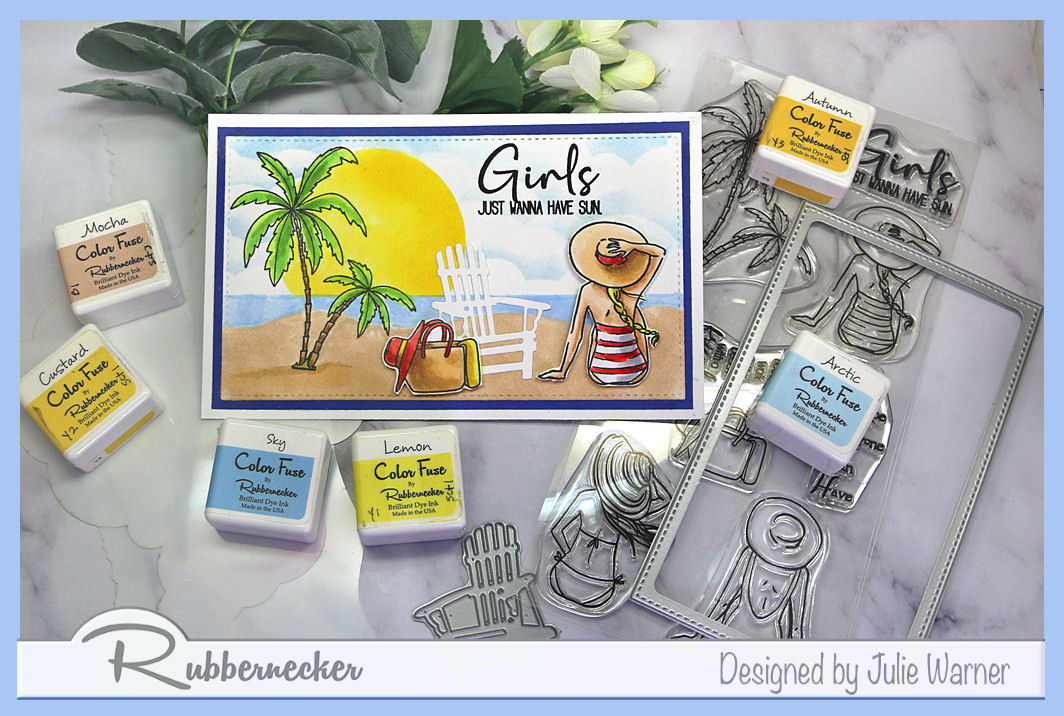
For my fun in the sun mini slimline card, I first stamped & colored the palm trees then I used a couple of stencils & a reverse circle mask to sponge in the sand, water & big yellow sun. I filled in the clouds using another stencil. The girl & beach bag were colored & die cut along w/ the beach chair.

I added a narrow royal blue layer & stamped the greeting across the top. The girl & bag were popped up a bit w/ foam.
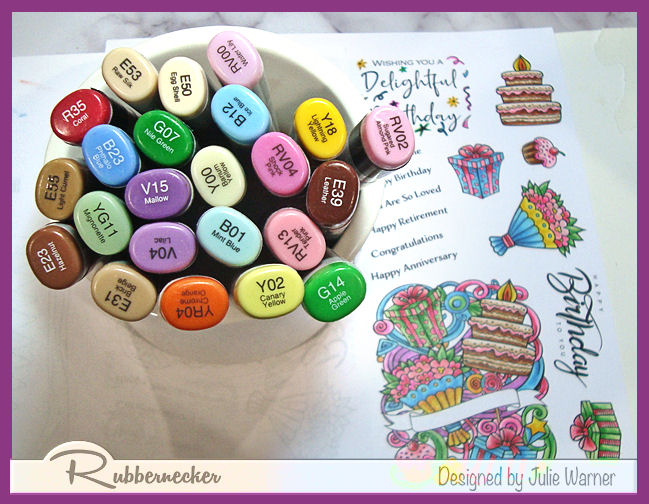
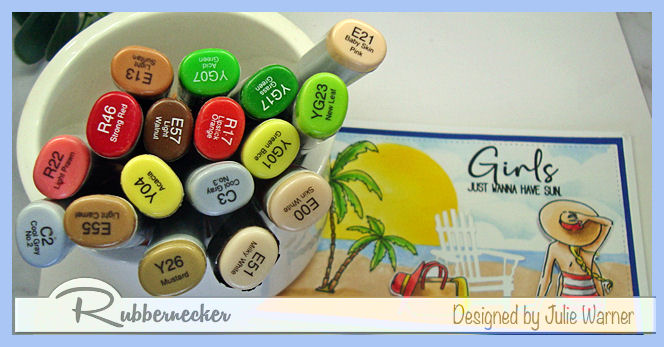
Here are the Copics I used:
Thanks so much for stopping by!
![]()
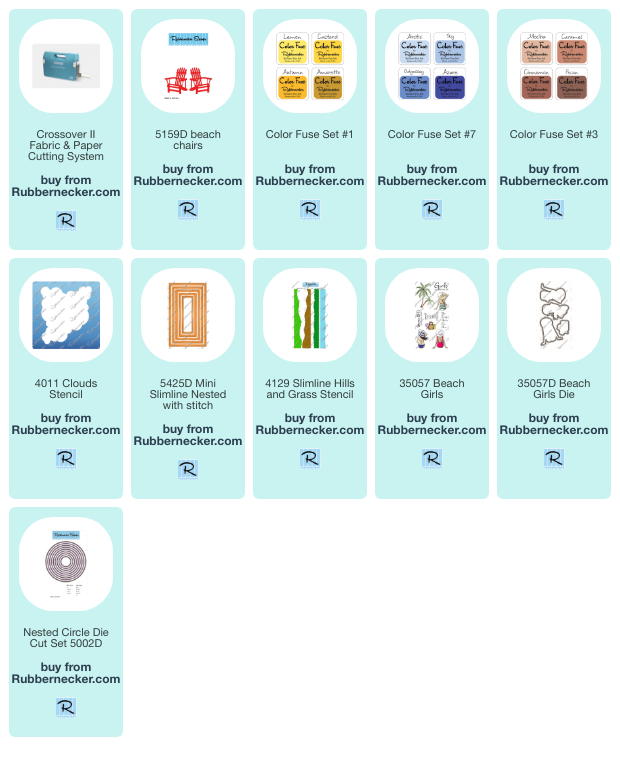
Supplies:
| Stamps: Rubbernecker Stamps: Beach Girls set |
| Paper: Staples 110# white, royal blue |
| Ink: VersaClair nocturne, Rubbernecker Stamps: Color Fuse ink set #1, set #3, set #7 |
| Accessories: Rubbernecker Stamps: Mini Slimline Stitch, Beach Chairs, Beach Girl, Circle (used for sun reverse mask) dies, Clouds, Hills Grass Stencils, MISTI, Copic markers |

|

|

|

|

|

|
You might also like: