• Tag Archives ocean
  • Splish Splash and a Mini Tutorial

    Julie Warner - justwritedesigns https://thewritestuff.justwritedesigns.com/

    Happy Friday!

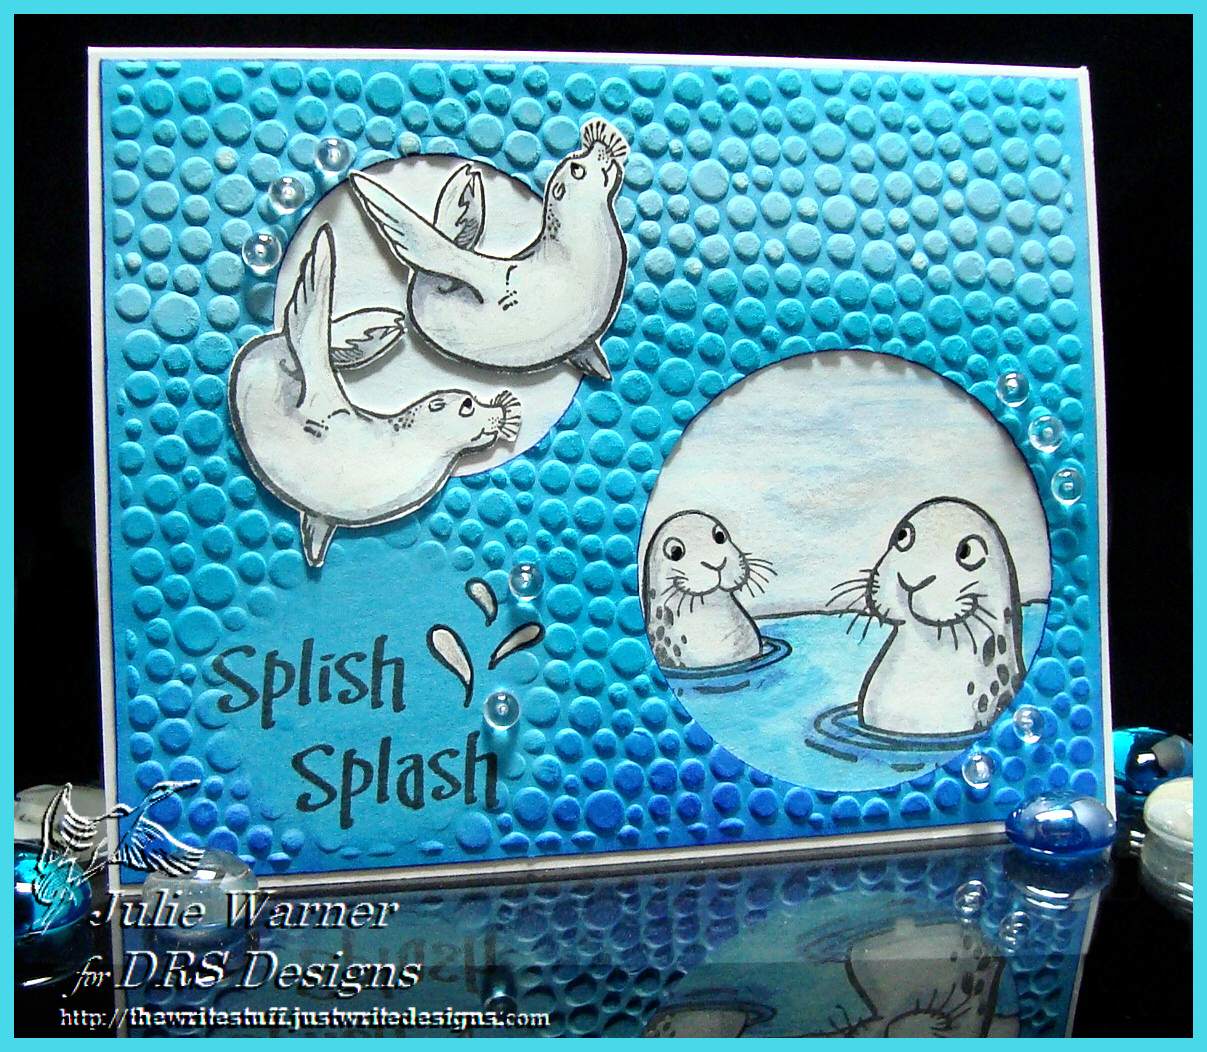
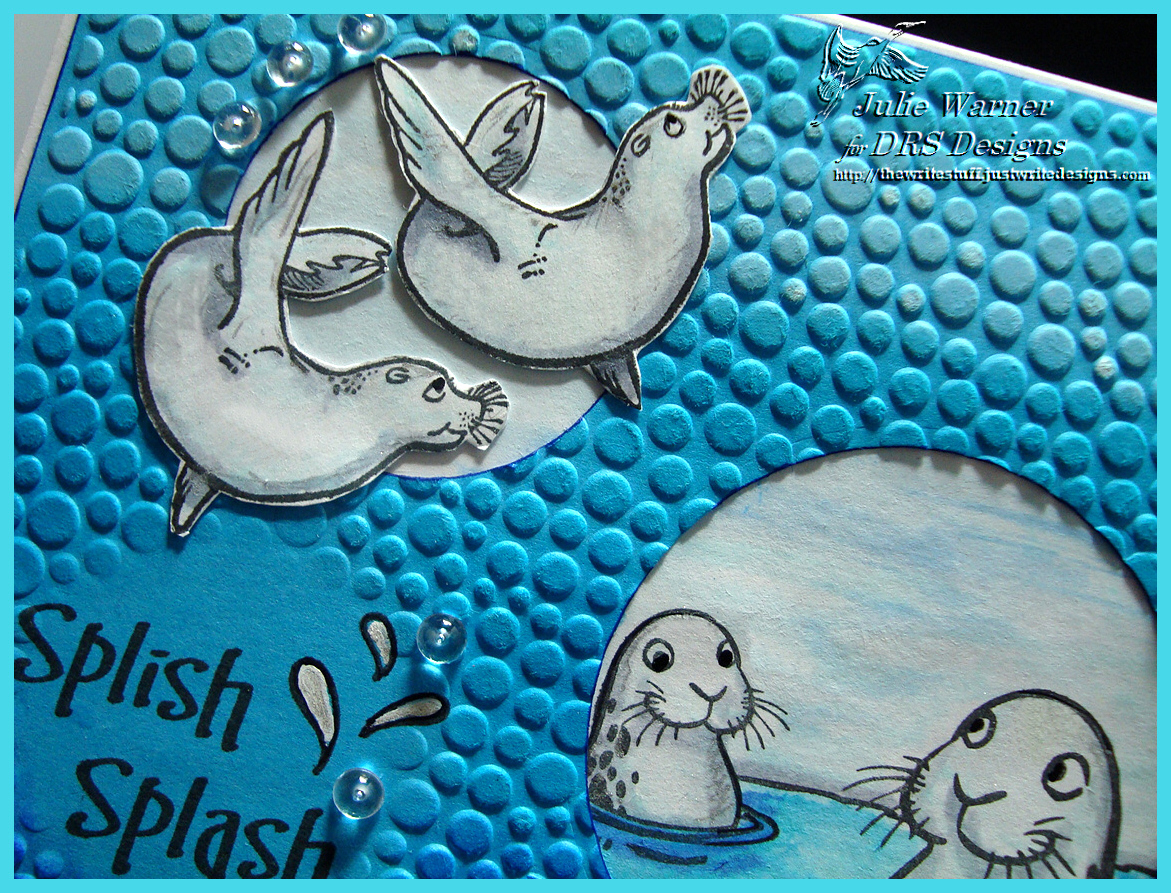
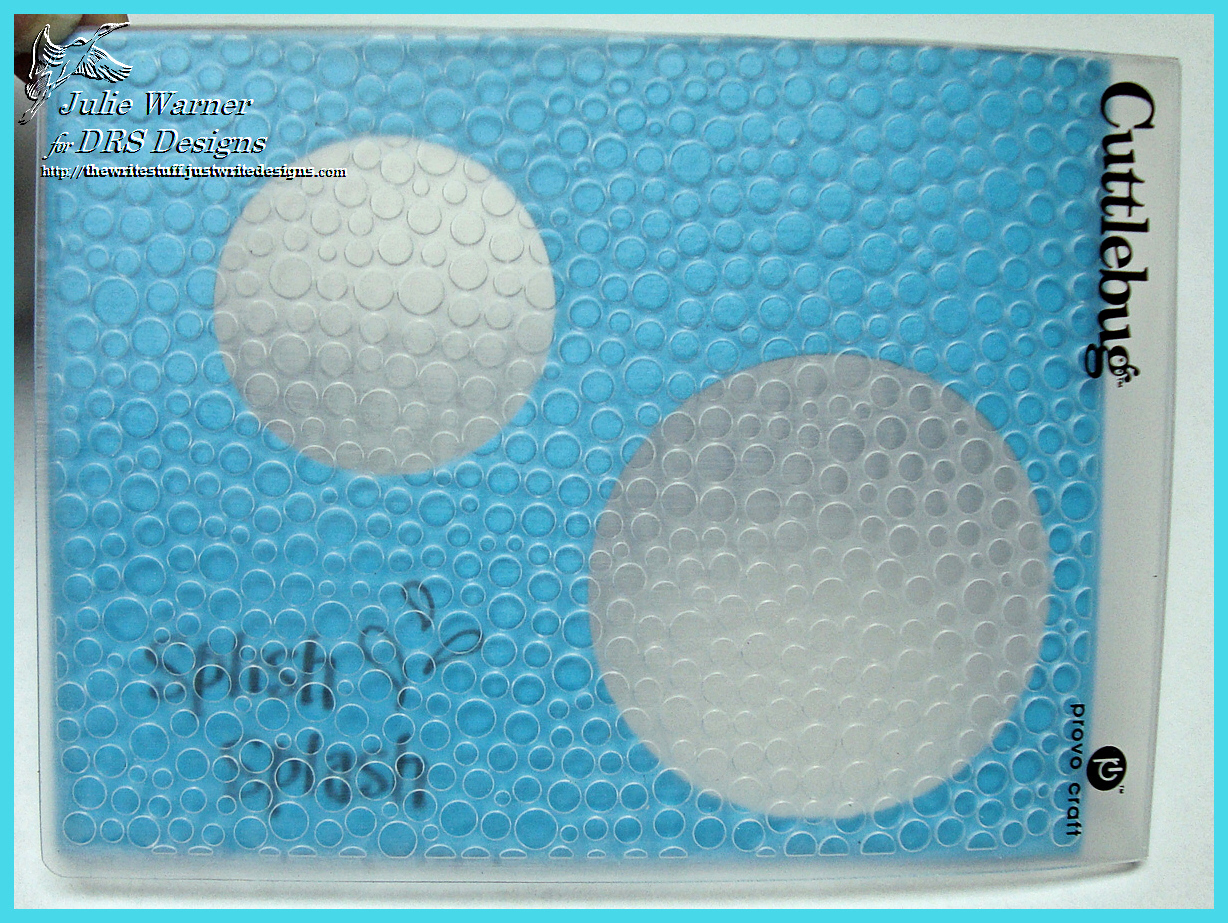
    Today I’d like share a card and a quick little mini tutorial. The images are all from DRS Designs. The otters and seals were stamped on white c/s and the seals were cut out. For the bubble frame, I decided where to put the circles in the turquoise c/s and die cut them. Then I stamped the sentiment. Now this is where the mini tutorial comes in. I wanted to use an embossing folder on the turquoise but I also wanted to NOT emboss the sentiment. In case you’ve ever wanted to do this and don’t know how, here’s the skinny on the technique. Honestly, it’s sooo easy!
    Julie Warner - justwritedesigns https://thewritestuff.justwritedesigns.com/
    First, place the card stock you want to emboss in the folder the way you want it, but don’t emboss yet.

    Julie Warner - justwritedesigns https://thewritestuff.justwritedesigns.com/

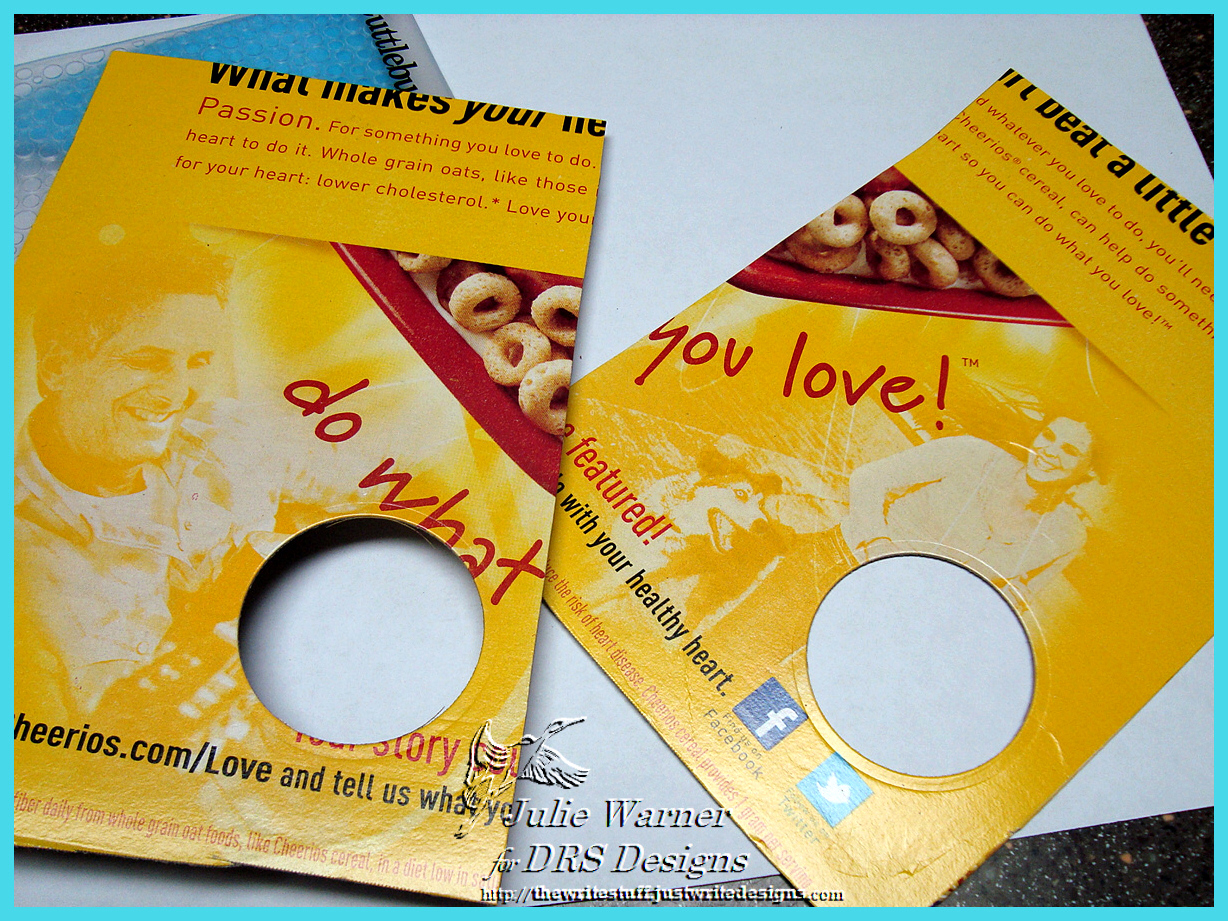
    Next, take two pieces of cardboard (I’m using a cereal box) and die cut the size opening you need to fit around your sentiment… it can be any shape, mine just happens to be a circle. Make sure to try and line these up in the same place on both so that the cardboard will cover everything except the area around the sentiment (or where you want the blank spot).

    Julie Warner - justwritedesigns https://thewritestuff.justwritedesigns.com/

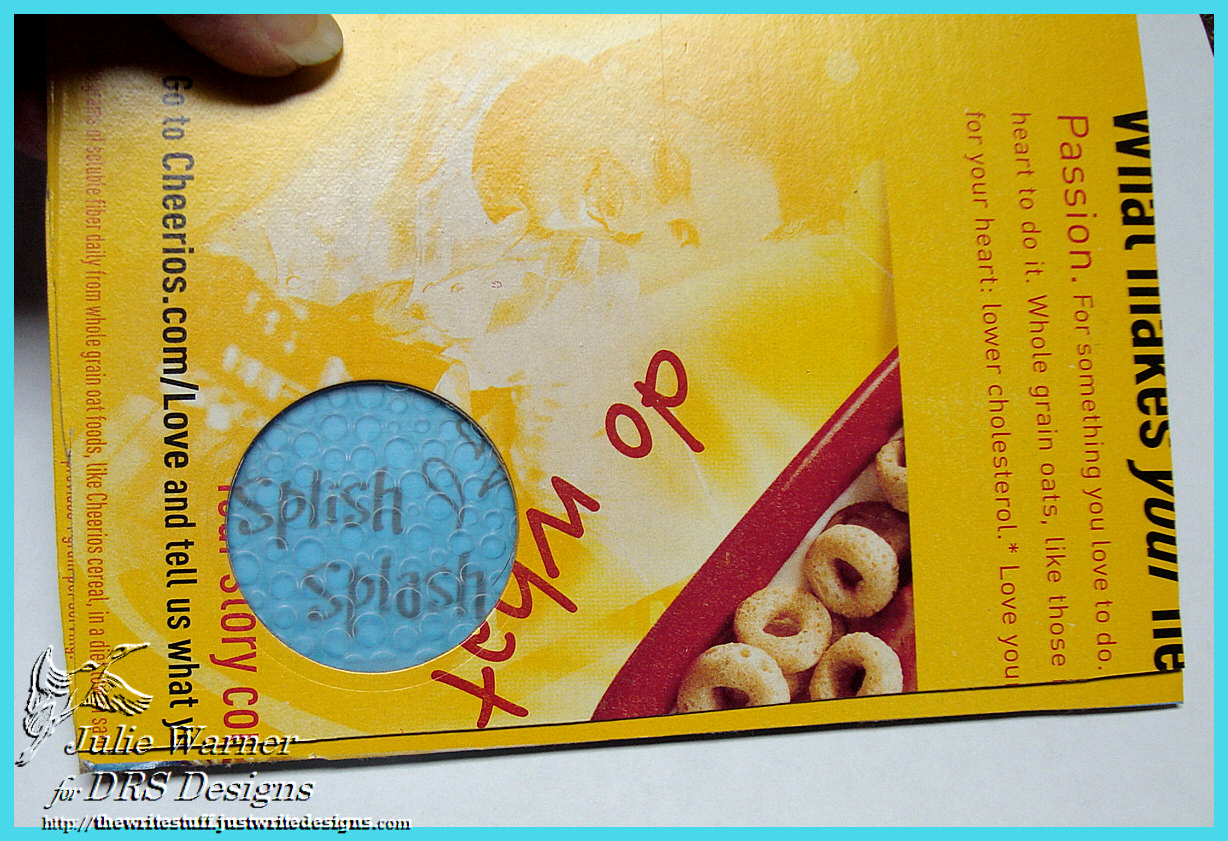
    Line up and stack your 2 pieces of cardboard on top of each other and position them as shown on top of the closed embossing folder, so that only the sentiment shows through. You shouldn’t be able to see anything else. Run this sandwich through your embossing machine. Note: I use an original Sizzix so I went with 2 pieces of cardboard. If you use a different machine, you may be able to only use 1 piece. Try it and see 🙂

    Julie Warner - justwritedesigns https://thewritestuff.justwritedesigns.com/

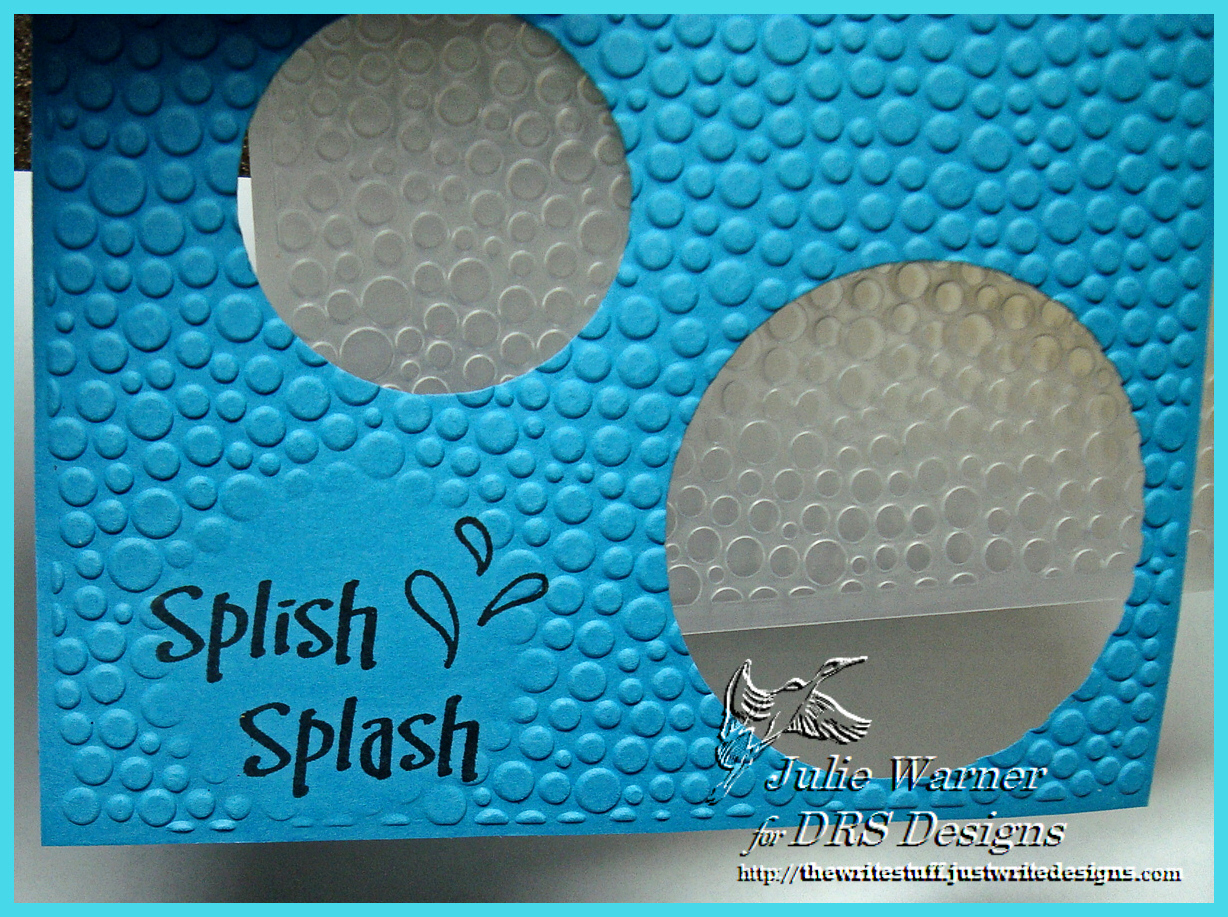
    Success! Here is my turquoise card stock, just the way I wanted.

    Julie Warner - justwritedesigns https://thewritestuff.justwritedesigns.com/

    A little close up of the finished card. After I embossed, I used a blue rainbow ink pad and a white pigment pad and sponged on a little more color in bands. Then I placed it over the background w/ the otters and positioned my cut out seals in the upper circle. The finished card is 5.50 x 4.25.

    Thanks so much for stopping by! Have a great weekend!


    Supplies:

    Stamps: DRS Designs
    Paper: Neenah white, turquoise
    Ink: Ancient Page coal, Kaleidacolor blue breeze, Colorbox frost white pigment
    Accessories: Spellbinders circle dies, Cuttlebug tiny bubbles embossing folders, Tombow markers, white gel pen, tiny dew drops (aka: floral filler from craft store), cardboard

  • Smooth Sailing Wooden Ship

    Julie Warner-justwritedesigns-The Write Stuff

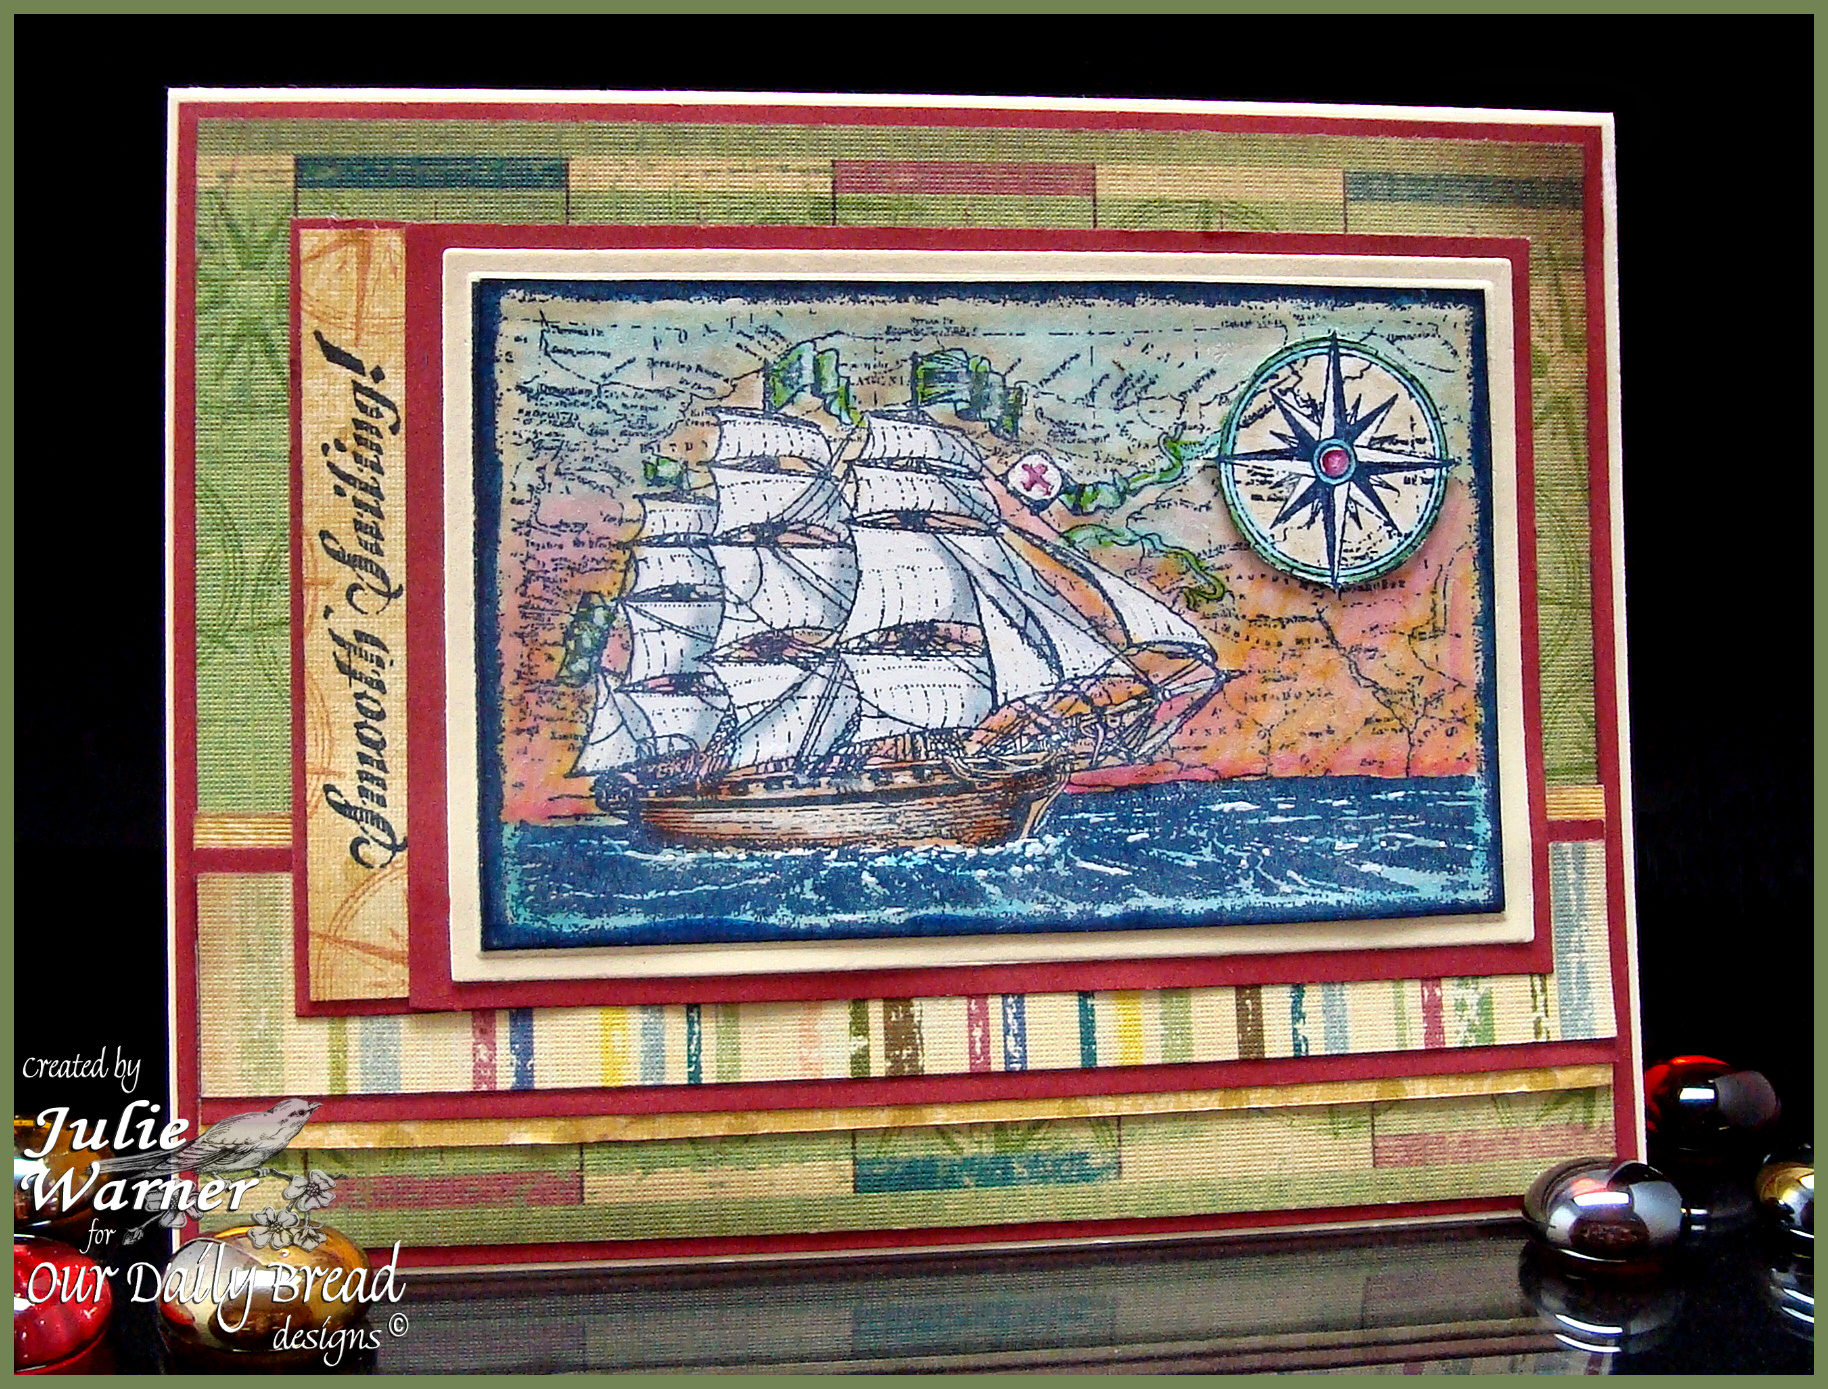
    Happy Friday! For today’s Free for All Challenge (F4A124), we are to use something ‘wood”, image or actual…whatever! So I’m using a “wooden ship” image. It’s new from Our Daily Bread designs and my new fave image.

    Julie Warner-justwritedesigns-The Write Stuff
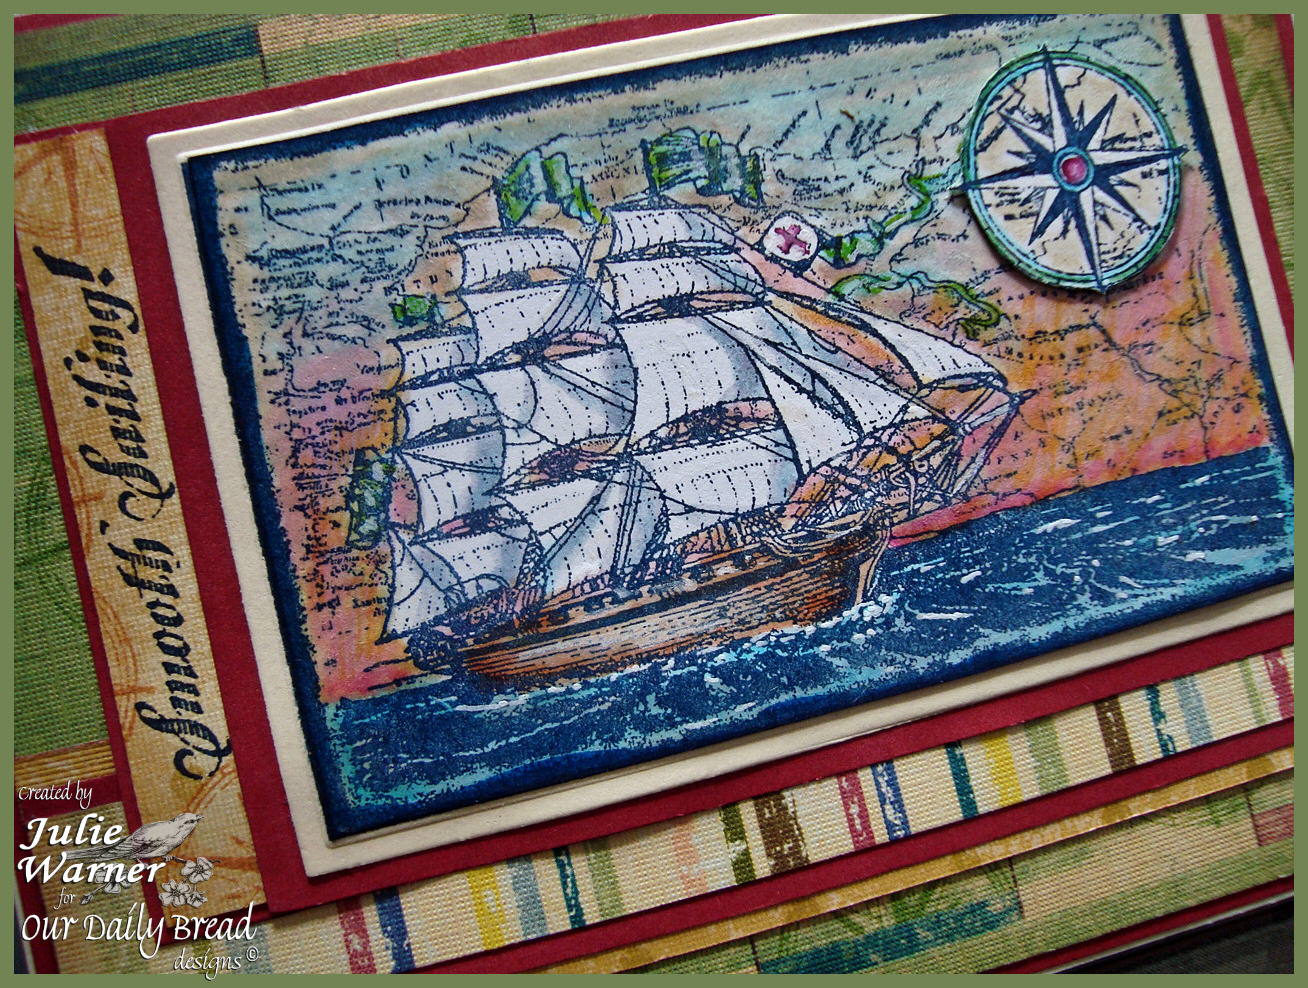
    The ship scene was stamped on white, water colored w/ markers, trimmed closely and attached to a piece of vanilla c/s that I die cut and resized to fit the image. The sentiment was stamped on a piece of the dp w/ the indigo ink and the compass was stamped w/ the tea dye ink.

    The rest is all dp from a big 12×12 pad but the only name I can see on it is ATD but I liked the colors and textured papers and thought they went well w/ my vintage looking image. On the green section, I stamped the compass repeatedly with the bamboo ink then cut it in half so I could have the bands of color across the top and bottom. I hid the seam behind a striped band of dp, layered on the cranberry and a piece of gold (it’s the reverse side of the green).  The finished card is 5.50 x 4.25.

    Thanks so much for stopping by!


    Supplies:

    Stamps:ODBD – Surging Sea, Smooth Sailing
    Paper: Neenah white, vanilla, cranberry, dp (ATD)
    Ink: Ancient Page indigo, Distress Ink tea dye, Memento bamboo leaves
    Accessories: Spellbinders rectangle die, Tombow markers, water brush

  • ODBD July Release Blog Hop!

    Julie Warner - justwritedesigns - https://thewritestuff.justwritedesigns.com

    Welcome to the Our Daily Bread designs July Release Blog Hop! 

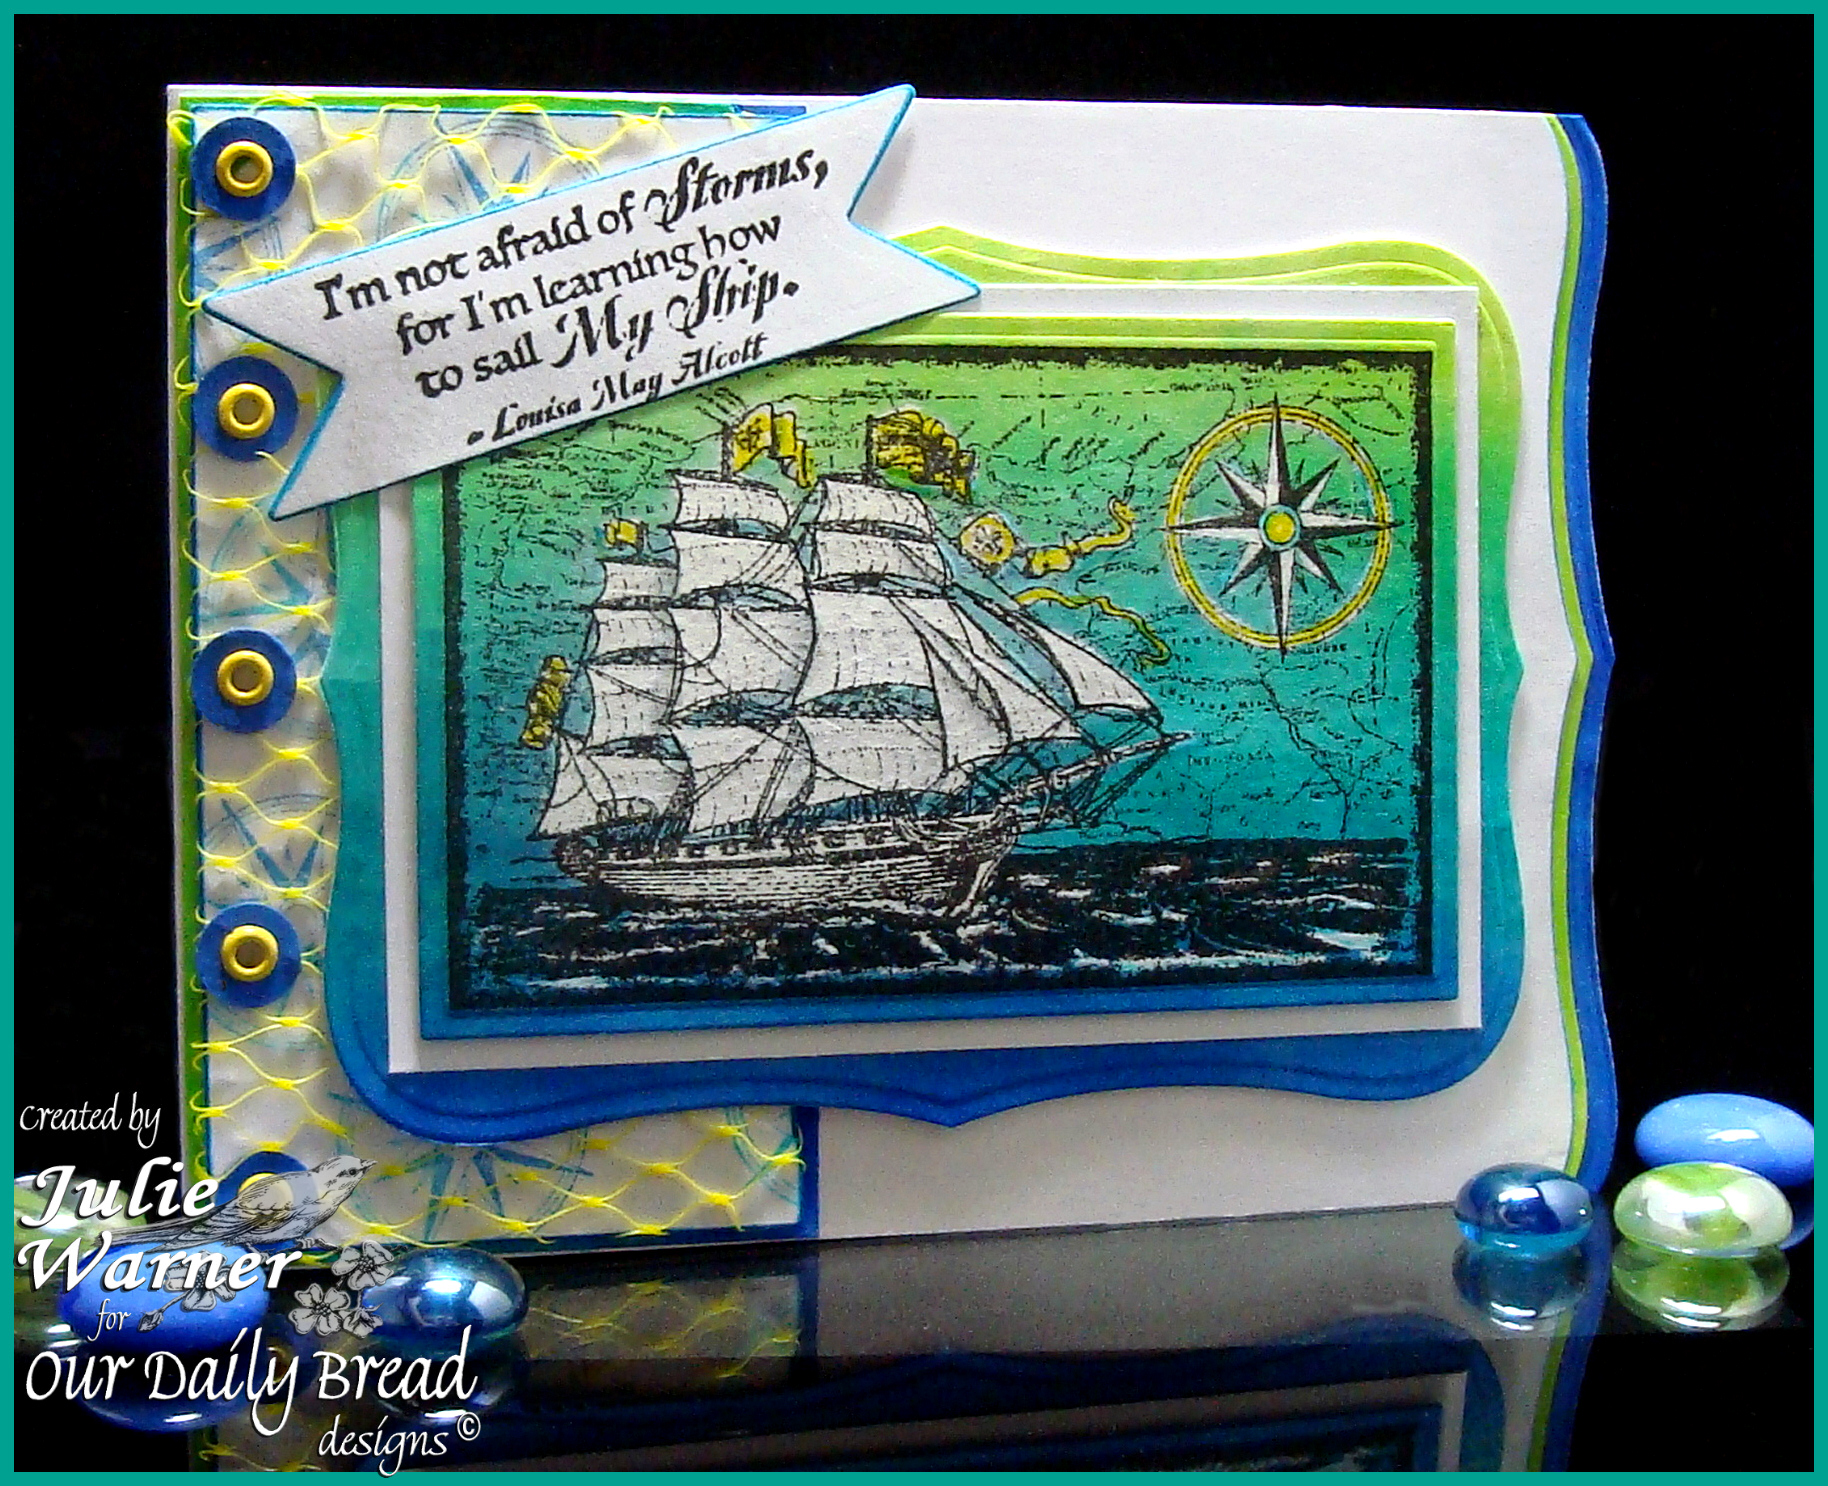
    I can’t tell you how much I love this new ship image! I’ve been wanting a great looking ship for so long and when Kelley showed us this Surging Sea set, I was over the moon! There’s just something about old sailing ships and nautical images that just float my boat, lol.  And it’s perfect for masculine cards.

    Julie Warner - justwritedesigns - https://thewritestuff.justwritedesigns.com

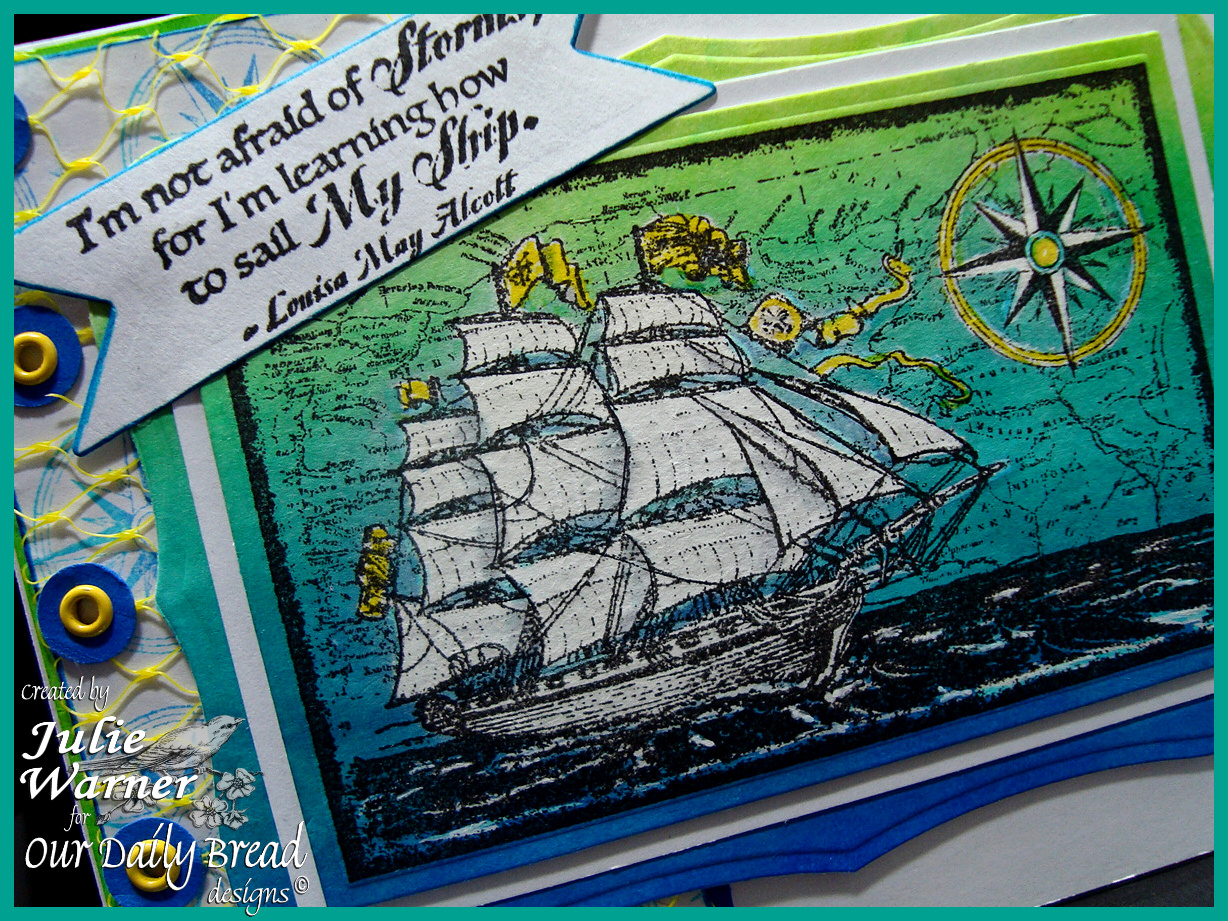
    For my card, I sponged on the rainbow of blues from a couple of Kaliedacolor ink pads, then stamped the image in permanent black ink. It was die cut using a rectangle die I resized to fit the image. These are some of my favorite colors and they work so well for a seafaring image. Since the Kpads are dye ink, they are highly bleachable. I used a tiny acrylic paintbrush to paint the bleach onto the ship and compass rose. After it dried, I added a little yellow to the flags. You have to wait until it’s completely dry before adding color w/ water based markers, or else it will just continue to bleach. You can help it along w/ a heat tool, but back away a little.

    The single compass rose was stamped on the vertical white strip and some netting from a bag of lemons was stretched over it (it looked like fish net to me). I used a circle punch for the little blue circles under the eyelets. The  greeting (from Smooth Sailing set) was die cut, but not embossed, using the Spellbinders nested pennant set. I cut to the half way point, then turned the die around and cut the flag point again on the opposite end.  The edge came about because I bent one corner of my 5.50 x 4.25 card and it looked funny. So I took one of the larger Labels 8 and cut the card edge and added some die cut strips of left over background.

    Thanks so much for stopping by!


    Supplies:

    Stamps: ODBD – Surging Sea, Smooth Sailing
    Paper: Neenah white, small scrap of cobalt blue
    Ink: Ancient Page coal, Kaleidacolor Caribbean Sea & Blue Breeze rainbow ink pads
    Accessories: Spellbinders labels 8, nested pennants, & rectangle dies, Tombow makers, lemon netting, yellow eyelets, 1/4″ circle punch, bleach & small acrylic paintbrush