• Tag Archives faux brads
  • Faux Brad Tutorial

    I frequently make faux brads for my cards. Apart from liking the way they look, I find they go through the mail easier, don’t add a lot of weight and I don’t have the prongs to worry about. I hate it when they stick out or won’t allow the layers to lay flat. They can also be made to match by using the same card stock or designers paper used for the project. Usually I stick to 1/4″ but really, the size is only dependent upon the size of hole or circle punch you use.

    In my quest to find an easy, consistent way to achieve the distinct rounded shape of a brad, I came up with a little brad jig. I’ve tried a lot of different objects, but this seems to work the best. I made this new one for the tutorial as my old one was made from a cereal box and had a lot of colors and words on it. After I finished this, I went back and added some other sizes using my Japanese screw punch.

    Before I show you how to make the faux brad, I need to show you how to make the Faux Brad Jig. It’s made from a piece of card board from a box. This is how it looks. (Click on any picture to enlarge)
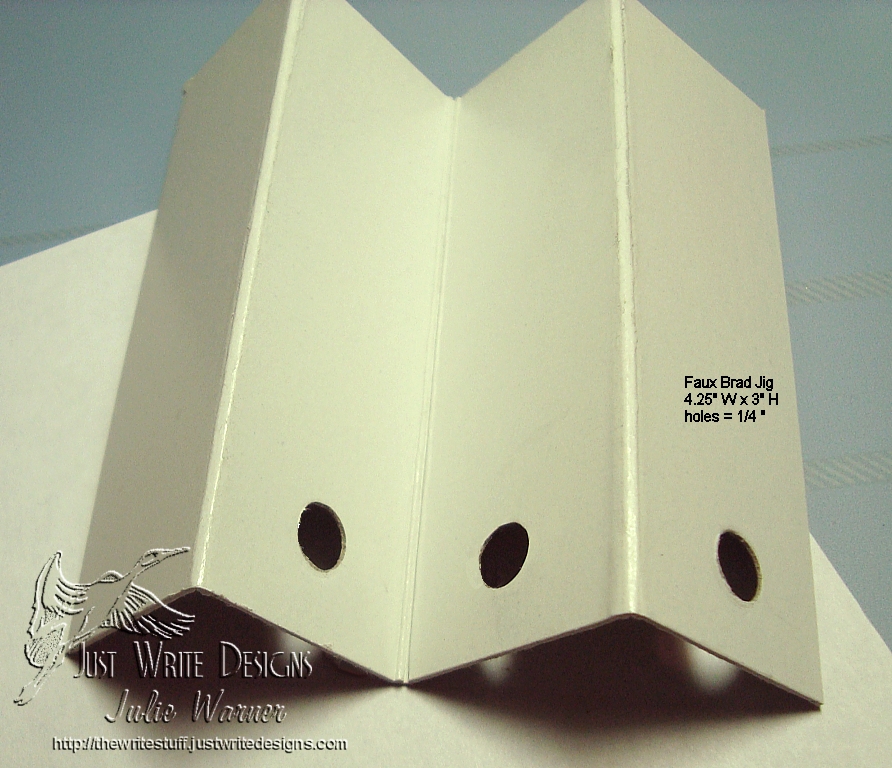
    Faux Brad Jig


    Step 1


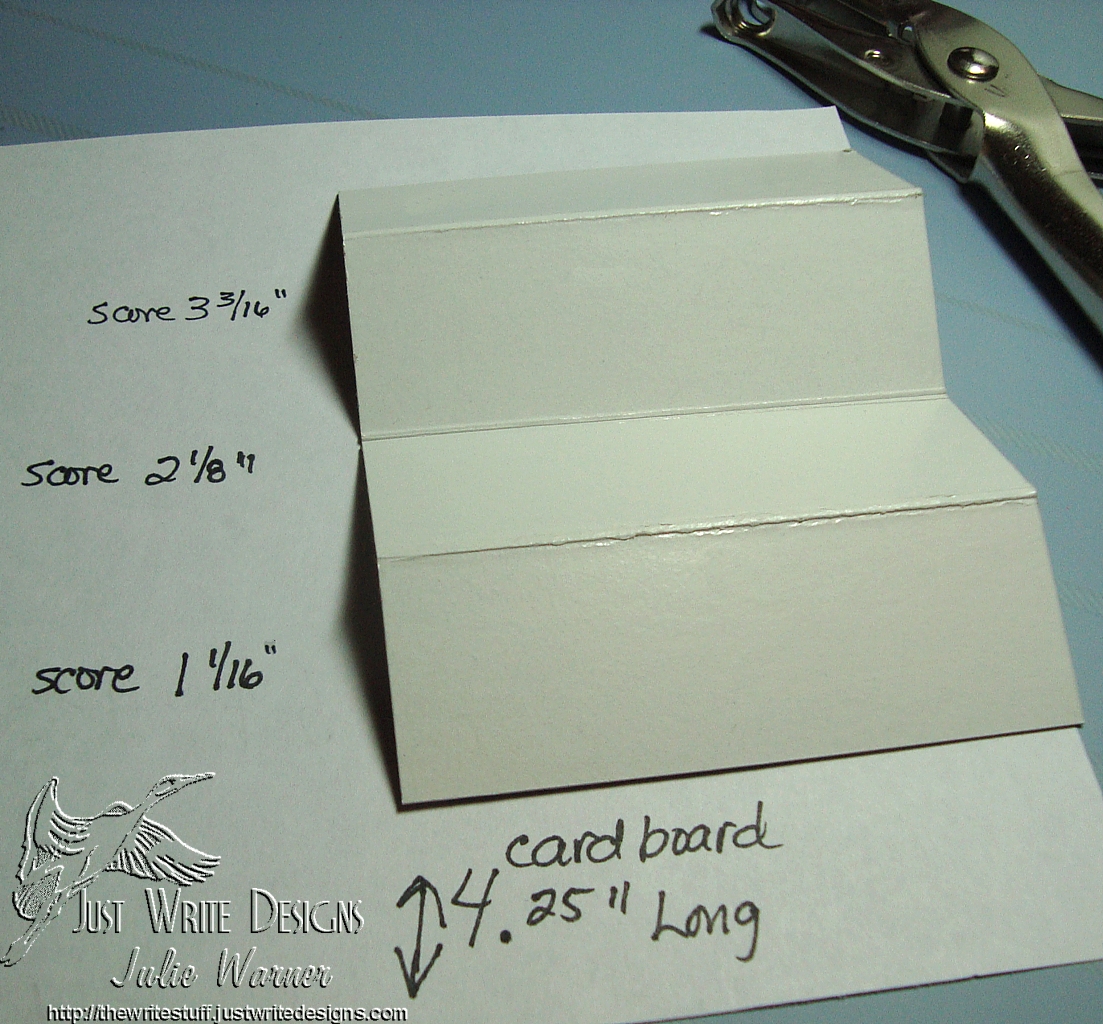
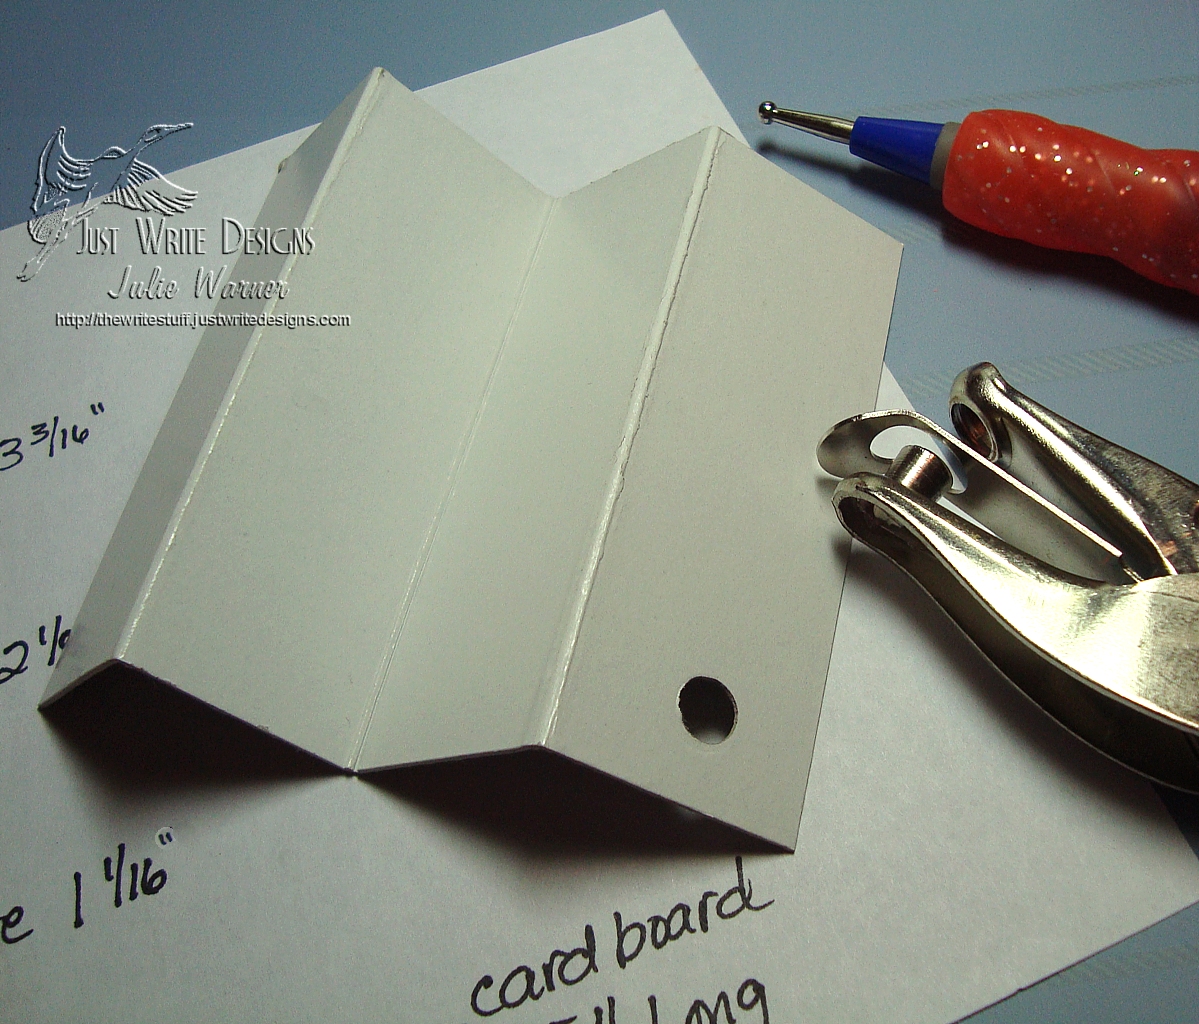
    Step 1: Cut a piece of card board and score where directed. I made my piece a little wider than I need for this, but I added more sizes next to it.
     

    Step 2


    Step 2: Use the punch to create a 1/4″ hole  halfway between bottom edge and first fold, as indicated.
     

    Steps 3 & 4


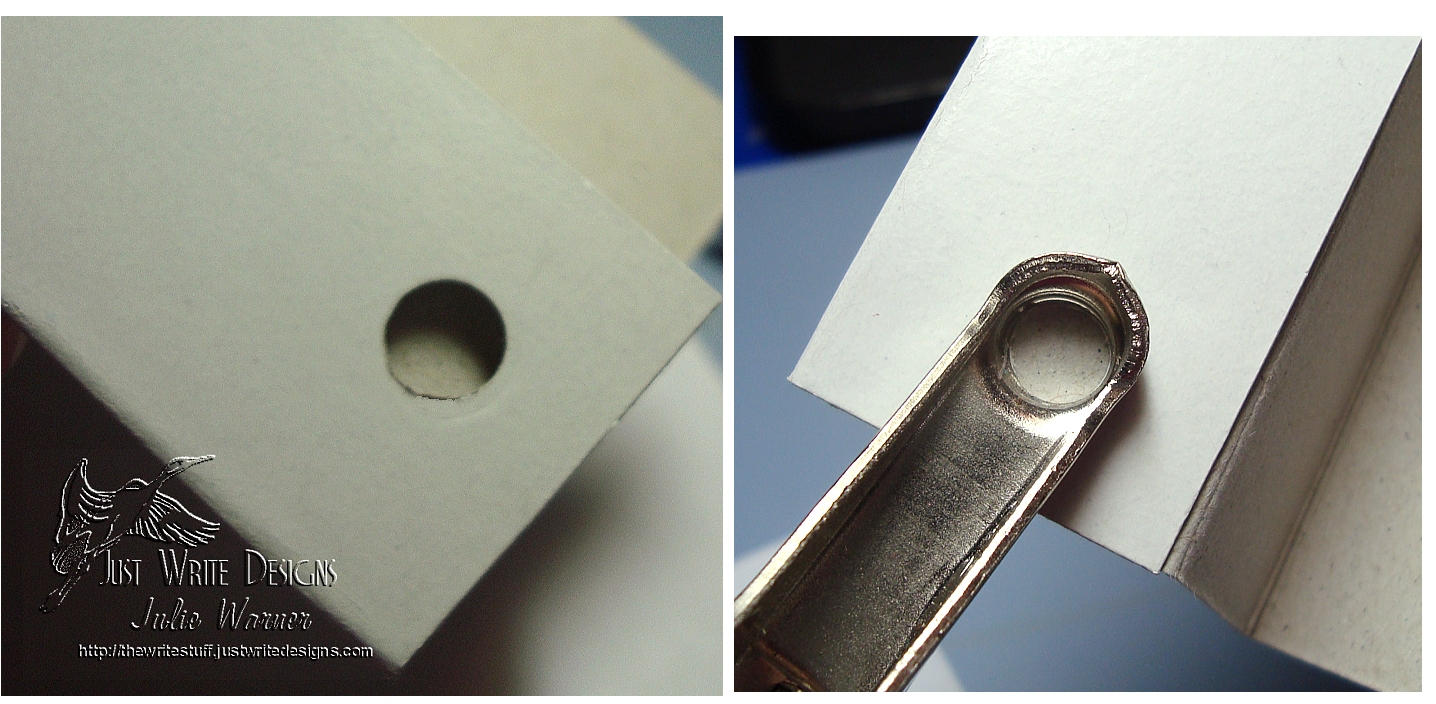
    Steps 3 & 4: Fold the punched layer over the next layer. Line up your punch over the punched hole so that you punch through the next layer in the same spot. (Turn your punch over to see the hole.) Repeat this step on the 3rd layer. Leave the 4th layer unpunched.  Your Faux Brad Jig should look like the first picture. If you made your jig this size, you will have room to add more sizes, if you wish.
     

    Supplies for Faux Brads


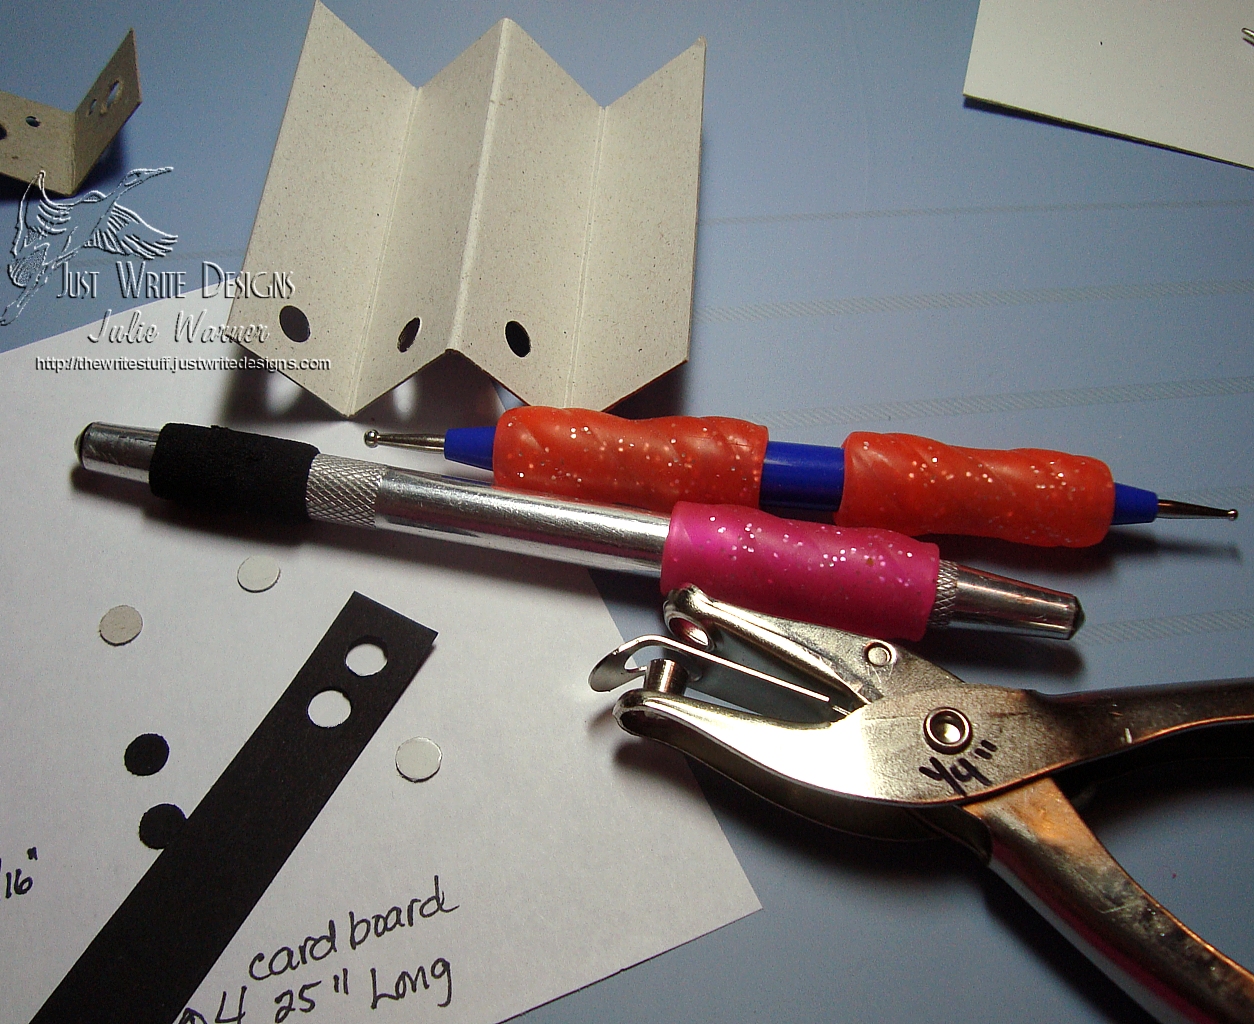
    To make the Faux Brads, you’ll need your Faux Brad Jig, 1/4″ hole punch, card stock, scrap card  board, glue, stylus (I use the two shown: the blue one is by Fiskars and the large rolling ball silver one says Chatterbox on the side. I put some of those squishy grips for pencils on them to make them a little more comfortable to handle.)
     

    Rounding the punched circle


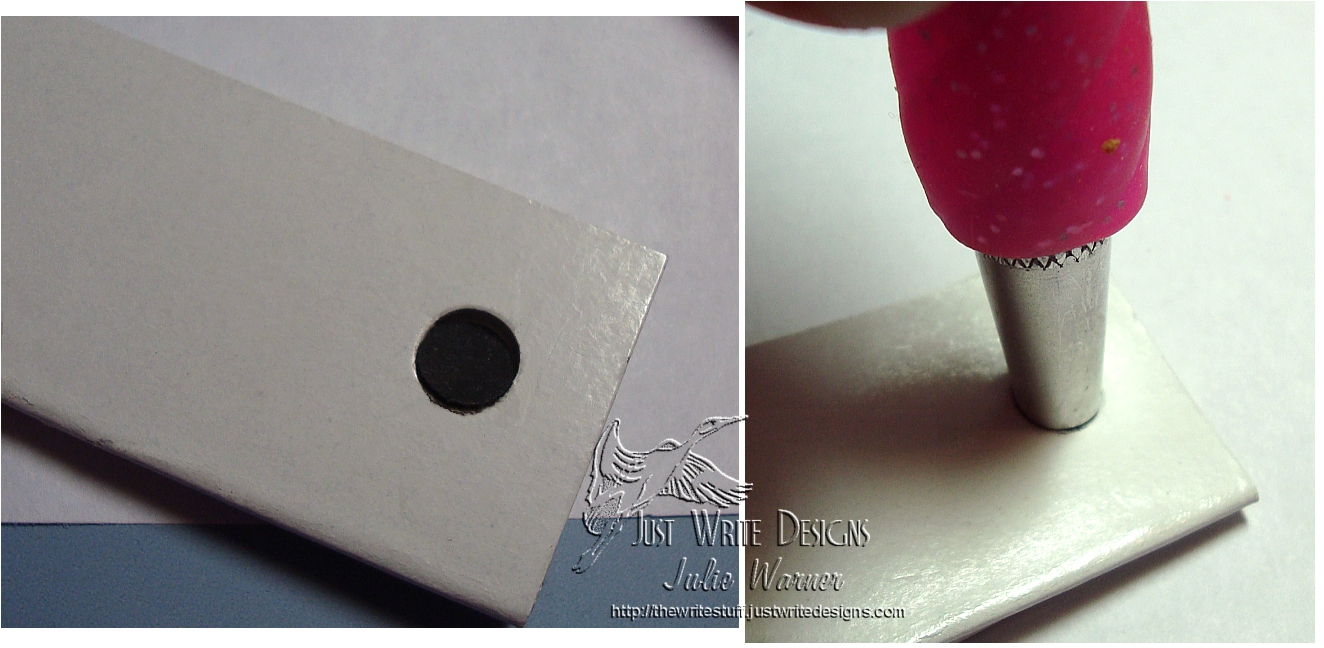
    First, punch a circle out of card stock. Fold up your jig completely and place the circle inside the hole. I use the largest round end of the silver rolling ball stylus to push the circle into the three layer deep hole. This will slightly round the edges of the circle.
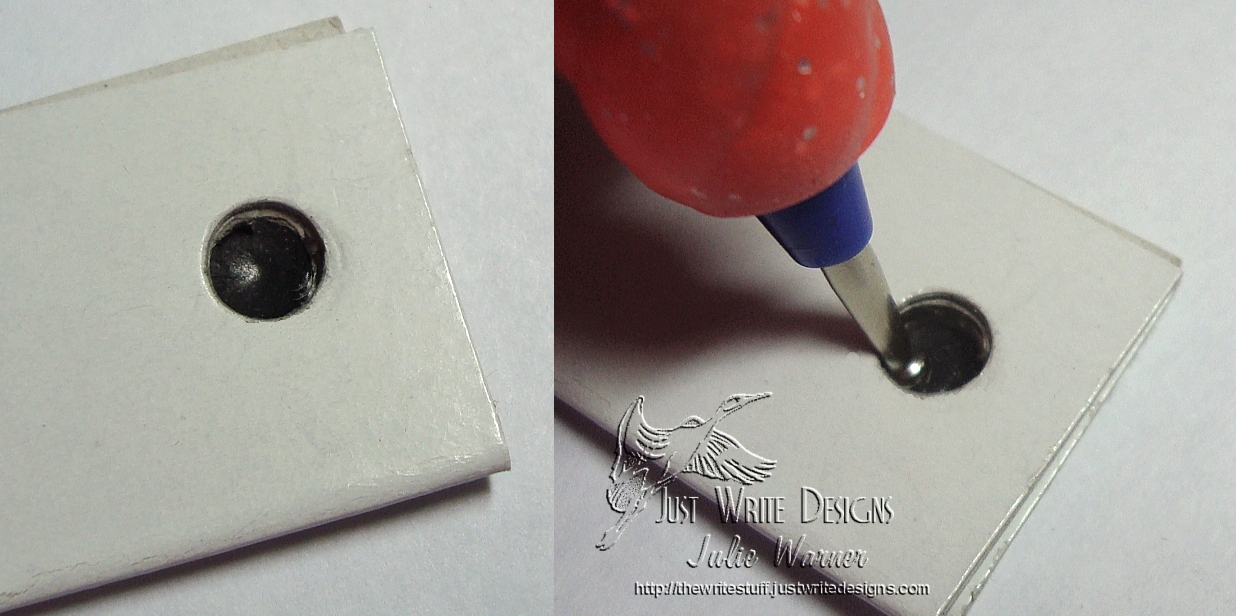
     

    Further rounding of Faux Brad


    You can see in the left photo, the Faux Brad is starting to take shape. Here, I switch to the smaller stylus, but I only use the largest end. I rotate the stylus inside the Faux Brad, concentrating on pushing the edges against the sides for maximum rounding.
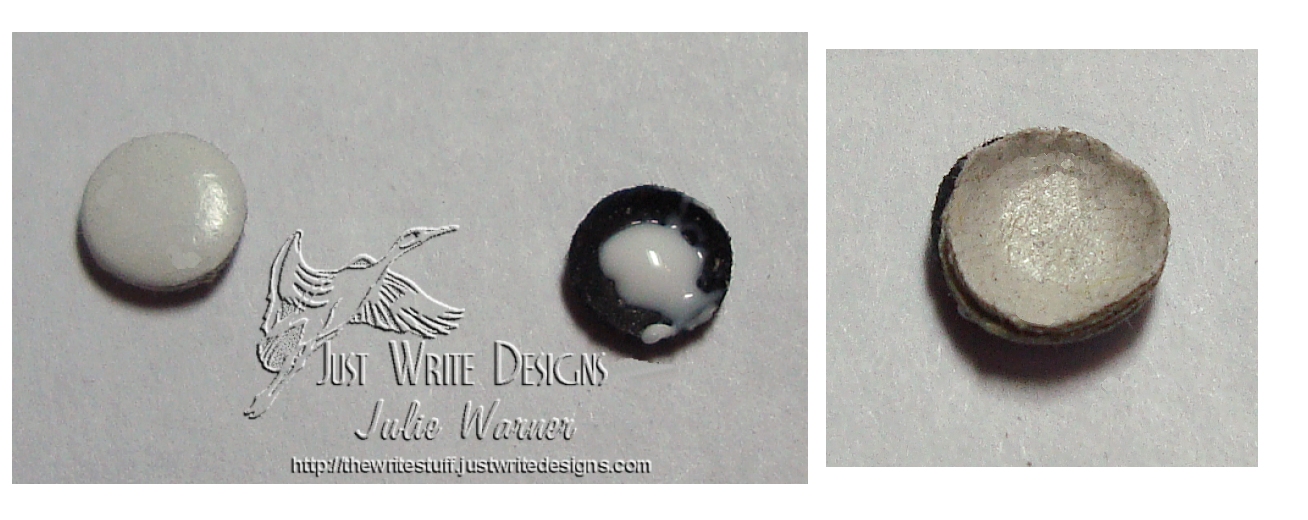
     

    Faux Brad with card board insert


    Make another brad shape out of a scrap of card board. You can use the same hole punch, but I usually use a size smaller to make sure it fits snugly inside the Faux Brad. You will need to round the card board circle before using a small amount of glue to attach it inside your Faux Brad.
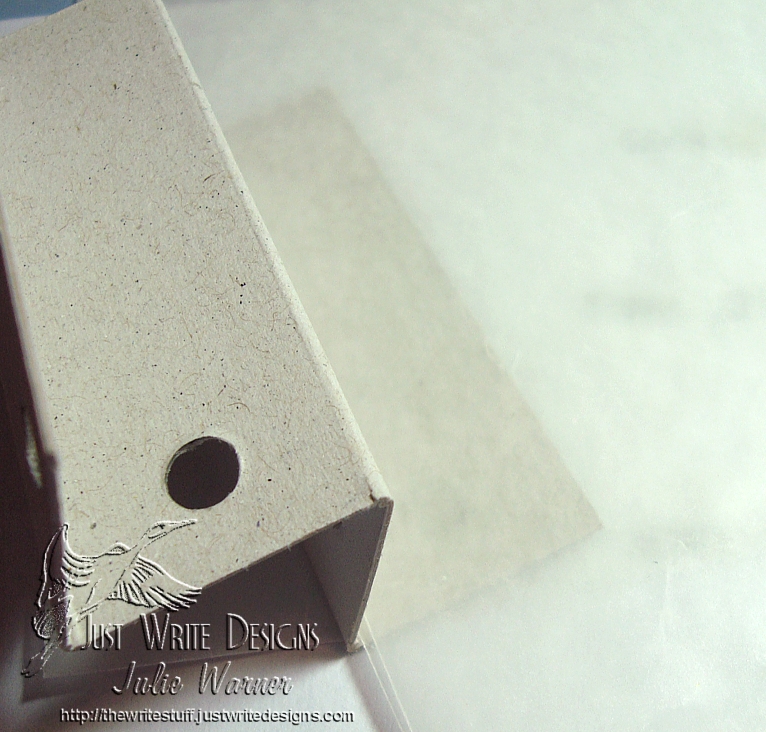
     

    Finishing Touch


    As a finishing touch, I place a piece of wax paper on the last (unpunched) fold of my Jig, place the Faux Brad back into the Jig and use the smaller stylus to ensure that the brad and the card board are firmly glued together. The wax paper keeps any excess glue from sticking to my Jig and it also adds a nice little shine to the brad by “waxing” it.
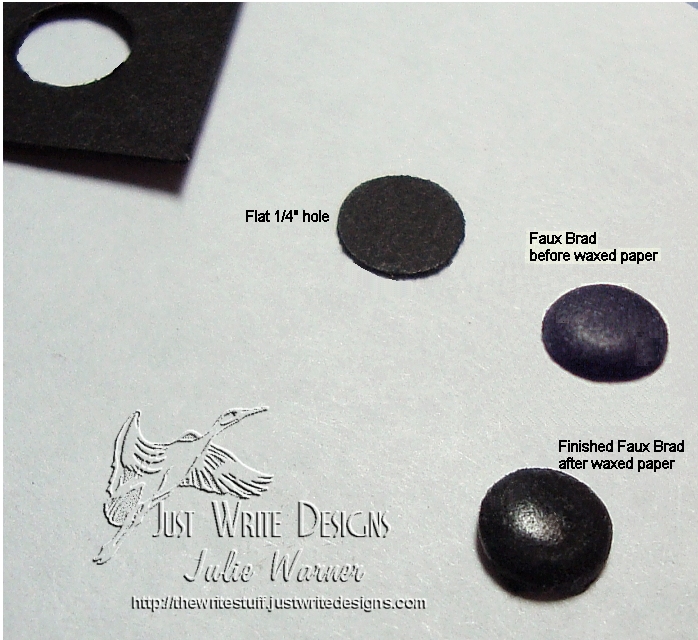
     

    Comparison


    I hope you’ve enjoyed my Faux Brad Tutorial and I hope you’ll give it a try.

    Thanks so much for stopping by! Your comments are always read and much appreciated!


    To see examples of cards using these Faux Brads, click HERE. A list will come up and you can click on any to see the card.

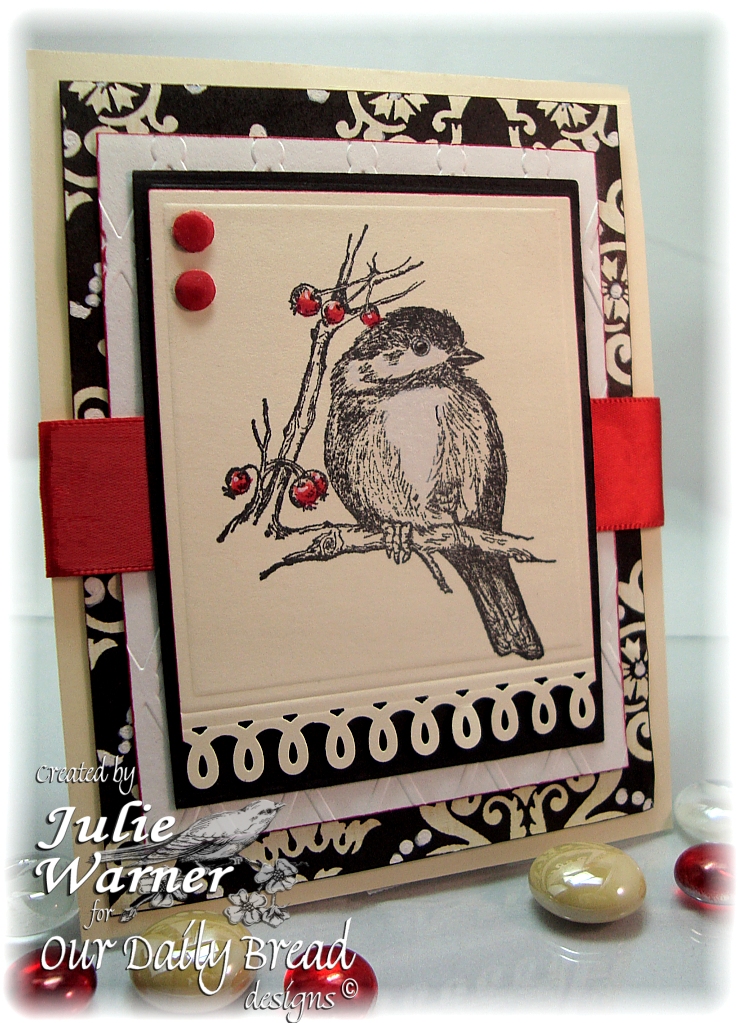


  • Little Chickadee

    Weekly-Favorite
    Happy Saturday!

    I made this for a couple of challenges at Splitcoast. First, Friday’s LSC260, to use a border punch and ribbon, and for today’s IC220.  I chose this Chicken Cushion for my inspiration. I used a pretty little Chickadee  stamp from Our Daily Bread Designs, and I used similar colors.

    The chickadee was stamped onto ivory c/s and I colored in the berries and added a little white to his chest w/ Prismacolor pencils. I used a loop punch across the bottom and cut the rest out using a Spellbinders rectangle Nestie. I was careful to only emboss the bottom and not cut it.  The white layer behing him was embossed using a Quickutz folder and it was lightly edged w/ a red marker. A layer of dp was added and a wide red satin ribbon and attached to a 4.25 x 5.5 (A2) ivory card. I made a couple of faux brads out of red c/s and added them in the upper left corner.

    Thanks so much for stopping by!

    Julie2 sig

    Supplies:
    stamps: ODBD – You Will Find Refuge
    paper: white, ivory, dp (The Paper Studio), small scrap of red linen
    ink: Ancient Page coal
    accessories: wide red satin ribbon, Prismacolor pencils, Martha Stewart loop border punch, Quickutz Diamond & Dots embossing folder, red marker, foam tape


  • Candlelight Christmas – FS146

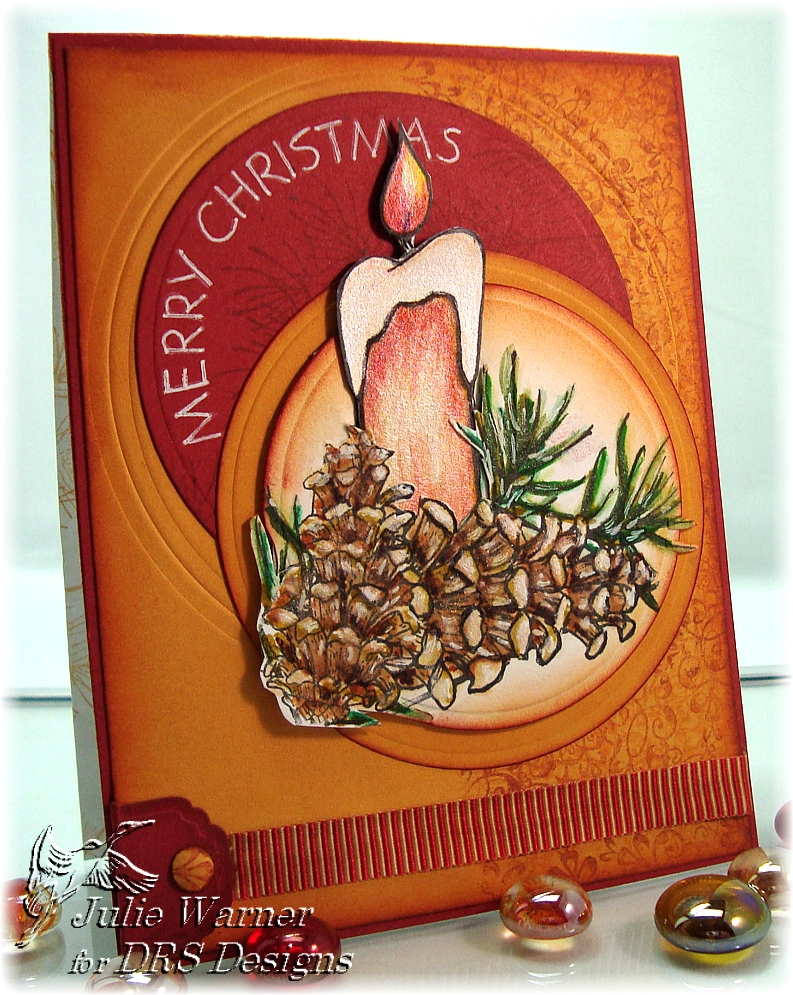
    Congrats to Birgit, the Featured Stamper today at SCS!  What a wonderful gallery she has. Lots of inspiration, but I finally picked one way back on page 9,  Peace. Candlelight Christmas 3977
    Weekly-Favorite

    I liked the candle, the layout and the warm colors, so I kept those. I changed the images, left off the embossing and used twinkling H2O’s to add a little sparkle to my centerpiece.

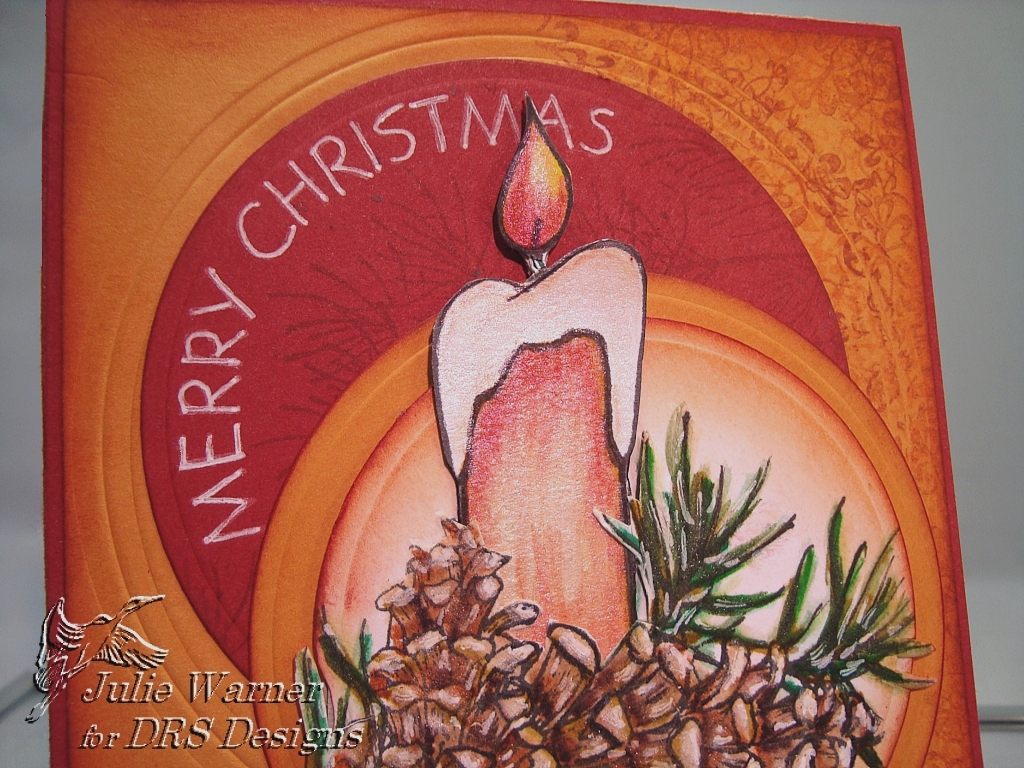
    All images are DRS Designs. I stamped the candle and the pinecone square (didn’t ink the square part, just the pine cone) and the candle on separate pieces of white c/s, colored them w/ markers then added some Twinkling H2O’s on top. I used the Out of the Box Nestie Tech to cut out the pine cone. The edges were sponged then  I cut around the top part of the pine cone and inserted the cut out candle.  It’s attached to a larger mustard circle.

    I stamped the greeting using alabaster chalk ink around the edge of a dk red confetti circle and the pine bough image w/ redwood ink. I embossed a larger Nestie circle offcenter on a piece of mustard c/s. I sponged the edges and stamped a filigree snowflake repeatedly w/ the different ink colors.

    Candlelight Christmas close up3974 a
    I didn’t have the right color ribbon, so took this red/white ribbed ribbon and colored it w/ a dk ochre marker. I used a small Labels 4 shape folded in half for the tab and punched a faux brad to add on top.

    Thanks so much for stopping by!

    Supplies:
    stamps: DRS Designs
    paper: white, mustard, dk red confetti
    ink: Ancient Page coal, sunburst, redwood, Fluid Chalk alabaster
    accessories: Twinkling H2O’s, markers, blender, Spellbinders circle and Labels 4 Nesties, 1/4 inch hole punch, ribbon