This tutorial came about after an ongoing discussion with Roxie at SCS about our methods of doing the Out of the Box Nestie Technique. We each were using this technique, we just went about it differently. (6/23/10 Edited to add: Roxie now has a blog and here is her version of this technique.) I promised I would take some pictures to show my method.
(Click on any image to enlarge.)
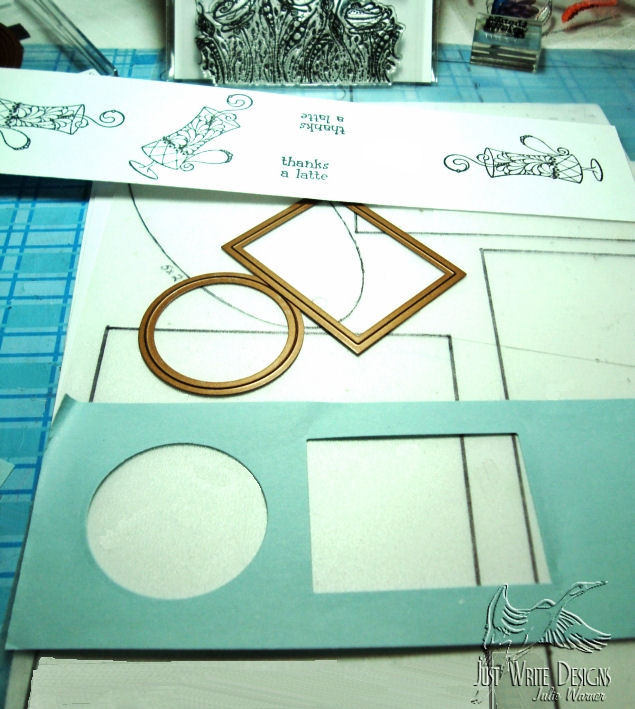
For Step 1, I stamped my image(s) and selected the Nestie shapes I might want to use. I selected the sizes of the circle and rectangle that were slightly smaller than my image in order to get the Out of the Box look I want. Usually, I just cut this frame out of white copy paper, but I’m using a light blue in order to be more visible here. The only reason I use a cut template and not the actual die is because of the 1/8″ difference in size. The inside of the die will be 1/8″ further into your image than the template. Most of the time this won’t matter, but on some of the more intricate ones I’ve done, it did make a difference.
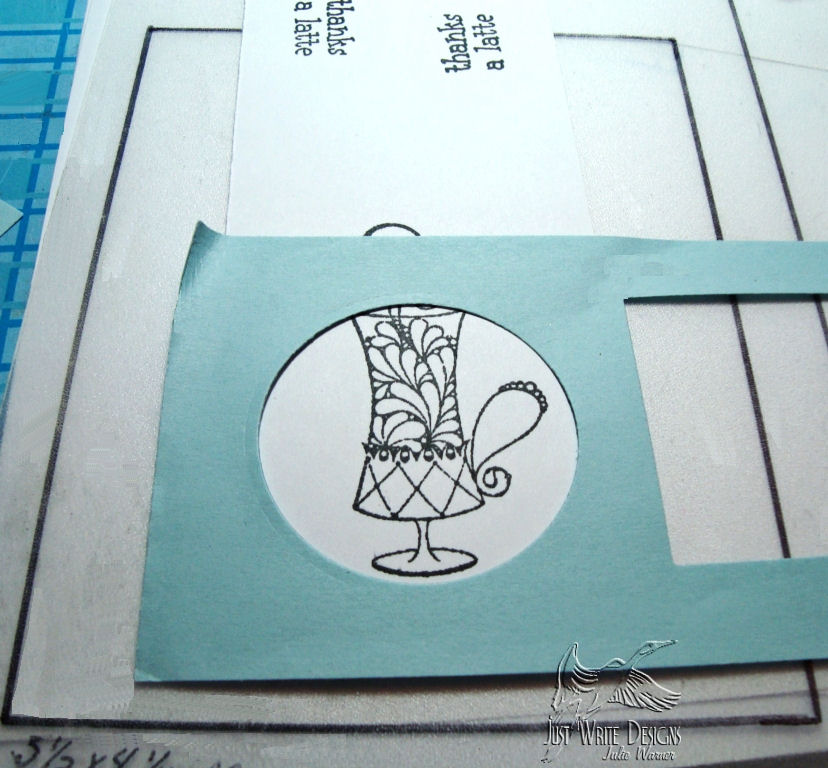
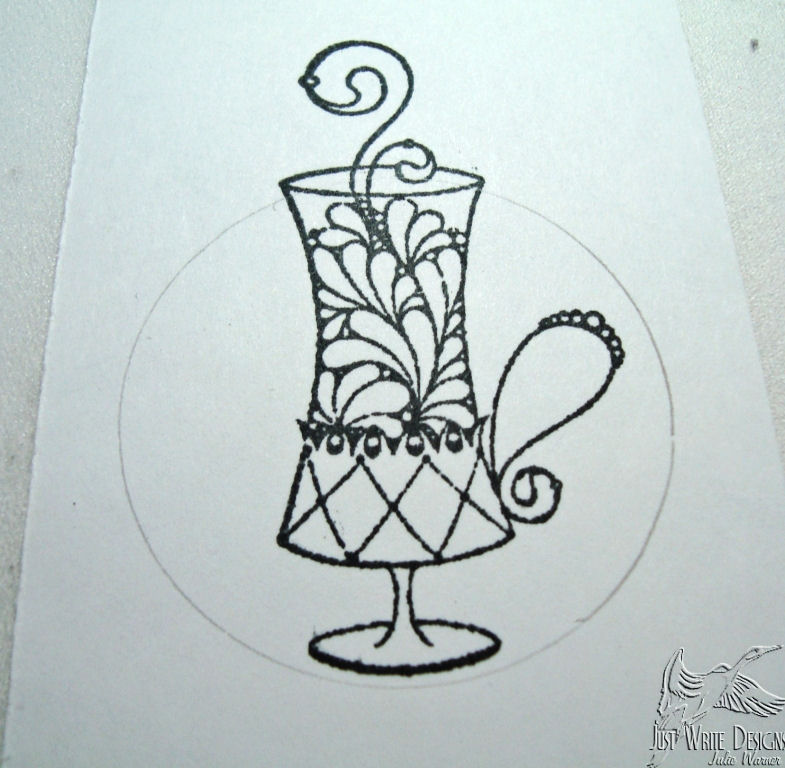
For Step 2, place the frame around the image and lightly trace the frame with a pencil.
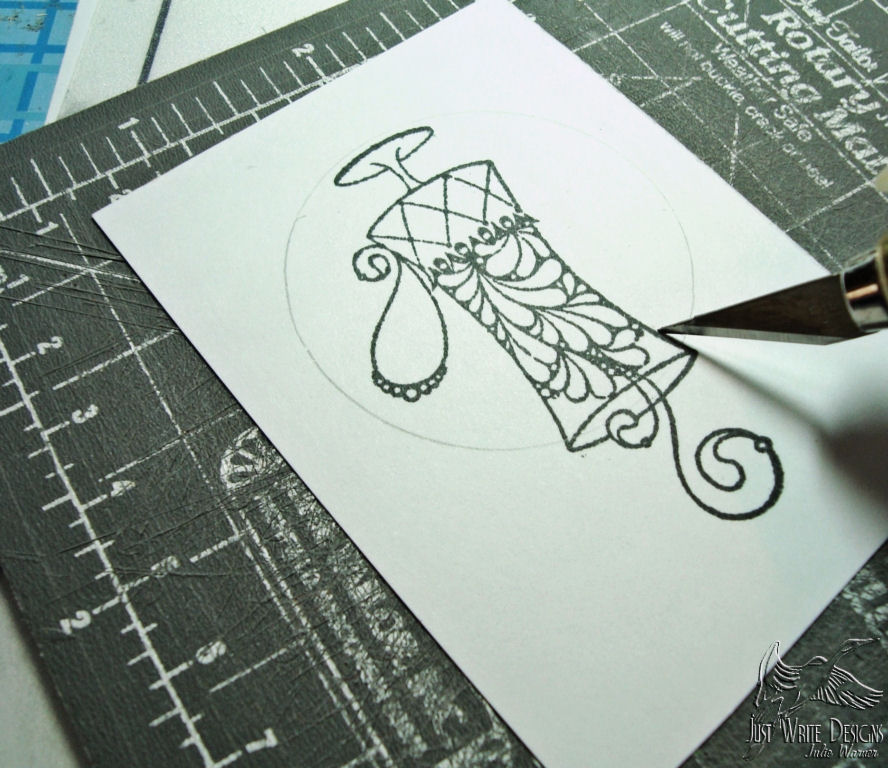
In Step 3, I use a craft knife to cut the areas which will be Out of the Box. In order to insert the Nestie die under this area, I have to start the cut inside the circle. I cut very close to the image outline and continue around the image to other side.
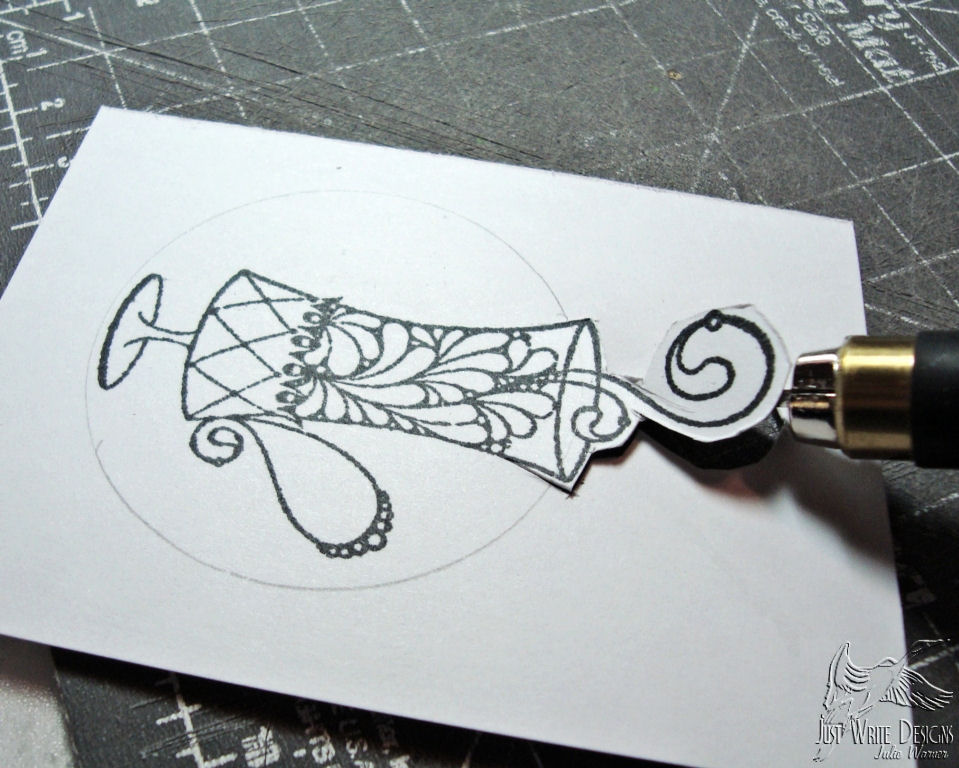
The Out of the Box area is cut. Note that the very top is just a rough cut for now. I don’t want it to be too unstable when I insert the Nestie die. I will go back and finish trimming this area with detail scissors after I’ve cut and embossed the Nestie circle.
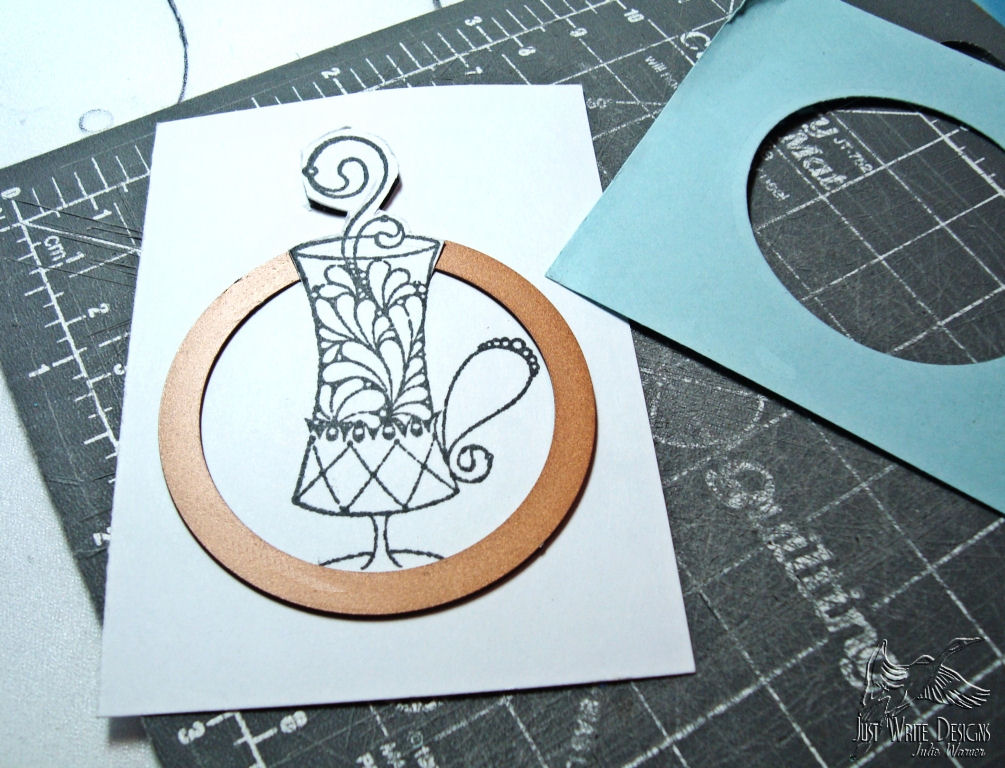
In Step 4, I insert the die under the Out of the Box area I’ve cut out. With the die under this area, it will not be cut or embossed. Test fit your die before cutting to make sure you have cut your image deep enough to allow the die to be inserted on your pencil lines.
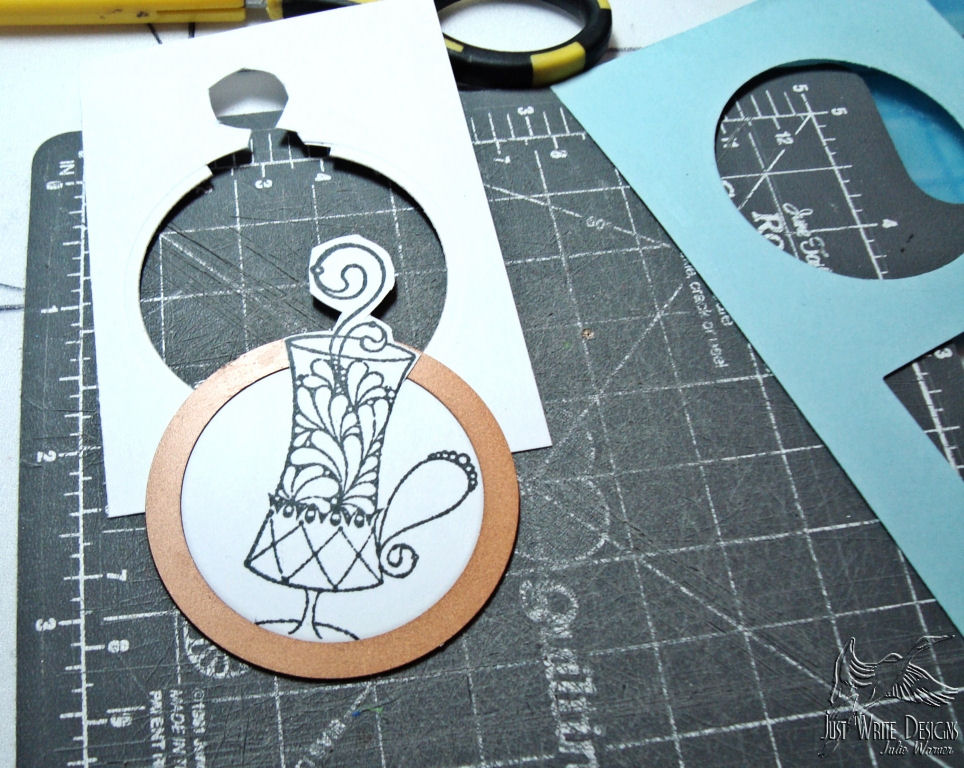
Now I will remove the die and finishing trimming the top area.
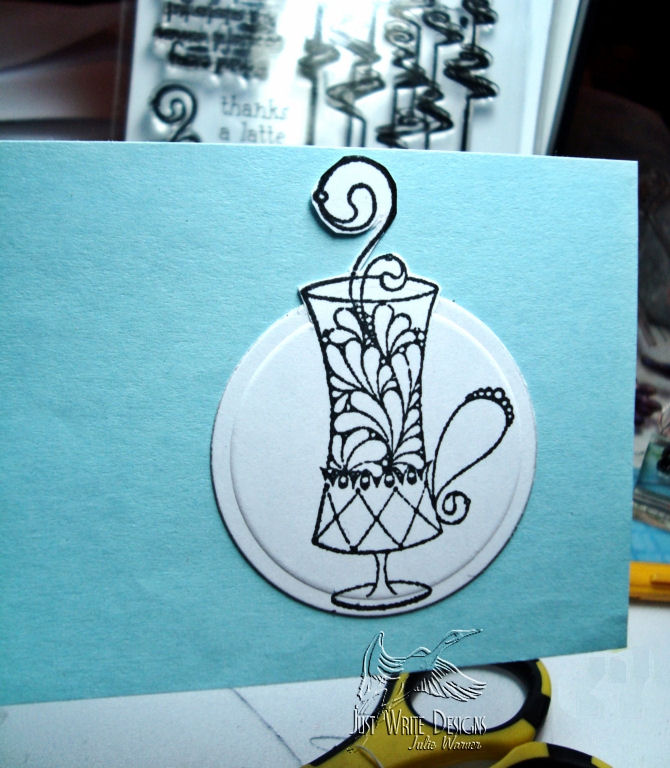
My Out of the Box is ready for coloring. It doesn’t really matter if you color your image before or after. I have done it both ways. With this method, it has worked the first time for me and I haven’t had to do it over. If my Out of the Box area has a lot of cutting inside the shape, I will usually add a little scotch tape to the back after it’s cut and embossed. This just stabilizes the area and really makes the cut disappear.
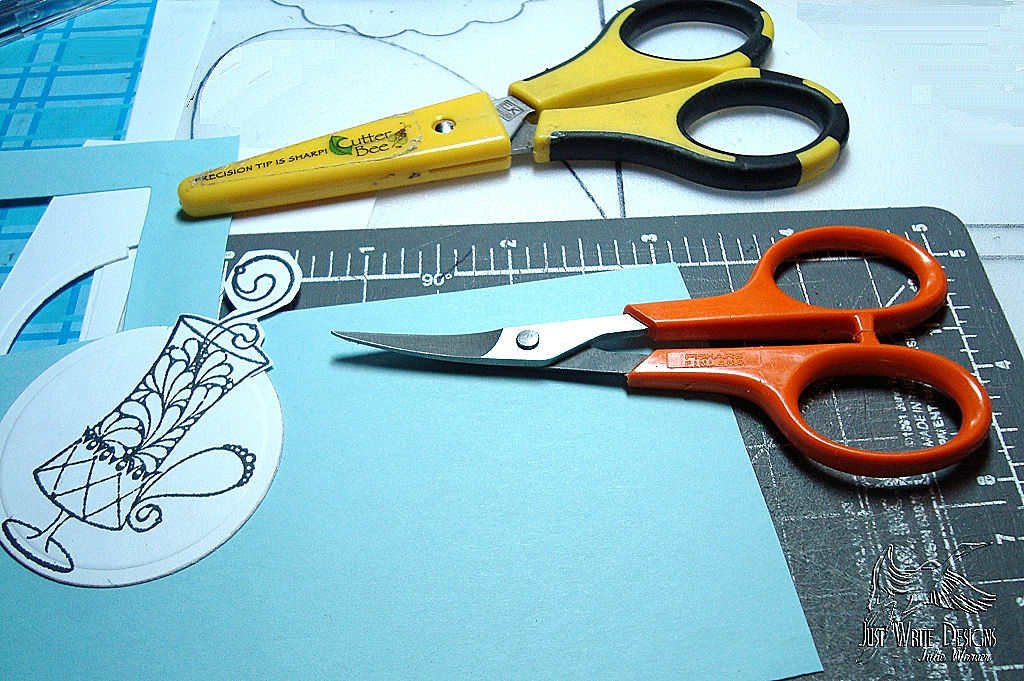
I’m including this picture to show you my detail scissors. Quite a few people have commented on my detail cutting so I wanted to include this. The little orange pair of scissors have small, curved blades. You can see they are only about 4″ in length but the small curved tips make cutting a breeze. I’ve done a lot of decoupage and these scissors are invaluable. Fiskars made these, but cuticle scissors work, too. Another trick is to remember to turn the paper, not the scissors, when you are cutting.
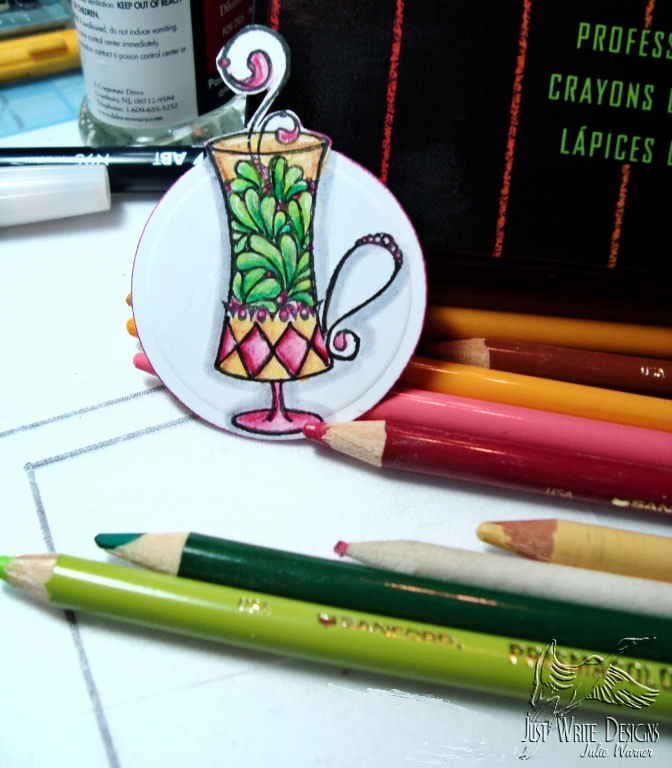
All done! This was colored with Prismacolor Pencils and OMS (odorless mineral spirits, aka Gamsol).
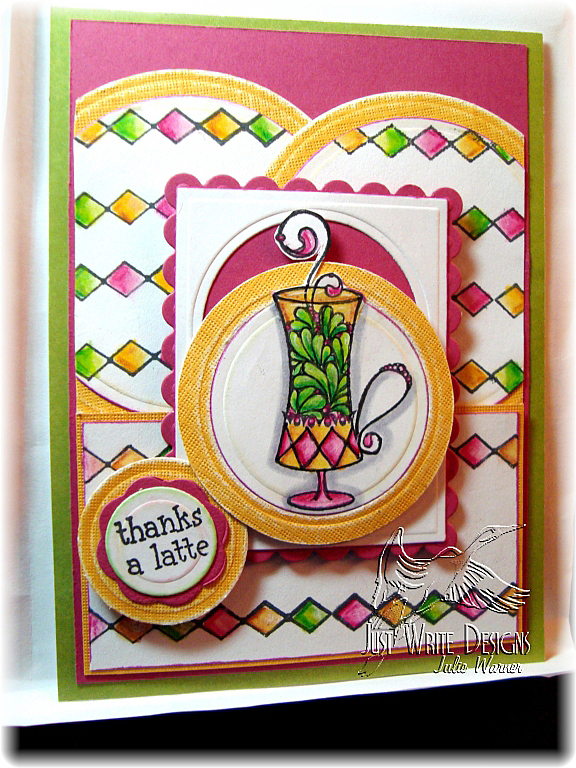
Thanks for looking and I hope you try this fun technique. Here’s the finished card I made with this fun image.


thanks again, Julie for your excellent pic showing just how you did this. Since I love to cut and trim things, I will definitely be using this. And I adore your card with the fab IO mug…the diamonds turned on their side is a great visual!
Happy Weekend
This is absolutely gorgeous! Wonderful coloring!
What a great tutorial!! Looks pretty easy now that I see it done…I’ll have to give this a try!! Fabulous card – love the fruity colors!
WOW! You are a genious! Love this and will have to try it on my own!! Hugs,
yes! genius!! I love it!! tfs!!!
Awesome! So easy too! Thanks, Julie!
Thanks for the great pics and tutorial. You’re brillant!
Wow thank you for this turtoial. I WILL have to try this. I woundered how you got it so nice looking. Thanks. Diana
This is a MUCH better way to do this than I do, which is to run it half way through my Cuttlebug, hoping I don’t go too far and cut part of the image, which is what usually happens! It works about 50% of the time……yeh…..not so good! lol!
I love your tutorial, but I don’t have Nesties, so I tried it with my cricut. You can see my take on it, on my Blog
Thanks for the tutorial
x
Rima
Are you kidding?! Wowsa, that is so cool. Plus I actually have that stamp. Looks like I’ll be casing another one of your inspirational ideas. Plus I just love the colors. Super job!
Cheryl
Pingback:The Write Stuff » Blog Archive » ISC Celebration Bash – Blog Hop & Sneak Peek
What a great technique. Thanks so much for sharing with the rest of us. I love to stamp, and have been stamping off and on for quite a few years, but I still consider myself a novice. I appreciate all of the help fellow stampers are willing to give with their vast creativity and knowledge. Thanks again. I love this technique and your card!
Fabulous instructions Julie. I’ll have to try that technique. Thanks for all the details. Your are SO good at that and the visual is a lifesaver!!
This is a great tutorial. Thank you so much for showing all of us.
Thank you; the pictures help tremendously – LOVE the bright card!!!
pure geniuus!..and a lovely and beautiful card!
TFS!
This is a super tutorial. Your card is fabulous. TFS!
Pingback:The Write Stuff » Blog Archive » DDIC 11- Peace of Mind
This is so cool! I hadn’t thought to do it this way but I’m ready to go give it a try. Thanks for sharing your technique and especially for taking the trouble to photograph it.
Great tutorial! thanks!
Pingback:The Write Stuff » Blog Archive » Happy Fall Tree
Pingback:The Write Stuff » Blog Archive » Santa’s Helper
Thank you for the wonderful tutorial. Your card is beautiful.
This is a FABULOUS tutorial. Thank you!! Going to have to tryit out 😀 Your card using it is wonderful.
Pingback:The Write Stuff » Blog Archive » Holiday Golf
Pingback:The Write Stuff » Blog Archive » Candlelight Christmas – FS146
Pingback:The Write Stuff » Blog Archive » Sing for Joy
WOW! Julie, this is so clever! Rox posted the link with her SCS challenge card today, and I well love it! I would have never figured this out myself…way too blonde (grey :)). Thanks so much for sharing!
This is wonderful and easy to understand. Thank you so much.
Rox just referenced this technique in her challenge card. I’ve always wondered how stampers have done this, and now I know. Your tutorial is fabulous, Julie. Thanks so much.
Pingback:The Write Stuff » Blog Archive » Cardinal Song
Pingback:The Write Stuff » Blog Archive » New Nest
Thank you so much for this tutorial! I have this teddy bear and really want to try to bring him to ‘life’. I think this just might do the trick! Thanks again. whim6915
Very clever!! LOVE this!! And your coloring is fab!!
A great tutorial…loved the colors with the pencils..just a brilliant as can be
thanks
pat
I have done something likethis before, but you just made my process WAY EASIER! Thanks so much and gorgeous coloring and card, too!
Pingback:The Write Stuff » Blog Archive » ODBD – 2nd Anniversary Celebration Day 4
Thanks so much for this tutorial, I’ve always wondered how to do this. I’ve tried without much success. Can’t wait to try this technique on my next card!!!
Thank you for sharing this. I find your instructions very easy to follow.
Pingback:The Write Stuff » Blog Archive » Playing Catch Up
Pingback:The Write Stuff » Blog Archive » Rejoice!
Pingback:The Write Stuff » Blog Archive » Courtyard Sympathy F4A8
Pingback:The Write Stuff » Blog Archive » A Mother’s Place
Oooh, that’s a good idea to use a template to trace around your design. Thanks for the tip….pretty close to what I ended up doing; your final design is so pretty, too!
LeAnne
Pingback:i just love you
Pingback:The Write Stuff » Blog Archive » Framed Fuchsia & 2 Techniques Revisited
I LOVE the tutorial!! Thank you SO MUCH for SHOWING how this is done, step by step!! It has answered a lot of my questions!! Being a “newbie”, I NEED a lot of questions answered! You are a GEM! :0)
Pingback:The Write Stuff » Blog Archive » Fuchsia Garden DDIC30
Pingback:The Write Stuff » Blog Archive » Mystical Treasures Blog Hop!
Thanks for the great tutorial! I will definitely be referring back to this one!
Arabella
Pingback:The Write Stuff » Blog Archive » ISC – June Release Day 3
Pingback:The Write Stuff » Blog Archive » So Thankful
What a great tutorial and idea Julie! I have to try this! Thanks so much!
Hi Julie,
Thank you so much for your tutorial. I also looked at Roxie one. You’re both so kind to show us how-to-do it. TTS!
Ah HA! I’ve been wondering and trying different approaches to this look, mostly end up paper piercing the out of the box portion, and knew some of these were not detached but could not figure this out. Thanks so much!
WAOUHHHHHHHHHHHHHHHHHHHH SUPER MERCI MD
Pingback:The Write Stuff » Blog Archive » ODBD Aug Release Blog Hop!
Pingback:The Write Stuff » Blog Archive » ODBD Sept Release Blog Hop!
Pingback:Letting an image go "outside" of your cut Nestie shape????: Techniques - Splitcoaststampers
Pingback:The Write Stuff » Blog Archive » DDIC40 & ISC Nov Day 2
Pingback:Stamping and Cutting question - Splitcoaststampers.com
Pingback:Question Answered – Out of the Box Technique
Thanks so much for answering my question. This is so cool.
Pingback:ODBD January Release Blog Hop!
Pingback:Hatfull of Shamrocks
Pingback:ODBD March Release Blog Hop!
Pingback:Fall Leaves
Pingback:Star Cowboy
Pingback:North Coast Creations Blog Hop!
Pingback:Dance in the Rain
Pingback:Pink Berry Wreath
Pingback:Irish Rosco
Pingback:6NCC New Releases!
Pingback:NCC April Release!