
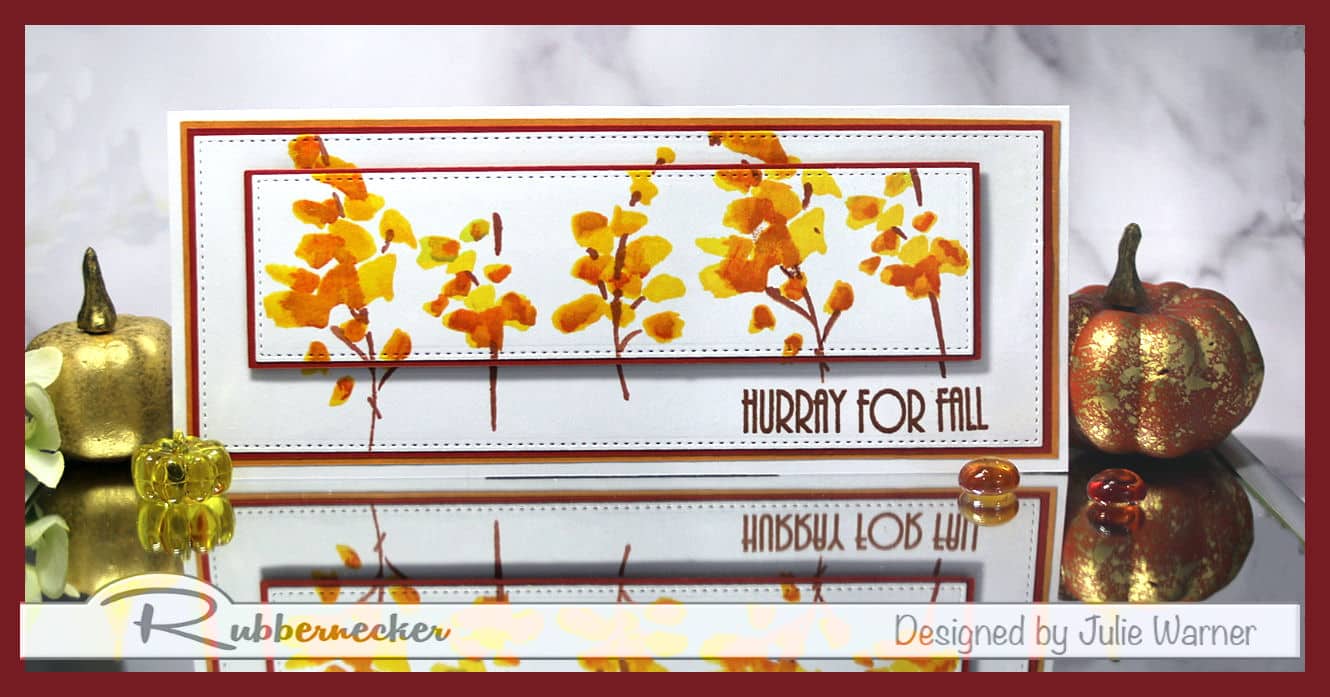
Such wonderful fence murals we have to chose from for the Splitcoast Inspiration Challenge (IC767)! I chose THIS fence for the lovely fall colors.
I also have a couple of extra pics to show you how I did this & a little hint on how to make it easier.
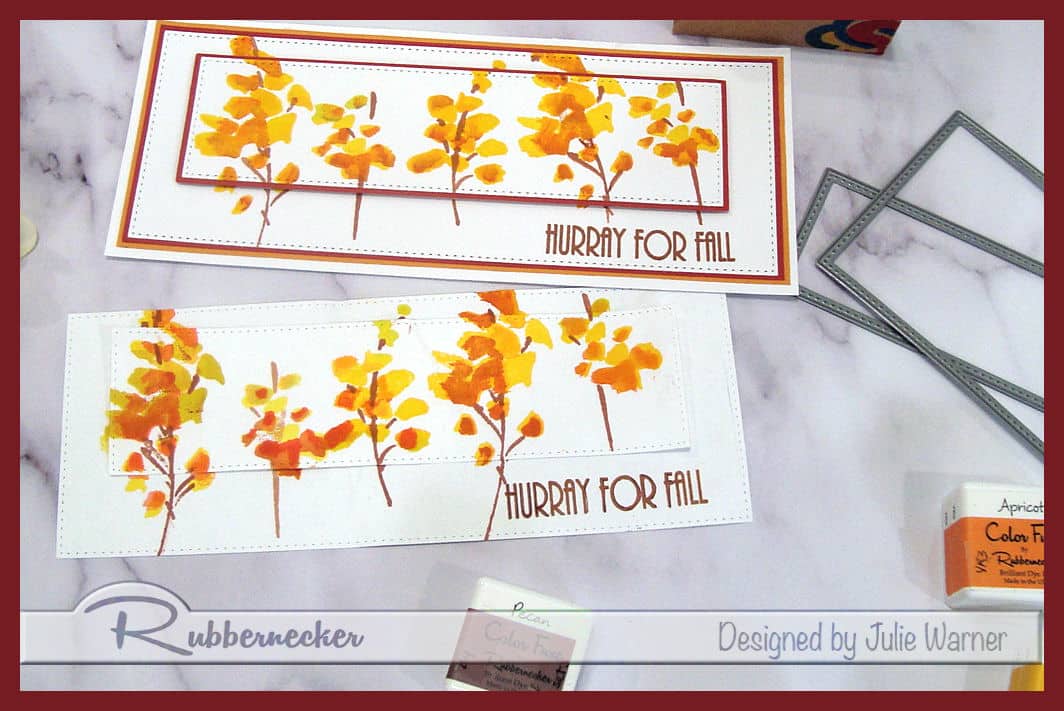
Before I made this card, I made a copy paper version of it in order to work out the logistics. I die cut the 2 layers out of paper & used temporary adhesive to stick them together. Then I put this sandwich into my Misti & inked the different layers of leaf stems w/ the Color Fuse inks. Each branch was stamped twice..once w/ the top layer in place, then I removed the smaller top layer & stamped it again. To make this easy to match up the layers, I drew a small corner reference on the lower right corner below the top layer w/ a pencil. So when I put it back to stamp the next branch, I could line it up easily. The reason I stamped the bottom layer as well as the top is so I wouldn’t have any blank spots showing thru when I popped up the top layer.
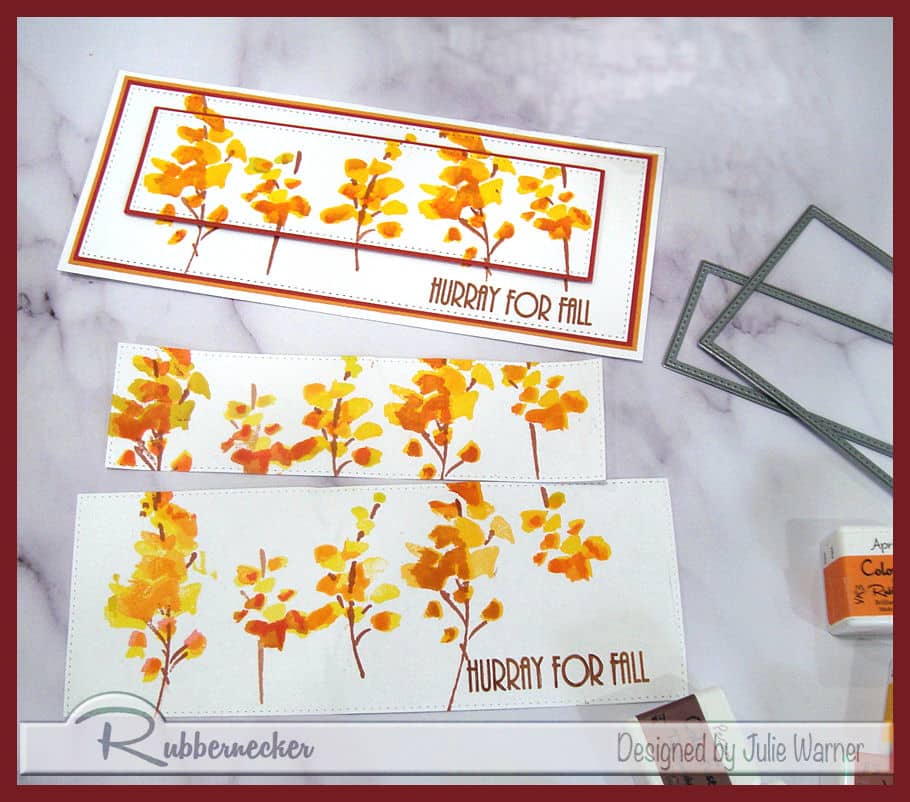
These are the 2 layers broken apart. I could also see that I would have to stamp the greeting first & mask it so the last 2 stems wouldn’t overlap it.
Since I had worked it all out on a paper version, the real version went very fast & no mistakes! I added a rust layer under the top part & elevated it w/ fun foam.
Thanks so much for stopping by!
![]()
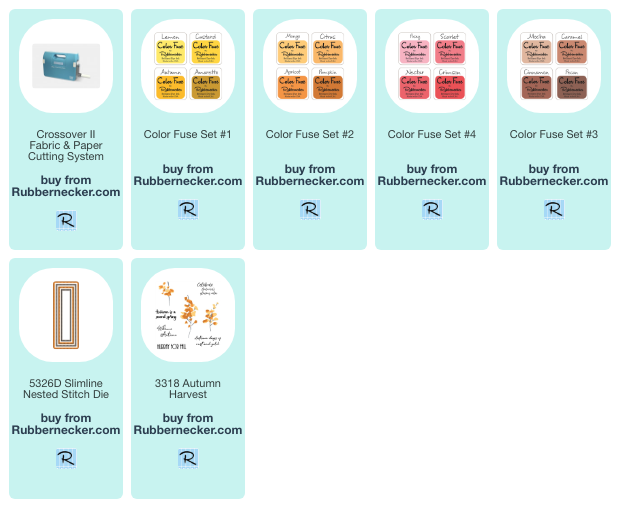
Supplies:
| Stamps: Rubbernecker Stamps: Autumn Harvest |
| Paper: Staples 110# white, rust, autumn gold |
| Ink: Rubbernecker Stamps: Color Fuse inks set #1, set #2, set #3, set #4 |
| Accessories: Rubbernecker Stamps: Slimline Nested Stitch dies, Crossover II |

|

|


Another stunning card. Thank you, once again, for adding the directions. I just bought a fall rusty orange nail polish. It’s the colour that you used today.