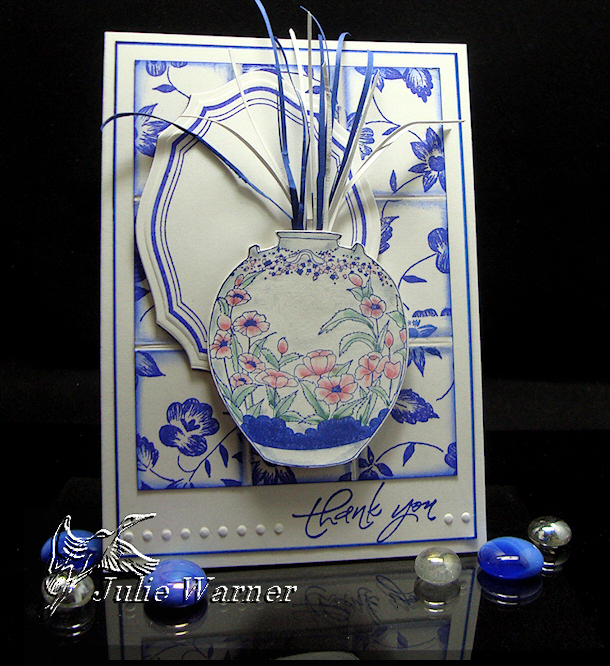


I’m so excited because I have a new Delft Tile tutorial over on Splitcoast today! It’s fun, easy and requires no special tools. And you get a beautiful Delft tile
background! I hope you’ll drop by and check it out.
Creative Ideas from Just Write Designs


I’m so excited because I have a new Delft Tile tutorial over on Splitcoast today! It’s fun, easy and requires no special tools. And you get a beautiful Delft tile
background! I hope you’ll drop by and check it out.
Welcome to our February Blog Hop! We at Sparkle N Sprinkle are teaming up with the crew at Really Reasonable Ribbon to show you some amazing projects using SNS glitters, flocking, stamps and embossing powders and some really pretty ribbon from the February Ribbon Kit from RRR.
If you came here from Cheryl Walker’s Blog, you are in the right place! If not, you may want to go to Really Reasonable Ribbon Blog so you’ll be able to start from the beginning.
For my card, I started by doing a brayered background on white c/s using only the yellow/orange/pink sections of a rainbow pad. All of the images were then stamped using black ink and I sponged on a little more color under the ducks. With a very small acrylic paintbrush, I applied bleach to the flowers. Since I used a non-waterproof dye ink, the color bleached out perfectly. I used a white gel pen to help accent the swirls on the ducks and then applied glue to these areas as well as the flower centers. I sprinkled on Sparkling Snow glitter on some flowers and Sunny Daze glitter on the rest then edged it w/ a black marker.
The only real difference in these cards is the treatment of the black layer. On the top version, I used a border punch on three sides and on the bottom version, I used a scallop edge die. On both, the sentiment was die cut w/ a small oval die and part of the crochet lace ribbon was added at the bottom of the image panel. I used a sunny yellow diamond ribbon for my bows and threaded a piece of the same crochet ribbon through the knot. Both are attached to 5.5 x 4.25 white cards.
In addition to the Really Reasonable Ribbon blog candy, Sparkle N Sprinkle is giving a stamp set to one lucky hopper! Leaving a message on every blog increases your chances of winning, because it’s a mystery which of the artists’ blogs has been chosen to house the prize! On Tuesday February 15, a name will be drawn from the comments on the mystery blog. Winner gets to choose a stamp set of their choice from SparkleNSprinkle.com!
Next, hop on over to True SJolander’s Blog. I’m sure she’ll have something wonderful to show you!
Thanks so much for stopping by and good luck to you!

Supplies:
stamps: Sparkle N Sprinkle – Spring Swirls #425, Spring Backgrounds #399
paper: Neenah white, black
ink: Kaleidacolor Birthstone rainbow pad, VersaFine onyx
accessories: February Ribbon Assortment from Really Reasonable Ribbon, Spellbinders petite oval, plaid border punch (EK Success), scallop border die (QuicKutz), brayer, Quickie glue pen, black Permapaque marker
http://sparklensprinkle.com/
If you hopped here by way of Judy Rozema’s blog, then you’re on the right track. If you’ve arrived from somewhere else, you might want to start from
the beginning, at the SNS blog, so as not to miss anyone’s remarkable cards! This is a 2 day hop, 10/18/10 thru 10/19/10.
Of course a prize is involved. Just:
(You may have seen these cards on the Splitcoast Faux Brad Tutorial which debuted 10/13/10.) For both of my cards, I used the Autumn Swirl set 410. Isn’t it lovely? For the first card, I used a rainbow ink pad for the tree, greeting and 1/2″ faux brads. I used a Spellbinders rectangle to cut it out and a petite oval for the greeting. On the horizontal mustard layer, I stamped another of the swirl images using part of the Autumn Leaves Kpad. The sentiment was die cut using a petite oval nestie. The faux brads were made using a scrap of the vanilla which I first stamped w/ the swirl images using the Kpads. These faux brads are 1/2 inch. Finished card measures 5.5 x 4.25 (A2).
Supplies:
stamps: Sparkle N Sprinkle – Autumn Swril set 410
paper: vanilla, mustard, grape
ink: Kaleidacolor Creole Spice & Autumn Leaves
accessories: Spellbinders petite ovals & rectangles, 1/2 inch hole punch (faux brads)
For this second card, I used the same images and layout, but “painted” my tree with 3 different embossing powders. The swirly tree image was stamped w/ VM and I used the 3 embossing powders and a technique I call “painting w/ ep”. I used a rectangle nestie to cut it out. Two very narrow mats, 1 mustard, 1 rust (spritzed w/ bleach), back it.
On the horizontal mustard layer, I stamped another of the swirl images using part of the Autumn Leaves Kpad. The sentiment was die cut using a petite oval nestie. The Faux Brads were made using a scrap of the vanilla which I first stamped w/ the swirl images using VM and sprinkled w/ the embossing powders. These faux brads are 1/2 inch. Finished card measures 5.5 x 4.25 (A2).
Supplies:
stamps: Sparkle N Sprinkle – Autumn Swril set 410
paper: vanilla, mustard, rust (spritzed w/ bleach)
ink: VersaMark, Kaleidacolor Autumn Leaves
accessories: embossing powders (Indian Corn, Fall Fiesta & Golden Follies- all SNS), Spellbinders petite ovals & rectangles, 1/2 inch hole punch (faux brads), bleach
Thanks so much for stopping by! To continue the hop, please visit Sandy Meier who will be sharing her lovely Autumn inspired design.