• Tag Archives flowers
  • Dotty Daisy

    Julie Warner - justwritedesigns https://thewritestuff.justwritedesigns.com/


    Are y’all having a great spring week? Except for a couple of nasty thunderstorms, the weather here has been terrific! Mostly sunny, a little windy, temps in the 60’s. Just about perfect! With everything in full spring bloom, I thought this dotty daisy looked a little like some of my pink azaleas.

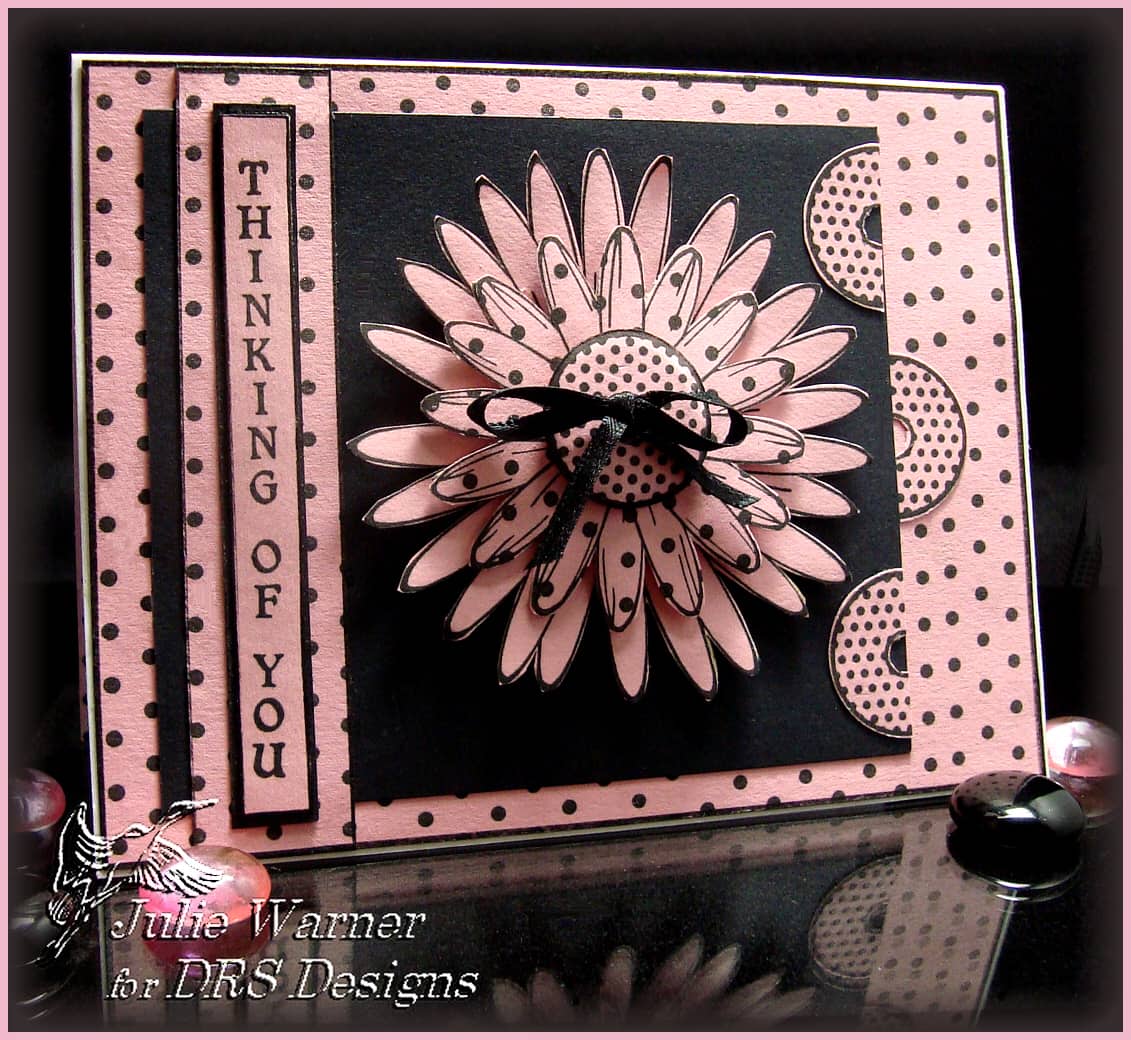
    This is actually a fairly simple card. No fancy tools or punches or even any coloring. Don’t you just love this new Dot Background stamp? It really dresses up plain pink card stock. I also used for the new daisy image. It’s layered on top of a plain huge bloom and a button ribbon slide is on top w/ a narrow ribbon tied through it. I stamped a couple extra of these and split them in half down the right side.

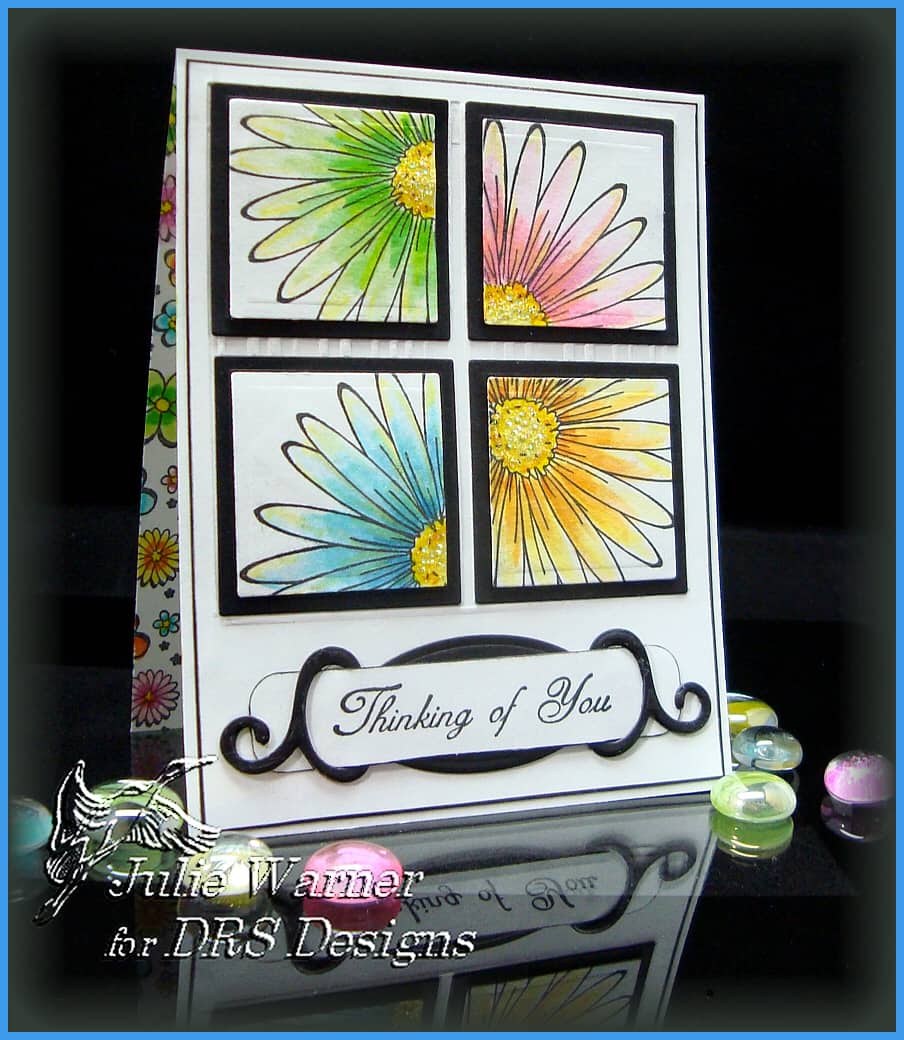
    The new Thinking of You was perfect for this layout and anytime you need a sentiment to go vertical. The finished card measures 5.5 x 4.25.

    Thanks so much for stopping by! Have a great weekend!

    Supplies:
    stamps: Polka Dot Background, Vertical Thinking of You, Medium Daisy Bloom, Bloomin’ Huge Flower, Button Ribbon Slide
    paper: black, pink
    ink: VersaFine onyx
    accessories: narrow black ribbon, black marker (for the edges)


  • ODBD April Release Blog Hop!

    Julie Warner - justwritedesigns - https://thewritestuff.justwritedesigns.com

    Julie Warner - justwritedesigns - https://thewritestuff.justwritedesigns.com

    For my card, I’m using the beautiful new Mother’s Day set. To make it even more fabulous, there is a matching poppy die for the gorgeous poppy image! Sweet! After copper embossing, coloring and die cutting, I layered a second die cut poppy on top of the base image for a little dimension. I used the exclusive ODBD Elegant Ovals die (made by Spellbinders) for the double frame around the poppy. I made a lattice behind it using a trellis border punch and raised the entire rose pink panel from the white layer to enhance the lattice window effect. I doodled around the edge w/ a white gel pen and added a lg daisy punch border across the bottom.

    Julie Warner - justwritedesigns - https://thewritestuff.justwritedesigns.com

    The proverb has rounded corners to mimic a long word window punch. I added a dp layer before attaching to a 4.5 x 6.25 (A6) white card. A large yellow gem was attached to the center of the poppy.

    Next, hop on over to Debi Southard’s blog to see what amazing project she has to share!

    Thanks for stopping by!


    Supplies:

    Stamps: ODBD – Mother’s Day
    Paper: Neenah white, pink rose, dp (SEI SunnyDay collection)
    Ink: Encore UM bronze metallic pigment, VersaFine Onyx
    Accessories: ODBD poppy die, ODBD Elegant Ovals die set, Tombow markers, water brush, Ranger copper embossing powder, lg yellow gem,  Martha Stewart trellis edge punch, EK Success lg daisy border punch, sm. corner rounder, white gel pen

    I am also adding this to these challenges:
    Paper Romance #44 (add bling – well, that’s a big honkin’ jewel, isn’t it?)
    Tuesday Throwdown (floral)
    SCS Ways to Use It (Flower Frenzy WT316)


  • Flower Squared

    Julie Warner - justwritedesigns - https://thewritestuff.justwritedesigns.comHappy Friday!

    Weekly-Favorite

    I hope your week has gone well. Today I want to share a card using parts of a couple of images. One of the reasons I love DRS images is that they are so versatile. For both of the images on the card front, I used only a part of the image. Sometimes it’s good to take a look at stamps you have and see how they look as a partial image or if they can be used in a different way.

    TIP: Die cut or punch a square (or other shape) in a piece of scrap paper. Take the punched opening and move it around on your stamped image to see what looks best. Then lightly pencil the frame so you know where to cut or punch.

    The bloomin’ huge flower was stamped a few times and I used a small square die to cut the four flower parts out. After coloring w/ markers and a water brush I attached them to slightly larger black die cut squares. I used a stripe embossing folder on the top 2/3 of the white layer and attached the squares.

    For the sentiment, I used only the first line. I liked the pretty script font of the greeting and it’s really large enough to stand on its own. I used a small corner rounder to mimic some of the word window punches. I die cut a fancy tag out of black and inserted my greeting. Stickles was added to the flower centers. The finished card measures 4.25 x 5.50.

    Thanks so much for stopping by! Have a great weekend!

    Supplies:
    stamps: Bloomin’ Huge Flower, Sm. Fun Flowers (inside), Thanksgiving Thinking of You
    paper: white, black
    ink: VesaFine Onyx
    accessories: markers, water brush, stickles, square & fancy tag dies, stripe embossing folder. sm. corner rounder