

Welcome to the May Challenge for Serendipity Stamps! This month the challenge is Flowers…stamped, die cut, designer paper, dried…whatever you have. The sale at Serendipity Stamps this week is 20% off the alphabets category. Good through 5/14. And as always, we have a have a gift certificate up for grabs to a random player.
For the design team, we have the added challenge of using one of beautiful Floral Alphabet stamps.
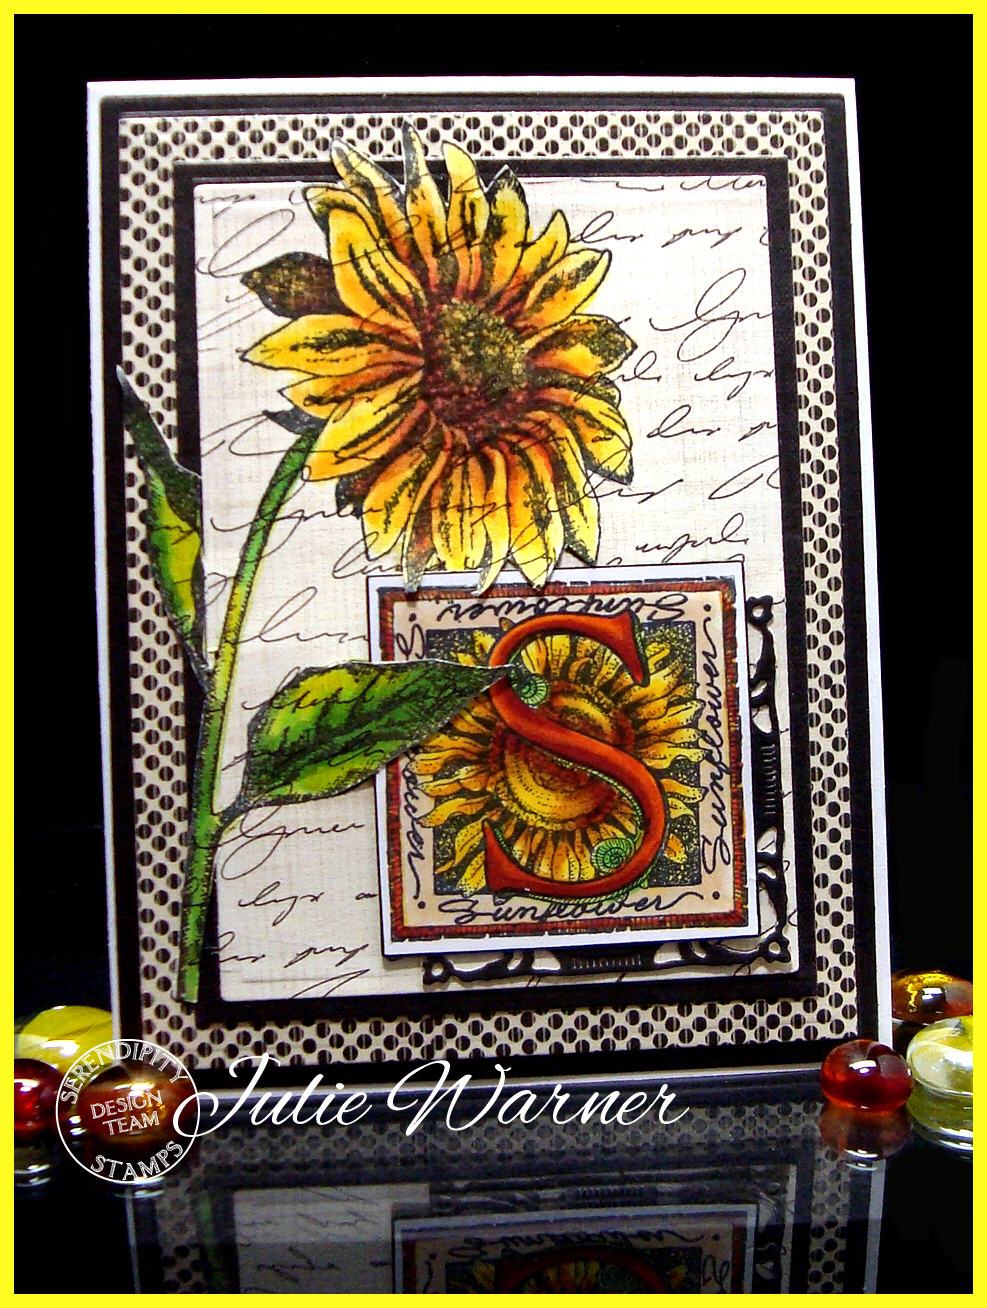
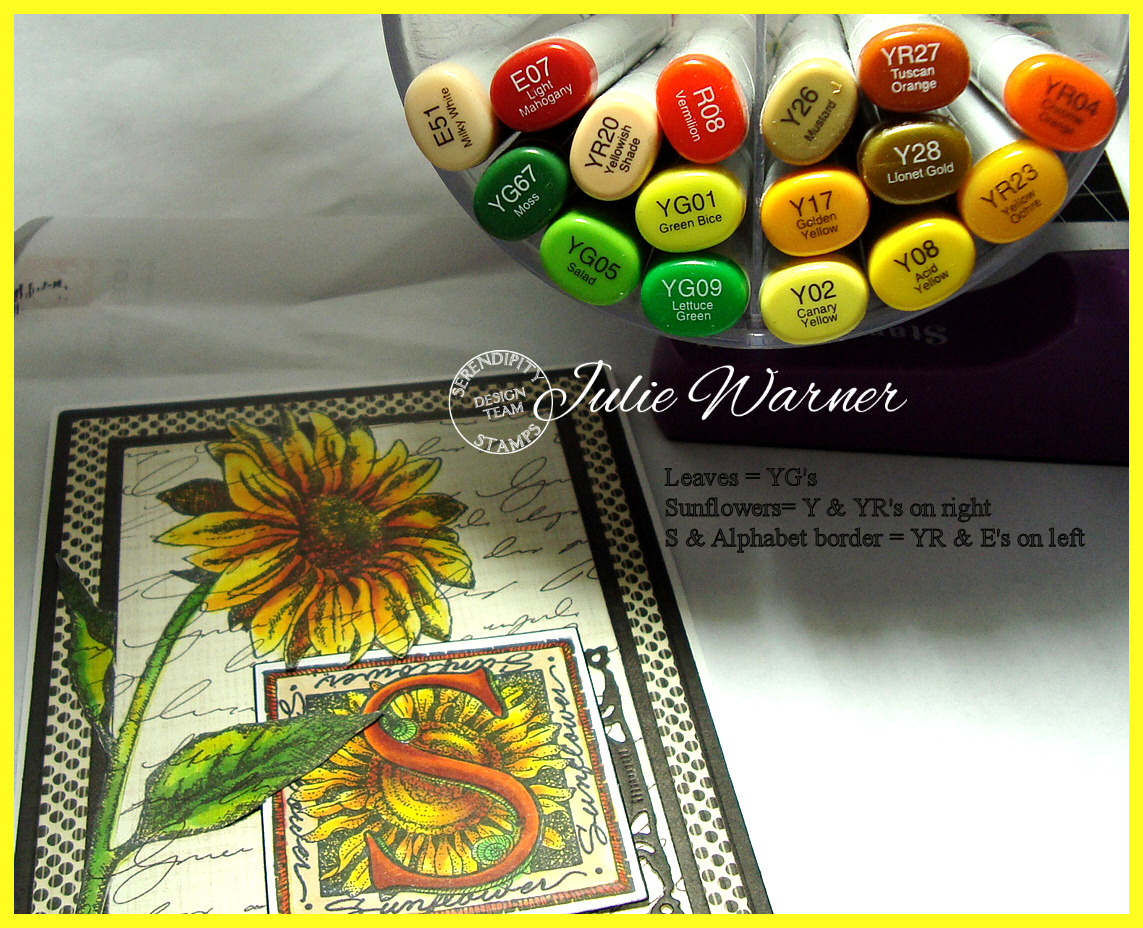
I chose to use the Floral Alphabet S and Lg Wild Sunflower images for my card. I first stamped the Lg Sunflower onto a handwritten text designer paper and the Floral S onto white. I colored both with Copics, then die cut them both. I used my out of the box technique for the Sunflower, used a craft knife to cut & “lift” the lower petals & leaf of the sunflower, then attached it to several more die cut layers. The Floral S was attached off center to a die cut black piece then inserted under the “lifted” petals & leaf.
The finished card is 4.25 x 5.50 and these are the Copics I used.
Thanks so much for stopping by!

Please be sure to visit all of the Design Team!
Julie Warner (you are here!)
Supplies:
| Stamps: Serendipity Stamps – Floral Alphabet S 518E, Wild Lg Sunflower 550L |
| Paper: X-Press It white, designer paper (handwriting text & solid black = Paper Studio) (black/cream dot = SEI Moonrise) |
| Ink: Memento tuxedo black |
| Accessories: Copic markers, Spellbinders Adorning squares, squares, matting basics A & B dies |


