• Tag Archives Divinity Designs/Our Daily Bread designs
  • ODBD April Release!

    Julie Warner - https://thewritestuff.justwritedesigns.com
    Welcome to the Our Daily Bread designs April release! Can you believe it’s already April? Well, you won’t believe this month’s release, either! We are talking some fabulous dies, papers and images! I am really loving this Vintage Flourish Pattern die! And the chalkboard background images are terrific!

    Prize Details:

    • Three winners will be randomly chosen from the comments left on the designers blogs to receive a $15 Gift Certificate to the ODBD Store, to be used toward the purchase of ODBD Stamps. 
    • You have until April 2, 2014 at 9:00 p.m. EDT to leave your comments! 
    • The Winners will be posted on the ODBD Blog on April 3rd, so be sure to check back there to see if you won!

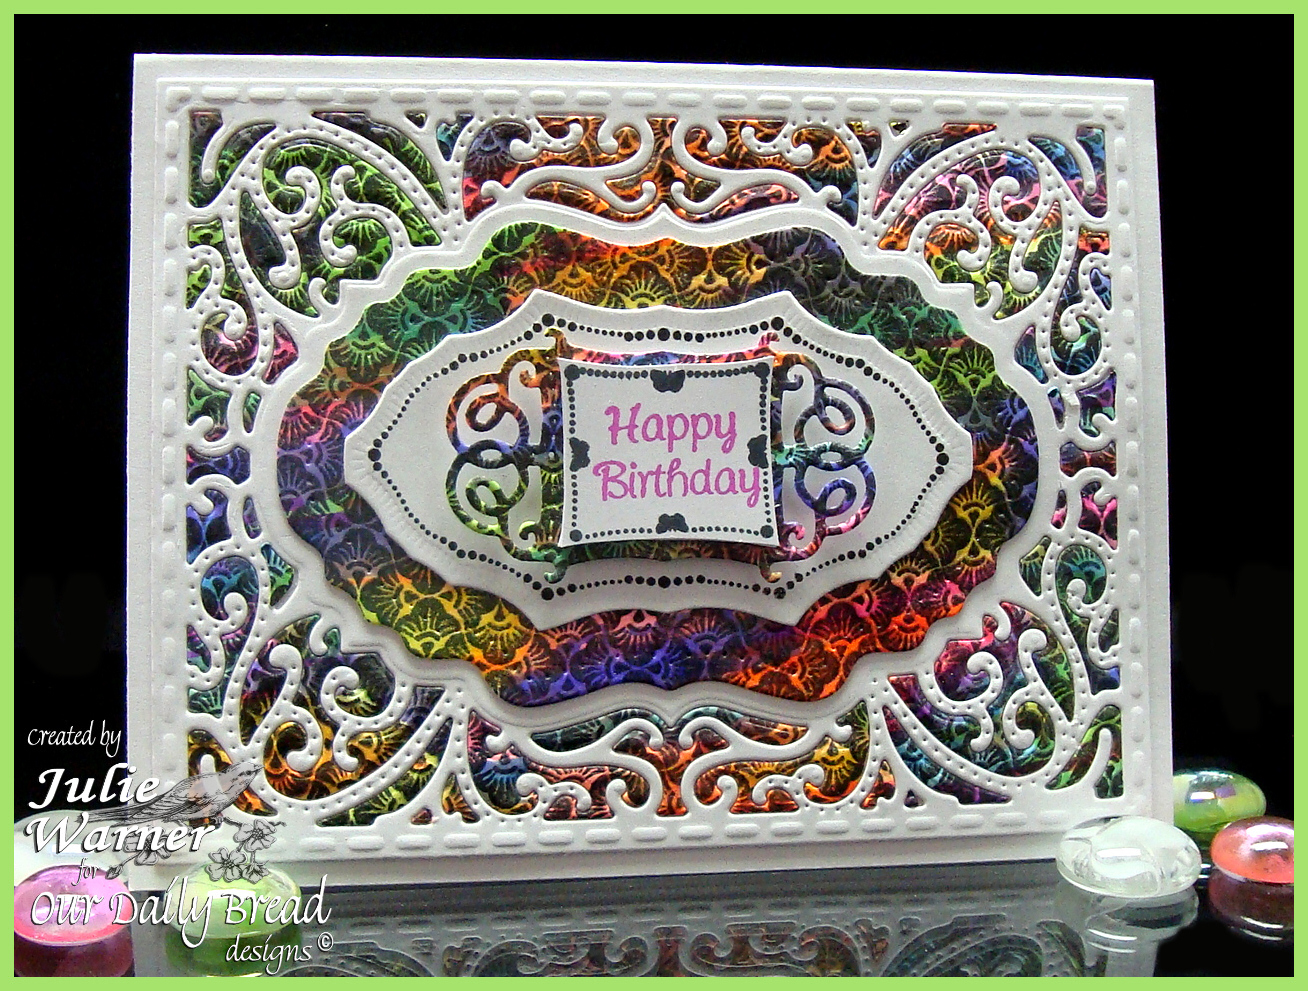
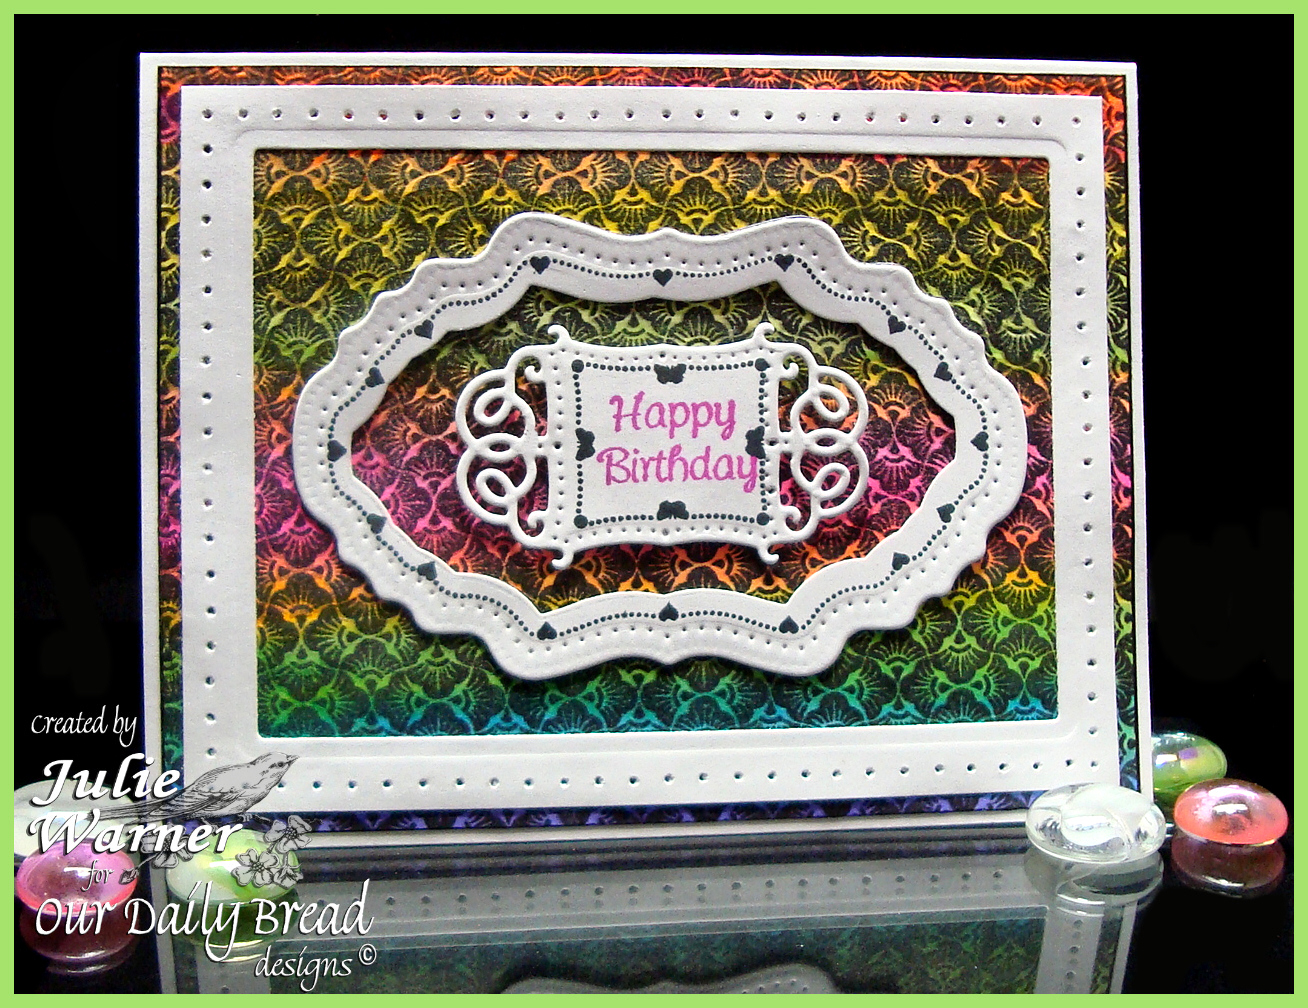
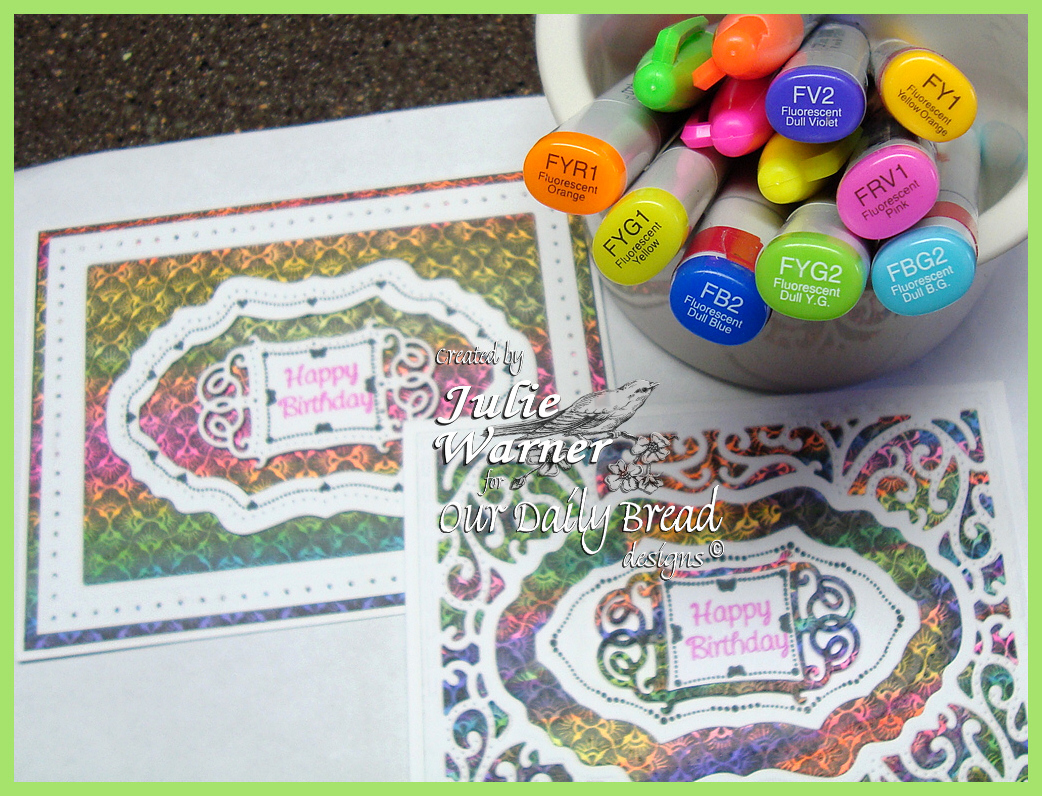
     I kept picturing neon colors behind a black pattern so for my pair of neon birthday cards, I first colored half of an 8.5 x 11  piece of white card stock with a rainbow of fluorescent Copics mixed with a bit of neon Sharpies. On the one above, I did a  swirly hodgepodge and on the one below I  did rainbow stripes. Then I stamped the Chalkboard Fan background with versafine onyx.  I used versafine because I consistently get a better black coverage with large, detailed images like this one.  On the one above, I used the Vintage Flourish die to die cut the entire background, then die cut another out of white. I covered a piece of white paper with adhesive (just used my ATG big gun) and stuck the white version to it. Call me crazy, but I took all the neon piece (negative bits that are usually discarded) and pieced them into the corresponding spaces on the white version. Then I placed the die back over it and ran it through the embossing cycle again just to make sure it all stuck in place.  I used the largest center die to cut out the large neon center frame and used the smallest insert to cut the scrolly frame. So I actually got all of the neon pieces out of the one background! Not too shabby! The greeting was stamped w/ neon pink ink and the  frame w/ black then fussy cut.The white layer was stamped w/ black and die cut. 
    Julie Warner - https://thewritestuff.justwritedesigns.com
    This one was a bit simpler. I added a die cut white frame that I pierced all the way around and a smaller white frame that was stamped with black. The scrolly center was done the same as above except in white. So in reality, I actually was able to make two A2 sized birthday cards out of 1 piece of 8.5 x 11 white card stock (not counting the actual cards). Not too bad, considering all the parts and pieces! These are the Copics & Sharpies I used for both cards.Julie Warner - https://thewritestuff.justwritedesigns.com
    Thanks so much for stopping by! Please be sure to visit all of the DT blogs so you’ll be entered to win!

     Chris * Sandee * Grace * Stacy * Dawn * Julie * Lori * Cathy * 

    Sabrina * Silke * Wanda * Angie * Audrey * Lisa

    Julie2 sig

    Supplies:

    Stamps: Our Daily Bread designs Flourish Label Borders, Chalkboard Fan Background, Mini Tags 3
    Paper: X-Press It white
    Ink:  Versfine onyx, HA neon pink
    Accessories: ODBD Vintage Flourish Pattern die, Spellbinders A2 matting basics A dies, Copic fluorescent markers, Sharpie neon markers, paper piercing tool


  • ODBD March Look Back

    Julie Warner - https://thewritestuff.justwritedesigns.com
    Today we are taking another look at the Our Daily Bread designs March release! And what a wonderful release it is!

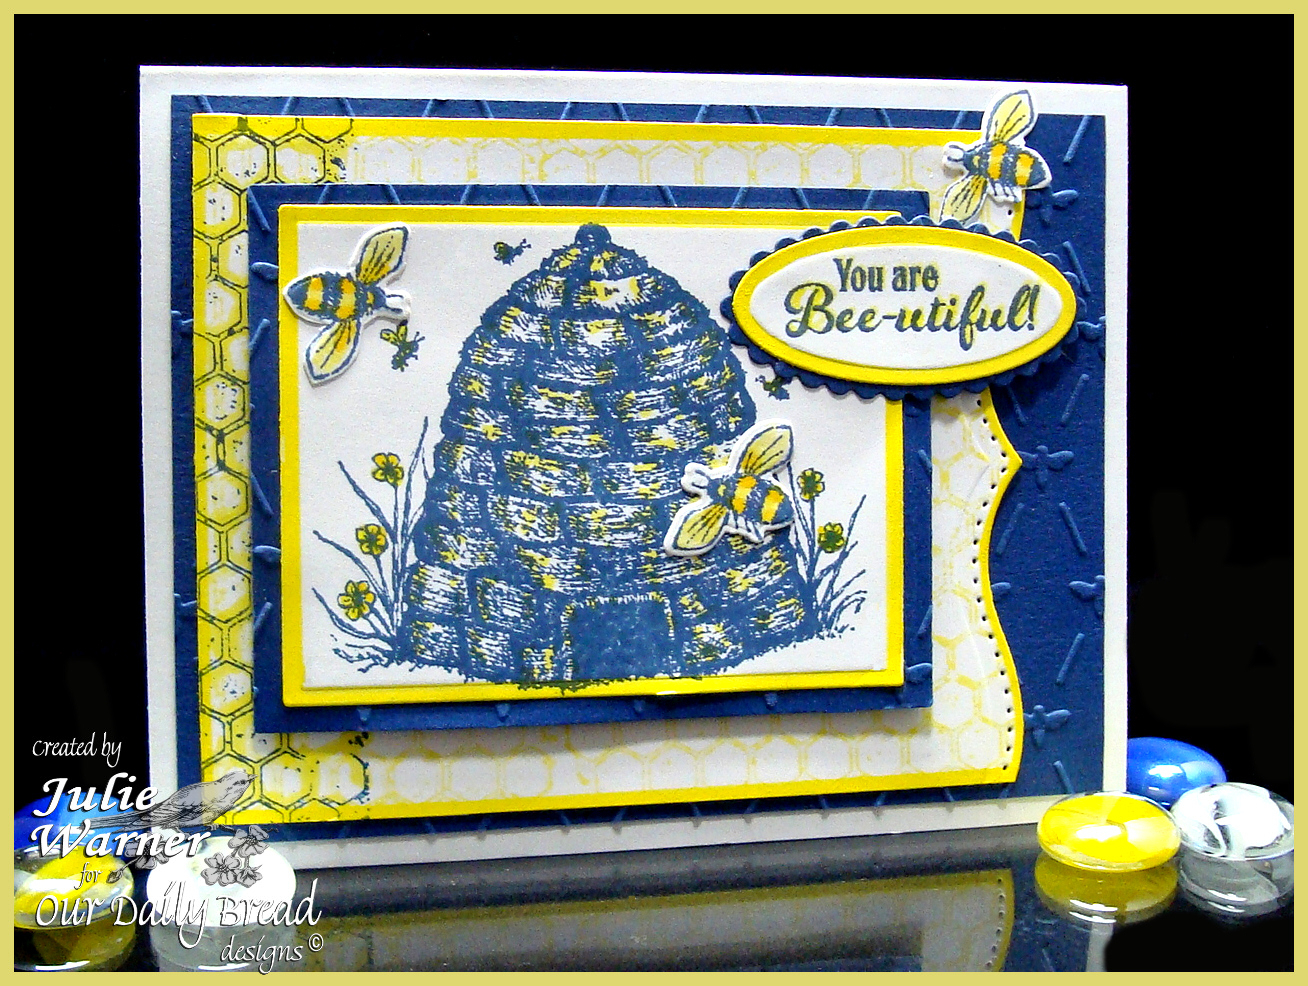
    For my card, I stamped the hive, bees and greeting with indigo ink and added a little yellow with some Tombow markers. The indigo ink is not compatible with Copics so I had to use a water based marker. I die cut with a rectangle and edged it with a yellow Permapaque marker. The greeting was done the same way and I used the Tombow marker to add the yellow to the letters. The honeycomb background was stamped first with the lemonade ink then only along the left edge with indigo ink. The right side was die cut and also edged w/ the Permapaque marker. The navy bg was embossed and the little bees were die cut w/ the matching die from the Zinnia die set. I wanted one bee facing the opposite direction, so I cut the legs off so it wouldn’t look like he was flying upside down, lol. The finished card is 5.50 x 4.25 and these are the beautiful sets I used:
    Thanks so much for stopping by! Please visit all the DT Blogs for more inspiration!
    Julie2 sig

     Chris * Grace * Sandee * Stacy * Julie * Dawn * Sabrina 

    * Cathy * Lori * Wanda


    Stamps: Our Daily Bread designs – Honeycomb Background, Bee Happy
    Paper: white, navy
    Ink:  Ancient Page indigo, Distress Ink squeezed lemonade
    Accessories: ODBD Zinnia dies, Spellbinders rectangle & bracket border dies, Quickutz/Lifestyle Honeycomb embossing folder set, yellow Tombow marker, yellow Permapaque marker

  • ODBD 6th Anniversary Release!

    Inspiration 03013
    Weekly-Favorite
    Welcome to the Our Daily Bread designs 6th Anniversary Release!

    First the prize details:

    • Three winners will be randomly chosen from the comments left on the designers blogs to receive a $25 Gift Certificate to the ODBD Store, to be used toward the purchase of ODBD Stamps.
    • ONE lucky random commenter will be randomly chosen to win the 2014 Anniversary Bundle!
    • You have until March 18, 2014 at 9:00 p.m. EDT to leave your comments!
    • The Winners will be posted on the ODBD Blog on March 19th, so be sure to check back to see if you won!

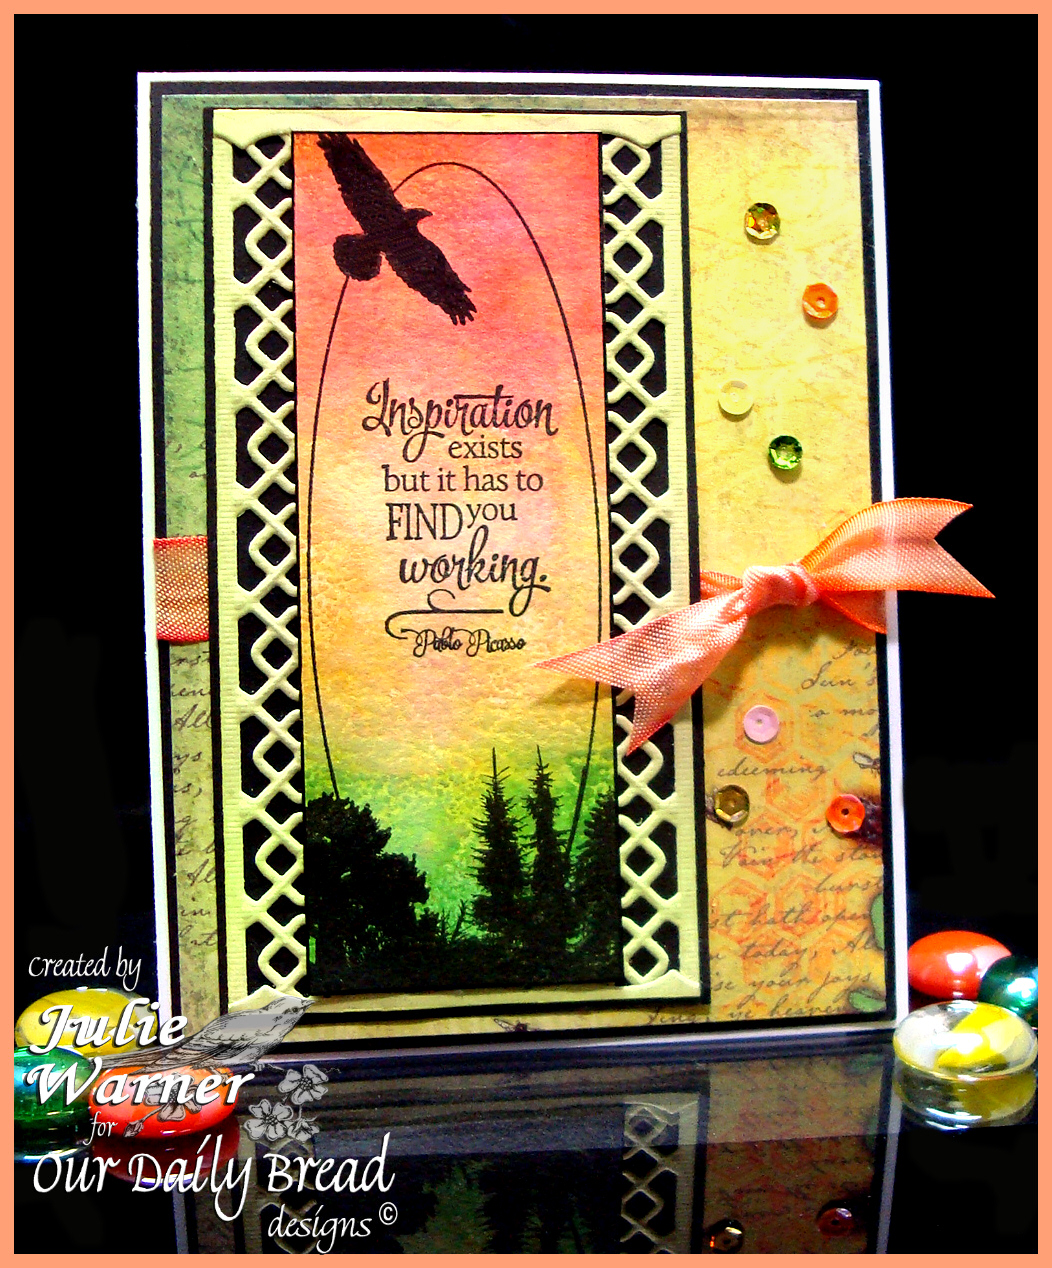
    I used the beautiful Quote Collection 4 for my cards. On the first card. I made an acrylic block background by inking a large block with several colors of distress inks, spritzing with water then pressing a piece of white card stock onto the block. After it dried, I stamped the bookmark image and quote on top and trimmed. Two piece of pale lime card stock were die cut using the Beautiful Borders dies, attached to black card stock then attached under my image. The beautiful dp is from the ODBD Blooming Garden collection paper. I colored some seam ribbon to match and added some sequins (a few of those were also colored with Copics to match). 

    Supplies

    Stamps: Our Daily Bread designs Quote Collection 4, Bookmarks Eagle
    Paper: white, ODBD Blooming Garden collection paper, pale lime green textured (DCWV), black
    Ink: Versafine onyx, Distress inks in dried marigold, ripe persimmon, mowed lawn, worn lipstick
    Accessories: ODBD Beautiful Borders dies,  Copic markers, seam ribbon, sequins

    A Friend 03018
    Weekly-Favorite
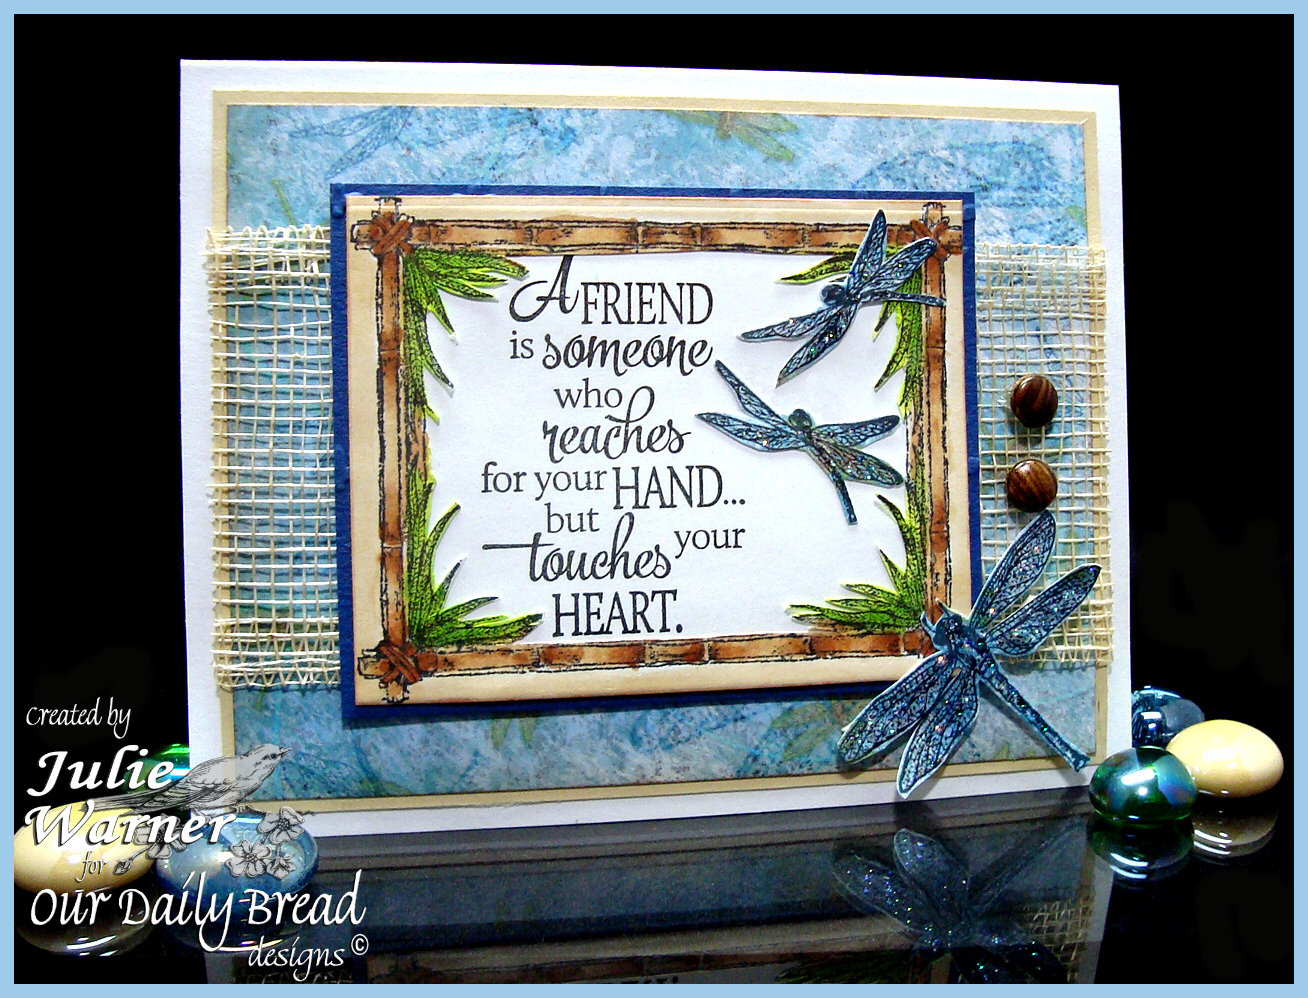
    On my second card, I stamped the bamboo frame, colored & die cut it with a rectangle. I used a craft knife to cut out the inside before attaching it on top of my quote.  The two sizes of dragonflies were stamped on scraps of the same blue dp (ODBD Blooming Garden collection) I used for the background. After fussy cutting them, I added stickles on top. I added some straw like woven ribbon and two brads I colored with Copics to match. 

    Supplies

    Stamps: Our Daily Bread designs Quote Collection 4, Bamboo Frame, Dragonfly Mini, With Heartfelt Sympathy (small dragonfly)
    Paper: white, ODBD Blooming Garden collection paper, tan, navy
    Ink: Versafine onyx, Memento tuxedo black
    Accessories: Copic markers, straw ribbon, brads, stickles, Spellbinders rectangle die

    Thanks so much for stopping by! Please stop by and visit all of the DT blogs for more inspiration!

    Julie2 sig

      Julie * Wanda * Chris * Stacy * Lisa * Grace * Dawn * Diana 

    * Sandee  *Sabrina * Silke *Cathy * Angie * Linda * Lori * 

    Cheryl * Audrey *Robin