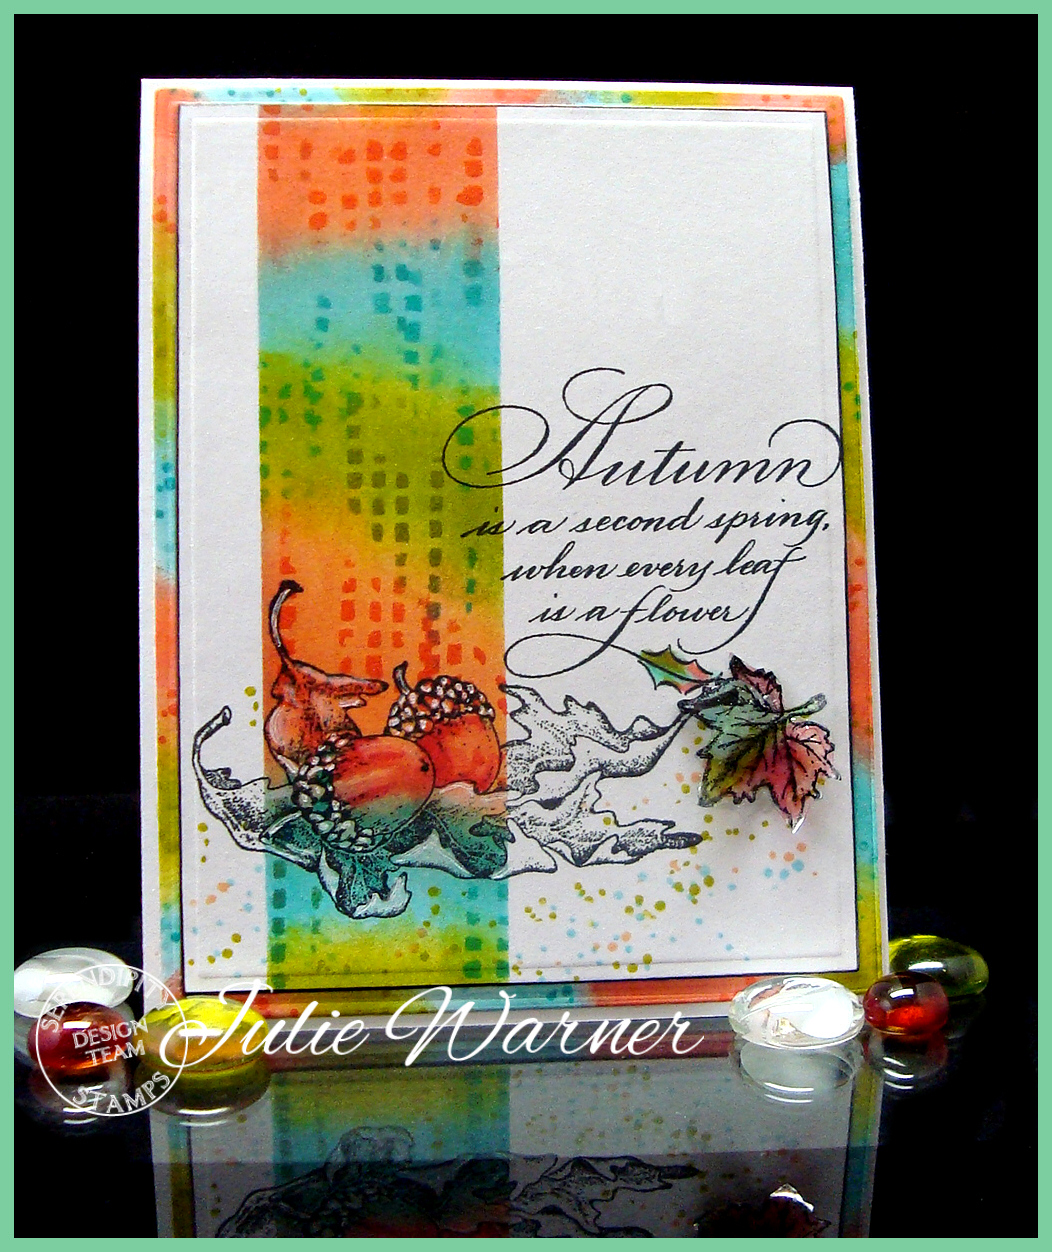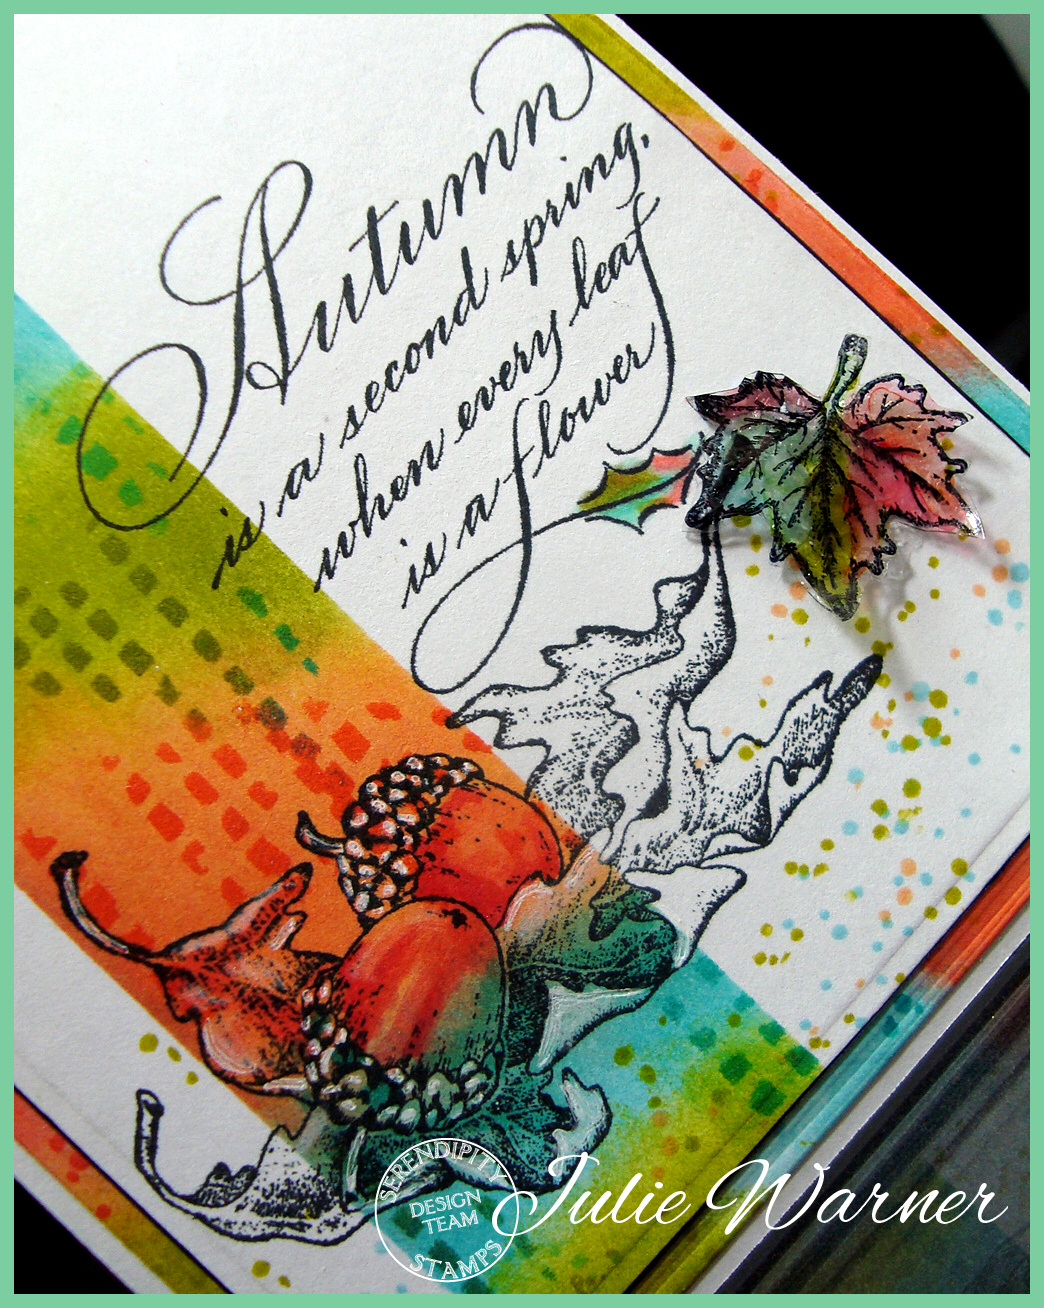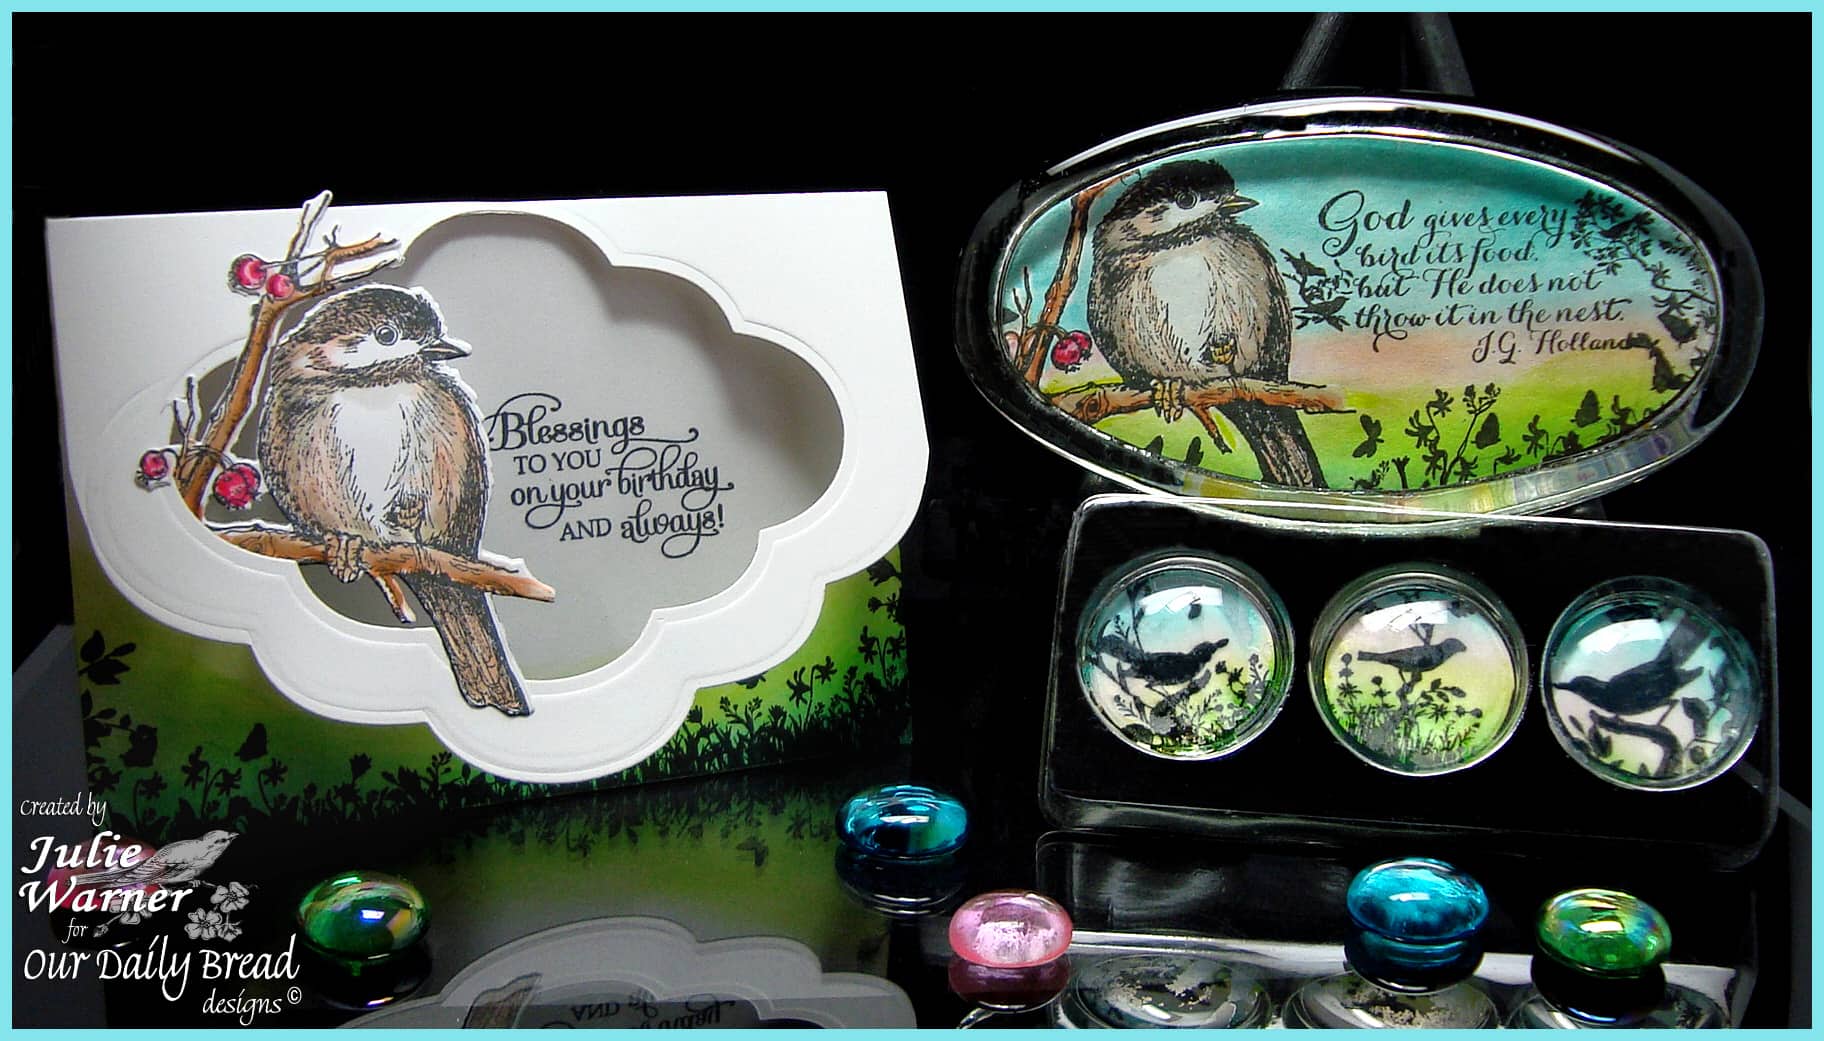
 My project today involves a large, glass oval paperweight and some small round glass magnets. I’ve always loved glass paperweights and when I saw this large oval one at my local craft store, I couldn’t pass it up. The images are all from Our Daily Bread designs.
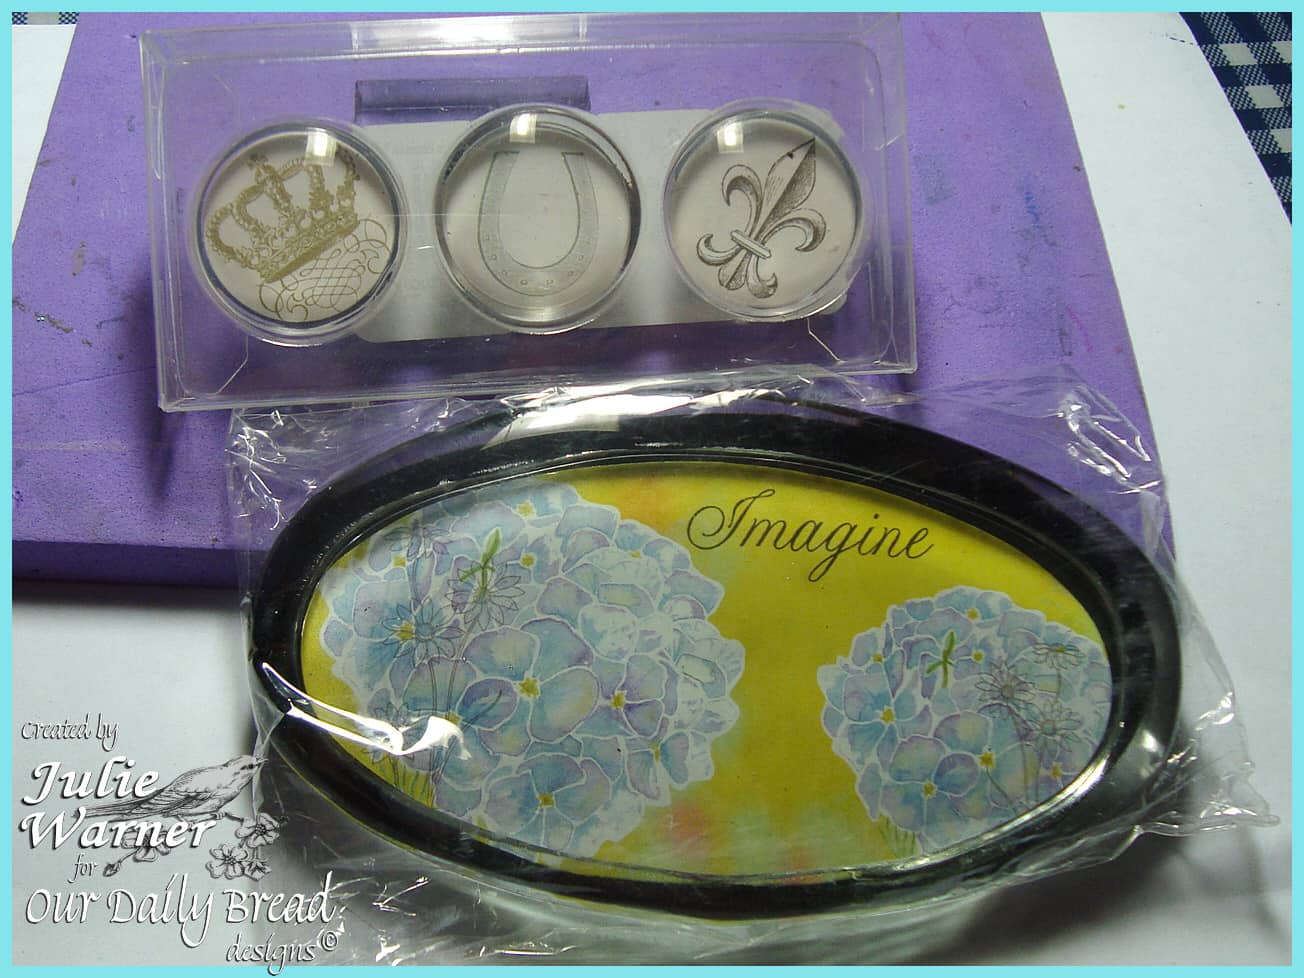
This is how they originally looked…not too impressive.
 When you turn them over, you’ll see the backs come off very easily. The oval just peels off and the magnet backs pop off. The paper stickers had to be peeled off. There is a silicon layer on the back of the glass and I’m going to leave that.
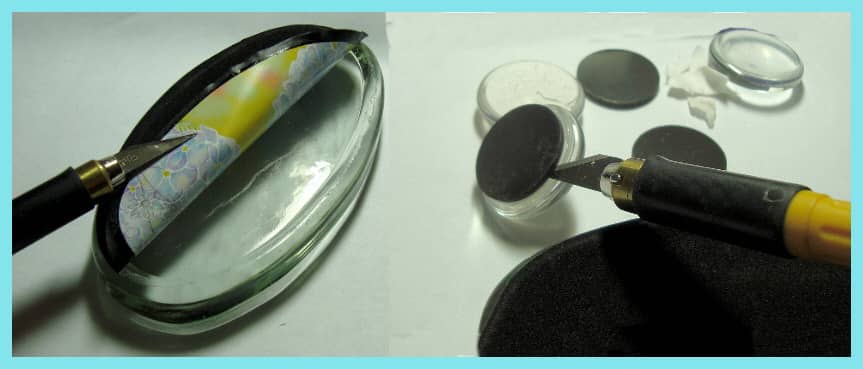
For the oval paperweight, I traced around the shape onto one sided sticker paper then stamped the chickadee. I stamped it again on scap paper and used the matching die to cut a mask. What a time saver!  With the mask in place, I sponged the background and stamped the quote and grassy border on the bottoms and sides. On a separate piece of sticker paper, I stamped the small bird labels/corners. I measured the original stickers and they were exactly an inch in diameter, so I used my 1″ circle punch. Just a tip if you hadn’t thought of it…turn your punch over to see exactly where to punch.
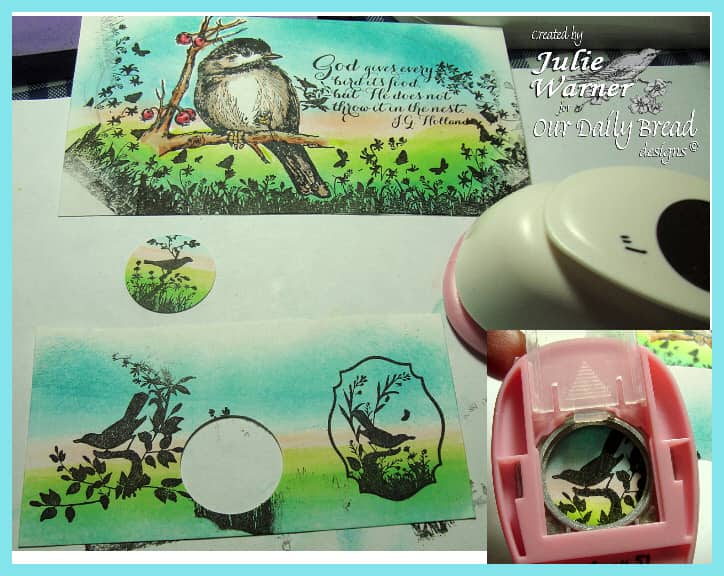
For my oval, I placed a piece of thin scrap paper over the back of the glass. Since it has a lip, I need my new sticker to fit inside. I used a craft knife to cut out the oval while it was on the glass. 
The cut out oval was removed and the remaining frame was placed over my picture and the shape traced so I know where to cut. This can be cut by hand, but by coincidence, the shape is pretty close to one of my Spellbinders Mega oval dies. The mega oval is a little long, but resizing it is easy. I did a tutorial on this several years ago, but in general…. 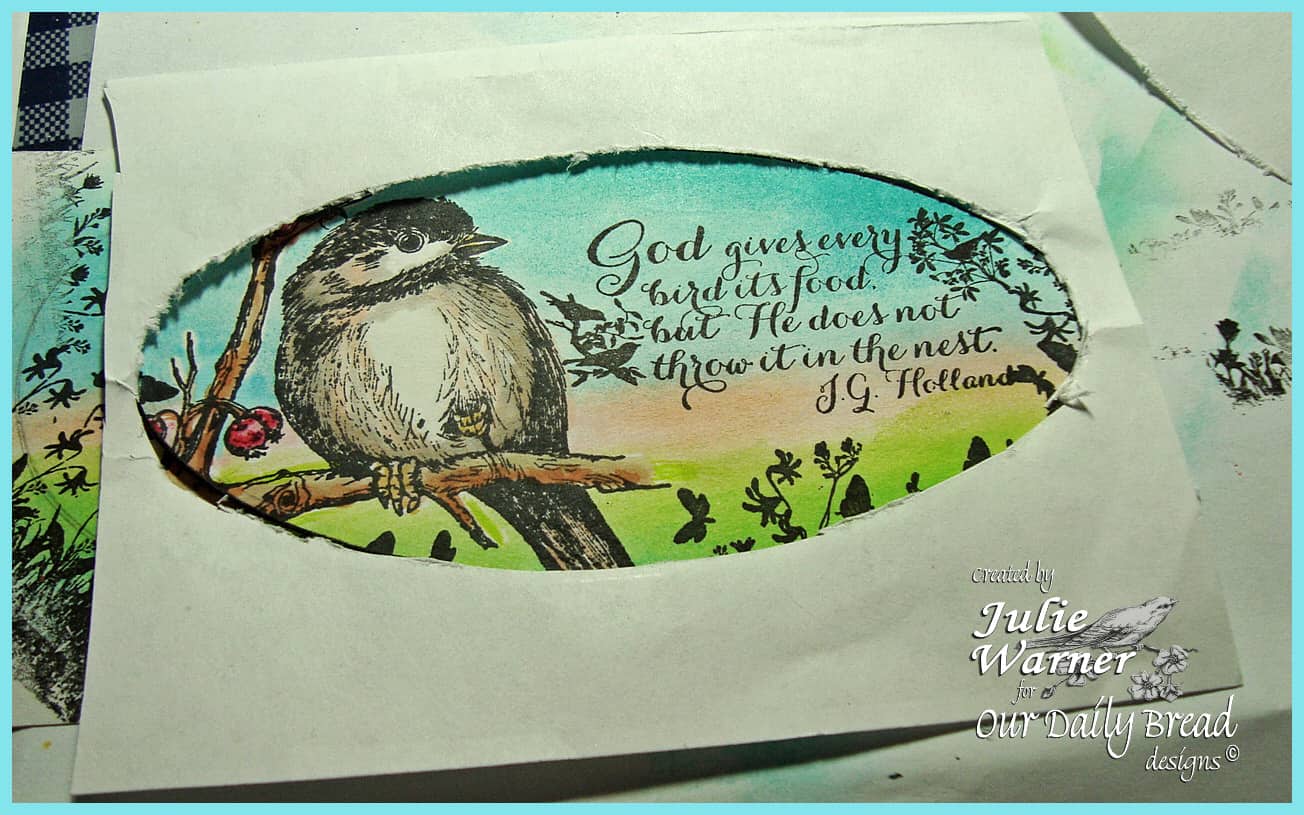
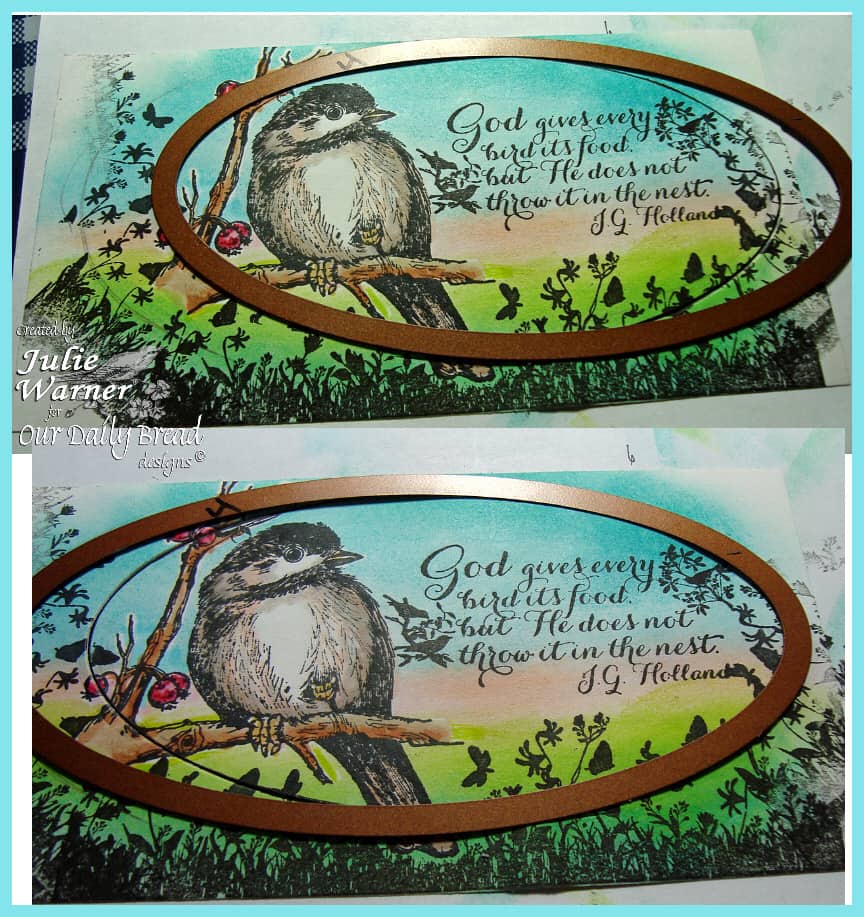 place the die on the line you want to cut on the left. Insert into the die cutting machine, left side first (I use an original Sizzix for this so you may have to adjust to your machine) and cut ONLY to the half way point. Remove from the cutter and move the die to the line you want to cut on the right side. Turn the project around and insert right side first and once again cut ONLY to the half way point.
 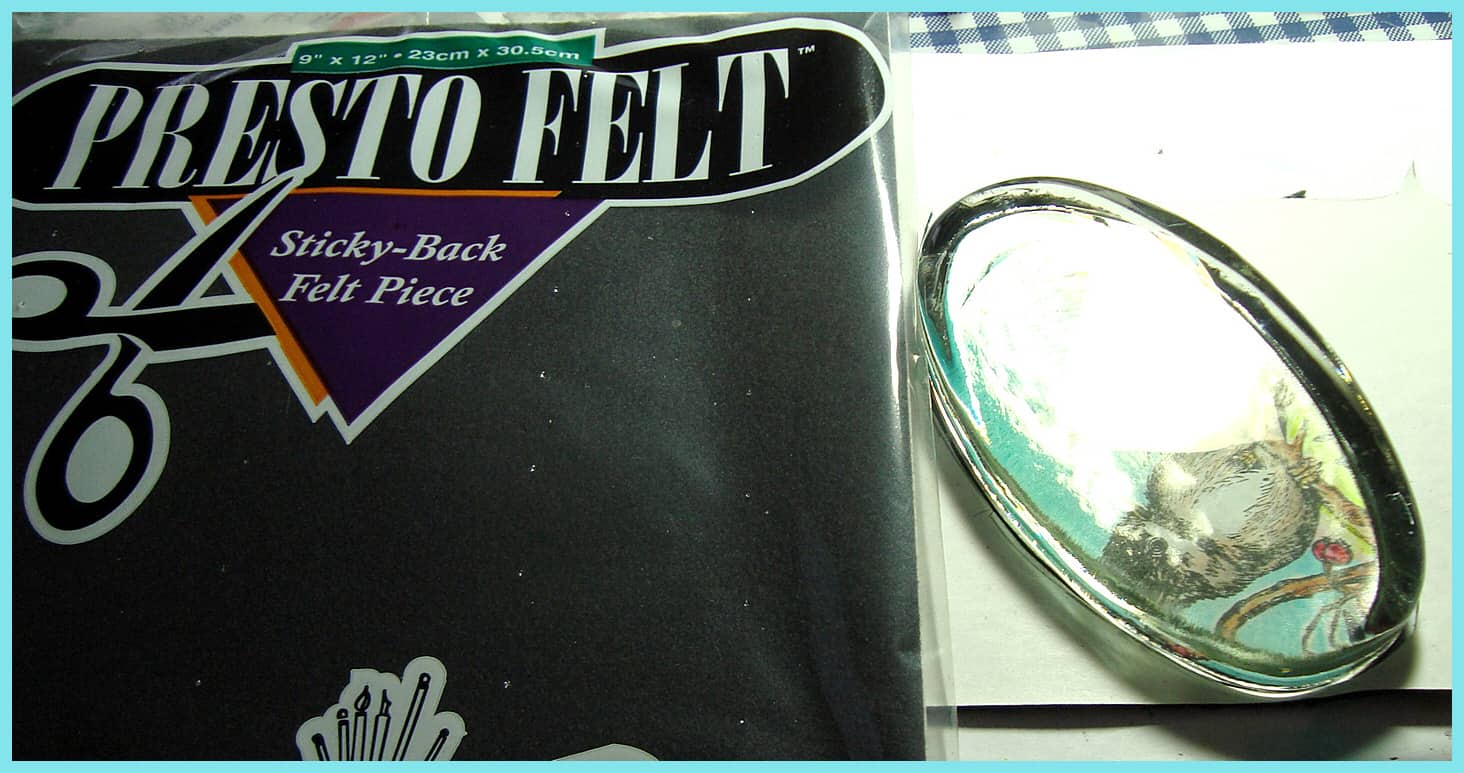 Now my oval is just the right size! I peeled the back off this new sticker image and attached it directly on top of the old sticker I peeled off. I placed this so that it fit inside the glass oval.
  For the magnets, after punching the stickers out, I applied glue to the silicon covered glass back. I used this Monoaqua glue from Tombow because it’s thick enough to self level and it dries clear. I placed the sticker face down and attached the original cardboard backing on top, applied more glue then attached the magnet. Gently press together the piece and have a baby wipe handy to wipe any excess off the glass.
 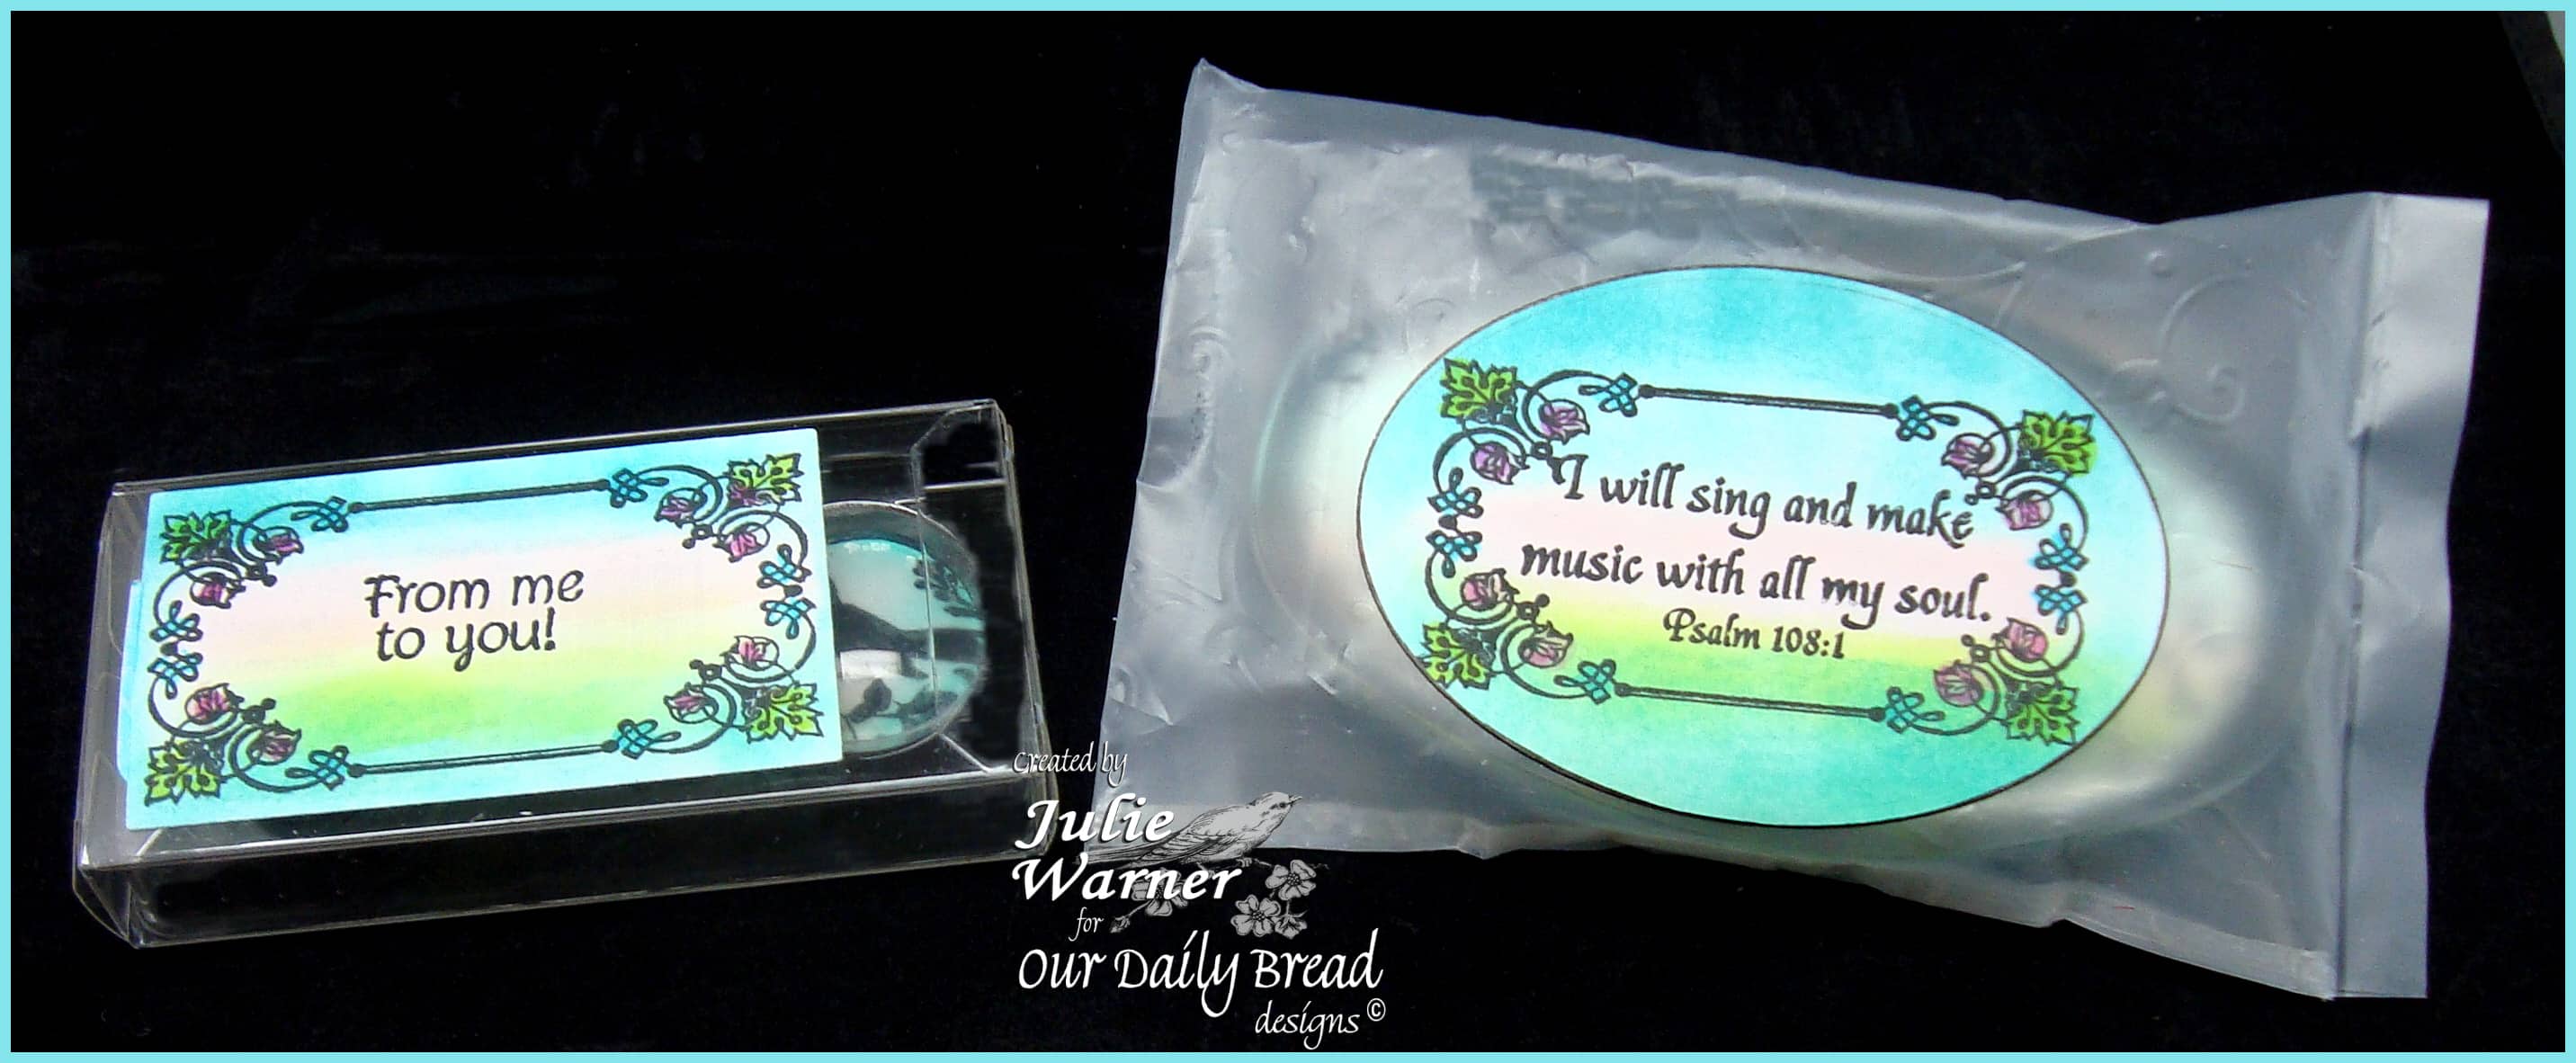 I kept the original little plastic box for the magnets, but made a new sticker label. For the paperweight, I made a new plastic sleeve for it out of a translucent shopping bag and put a sticker label on it.
  I made a little gift card to go with my set. I used two sizes of the Spellbinders Labels 6… the largest one for the lower edge and the next smaller for the window. I die cut two of the birds and attached the uncolored one to the back of the top one from the inside to give more stability since so much of him is in the opening. Thanks so much for stopping by and I hope you’ve enjoyed my project!

Supplies:
| Stamps: ODBD -ODBD – Quote Collection 2, You Will Find Refuge, Bird & Butterfly Labels, Bird Borders & Corners, Brocade Borders, Mini Tags 3, Birthday Blessings |
Paper: Neenah white for card, sticker paper for others
|
| Ink: Ancient Page coal, Kaleidacolor caribbean sea, Memento angel pink |
Accessories: ODBD Chickadee die,Spellbinders labels 6 & mega oval dies, Tombow Monoaqua liquid adhesive, sticky back black felt, Tombow markers, 1″ circle punch, craft knife
|