• Tag Archives blog hop
  • Serendipity Tea Time Blog Hop!

    Julie Warner – https://thewritestuff.justwritedesigns.com

    Weekly-Favorite

    Tea-Time-Hop-Badge-1

    Welcome to the Serendipity Tea Time Blog Hop! 


    We know you’ll love these beautiful new Tea Time dies! The rose cut outs are just gorgeous and the shape and lines are fabulous. 

    The hop will run through midnight EDT, March 30, 2014. Just visit all of the Design Team blogs and one random winner will receive a $20 gift code off their next order!
    Julie Warner – https://thewritestuff.justwritedesigns.com
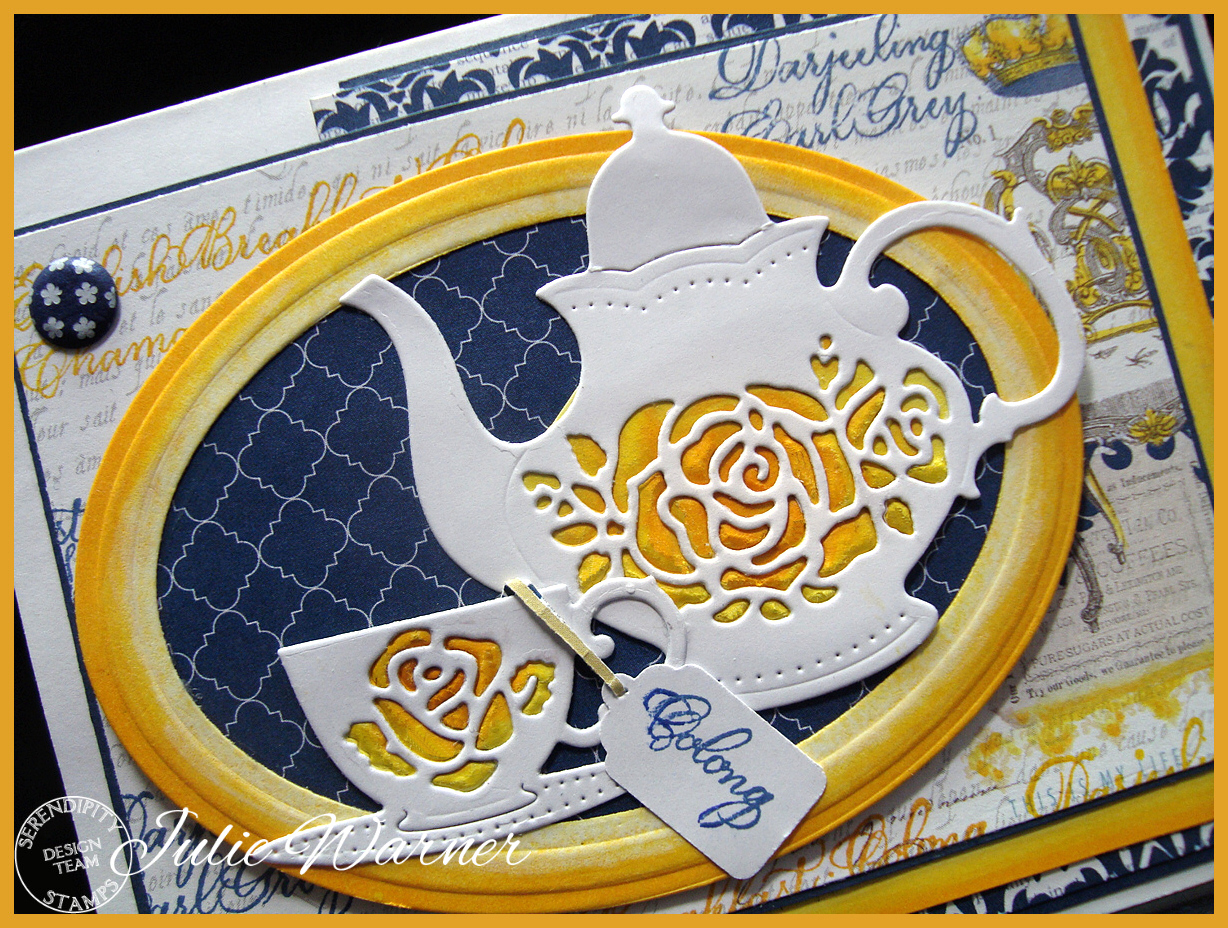
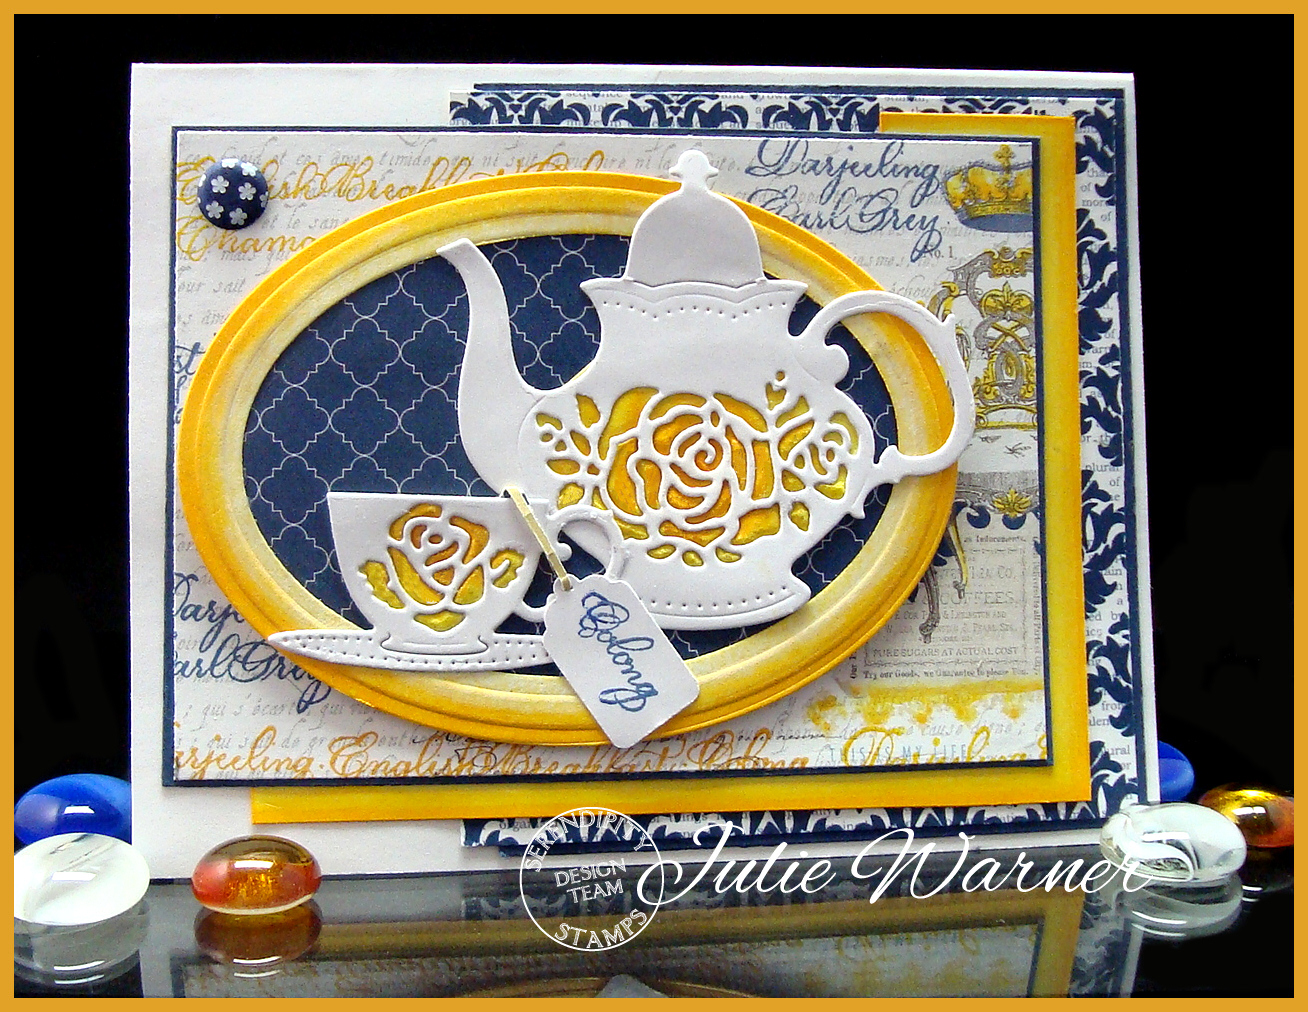
    For my card, I die cut the teapot & teacup in white, then lightly embossed them only on lt yellow card stock. I used yellow & yellow/orange Copic markers to add some additional color to the embossed yellow roses, then trimmed to fit under the white die cut versions. I came across a previously die cut white oval frame & used the same Copics to add color to match. I did the same with the larger, yellow/orange mat. The printed paper was added underneath for contrast. On the larger piece of designer paper, I stamped the tea border with the distress ink and added some of the yellow/orange color to it as well. The layout is a bit non-standard but I had some pieces of designer paper left from another project and didn’t want them to go to waste. One word of the tea border was stamped on white and I used a multi tag punch to punch out the one little “tea bag” tag to add to the cup. I added a printed navy Candi dot in the upper left for balance.

    Thanks so much for stopping by! Please stop by and visit all of the blogs so you’ll be sure to be in the drawing!

    Julie2 sig


    Supplies:

    Stamps: Serendipity Stamps – Tea Border
    Paper: X-Press It white, navy,  dp (Teresa Collins -Moments collection)
    Ink:  Memento tuxedo black, Distress inks in chipped sapphire, wild honey
    Accessories:  Serendipity Teapot & Teacup dies,  Copic markers, Spellbinders lg & sm petite oval dies. multi tag punch (McGill), Candi dot, Perfect Paper Crafts mini rulers & mat

  • Serendipity & Perfect Paper Crafting Hop!

    Julie Warner - https://thewritestuff.justwritedesigns.com

    SerendipityHop

    Welcome to the Serendipity Stamps & Perfect Paper Crafting Blog Hop! We have some fabulous projects from both Design Teams and some fabulous prizes to go along with them!  Our blog hop will start on Monday, March 10, 9:00 AM Pacific time (noon EDT) and go through Sunday, March 16, Midnight Pacific time (3/17/14, 3:00 AM EDT).

    Winners will be announced on each companies blog for the $50 Gift Certificates on Monday, March 17. Winners will be randomly selected from those that leave comments on all the blog hop stops.In addition both companies have these specials for you:

    Perfect Paper Crafting: Use the code, serendipity5%, shoppers will get a discount on their order on at checkout.
    Serendipity Stamps: Everything in our Easter Category is 20% off until Wednesday March 12, 2014.

    Julie Warner - https://thewritestuff.justwritedesigns.comWeekly-Favorite
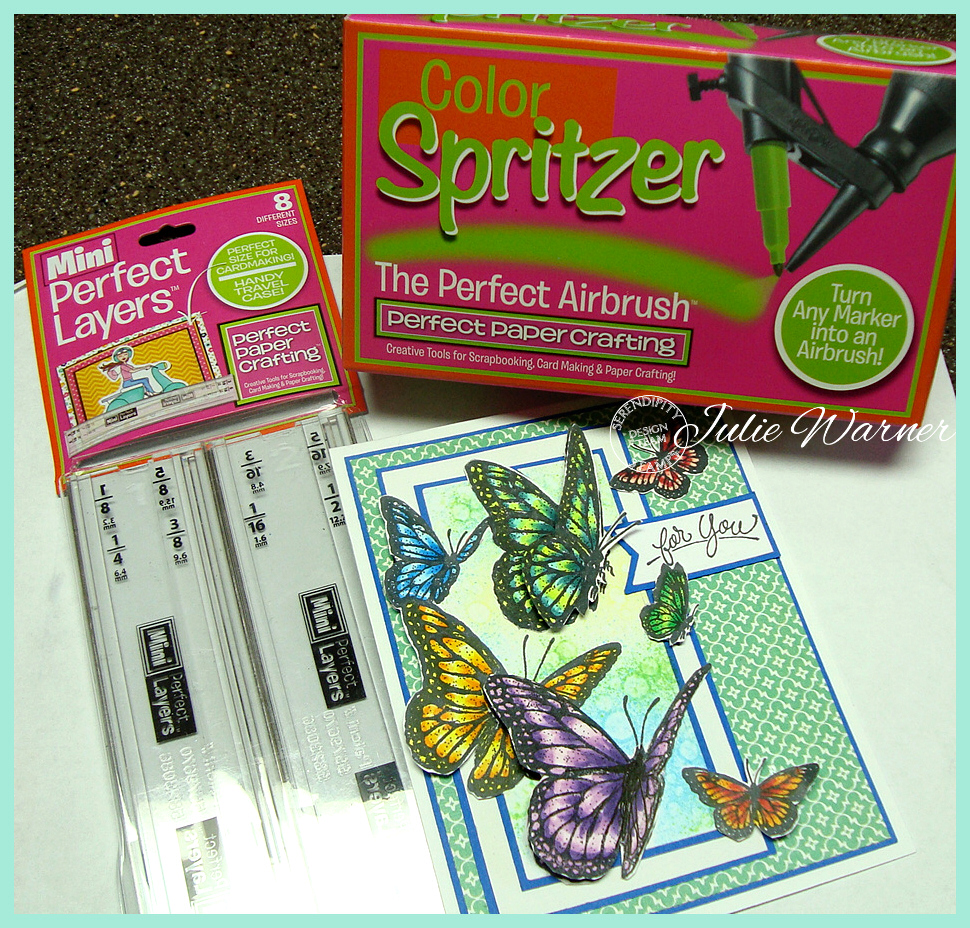
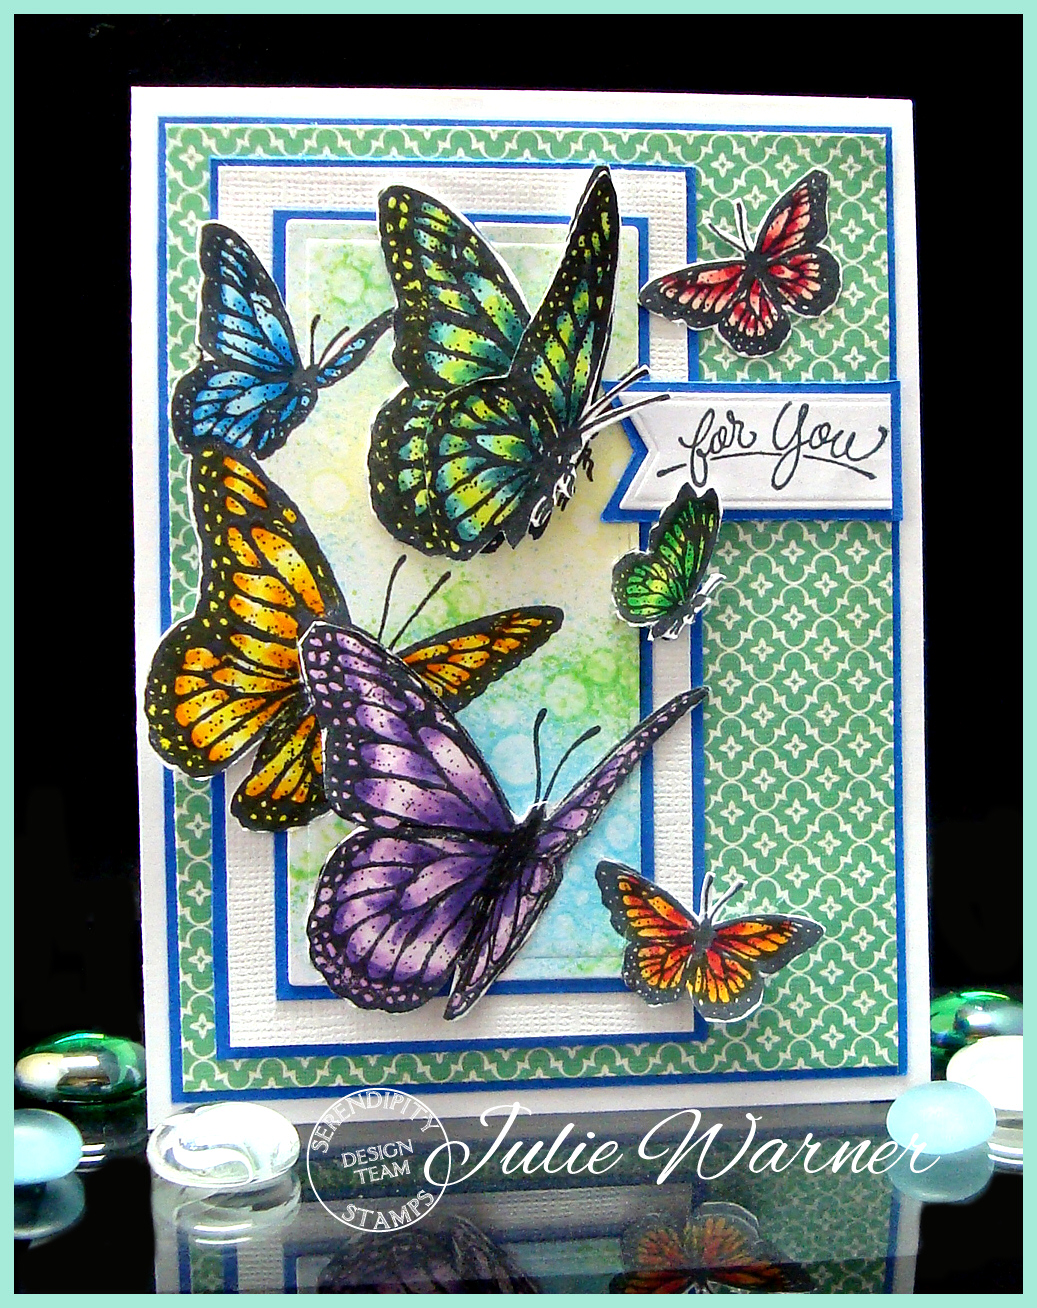
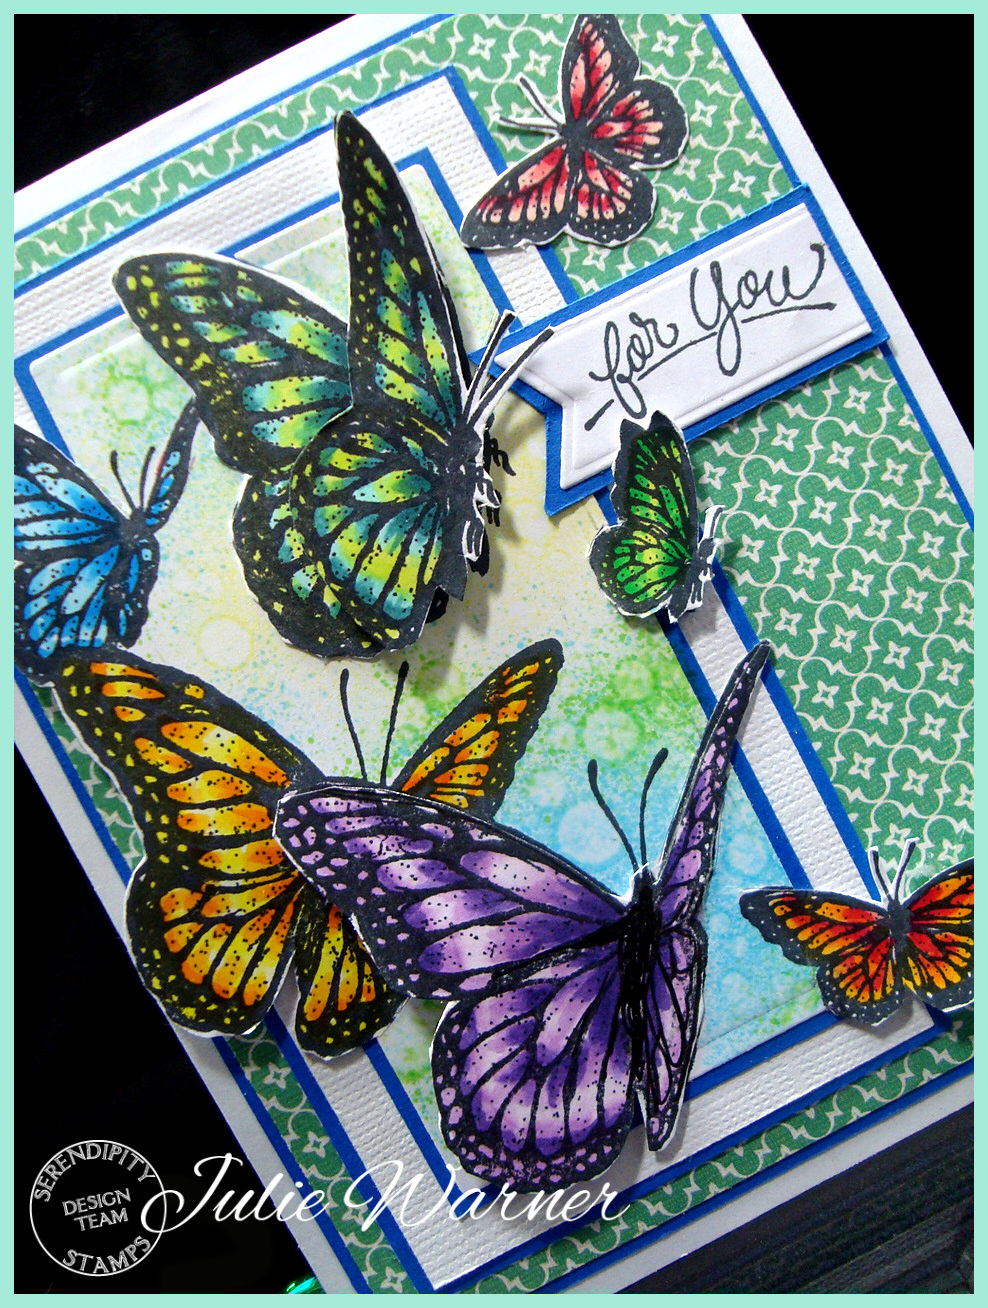
    On my first card, I used this beautiful Serendipity Butterflies in Flight 442L, and the fabulous new Perfect Paper Crafting Layers Mini set! I stamped the butterflies twice, colored both with Copics and set aside one for later. On the other, I did a very tricky out of the box Nestie technique on it using a long rectangle die. Normally, it’s not this involved but I had so many points that were out of the box, including two little butterflies on the right that were almost entirely out of the box, that it was more complicated than usual. But it worked! Since I couldn’t line up the PPC mini ruler against the edge, I die cut another the same size and used it for the template to cut the cobalt blue layer using the ruler to create a 1/16 border. The textured white has a 1/4 inch border, followed by another 1/16 inch cobalt border. I used the same 1/16 inch border for the largest cobalt layer as well.

    Since I also have the PPC Perfect Airbrush Color Spritzer, I wanted to try it out and see if I really could use my Copic markers with it. It worked great! By removing the insert my sketch markers fit and worked wonderfully. By varying the amount of pressure, I was able to have a soft airbrush look or a more splattered look by squeezing harder. So I masked the butterflies and used the spritzer with several colors using a light mist. Then I used a small acrylic paintbrush dipped in blender solution to splatter the background and the result is the watercolor like look you see here.
    Julie Warner - https://thewritestuff.justwritedesigns.com
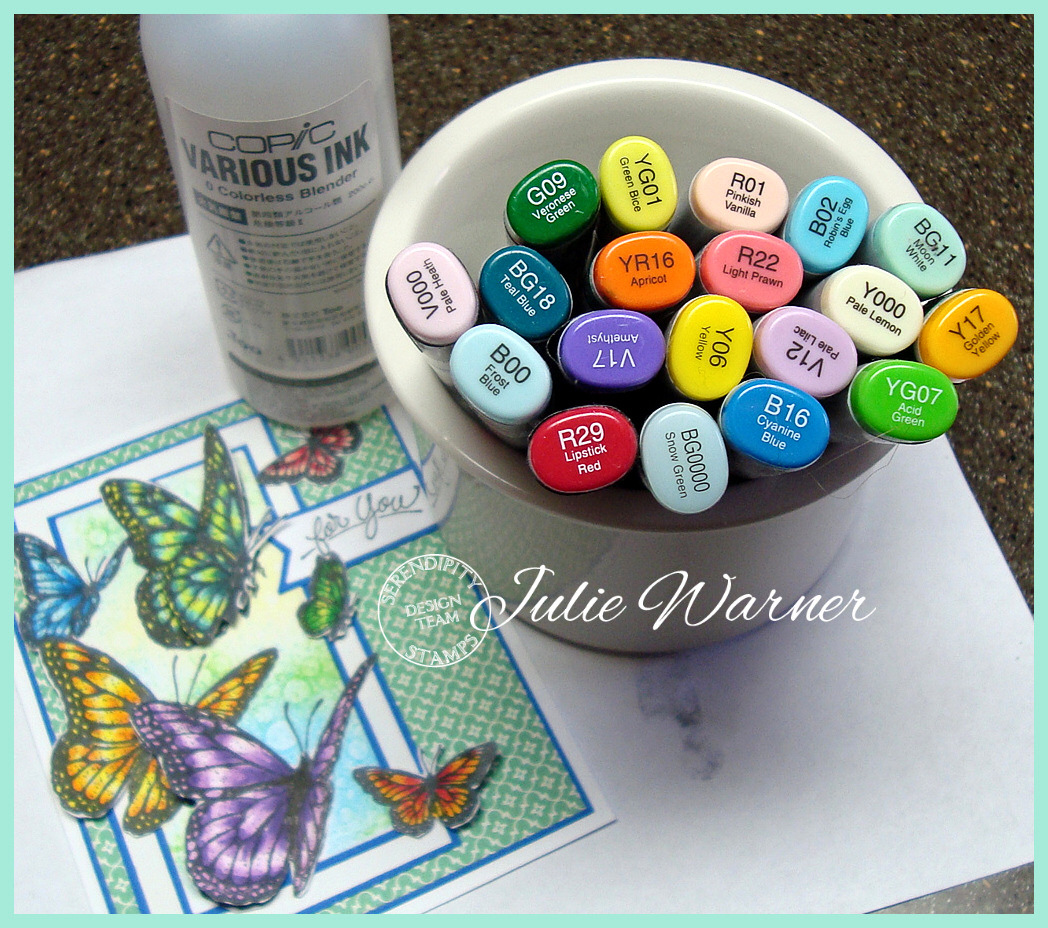
    The fishtail banner die cut sentiment also has a 1/16 inch cobalt layer created with the PPC Layer Mini and by using just the end of the ruler jutted up against the inside indentation, I was able to use the ruler all the way around. I cut out a few of the extra butterflies and attached them with foam tape for extra dimension. The finished card is 4.25 x 5.50 and these are the Copics I used

    Julie Warner - https://thewritestuff.justwritedesigns.com
    Supplies:

    Stamps: Serendipity Stamps – Butterflies in Flght 442L, For You Small 615B
    Paper: X-Press It white, cobalt, dp (Basic Grey -Knee Highs collection)
    Ink:  Memento tuxedo black
    Accessories:  Copic markers, Copic Blender Solution, Perfect Paper Crafting Layers Mini, Perfect Paper Crafting Perfect Airbrush, Spellbinders long rectangle die, MFT fishtail banner die,

    Julie Warner - https://thewritestuff.justwritedesigns.com
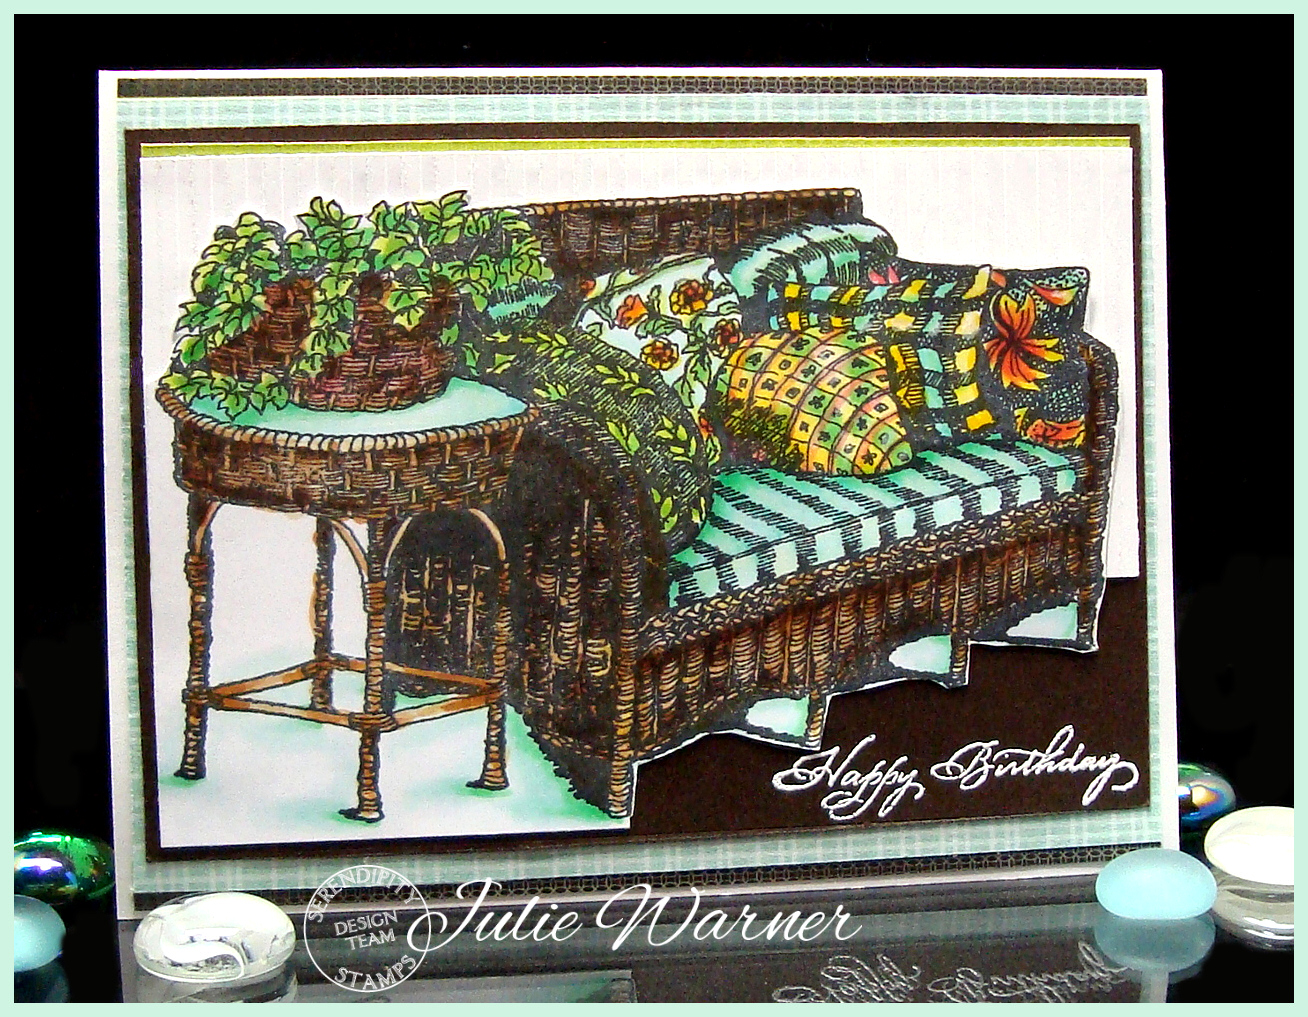
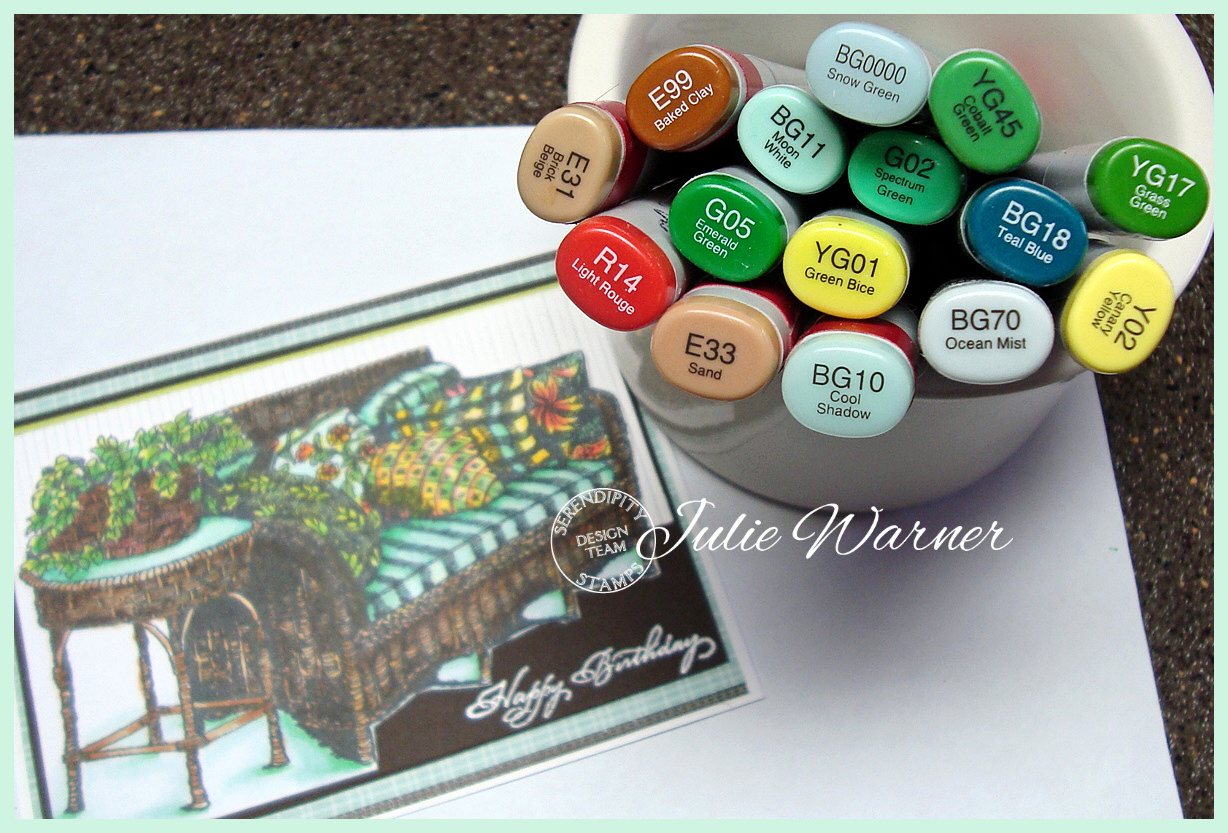
    My second card is much simpler! After stamping the sofa and coloring, I trimmed around the top, right and lower right edges, leaving only a small section around the left side. I added a strip embossed white panel behind the couch and used the PPC Layers Mini to created a lime green 1/16 inch strip on top before attaching it to a larger chocolate brown layer w/ the greeting white embossed in the lower right. I used the PPC Layer Minis to create a 1/4 inch border on top & bottom with a 1/16 inch border on left & right on the pale aqua checked paper. I attached two strips on top and bottom w/ the chocolate stripe showing and again used the ruler to create the 1/16 inch borders. The finished card is 5.50 x 4.25 and these are the Copics I used.
    Julie Warner - https://thewritestuff.justwritedesigns.com
    Supplies:

    Stamps: Serendipity Stamps – Rattan Sofa 002L, Everyday Words Small Horizontal
    Paper: X-Press It white, chocolate, dp (lime & brown stripe -Kaisercraft Chapter One), aqua checked dp (Recollections)
    Ink:  Memento tuxedo black, Colorbox frost white pigment
    Accessories:  Copic markers  Perfect Paper Crafting Layers Mini, Lifestyle/Quickutz embossing folder (Nautical set), white embossing powder

    Thanks so much for stopping by!
    Julie2 sig

    This is the Hop order in case you lose your place:

    Serendipty Stamps
    Perfect Paper Crafting & Laura Lynn
    Anya Schrier
    Jenny Gropp
    Marybeth Lopez
    Pam Sparks
    Julie Warner (you are here!)
    Jenn Cochran
    Vickie Zimmer
    Roxie Glaza
    Jeanne Jachna
    Dana Joy
    Karen Amidon
    Miriam Napier


  • Serendipity Stamps Blog Hop Day 3!

    01-14 Blog Hop Badge copy

    Welcome to the Serendipity Blog Hop! We are showcasing some fabulous new dies these 3 days and Hoppers have until Feb 5 to leave a comment! Winners will be posted on Feb 7.  Blog candy is hidden – meaning the winner will be chosen at random from one of our DT blogs.  Be sure to leave a comment on each blog so you’ll be in the random drawing.   The prize will be  $10 discount code each day of the hop!

    If you came here from Mary’s Blog (Serendipity Challenge Blog), you are in the right place. If not you might want to start there so you won’t miss a thing!

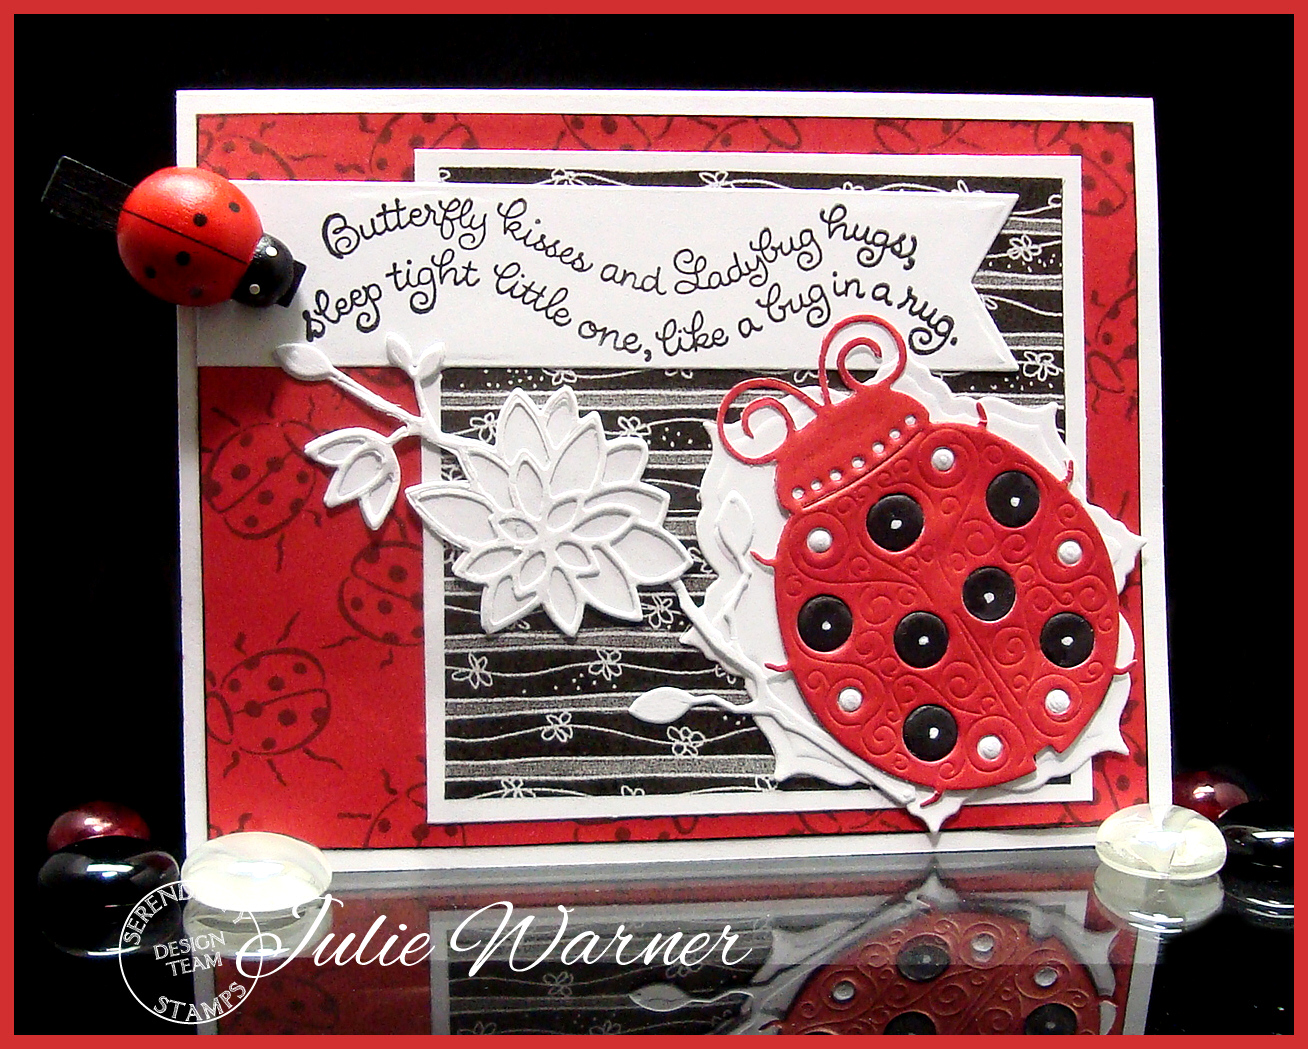
    Ladybug 02712
    This is the final day of the Serendipity Blog Hop and our last die to show you is this beautiful Ladybug! It is so detailed! The scoring and different size circles are just wonderful. It may be cliche, but I immediately thought red, white & black. A little funny, because ALL of the ladybugs we have around here are orange and black. Must be a different variety. Anyway, I die cut 3 ladybugs…1 red, 1 black & 1 white. The red is the main ladybug and I used the lg dots from the black version & small dots from the white version & I added dots w/ a white gel pen to the centers of the lg black dots.. I added a white die cut blossom layer underneath the ladybug and a die cut white flower.

    The red background was stamped w/ a cute little ladybug image and some black & white dp that I’ve had forever seemed to be a good match. The greeting was die cut with a fishtail banner & I found a package of little ladybug clothespins so I added it to the banner. The finished card is 5.50 x 4.25.

    Thanks so much for stopping by! Now I’ll send you on to your next stop…the blog of the wonderful Karen Amidon!

    Julie2 sig
    Supplies:

    Stamps: Serendipity Stamps – Ladybug, Ladybug Hugs
    Paper: black, white, red, dp (unkwn)
    Ink:  Memento tuxedo black
    Accessories: Serendipity Ladybug die, Spellbinders blossom 4 die, MFT fishtail banner die, Memory Box Cheshire branch solid & outline dies, ladybug clothespin, white gel pen