• Tag Archives snowflakes
  • Let it Snowflakes

    Let it Snowflakes cu08237
    Weekly-Favorite
    Today’s Ways to Use It Challenge (WT567) is about how cold it is! It’s definitely been on the chilly side here…we had sleet most of the the afternoon & we’re supposed to have snow tomorrow afternoon & on into Sat. morning. Maybe it’s just me, but when it’s already that cold, just go ahead and snow. It’s much preferable to the frozen rain, sleet & ice. Those are just accidents waiting to happen! And besides…I would much rather see lacy, pretty snowflakes like these than frozen pellets of ice. 
    Let it Snowflakes2 08236
    To make my wintry blue card, I first die cut the largest layer, then die cut the smaller inset w/ a stitched rectangle.  Then I heat embossed the large & smaller snowflakes w/ white powder onto the smaller inset then sponged on the blue inks from the Kaleidacolor ink pad. I also sponged the larger frame but reversed the colors w/ the dark on top & light at the bottom. 

    The greeting took a bit of finagling. I used a stamp positioner & masking to rearrange the vertical SNOW into a horizontal direction & colored it w/ a few blue & blue-violet Copics. I added a couple of die cut shapes that reminded me of snowflakes, a few punched snowflakes & some stickles for a little sparkle.


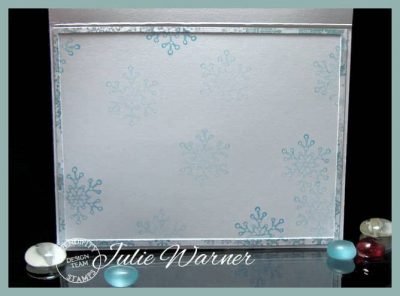
    Here’s a look at the inside..just some simple stamping.
    Let it Snowflakes inside 08239
    Thanks so much for stopping by! If you haven’t, please head on over and check out the DRS Thursday Challenge..this week it’s a color challenge. DRS images are not required & there’s a nice prize up for grabs!
    Julie2 sig
    Supplies:

    Stamps: DRS Designs – Med. Filigree Snowflake, Lg. Filigree Snowflake,Vertical Let it Snow,  (Warm Thoughts-inside)
    Paper:  Neenah white
    Ink:   Kaleidacolor blue breeze, Colorbox frost white pigment
    Accessories:  Spellbinders pierced A2 matting basics A , Persian Accents dies, Lil’ Inkers Stitched Rectangles, stickles, Copic markers, snowflake punches

  • Snowflake Birthday

    Snowflake Bday cu 08156
    This is for a couple of Splitcoast challenges..Color (CC564) & Sketch (SC574). Love these colors & looking through my stash, I found I have a whole bunch of backgrounds made with the blue/green combo…really one of my favorite combos. So I took one I made on a lg tag & cut it down & added some of the sand color in the bg for the color challenge. For the sketch, the only thing different is mine is the mirror image & it’s only that because the card front was upside down when I attached the vertical panel, so I had to reverse everything. Go ahead & laugh…like you’ve never glued anything upside down, lol. 
    Snowflake Birthday 08155
    The med & lg snowflakes were stamped onto white, die cut & added to larger circle layers. For the sand bg, I stamped the snowflake bg all over using the sand ink then just a few flakes here & there w/ the white ink. The tag that I used for the vertical panel was done w/ a kind of modified Wrinkle Free Distress technique & I added just a bit of the Brilliance on top for a little shimmer.

    Snowflake Bday inside 08161
    Thanks so much for stopping by!

    Julie2 sig

    Supplies:

    Stamps: DRS Designs – Interlocking Snow Bg, Snow Doubt Birthday, Med. Filigree Snowflake, Lg. Filigree Snowflake, (Birthday Wishes -inside)
    Paper:  Neenah white, cucumber crush, Pacific Point & Sahara sand clones, manilla tag
    Ink:   Kaleidacolor fresh greens, Distress inks mermaid lagoon, tumbled glass, twisted citron, Brilliance platinum planet, Memento tuxedo black & desert sand, Colorbox frost white pigment
    Accessories:  Spellbinders pierced A2 matting basics A & B, circles & pennant dies, ODBD flourished star pattern die, kraft sheet, fine mister

  • Green Snowman

    Green Snowman cu 07992
    Weekly-Favorite
    This is for 3 Splitcoast Challenges…the sketch (SC570), the Technique (TLC563) & the CAS (CAS354). It’s been a long time since I combined more than 2 challenges. Green Snowman 07990
    For the CAS, it was to use Christmas greens. I used only greens…5 shades of green from a Kaleidacolor ink pad. And since I really didn’t color anything & it’s all die cuts, it really was easy. For the Technique, we were to use small stamps to create something. I used 3 small images to make the large circle & a small greeting to make the border. I just eyeballed the placement & it worked out pretty good. For the sketch, I did a little finagling….I rotated it counterclockwise, my panel 5 is a bit larger to accommodate the snowman & my greeting is also round.

    Everything was stamped w/ the fresh greens rainbow pad onto water color paper (that’s why it isn’t bright white). For the snowman, I used a water brush to drag the color in for shadows then dried it & over stamped w/ the same ink to sharpen the details again. The panels were all die cut & I used the same inks & water brush to add color to the edges. A little stickles was added along w/ a glittery round embellishment I colored green w/ a Copic (it was clear).

    Here’s a look at the simple inside.
    Green Snowman inside 07995
    Thanks so much for stopping by!
    Julie2 sig

    Supplies:

    Stamps: DRS Designs – Simply Snowman, Small Merry Christmas, Interlocking Snow Bg,  4 in 1 Accessories, Snow Background
    Paper:  water color
    Ink:   Kaleidacolor fresh greens
    Accessories:  Spellbinders pierced rectangles, circles & pierced circles dies, stickles, water brush, glitter gem