• Tag Archives bees
  • ODBD March Release!

    Julie Warner – https://thewritestuff.justwritedesigns.com
    Welcome to the Our Daily Bread designs March release!  And what a bee-u-tiful release it is! Flowers, bees, honeycombs, dies to match…you’re going to love these!

    First, the prize details…Three winners will be randomly chosen from the comments left on the designers blogs to receive a $25 Gift Certificate to the ODBD Store, to be used toward the purchase of ODBD Stamps.  You have until March 2, 2014 at 9:00 p.m. EST to make your comments!  The Winners will be posted on the ODBD Blog on March 3rd, so be sure to check back there to see if you won!

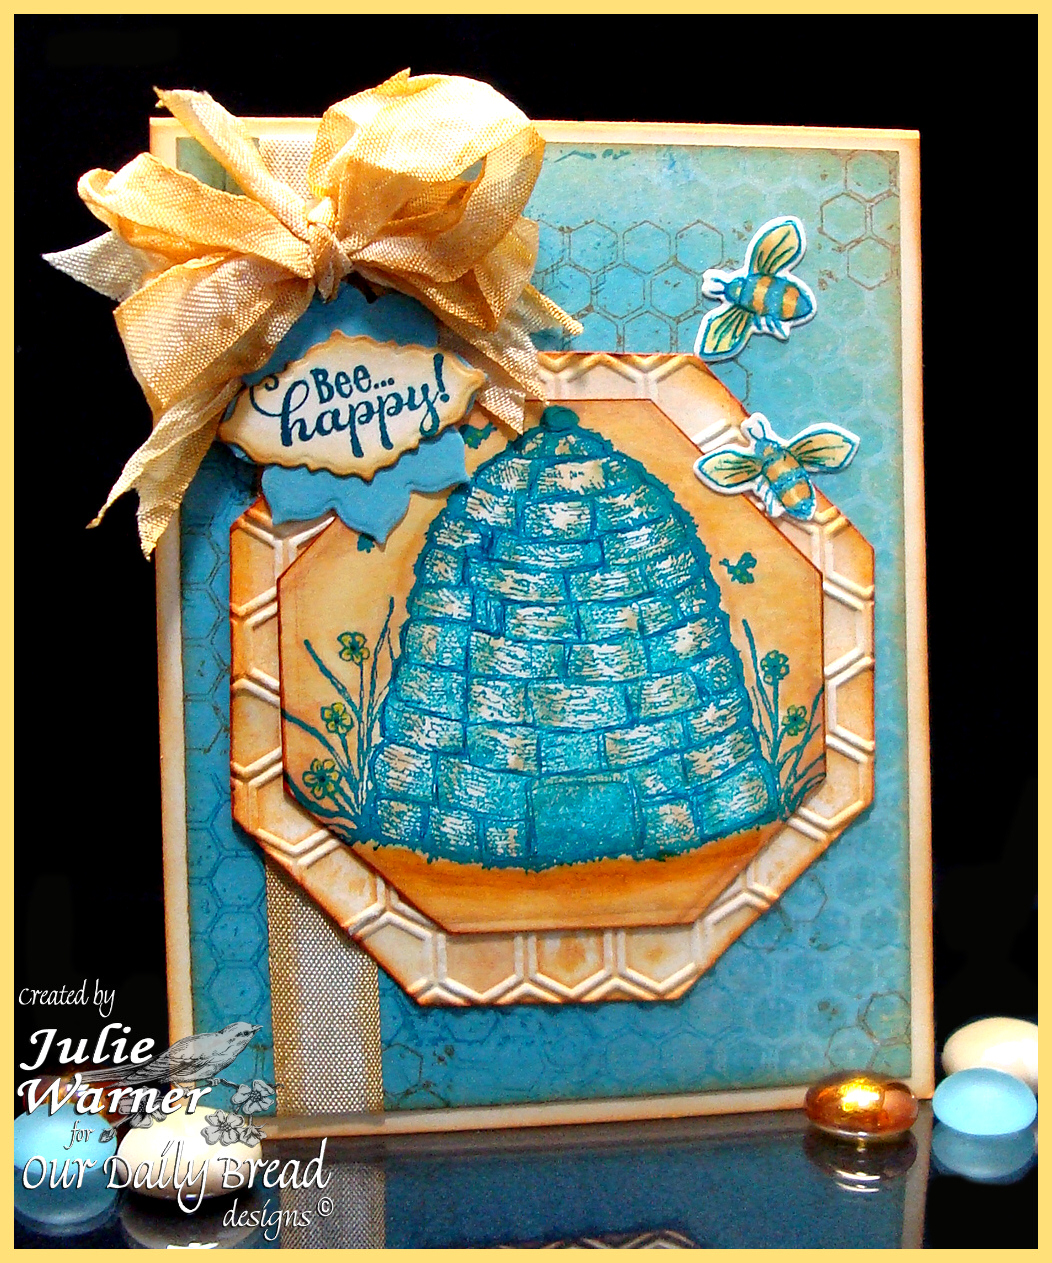
    My first card features the fun Bee Happy set and Honeycomb Background. After stamping the beehive with deep lagoon chalk ink, I added a little yellow ochre with a Tombow marker. Normally I use a Copic marker, but they don’t play well with chalk inks. I did use the yellowish Copics to add color around the beehive, but I did so very carefully.I really wanted a hexagon die to mimic the shape of the honeycomb, but I don’t have one. So I die cut it with a square die then turned it 45 degrees and cut the corners to mimic a hexagon shape. The honeycomb embossed layer behind it was done by inking the embossing folder, embossing the vanilla card stock then die cutting with the square the same way. For the turquoise background, I stamped portions of  the Honeycomb Background with teal, butterscotch and white pigment inks. The seam binding was colored with Copics to match.

    Supplies:

    Stamps: Our Daily Bread designs Honeycomb Background, Bee Happy
    Paper: vanila, turquoise dp (Authentique – Summer)
    Ink:   Colorbox deep lagoon chalk ink & frost white pigment inks,  Adirondack butterscotch,
    Accessories:  ODBD Ornate Borders & Flowers dies,  ODBD Zinnia dies,  Copic markers, Spellbinders squares dies, seam binding, Quickutz/Lifestyle Honeycomb embossing folder set, yellow ochre Tombow marker, mini bowdabra

    Julie Warner – https://thewritestuff.justwritedesigns.com
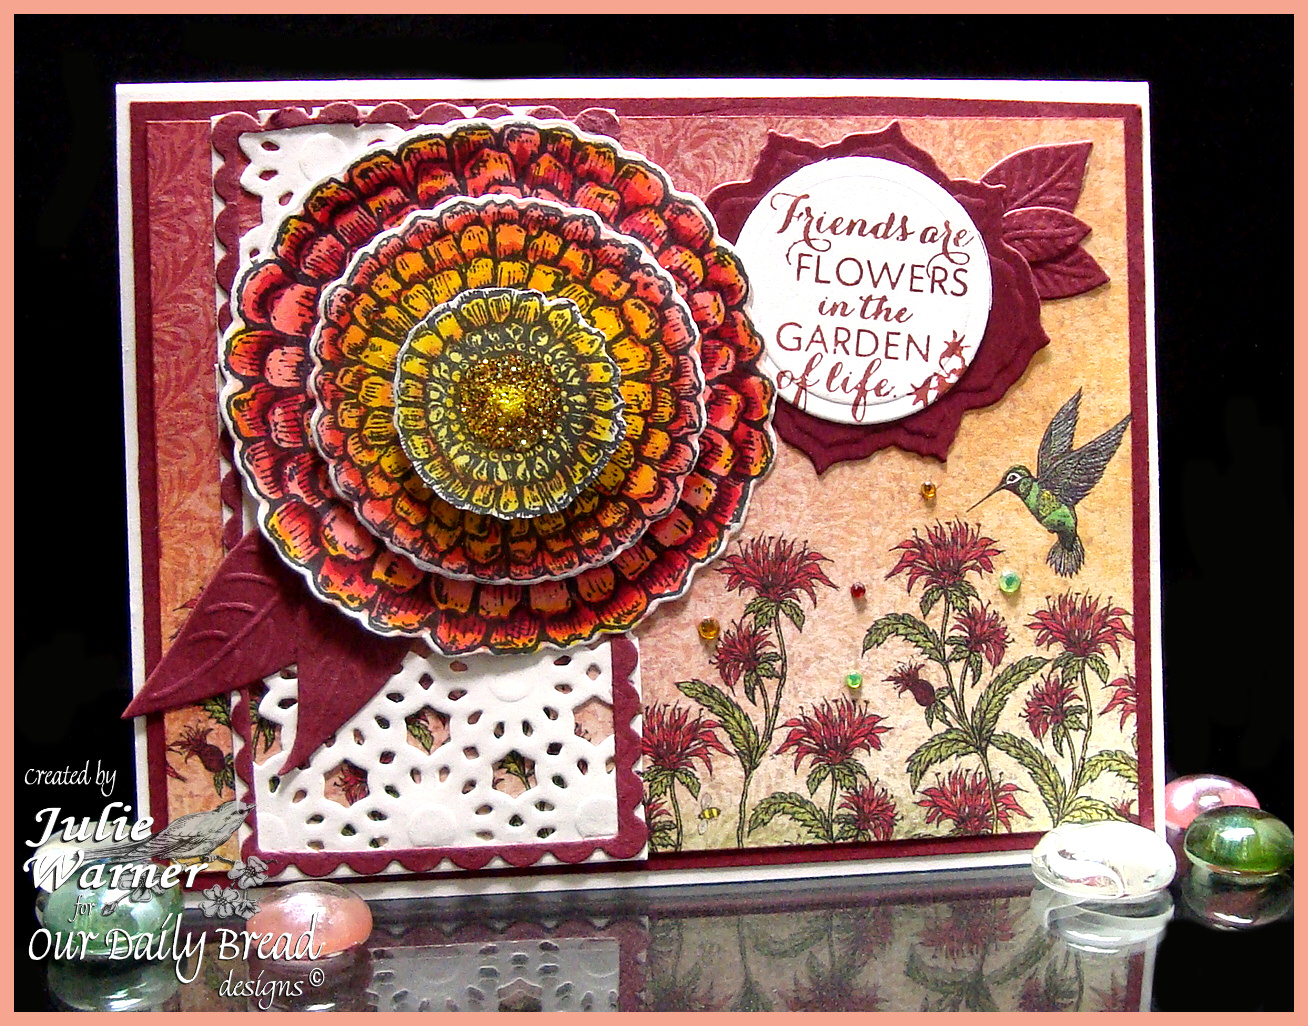
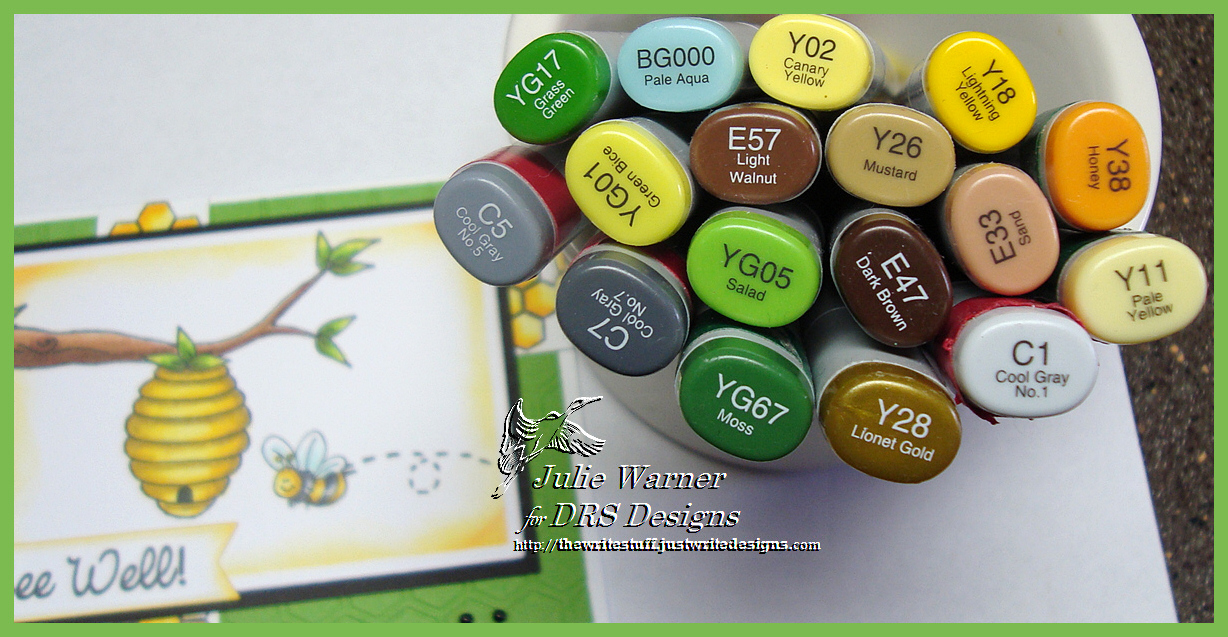
    For my second card I’m using the beautiful Zinnia set and matching dies along with the gorgeous Blooming Garden paper collection. After stamping the large zinnia once and small zinnia twice, I colored them Copics then die cut. One of the small zinnias, I fussy cut smaller than normal then layered them together and added a little stickles in the center. The greeting was die cut with a circle die and attached to a floral die cut along with some little leaves from the Fancy Foliage set. The vertical white panel was die cut with  the  Daisy Chain die and a  scalloped long rectangle die was added around it. A few colored gems were added for extra interest. The finished card is 5.50 x 4.25 and these are the Copics I used.Julie Warner – https://thewritestuff.justwritedesigns.com
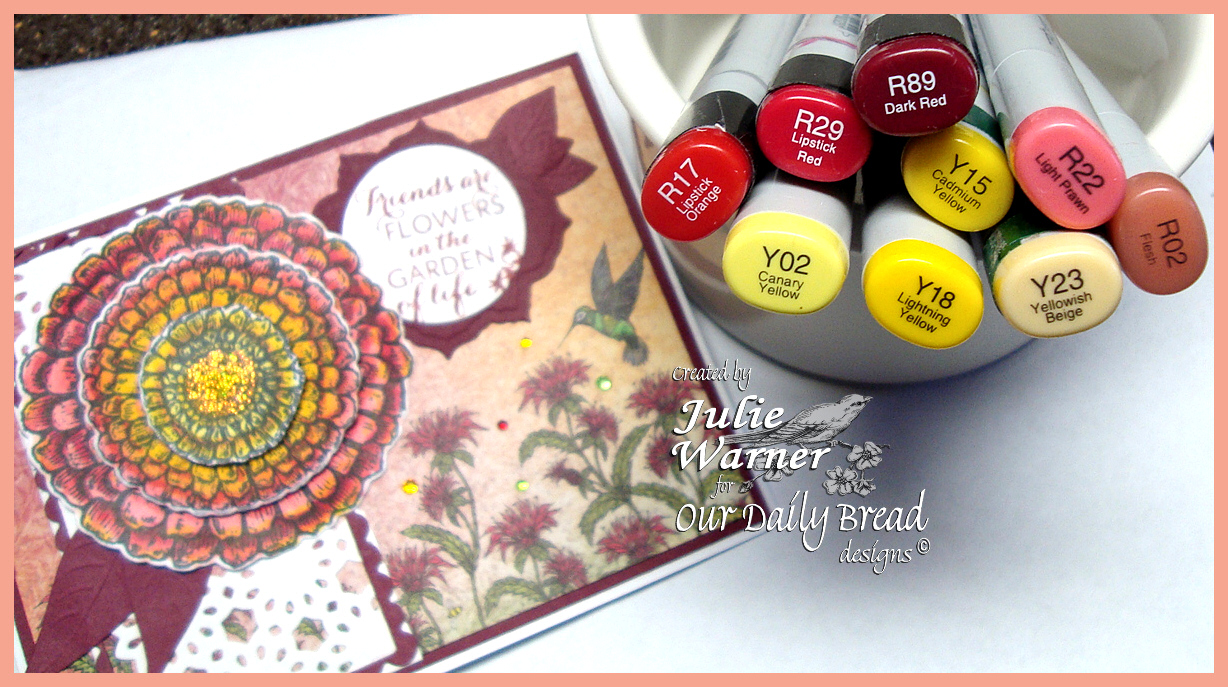
    Stamps: Our Daily Bread designs  Zinnia
    Paper: white, ODBD Blooming Garden collection paper, maroon
    Ink: Colorbox black cherry chalk ink
    Accessories: ODBD Zinnia dies, ODBD Fancy Foliage dies, ODBD Daisy Chain Bg die,  Copic markers, Spellbinders circles & blossom 4 dies, gems

    Thanks so much for stopping by! Please be sure to check out all the DT blogs for more wonderful inspiration

    Julie2 sig
    Stacy * Grace * Chris * Dawn * Julie * Sabrina * Cathy * 

    Lori * Sandee * Wanda * Audrey * Silke * Angie * Lisa

  • North Coast Creations Look Back

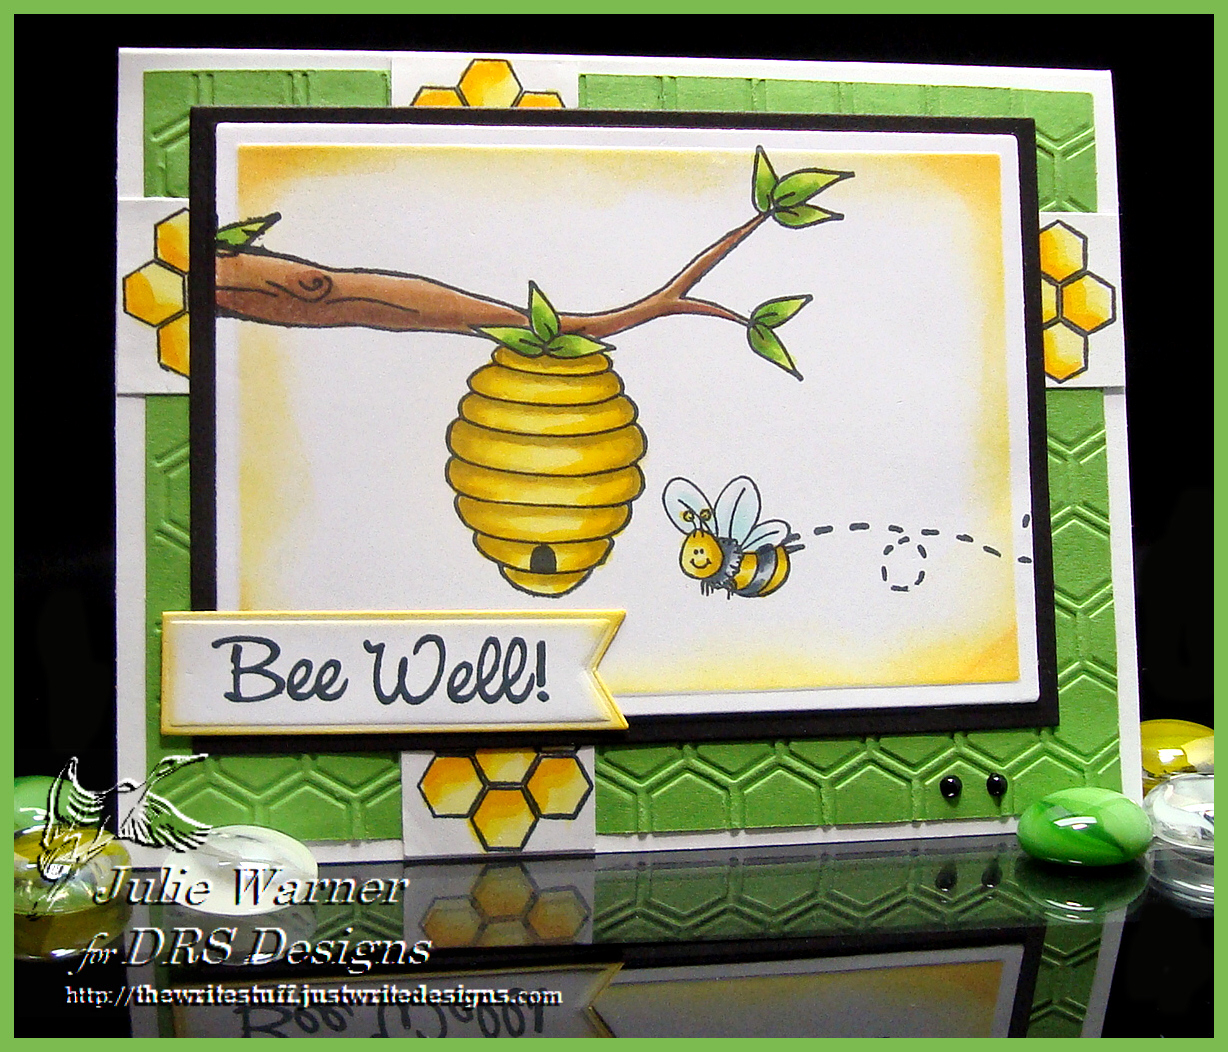
    NCC Bday Honeycomb 02756
    Today we are taking another look at the North Coast Creations January release! This is such a fabulous release, with beautiful florals and lovely greetings for all occasions. For my card, I used the Floral Sentiments 2 and two ODBD images that complement it and the paper I used.

    On a piece of the designer paper, I stamped the Happy Birthday greeting with the chalk ink in a section of the dp that seemed perfect for it. After die cutting on a curve, I also die cut a border section using the reverse side of the same piece of dp. I stamped the sweet branch image w/ the teal ink, added a hint of color and fussy cut it.On a piece of ivory card stock, I stamped the ODBD honeycomb bg with a combination of the two distress inks and the Memento ink. I added color with Copics in just a few of the honeycombs and sponged the edges with the straw ink. Since the card front was white, I also sponged the edges of it to better coordinate. The finished card is 4.25 x 5.50.


    Thanks so much for stopping by! Please be sure to check out the NCC Blog and all of the DT blogs for more inspiration!

    Lori * Julie * Amber * Dawn * Lisa * Sabrina 

    *Sandee

    Julie2 sig

    Supplies:

    Stamps: North Coast Creations – Floral Sentiments 2, ODBD Simple Things & Honeycomb background
    Paper: ivory, dp (Authentique – Summer)
    Ink: Distress Inks tumbled glass, scattered straw, Memento teal zeal, Colorbox deep lagoon chalk ink
    Accessories:  Spellbinders curved borders die, buttons, Copic markers, buttons

  • Simple Things

    Julie Warner - justwritedesigns - https://thewritestuff.justwritedesigns.com

    Weekly-Favorite
    Best of 2011
    It’s almost Christmas! Only a few more days! Are y’all ready? I still have lots of wrapping and baking to do. Not really sure why I’m always behind, but no matter how well I think I plan, it always comes down to the wire. And there’s always that one gift that goes missing. According to the tracking, it’s been doing a winter vacay in Colorado since Dec 13. How do I get a deal like that, lol?

    I made this for today’s Sketch Challenge (SC364) and yesterday’s Color Challenge (CC354) at Splitcoast. Wonderful sketch and it turns out the colors are kinda nice together. Not sure I would have ever come up w/ the combo, but it’s growing on me.

    All images are Our Daily Bread designs. With these colors, I figured I would have a tough time trying to make a last minute Christmas card, so I packed that idea in pretty quickly and went w/ a spring card. I inked the clover w/ the lime ink, wiped off the little clover blooms and inked them w/ a wisteria marker. The sentiment was stamped first w/ the rose coral ink then lined up and stamped again w/ the grape ink. I used a coral marker to highlight a few of the words.

    I die cut it using the out of the box Nestie technique and added a coral layer and lacy square layer out of dp.

    Julie Warner - justwritedesigns - https://thewritestuff.justwritedesigns.com
    For the circular element on the left, I die cut a piece of sparkly lime dp using a Cheery Lynn die. I used the same die on a piece of wisteria colored dp but did the emboss only. I attached the lime die cut on top and trimmed around the edges. Not really sure how this came about, but I put a coral like piece of c/s under the area I cut out of the lime and attached the die cut back on top, but a little off.

    I added a cuttlebug embossed strip across the bottom, w/ a little stickles and attached to a 5.50 x 4.25 card.

    Thanks so much for stopping by!

    Happy Holidays!

    Supplies:

    Stamps: ODBD – Simple Things
    Paper: white, dp (all SEI – On the Coast collection), some coral like c/s
    Ink: Archival grape, Colorbox rose coral & lime chalk inks
    Accessories: Spellbinders squares & lacy squares dies, Cheery Lynn Italian Flourish die, Cuttlebug With Love border folder, Tombow markers, stickles