• Tag Archives out of the box
  • Our Daily Bread Designs Blog Hop 2010!

    Welcome to the First Blog Hop of 2010 for Our Daily Bread Designs! If you got here from Debi’s blog, you are in the right place! If not, you might want to go back to the Our Daily Bread Designs blog and start the hop from there!

    We are kicking off the new year with the release of three new sets,perfect for Baptisms, Confirmation, and New Baby cards! Three blessed hoppers will be chosen randomly to receive One Set of  THEIR CHOICE! All you have to do to be eligible to win is complete the hop, leaving comments on each blog and returning to the ODBD Blog and leaving your answer to the question there by Monday, Jan. 4 at 8PM EST. The question will be posted on the ODBD blog, but here’s a tip.. as you are hopping along, take note of your favorite set and what you like best about them! Did I mention there will be THREE WINNERS?!!

    One of the big changes that we are so excited about is that Our Daily Bread designs has accepted a position as a Member Company on Splitcoaststampers!

    Please visit the ODBD Welcome Forum and leave a comment by January 10! If you do, you will be entered into a drawing to win a $50.00 Gift Certificate to the ODBD Store! We have a many things planned including Challenges and a special Prayer Request area! I hope to chat with you over on the ODBD Forum on SCS! Speaking of Challenges, we will be having a weekly challenge! The weekly challenge will be posted on the SCS Forum as well as the ODBD Blog. That means more prizes and awards, and fun for all!!! More on that shortly… stay tuned to the Our Daily Bread designs blog and the SCS Forum for further details. For now… just be sure to be back on Jan 9 when our first Challenge of the New Year will kick off!

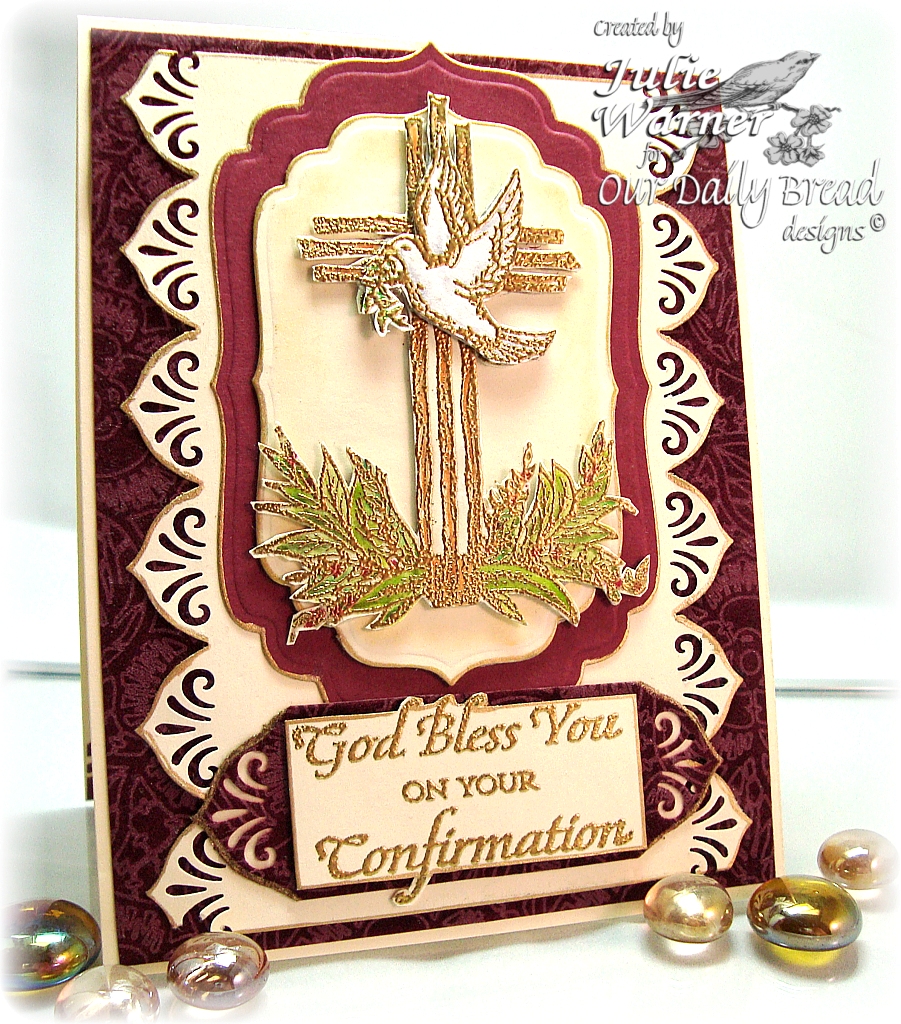
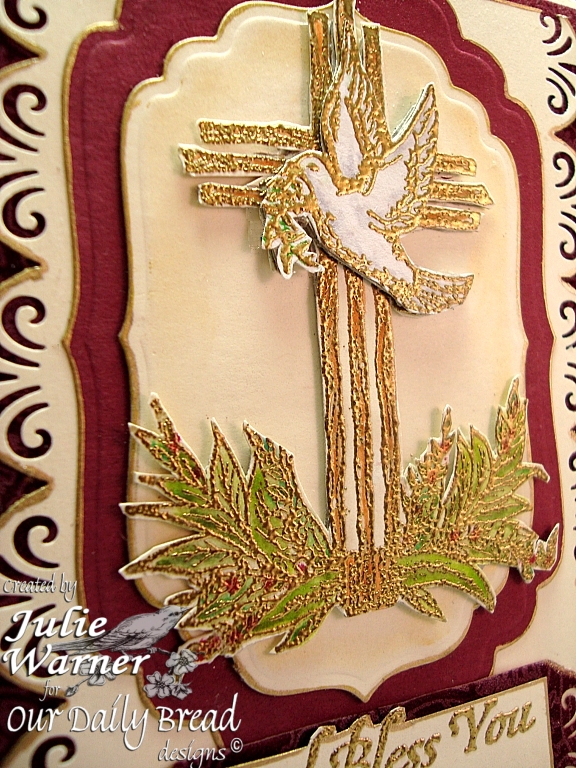
    OK… now on to my card: I used the new ODBD Confirmation set.  All the images were gold embossed and all panels were edged with a gold leafing pen. A little color was added to the image using markers and a blender pen. I used Spellbinders labels 4 to cut out my main panels and a border punch to punch down the sides of the ivory panel. I left the die in place and sponged on a little Brilliance gold ink. The beautiful background paper is from the Juliette collection from SEI.

    From here hop to Lorelie’s blog to see what great inspiration she has for you today!

    Have fun hopping, and Happy New Year from the Our Daily Bread designs Bread Basket!

    Thanks for stopping by!


    Julie2 sig

    Supplies:
    stamps: Our Daily Bread designs-Confirmation set
    paper: ivory, burgundy, velvet embossed dp (SEI- Juliette collection)
    ink: Encore UM gold pigment, Ancient Page bordeaux, Brilliance Galaxy Gold
    accessories: gold ep, Krylon gold leafing pen, Spellbinders labels 4 dies, EK Success Moroccan Lace border punch
  • Out of the Box Nestie Tutorial

    This tutorial came about after an ongoing discussion with Roxie at SCS about our methods of doing the Out of the Box Nestie Technique. We each were using this technique, we just went about it differently.  (6/23/10 Edited to add: Roxie now has a blog and here is her version of this technique.)  I promised I would take some pictures to show my method.

    (Click on any image to enlarge.)


    Julie Warner - justwritedesigns https://thewritestuff.justwritedesigns.com/
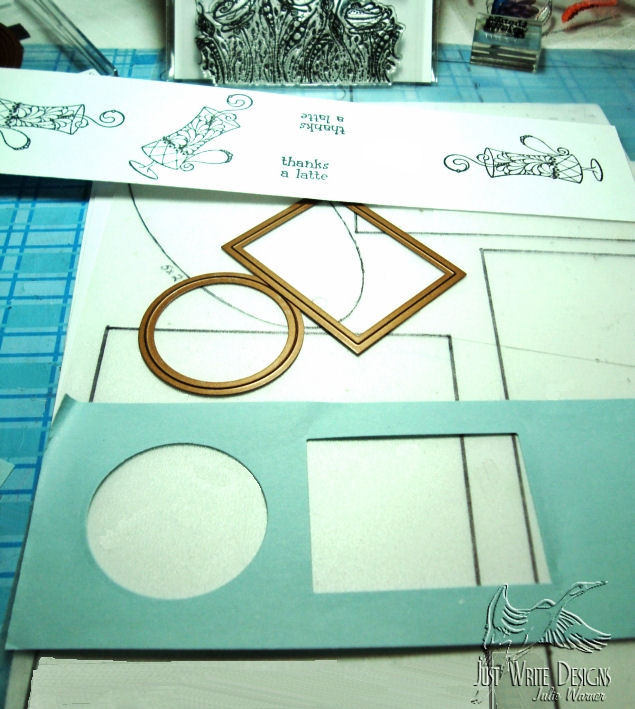
    Step 1


    For Step 1, I stamped my image(s) and selected the Nestie shapes I might want to use. I selected the sizes of the circle and rectangle that were slightly smaller than my image in order to get the Out of the Box look I want. Usually, I just cut this frame out of white copy paper, but I’m using a light blue in order to be more visible here. The only reason I use a cut template and not the actual die is because of the 1/8″ difference in size. The inside of the die will be 1/8″ further into your image than the template. Most of the time this won’t matter, but on some of the more intricate ones I’ve done, it did make a difference.

    Julie Warner - justwritedesigns https://thewritestuff.justwritedesigns.com/
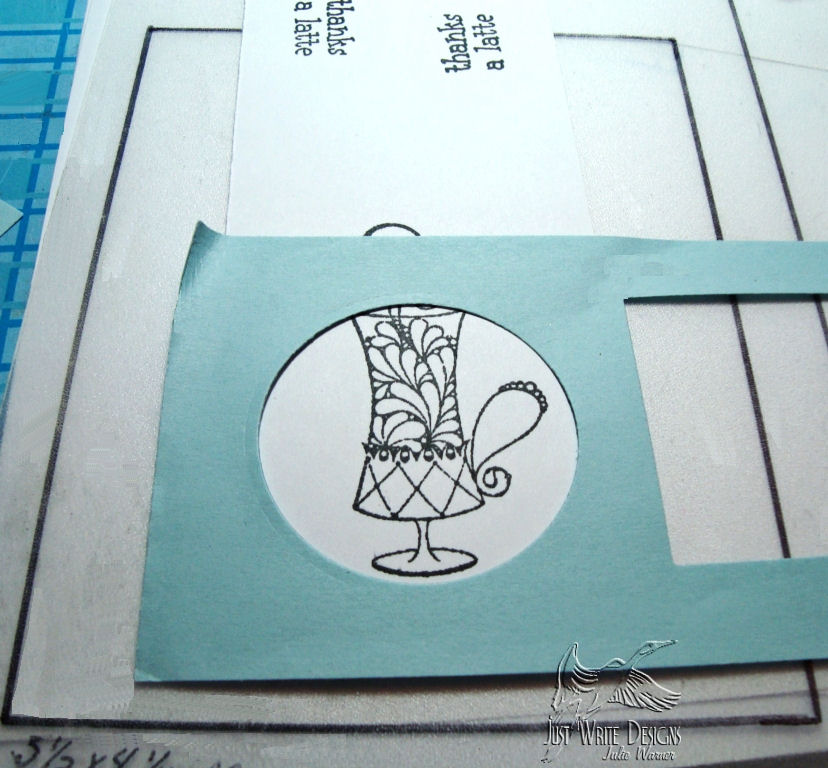
    Step 2


    Julie Warner - justwritedesigns https://thewritestuff.justwritedesigns.com/
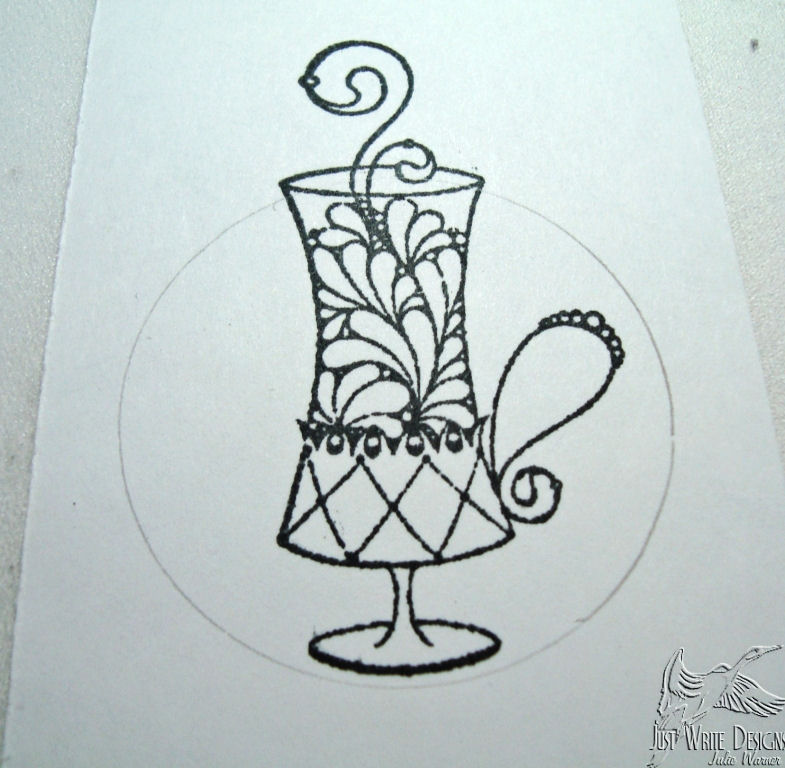
    Penciled Frame

    For Step 2, place the frame around the image and lightly trace the frame with a pencil.

    Julie Warner - justwritedesigns https://thewritestuff.justwritedesigns.com/
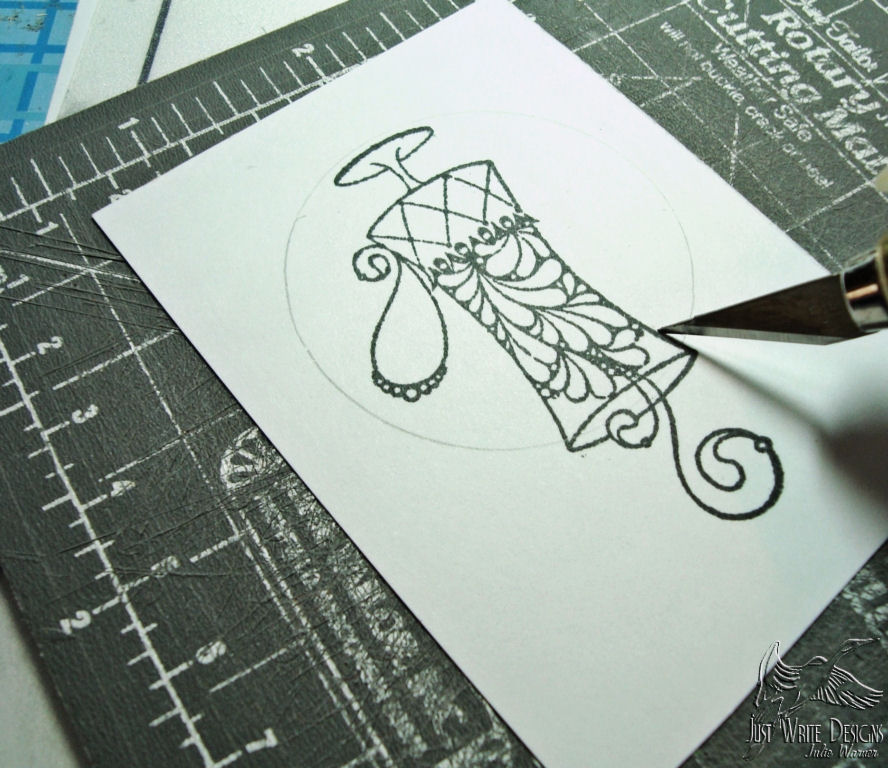
    Step 3

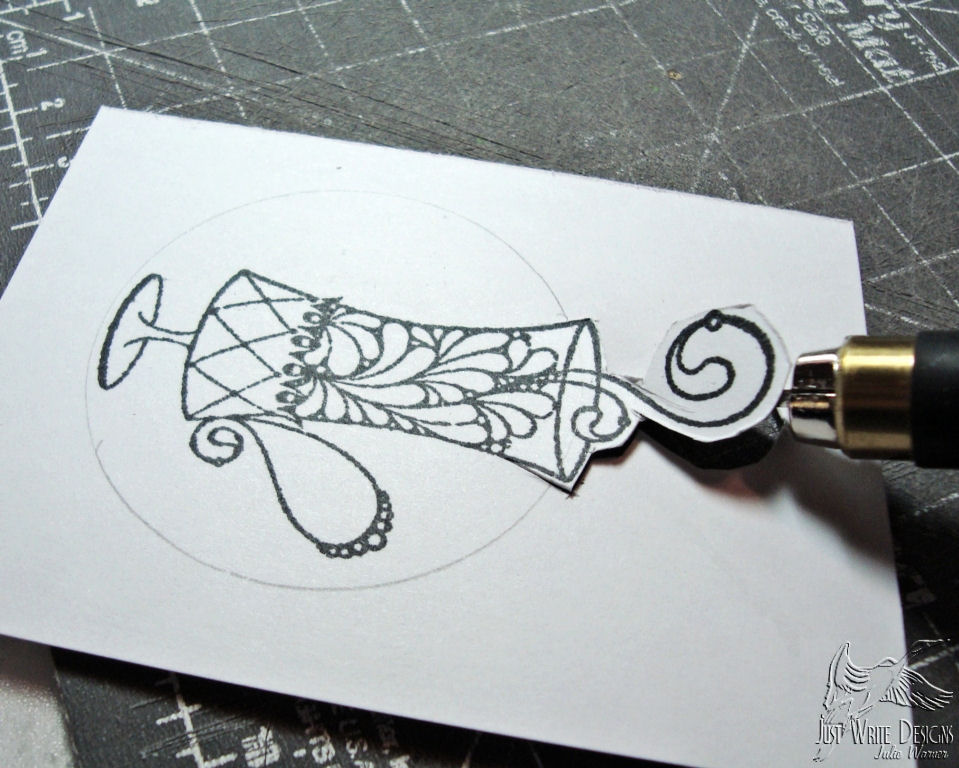
    In Step 3, I use a craft knife to cut the areas which will be Out of the Box. In order to insert the Nestie die under this area, I have to start the cut inside the circle. I cut very close to the image outline and continue around the image to other side.

    Julie Warner - justwritedesigns https://thewritestuff.justwritedesigns.com/
    Top Cut

    The Out of the Box area is cut. Note that the very top is just a rough cut for now. I don’t want it to be too unstable when I insert the Nestie die. I will go back and finish trimming this area with detail scissors after I’ve cut and embossed the Nestie circle.

    Julie Warner - justwritedesigns https://thewritestuff.justwritedesigns.com/
    Step 4

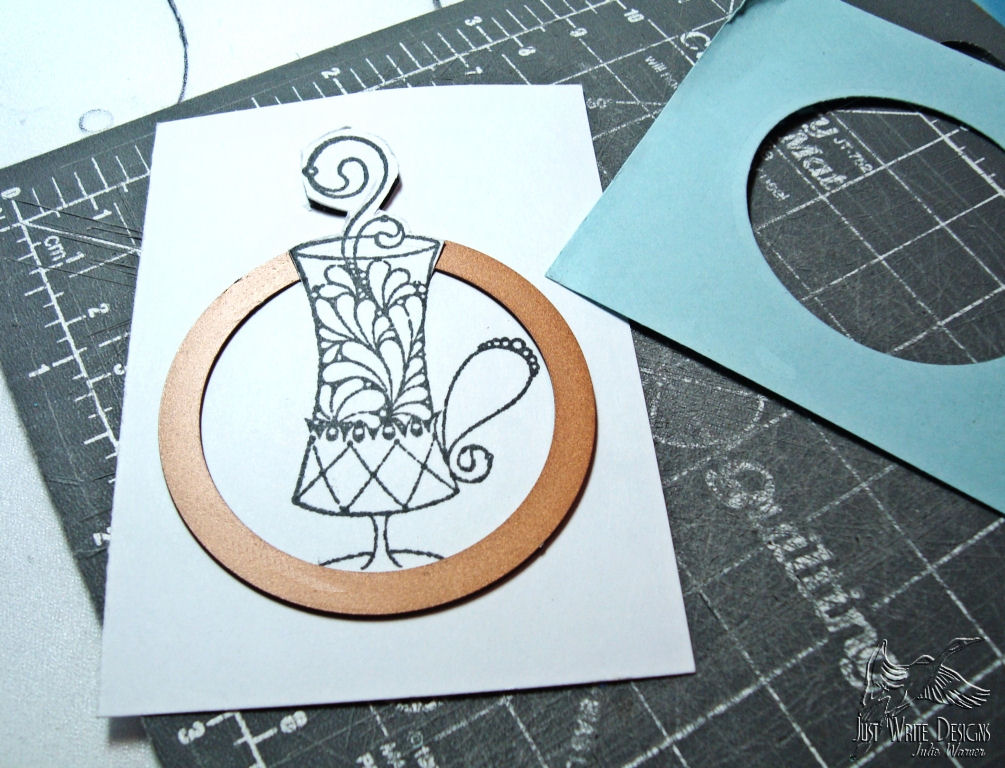
    In Step 4, I insert the die under the Out of the Box area I’ve cut out. With the die under this area, it will not be cut or embossed. Test fit your die before cutting to make sure you have cut your image deep enough to allow the die to be inserted on your pencil lines.

    Julie Warner - justwritedesigns https://thewritestuff.justwritedesigns.com/
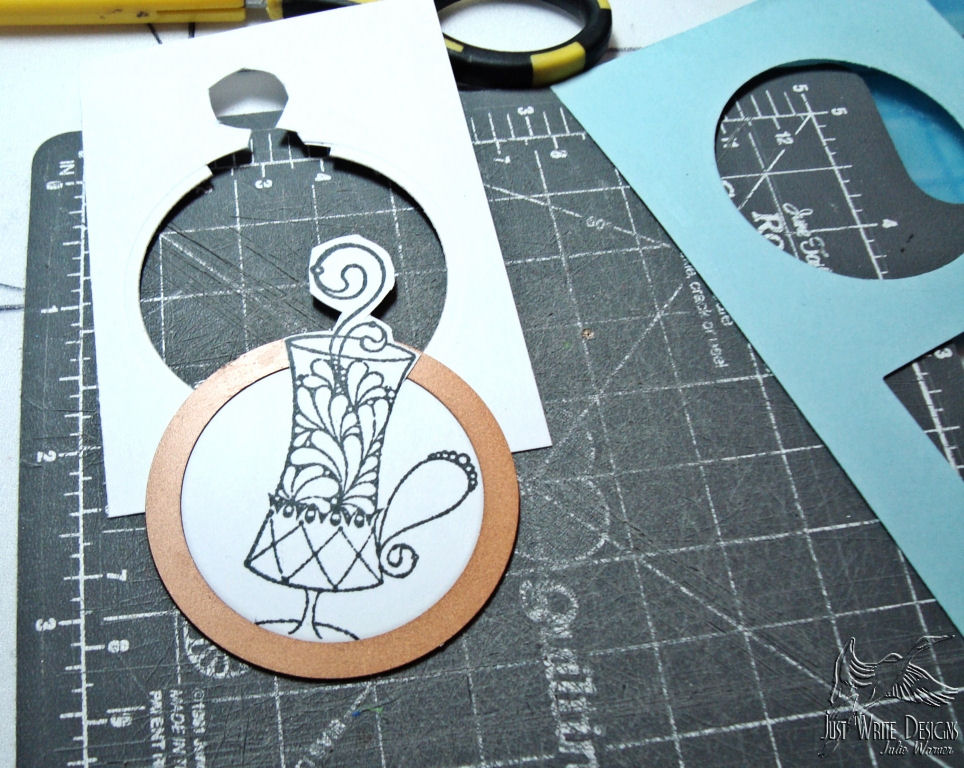
    After cutting & embossing

    Now I will remove the die and finishing trimming the top area.

    Julie Warner - justwritedesigns https://thewritestuff.justwritedesigns.com/
    After top is trimmed

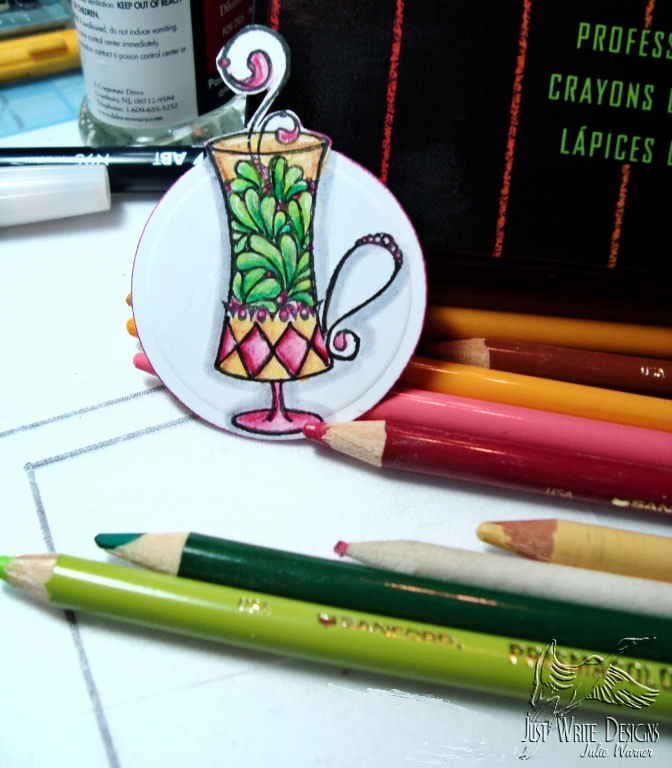
    My Out of the Box is ready for coloring. It doesn’t really matter if you color your image before or after. I have done it both ways. With this method, it has worked the first time for me and I haven’t had to do it over. If my Out of the Box area has a lot of cutting inside the shape, I will usually add a little scotch tape to the back after it’s cut and embossed. This just stabilizes the area and really makes the cut disappear.

    Julie Warner - justwritedesigns https://thewritestuff.justwritedesigns.com/
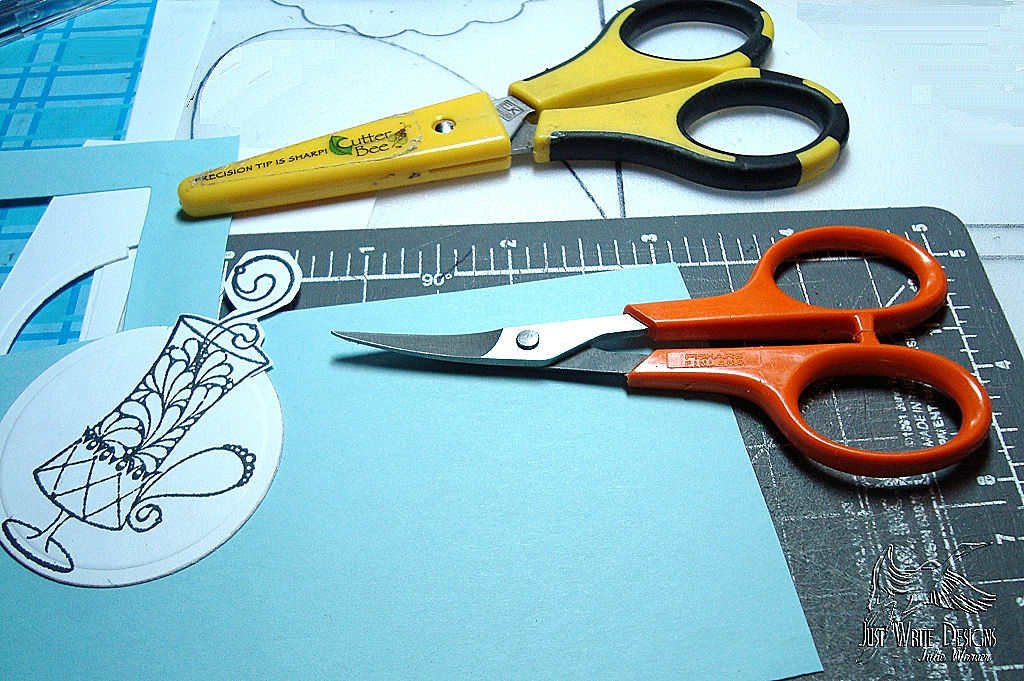
    Detail scissors

    I’m including this picture to show you my detail scissors. Quite a few people have commented on my detail cutting so I wanted to include this. The little orange pair of scissors have small, curved blades. You can see they are only about 4″ in length but the small curved tips make cutting a breeze. I’ve done a lot of decoupage and these scissors are invaluable. Fiskars made these, but cuticle scissors work, too. Another trick is to remember to turn the paper, not the scissors, when you are cutting.

    Julie Warner - justwritedesigns https://thewritestuff.justwritedesigns.com/

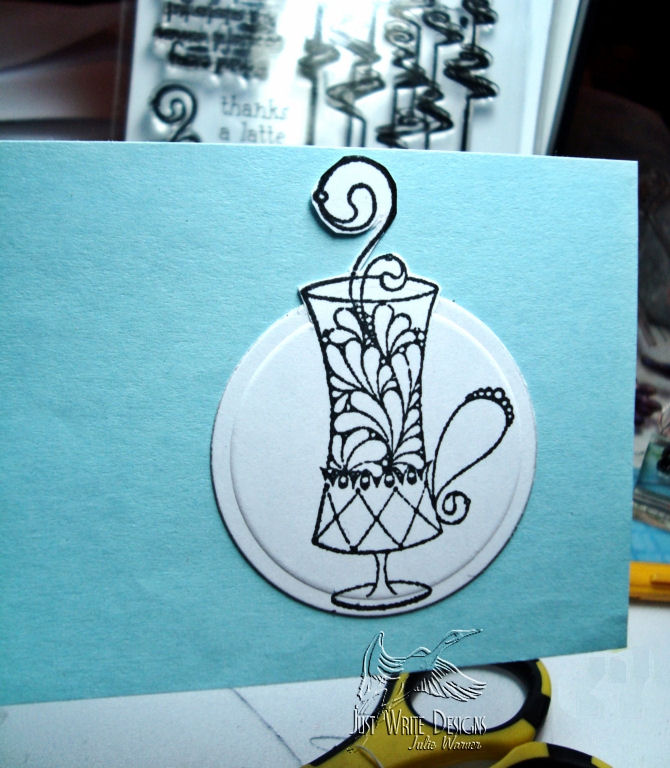
    All done! This was colored with Prismacolor Pencils and OMS (odorless mineral spirits, aka Gamsol).

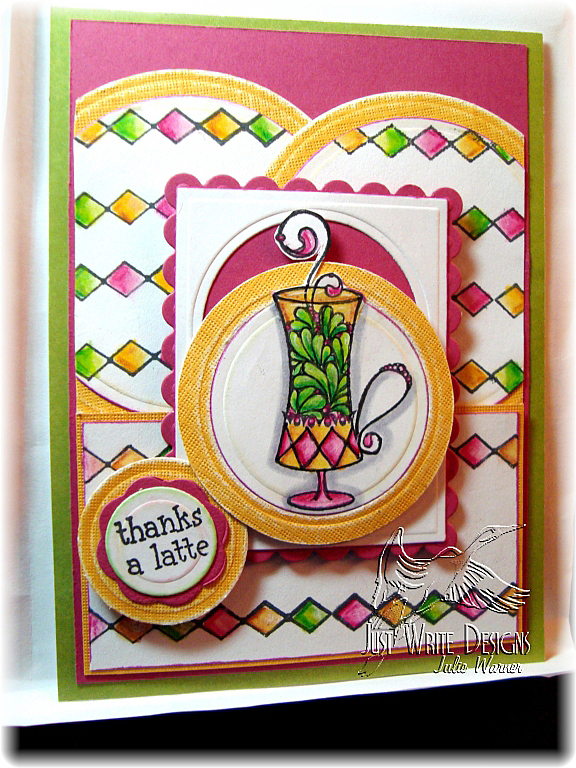
    Thanks for looking and I hope you try this fun technique. Here’s the finished card I made with this fun image.


    Julie Warner - justwritedesigns https://thewritestuff.justwritedesigns.com/

    Julie2 sig