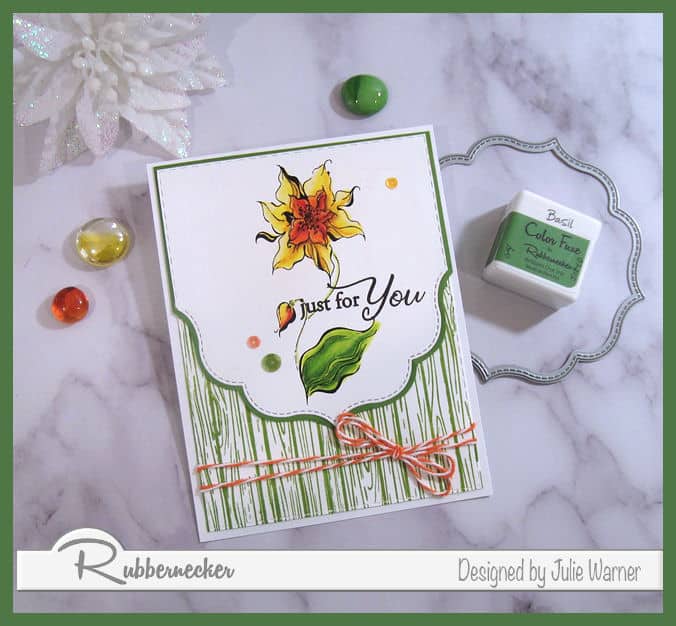
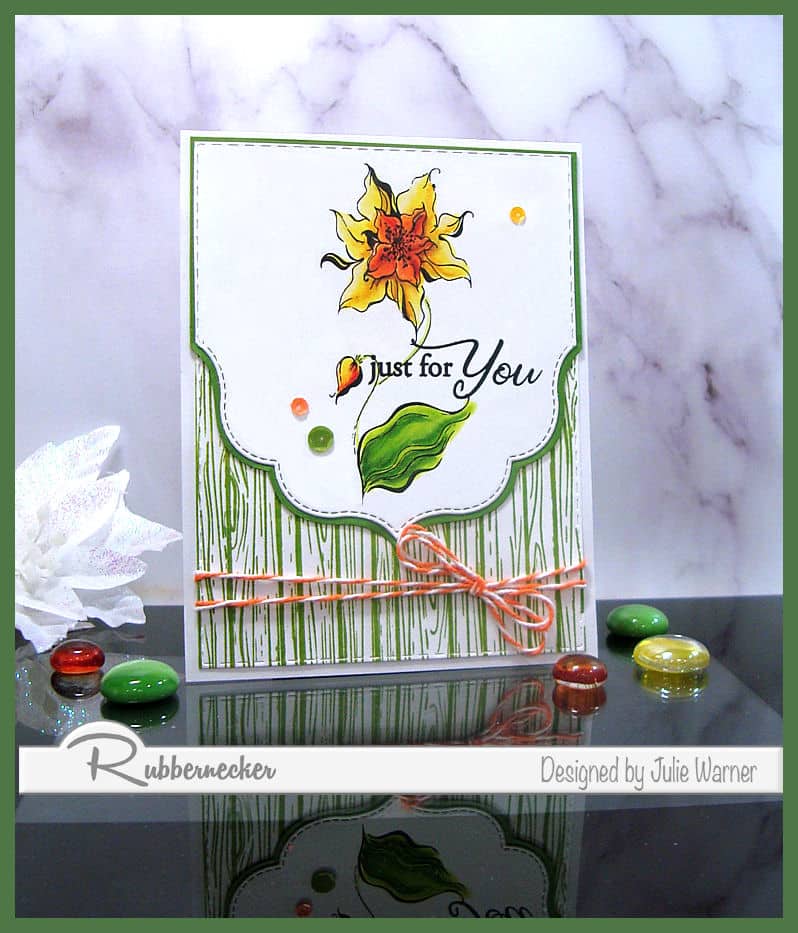
 Congrats to Gloria, the newest Featured Stamper (FS690) on Splitcoast! She has a lovely gallery & I chose THIS card to case. I kept the layout & flower theme, but I used different images, dies & swapped out the stripe paper for a stamped woodgrain.
After coloring the daffodils, I die cut it first w/ a rectangle stitch die then used the bottom half of a marquee die to cut the lower section. I took a few picture to show how I did this.
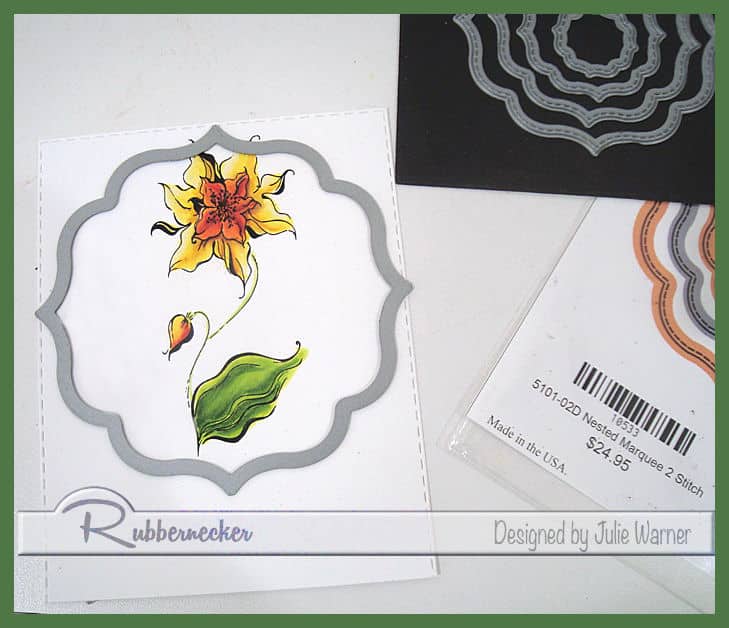
This is the die I used for the lower half. I used the largest die because I saw that it was large enough to go all the way across to sides so I placed it where I wanted the bottom cut to be.
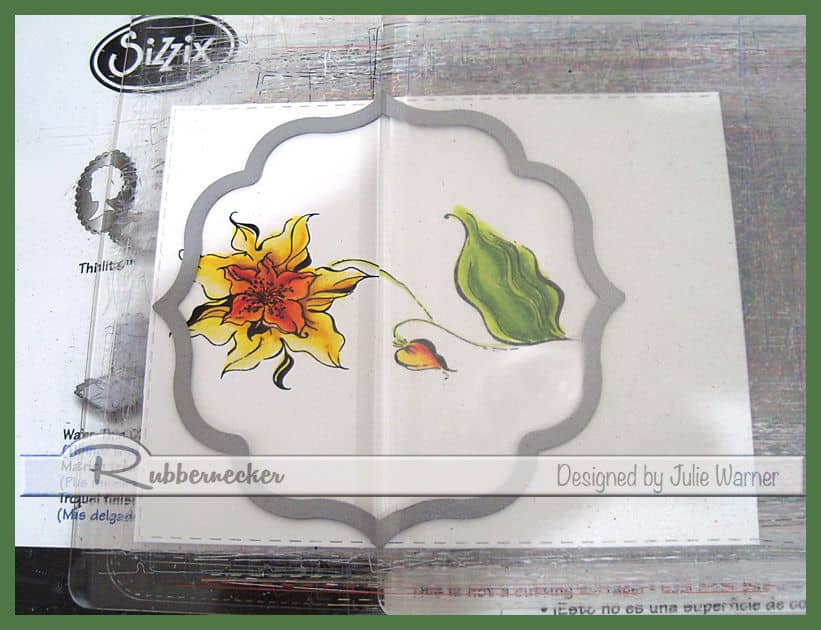
After placing the image panel & die on top, I put the top plate on top, but only to the point where I want it to stop cutting (which is halfway up the die). By having the top plate stop here, it will only cut to that point.
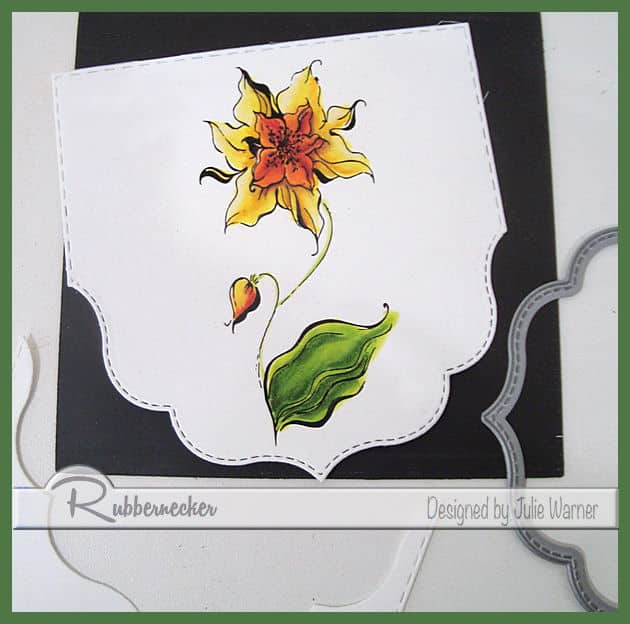
Here it is after die cutting! I do this technique quite a lot, so it doesn’t matter to me if I’ve colored it yet or not. If you’re trying it for the first time, you may want to wait to color until after you’ve cut it, in case you need to start over because it didn’t work the way you wanted. For the lower part of the card, I stamped the woodgrain bg w/ the dark green ink.
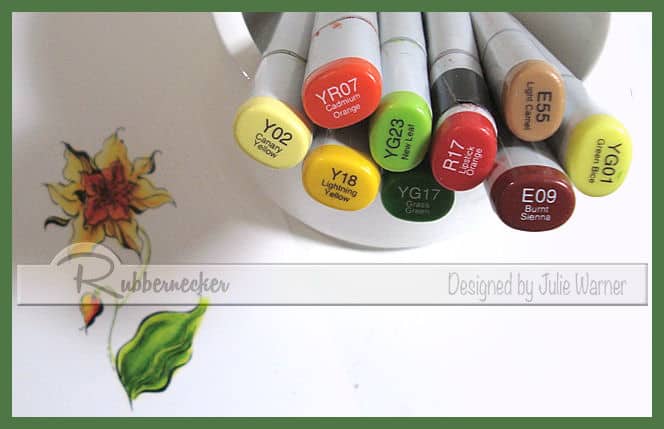
Here are the Copics I used:
Thanks so much for stopping by!

Supplies:
| Stamps: Rubbernecker Stamps: Brushed Flower #11, Woodgrain Fence, Summer Bloom |
| Paper: Staples 110# white, Hammermill digital |
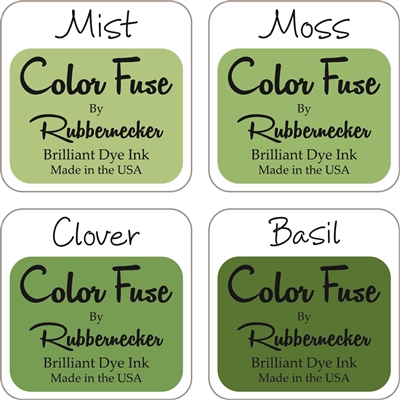
| Ink: Versaclair nocturne, Rubbernecker Color Fuse ink set #10 |
| Accessories: Rubbernecker Stamps: Rectangle Stitch, Marquee 2 Stitch dies, Copic Sketch Markers, Sequins, MISTI, Baker’s Twine |

|

|

|

|

|
|

|

|

|

|

|

|

|