
Best of 2014!
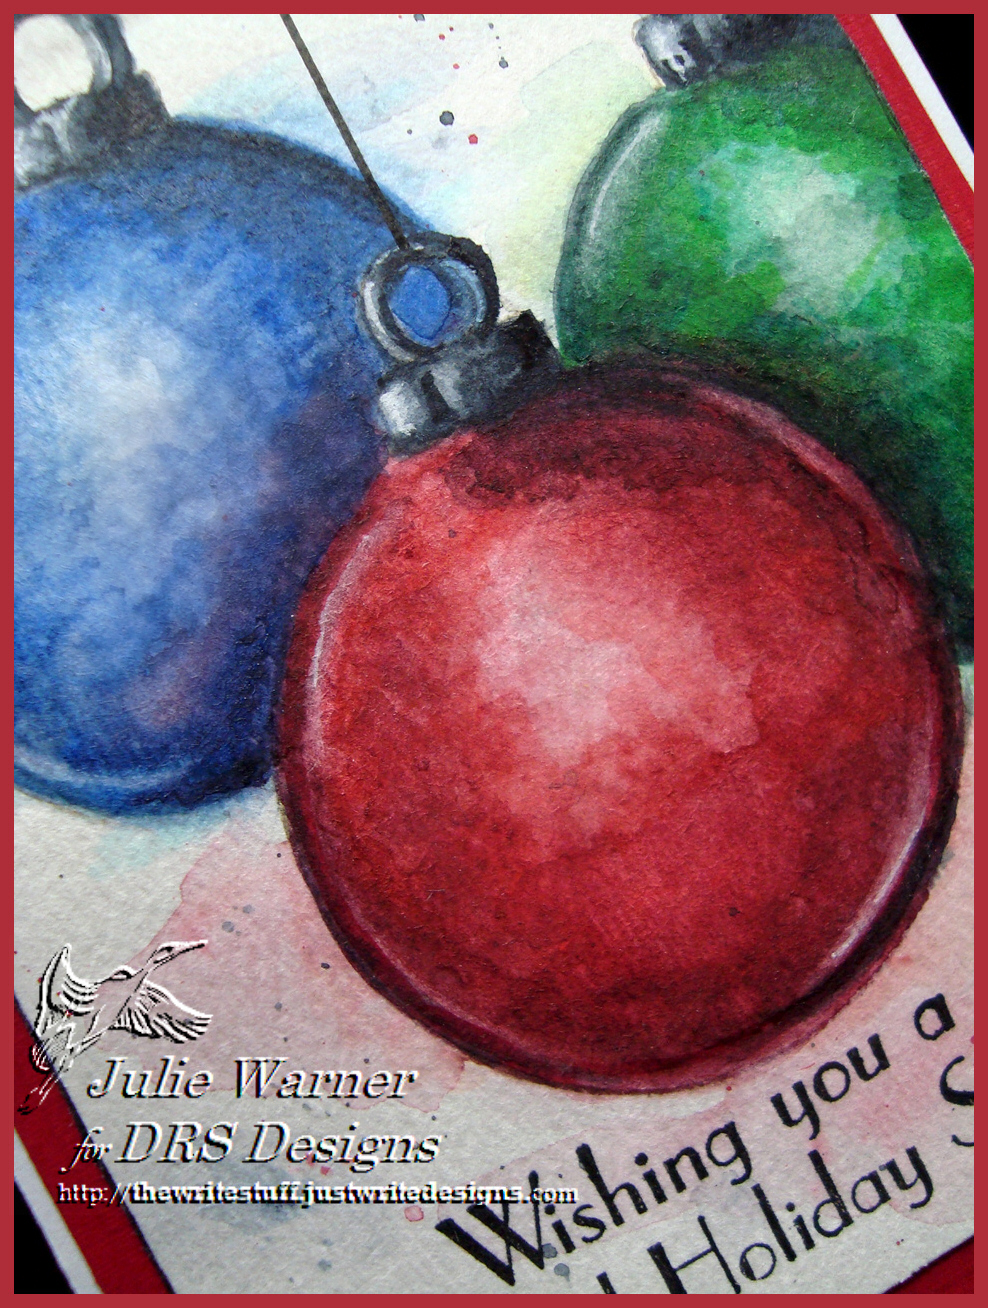
For today’s Inspiration Challenge on Splitcoast (IC470), I chose THIS for my first card and THIS for my second. I’m actually using the same ornament image on both, just different techniques and I actually had to do “surgery” on my ornament image. I wanted a blank ornament but all I could find was this ornament which originally had a nativity scene inside, so I took a craft knife and carefully cut it out. On this triple ornament card, I saw a card Lydia posted on the SCS FB page of some free form water color ornaments and really liked it. I don’t remember who did it or how long ago it was, or I’d link it.
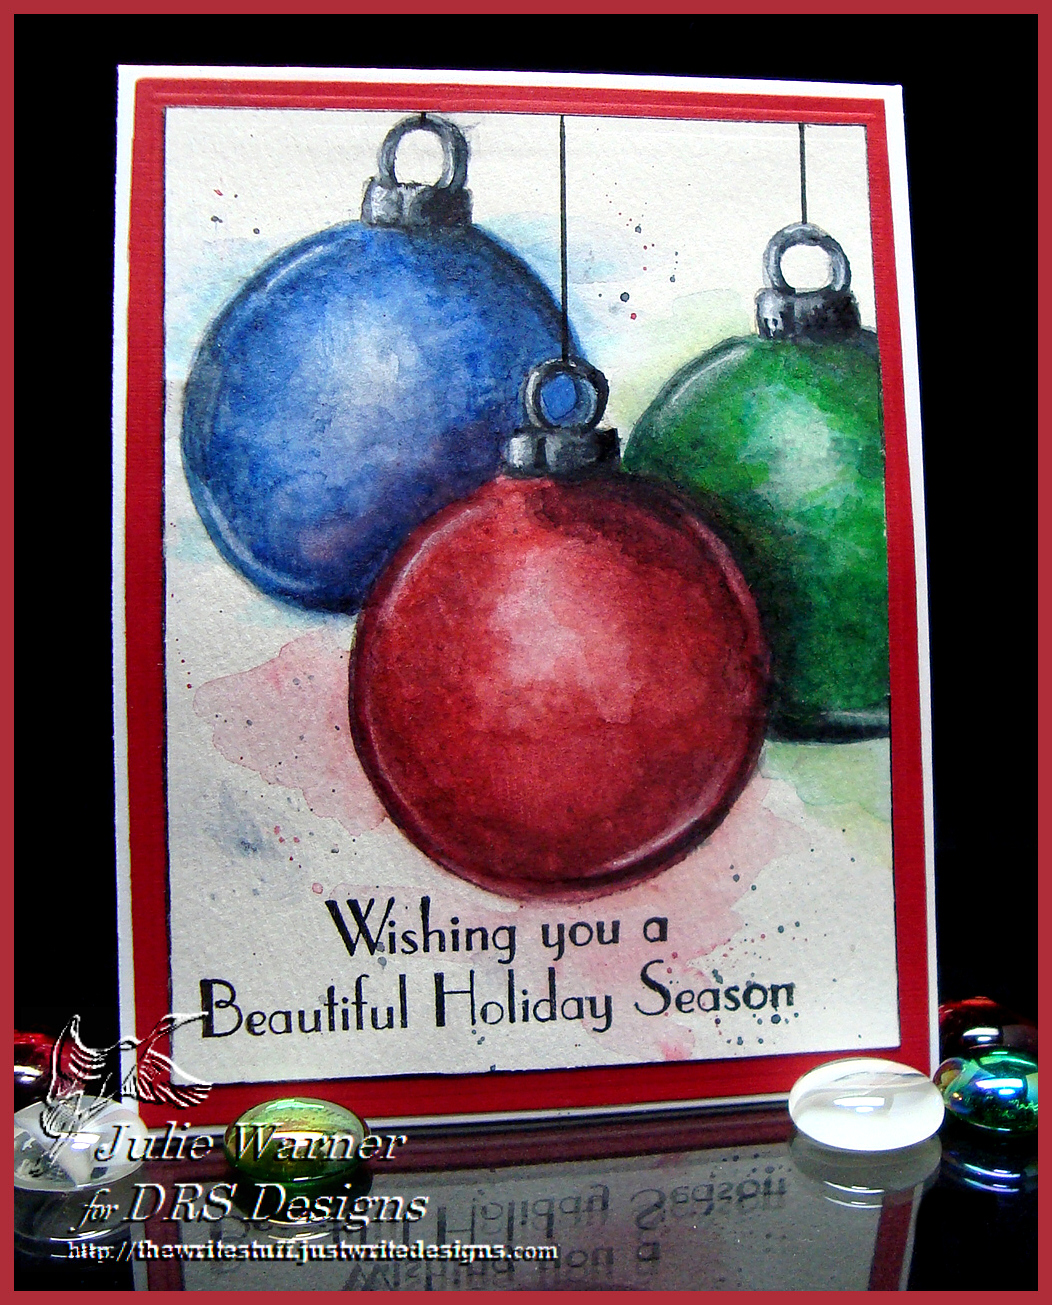
So after the image surgery, I stamped the ornament, masked & stamped twice more using pumice ink (after stamping off once) onto water color paper. This w/c paper isn’t my fave..it’s a little rougher & grainer than what I usually use, but I couldn’t remember where I put the other paper. Anyway, the pumice ink after stamping off 1 time, just leaves a bare outline that pretty much disappears when all the coloring is finished. Now the coloring took me a quite a while because the color has to be painted in layers & allowed to dry in between. I’m not one to appreciate watching paint dry, so I helped it a lot w/ a heat gun. The splotchy, free form look is intended to be that way & I’m pretty satisfied with it.
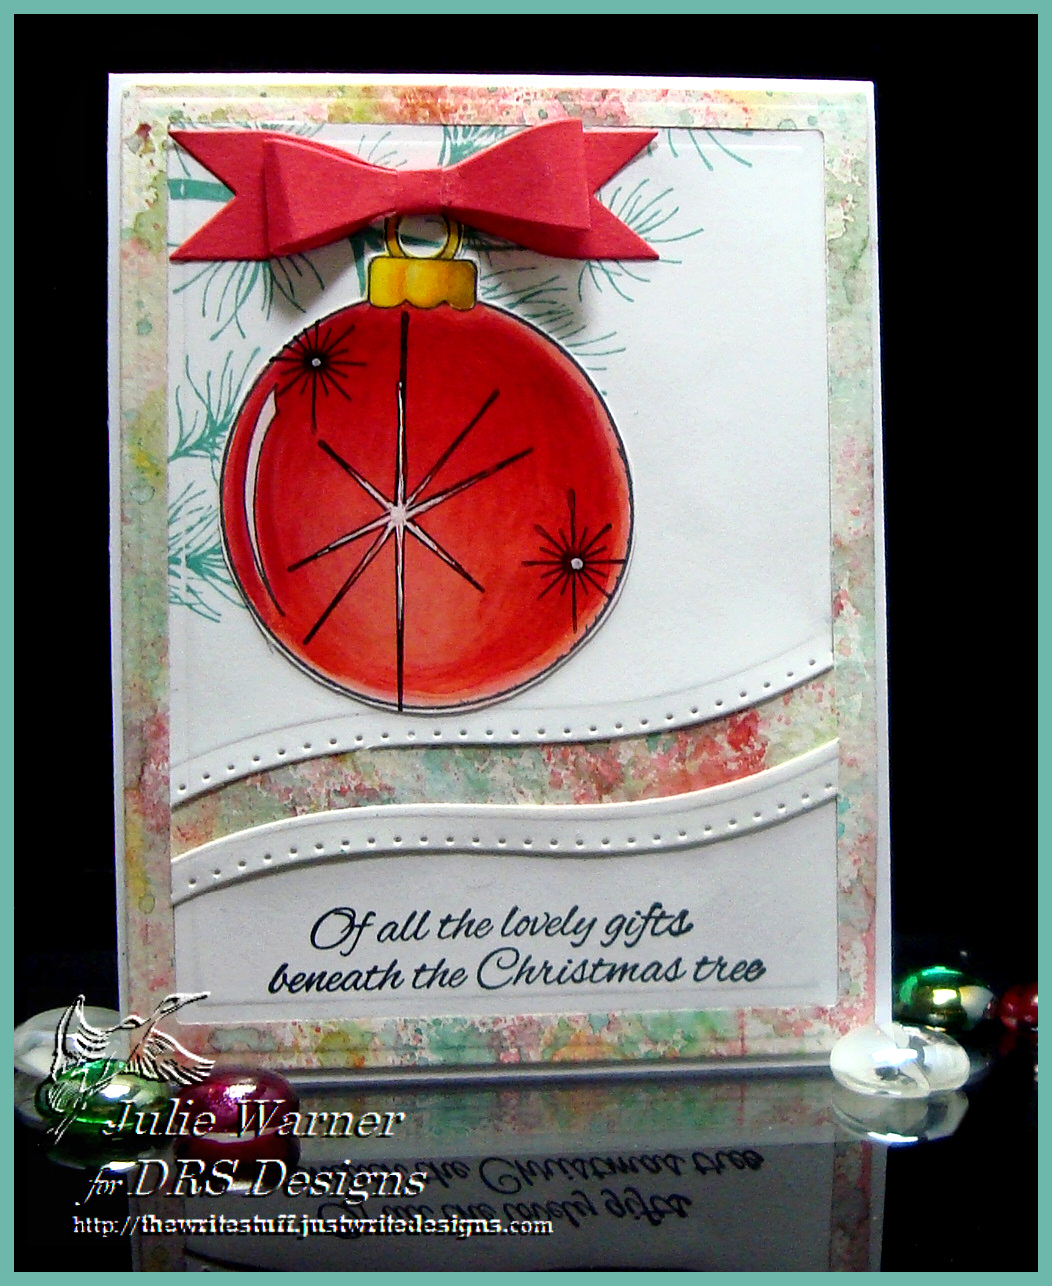
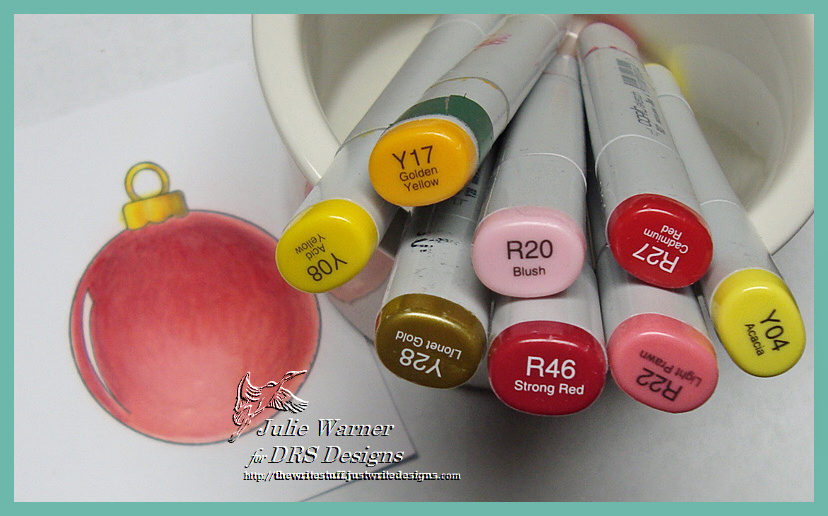
For this card, I stamped the same surgically enhanced ornament w/ the black ink & colored with Copics. The stars were stamped on top and I used a white gel pen to fill the large one in then fussy cut it. The pine branches were stamped w/ the evergreen ink then I die cut the panel w/ one of the matting basics rectangles. I took a curved border die and cut off the bottom & attached the two parts on top of a background I made a while back using distress inks, spritzing & w/c paper. I added another little curved border strip on top of the bottom section & stamped half of a greeting under it (the other half is on the inside). A die cut red bow was added on top & these are the Copics I used.
Thanks so much for stopping by!

Supplies:
| Stamps: DRS Designs- (1. Triple Ornament card) Nativity Ornament, Beautiful Holiday Greeting (2. Red Ornament card) Nativity Ornament, Pine Bough, Lovely Gifts Christmas Greeting, Retro Starburst, 3 Wisemen Peace (for small star) |
| Paper: 1. water color, red linen, 2. X-Press It, water color, red |
| Ink: 1. Distress Ink pumice stone, Versafine onyx 2. Memento tuxedo black, Distress Ink evergreen bough, worn lipstick, spun sugar, pistachio, tumbled glass |
| Accessories: 1. tube water colors, #10 round brush, #0 liner brush, Copic markers, Spellbinders A2 matting basics A & B 2. Copic markers, Spellbinders A2 matting basics A & B, curved dies, white gel pen, Cheery Lynn Pretty Pretty Bows die |

Love these cards! Your watercoloring is so good!! You surely did make me want to start taking up watercoloring!! Beautiful designing!