Today I have flowery card in shades of blue. It’s not hard to make, just one die for all of the flowers and leaves cut out of coordinating blues and a couple of greens. The background…
- Category Archives Splitcoaststampers Weekly Favorite
-
-
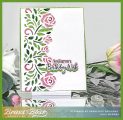 Glitter Rose Border
This is a clean and simple card, perfect for a birthday. The glitter paper gives it a nice sparkle for that extra something. The recipient will think you spent all day, so it will be your l…
-
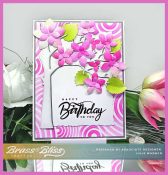 Flowering Birthday Tree
I have a happy, bright pink flowering birthday card to share today. The pink really came out lovely and the little bit of bright green really adds the perfect touch. This card is not hard t…