Have you checked out all the terrific new Spring stamp sets & dies at Rubbernecker yet? They are fabulous! If you want to see the entire release it’s HERE. And don’t forget to join in on our Instagram Hop. There are PRIZES involved! Just click the IG Hop badge below. This is also for the Splitcoast Inspiration Challenge (IC794) & THIS was my inspiration.
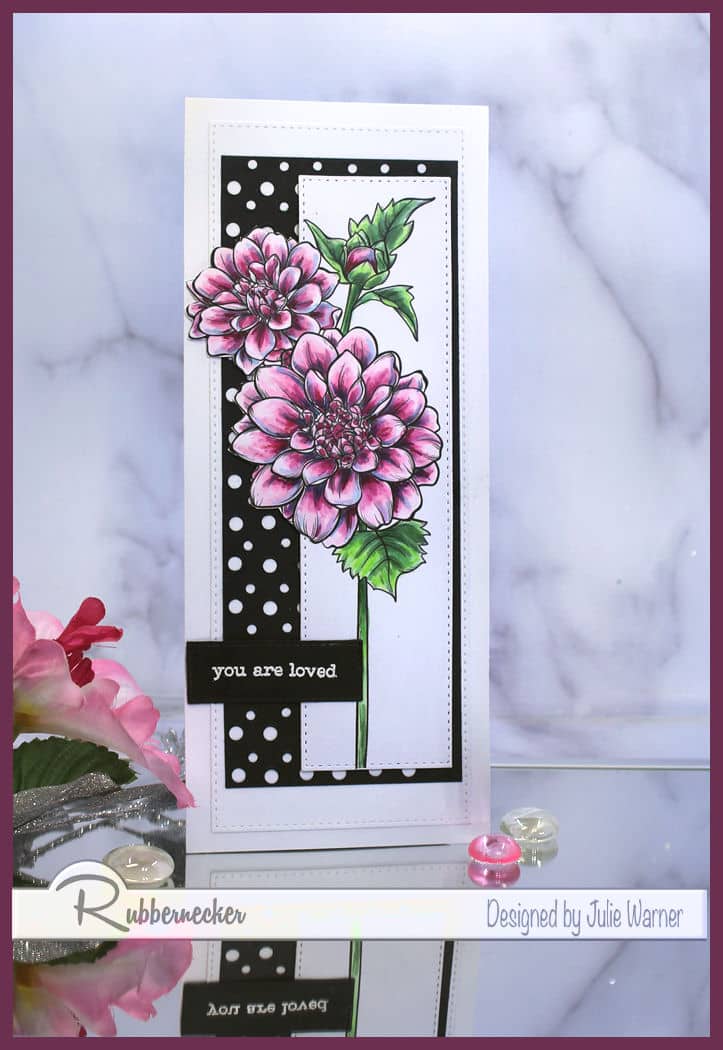
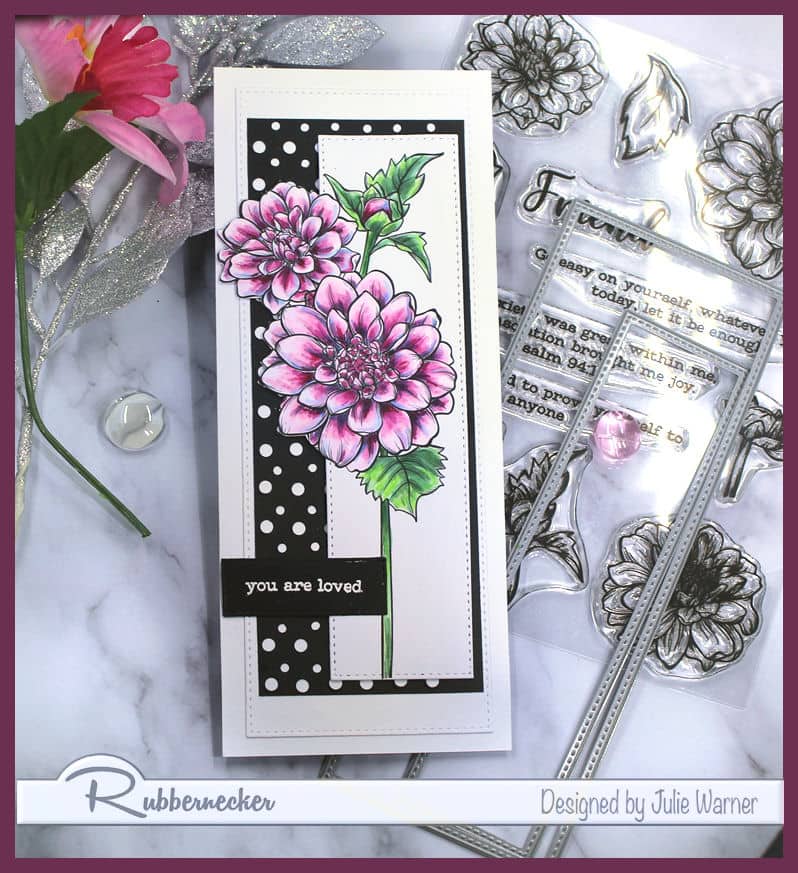
For my card, after stamping & coloring, I die cut the dahlias, using my out of the box technique on the left side. The matching dies will let you cut out the flower heads separately, but since I already had them arranged, I did this way so I could have them still part of the white panel. For the black dotty panel, I wanted some black & white paper but didn’t have any that was just right. So…I took a piece of black & embossed it w/ folder that has 2 sizes of dots. Then I took out my Japanese screw punch & used 2 sizes of bits to drill out the embossed dots. Having the pattern already embossed, made it really easy & quick. Here’s a pic showing the process.

The greeting was white embossed on a small black strip.
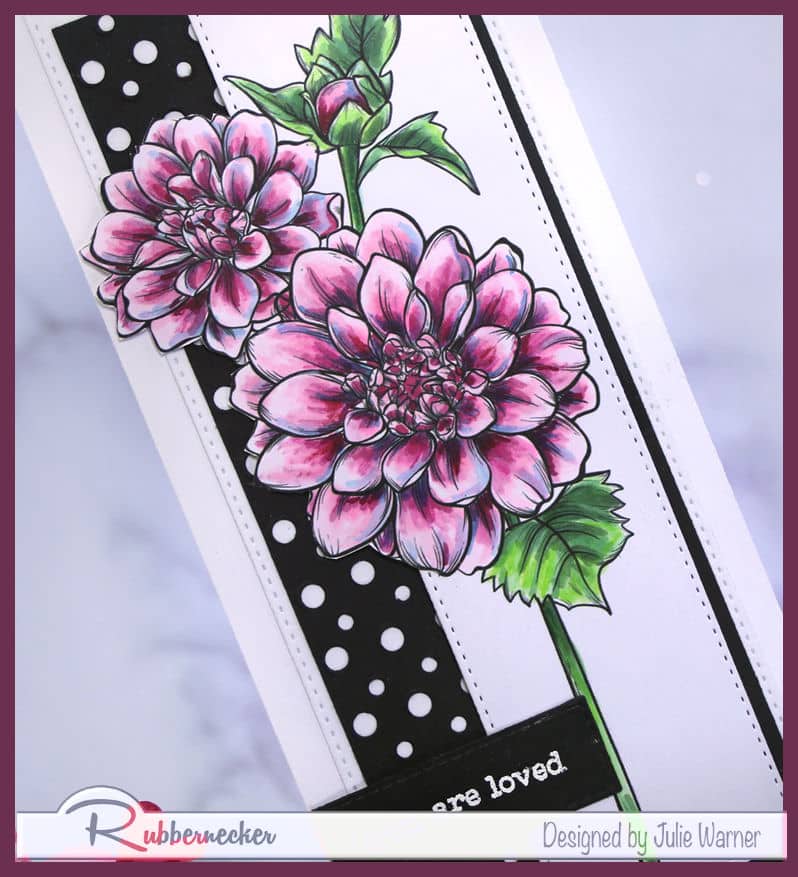
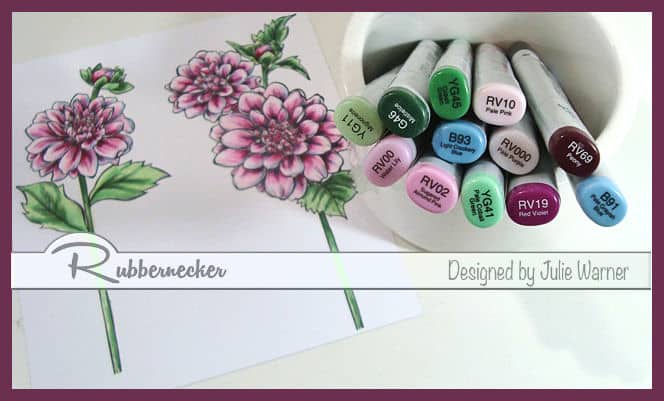
Here are the Copics I used for these beautiful dahlias.
Thanks so much for stopping by!

Supplies:
| Stamps: Rubbernecker Stamps –Darling Dahlias |
| Paper: Staples 110# white, black, |
| Ink: Memento tuxedo black, Colorbox frost white pigment |
| Accessories: Rubbernecker Darling Dahlias, Slimline Nested Stitch dies, MISTI, Screw Punch Tool & bits, Darice Dots Bg embossing folder, Copic Sketch Markers, white embossing powder |

|

|
|

|

|

|

|
|

|

|

Your card is beautiful. I like the small and large polka dots.