Today I have a card that reminds me of the series of floral postage stamps. I love that it lends itself so well to using just bits of several floral sets. You could even use parts of leftov…
- Category Archives Embossing/Dry or Heat
-
-
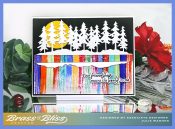 Your Friendship
This scenic card was pretty easy to make and has a rainbow of colors to offset the black backgrouns and white trees. It just takes a few dies, the brush stroke clear stamps, multple inks an…
-
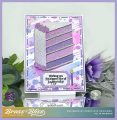 Slice of Happy
Are you craving a big, sparkly, multi layer piece of cake? I have just the thing for you. This big slice of cake, well, it takes the cake. It looks great in plain card stock or maybe like m…