• Tag Archives Glitter
  • Joy to the World


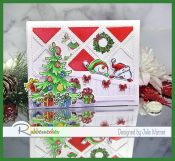
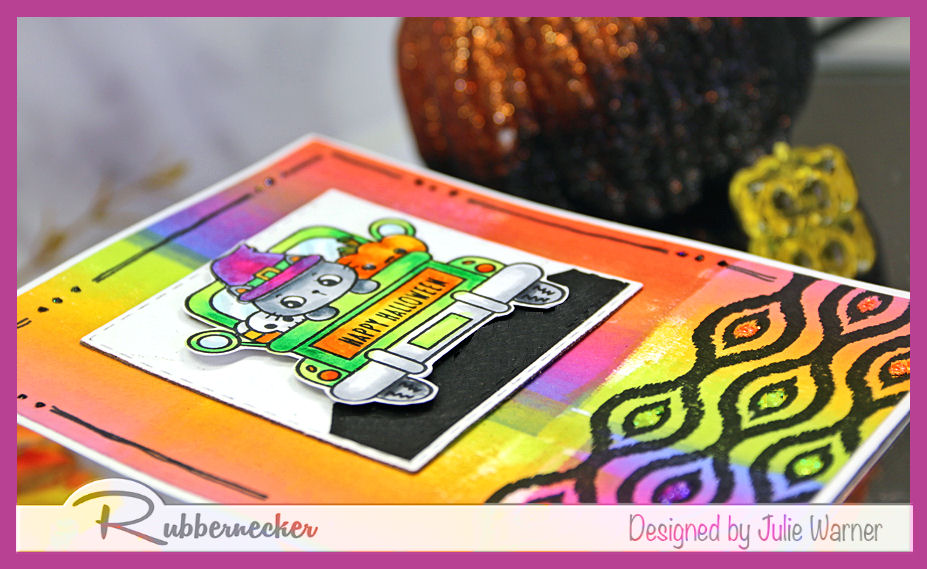
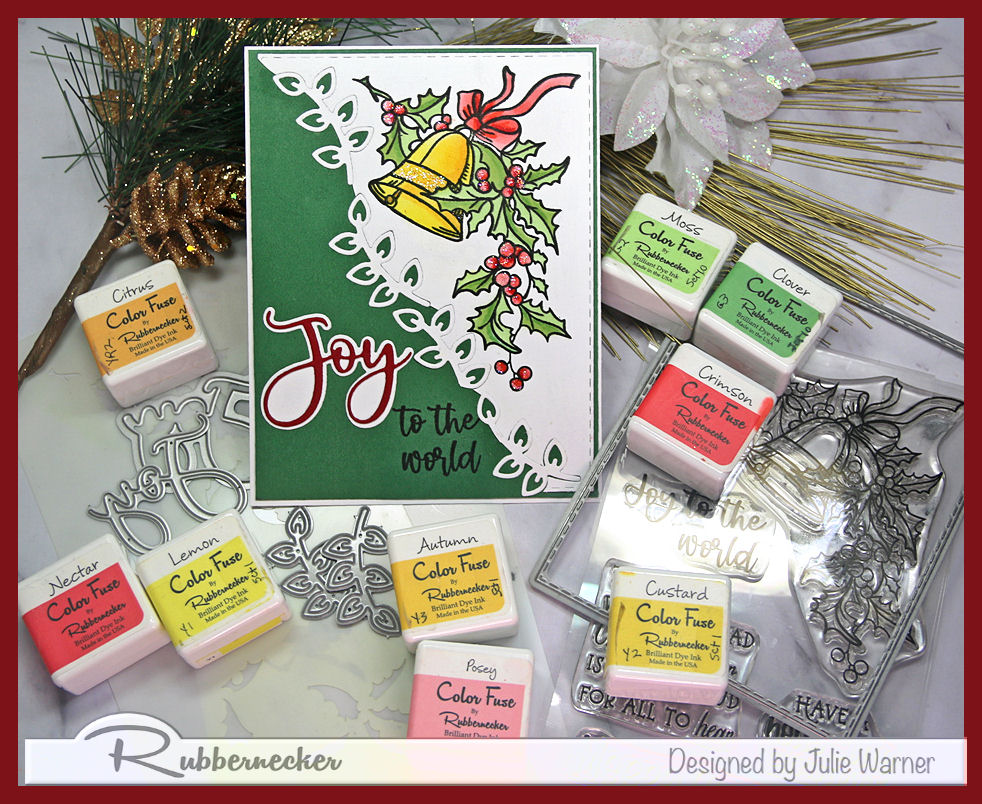
    A Christmas card with a diagonal split front using a new set and coordinating stencil, making it easy and quick to add color to the images. A matching die is great if you want to add some dimension or layer it onto a different background.

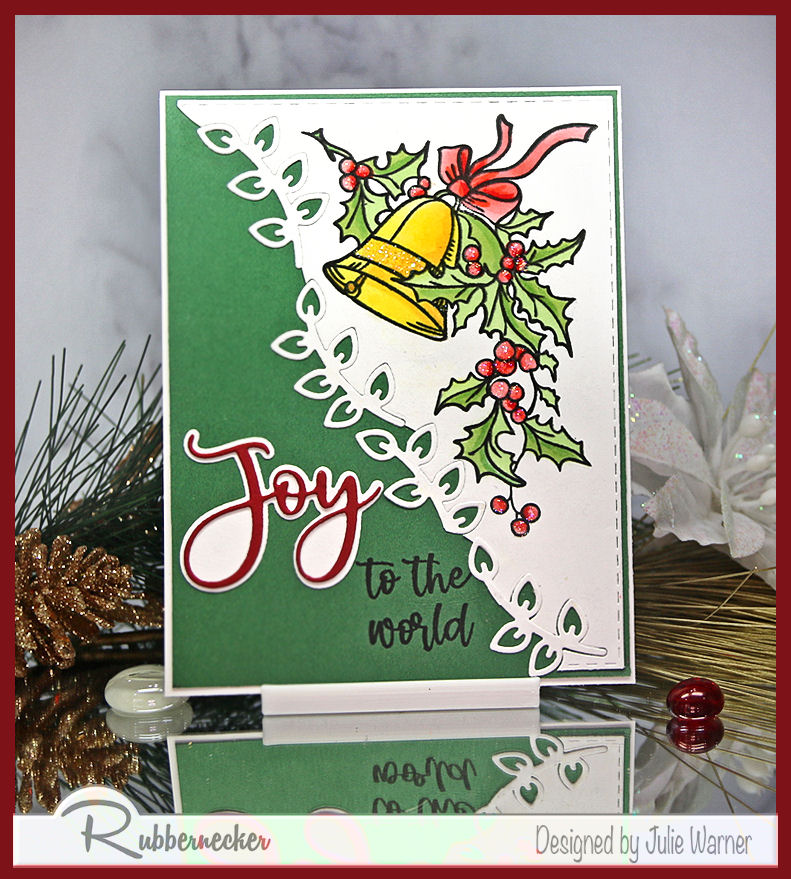
    A big congrats to Korimu, the newest Featured Stamper (FS874)! She has a beautiful gallery & I chose THIS to case. I kept the layout & divided front panel, but I used different images & dies, different colors & made mine a Christmas card.

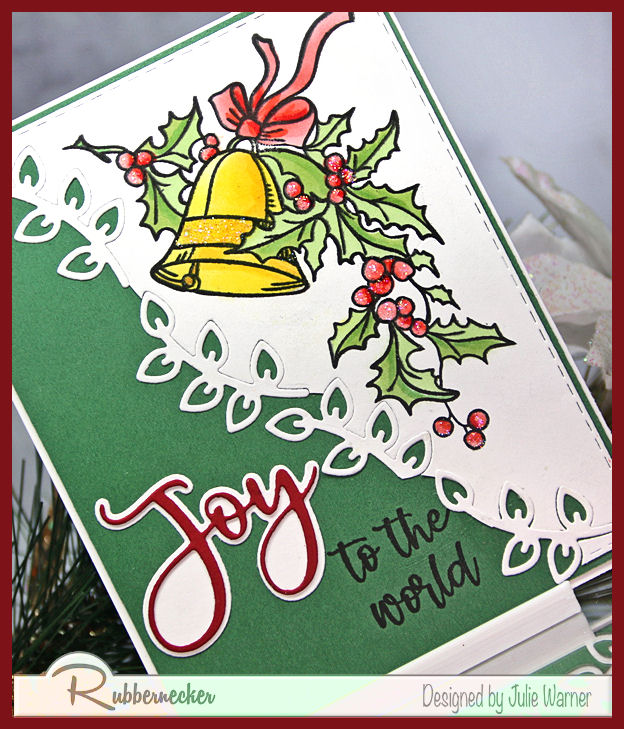
    For my joyful bells, I stamped the image then used the coordinating stencil & the Color Fuse inks to sponge in the colors. It has a matching die, but I didn’t use it here. I took 2 leaf dies from a floral frame set & used them to cut the edge on a diagonal. After placing my panel on top of a larger green one, I positioned all the cut out leaf branches in place. I did some minor surgery on a couple of them to keep them from covering part of my greeting.

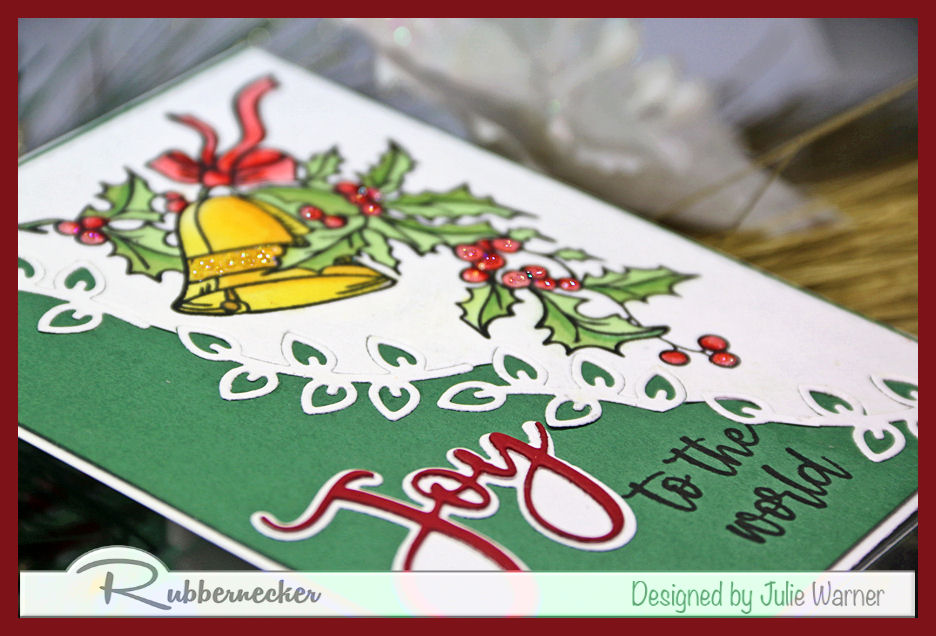
    I replaced the stamped Joy of the greeting w/ a die cut Joy to help bring some of the red into the corner & also help balance out the image, size wise, & not seem top heavy on the upper right.

    Thanks so much for stopping by!


    Supplies:

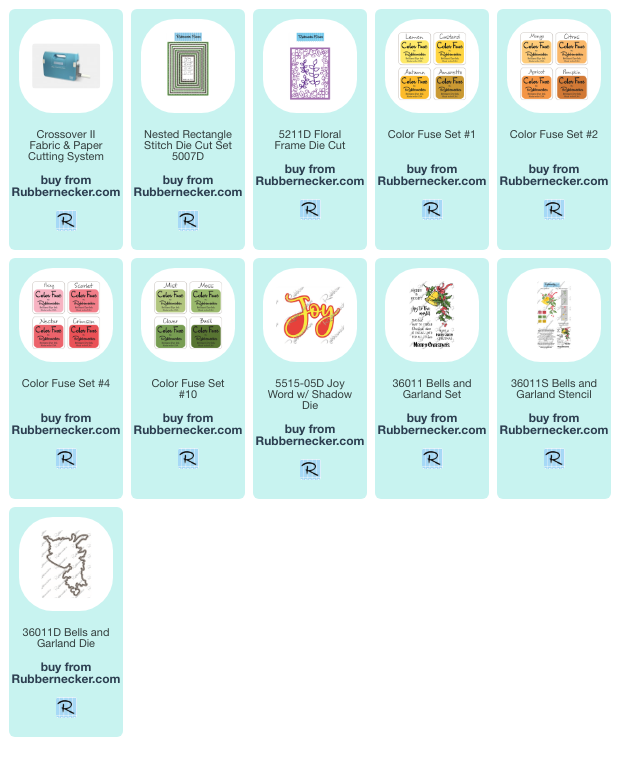
    Stamps: Rubbernecker Stamps: Bells & Garland set
    Paper:  Staples 110# white,  green, scrap of red
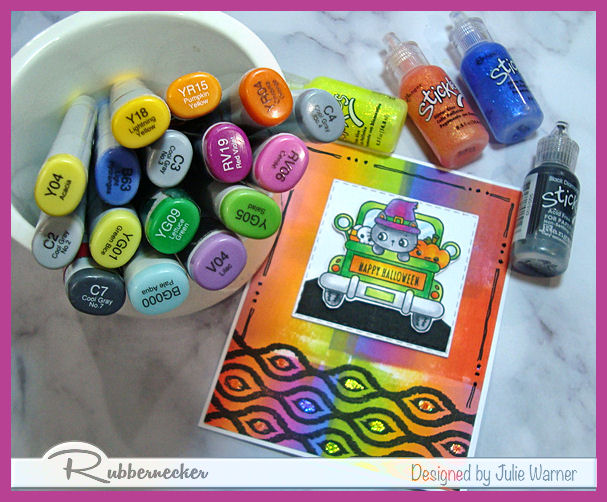
    Ink: Memento tuxedo black, Rubbernecker Stamps: Color Fuse inks set #1, set #2, set #4, set #10
    Accessories:  Rubbernecker Stamps: Stitched Rectangles, Bells & Garland set, Joy w/ Shadow, Floral Frame dies, Crossover II, stickles


    You might also like:


  • Halloween Truck

    A colorful, easy, Halloween card w/ a cute truckload of trick or treaters. Basically a 1 layer card w/ a bright brayered background.

    It’s my turn to host the Featured Stamper Challenge (FS867) & a big congrats to Brian! He has a terrific gallery & I chose THIS card to case. I kept the bright bg & frame layout, but used different images, used a smaller image for the center & made it smaller & my frame is stamped instead of an actual frame.

    My card started w/ a leftover background I made for another card. I only used a strip of the bottom part so I had this whole piece left. I thought the colors were great for Halloween so I colored the little image, die cut & added it to a white square. For the black road, I used a small portion of a mountain die cut. I liked the way it narrowed behind them like a road would. I used a set of freehand borders on the top & sides & I already had the texture strip bg stamped across the bottom.

    The image square is popped up a bit & I added some Halloween colored stickles to the centers of the pattern on the bottom.
    Here are the Copics I used:

    Thanks so much for stopping by!

    Supplies:

    Stamps: Rubbernecker Stamps –  Pumpkin Dress Up #2, Texture Background Strip #1, Freehand Borders
    Paper:  Staples 110# white, black
    Ink: Memento tuxedo black, Kaleidacolor Luau & Bouquet,
    Accessories:  Rubbernecker:  Stitched Squares, Pumpkin Dress Up #2 , Tabbed Mountains dies,  MISTI, small rubber brayer, Copic markers,  Crossover II 


    You might also like:


  • Stir Up Trouble

    A fun Halloween card w/ a cute smiling cup, stenciled background & glittery goo border. Easy to make & easy to change the colors to go w/ your selection of Halloween paper.

    For the Inspiration Challenge (IC927), we’re visiting Country Living Pinterest Board where I found THIS cute picture.

    My little Halloween card is pretty easy. I colored the cute little smiling cup then die cut it w/ stitched circle die. I used my out of the box  for the stir stick to keep from chopping it off. The designer paper strip & purple strip behind it were die cut using 2 sizes of slimline dies, since I wanted them narrower than normal rectangle dies. I used my resizing trick to make them shorter. For the top section, I used a fun jack-o’lantern face stencil & lost shadow oxide ink for that barely there look. The orange drippy goo die cut was draped across the top of the purple strip & I added stickles to it & a couple of areas on the cup.

    The center circle was popped up a bit & I added an extra layer behind the top half of the circle to even it out w/ the added layers on the bottom.

    Here are the Copics I used:

    Thanks so much for stopping by! 


    Supplies:

    Stamps: Rubbernecker Stamps:  Spooktacular Coffee set
    Paper:  Staples 110# white, black, purple,  dp (Rubbernecker Stamps: Spooktacular paper)
    Ink:  Memento tuxedo black, Distress Oxide Lost Shadow
    Accessories:  Rubbernecker Stamps: Rectangle Stitch, Spooktacular Coffee set, Slimline Stitch, Circle Stitch, Drips & Splatters  dies, Jack O’Lantern Stencil,  Crossover II, Misti, stickles


    You might also like: